• Skip to main content
  • Skip to primary sidebar
  • Skip to footer
  • Blog
  • About
  • Contact
  • FAQ
  • Sponsor

see kate sew

sewing, crafts, tutorials, DIY

  • Patterns
    • Free Patterns
    • Pattern of the Month
  • Tutorials
    • Accessories
    • Bags and Pouches
    • Clothing
    • Costumes
    • Crafts
    • Cricut Projects
    • Holiday
    • Household
    • Kids
    • Maternity
    • Quilting
  • Topics
    • Baby
    • Boy
    • Christmas
    • dog
    • Dolls
    • Easter
    • Girl
    • Halloween
    • Lookbook
    • Party
    • pet
    • Printables
    • Training
    • women
  • No Sew
  • Sewing 101
  • Sew4Good
  • Pet
  • Sewing Room
    • DreamBox
  • Reviews
Home
  • Patterns
    • Free Patterns
    • Pattern of the Month
  • Tutorials
    • Accessories
    • Bags and Pouches
    • Clothing
    • Costumes
    • Crafts
    • Cricut Projects
    • Holiday
    • Household
    • Kids
    • Maternity
    • Quilting
  • Topics
    • Baby
    • Boy
    • Christmas
    • dog
    • Dolls
    • Easter
    • Girl
    • Halloween
    • Lookbook
    • Party
    • pet
    • Printables
    • Training
    • women
  • No Sew
  • Sewing 101
  • Sew4Good
  • Pet
  • Sewing Room
    • DreamBox
  • Reviews

11.06

Placemat Sewing Tutorial with Leftover Strips

Welcome to See Kate Sew! If you’re new here, sign up for my email newsletter for access to free patterns, tutorials and all the latest sewing news! Tour my sewing room HERE!

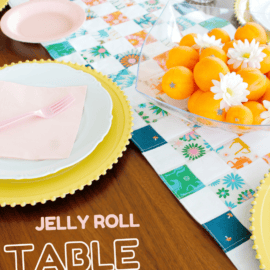
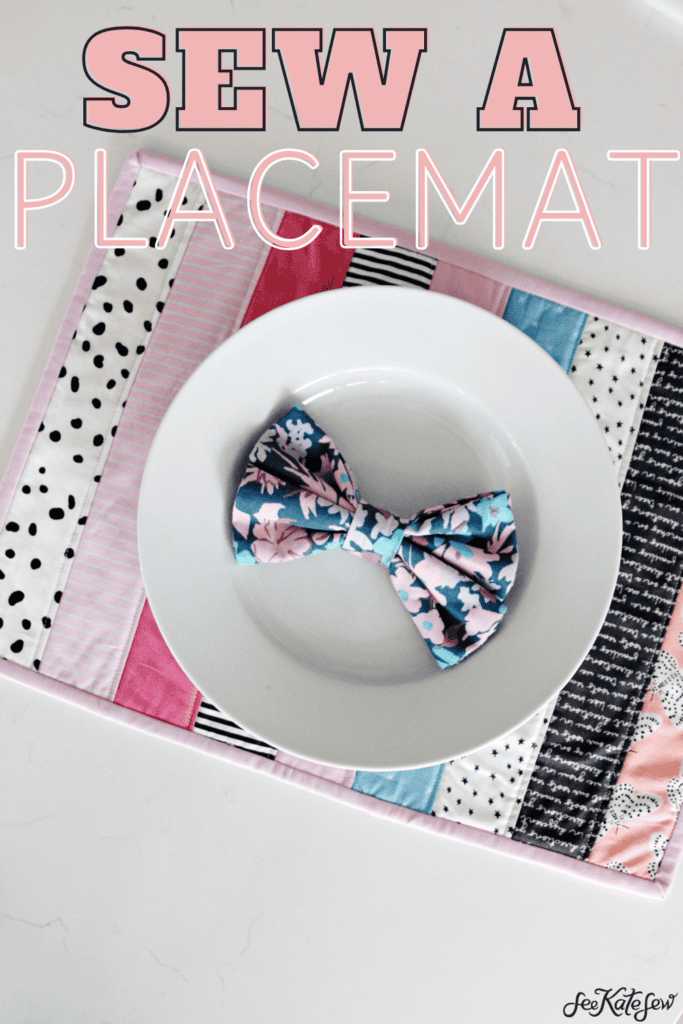
Let’s sew some placemats! In this placemat sewing tutorial I will show you how to make placemats with leftover strips!

Placemat Sewing Tutorial

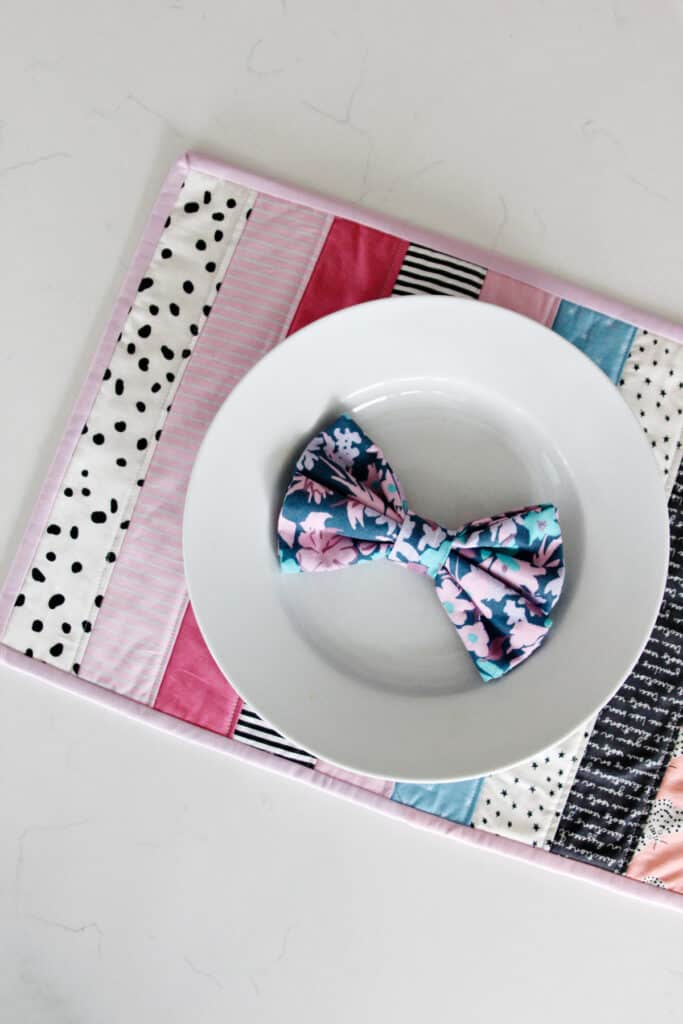
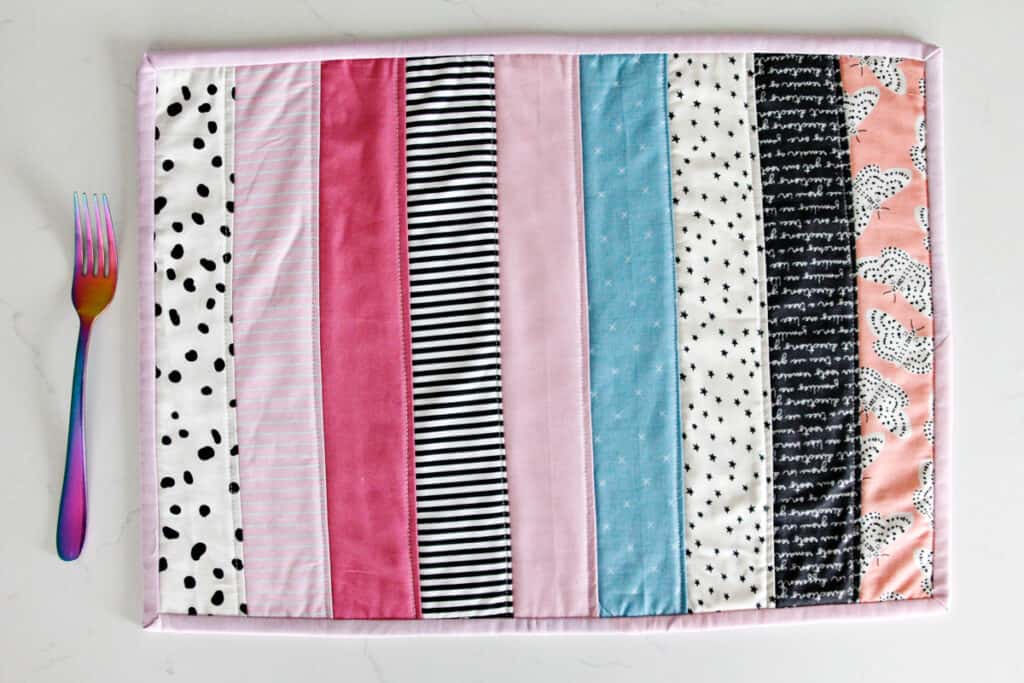
With the holidays coming up, these are great for entertaining! But they are also really fun for everyday use! I love the simplicity of bold strips but there is also so much pattern play!

Placemat Sewing Tutorial

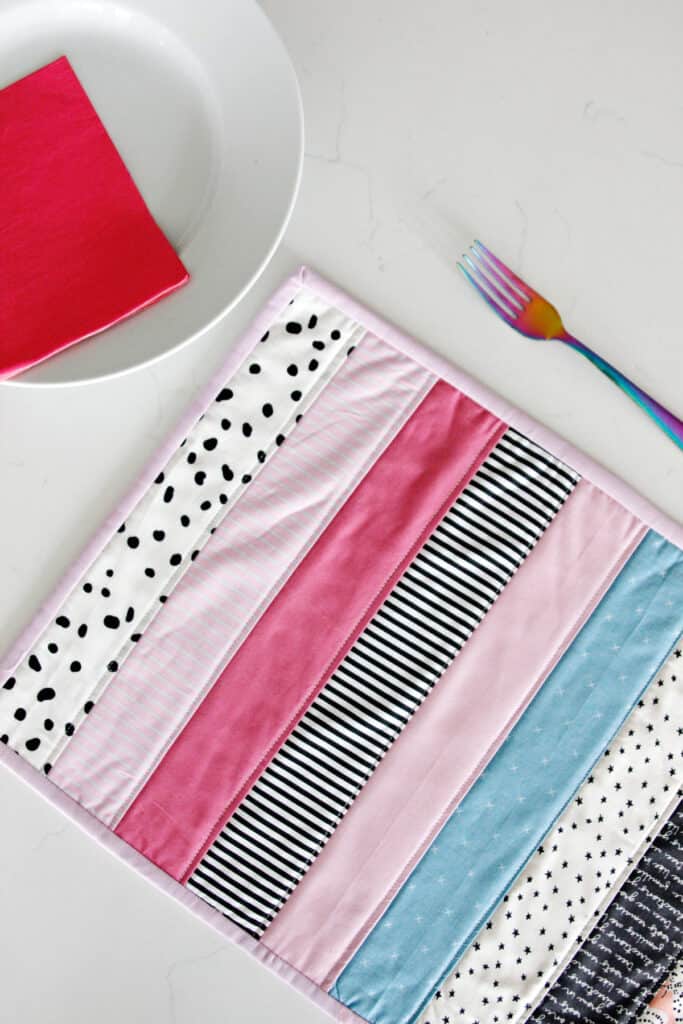
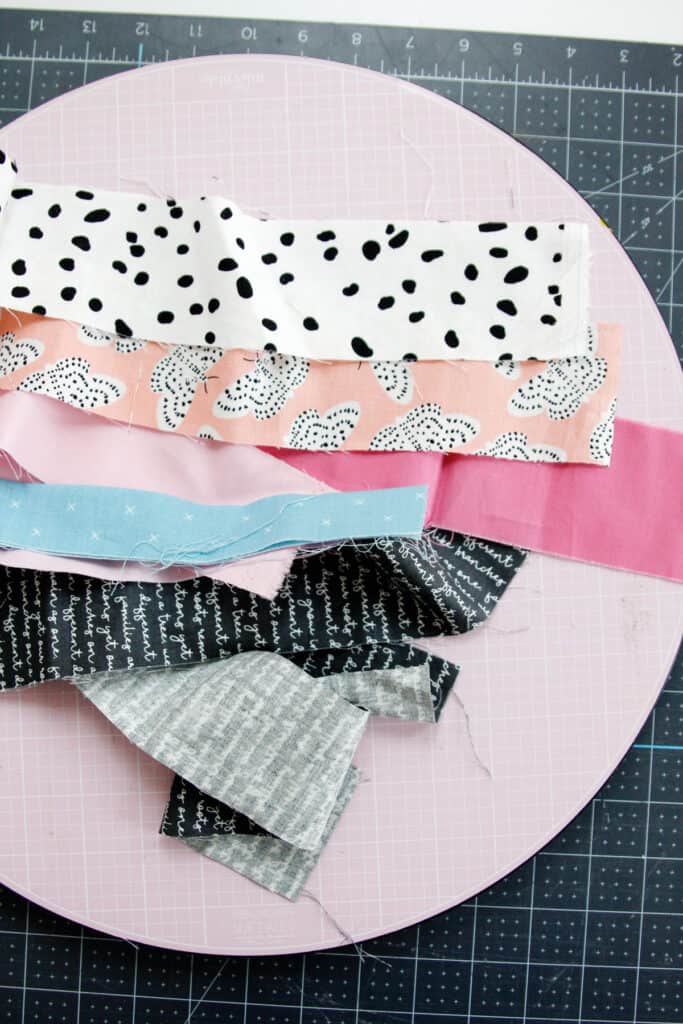
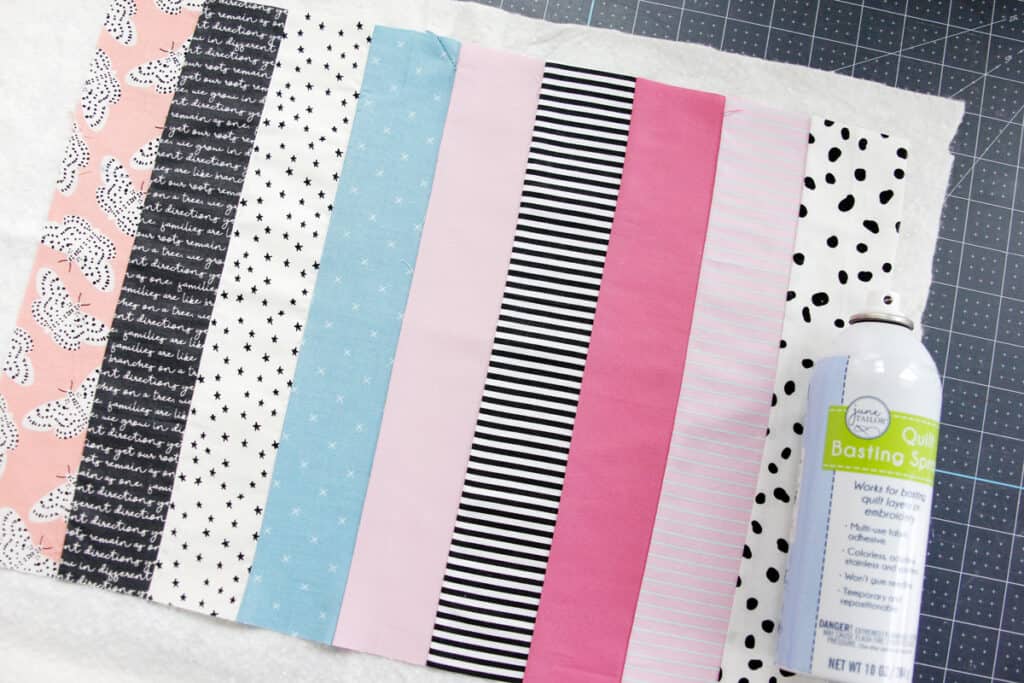
I used my leftover quilt binding bin to make these! Since I typically use the same width of binding (2.5″) they were already cut and ready to go for this project! You can also use strips from a jelly roll or just cut your own strips from yardage.

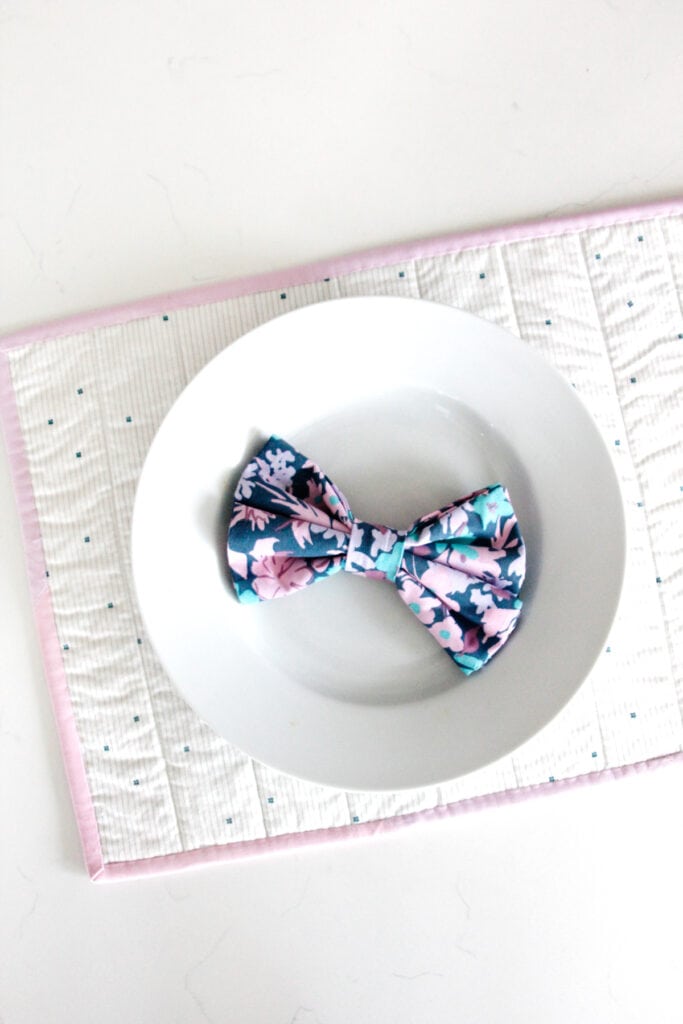
This placemat is also reversible! Pick a fun fabric for the back or create two striped panels!

Placemat Sewing Tutorial Materials

  • 2.5″ strips, leftover from binding, jelly rolls or cut from yardage
  • 1/3 yard for backing
  • Quilt batting
  • Lightweight fusible interfacing
  • Spray baste
  • 3/8″ quilt binding or bias tape
    • You can make your own binding with more 2.5″ strips! Here is a tutorial!

This placemat finishes about 13″ by 18″ which is a great standard size for a placemat!

Placemat Sewing Tutorial

How to sew a placemat with leftover strips

Use a 1/4″ seam allowance.

Each strip will need to be 13″ long. You can either measure them out and cut before assembly or just do a rough cut and make sure the strips are at least 13″ then trim them down later.

Placemat Sewing Tutorial

I prefer to just sew them and trim later, that way a get a nicer edge and don’t have to worry about being perfect. I just make sure they are longer than 13″ and then line up one edge at the top before sewing.

Placemat Sewing Tutorial

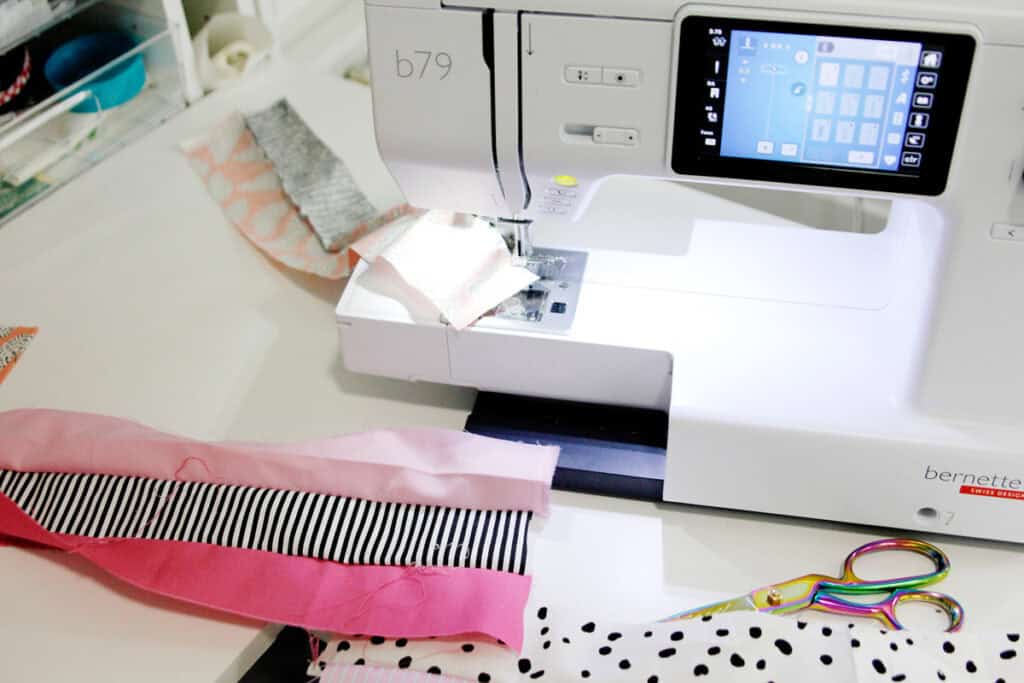
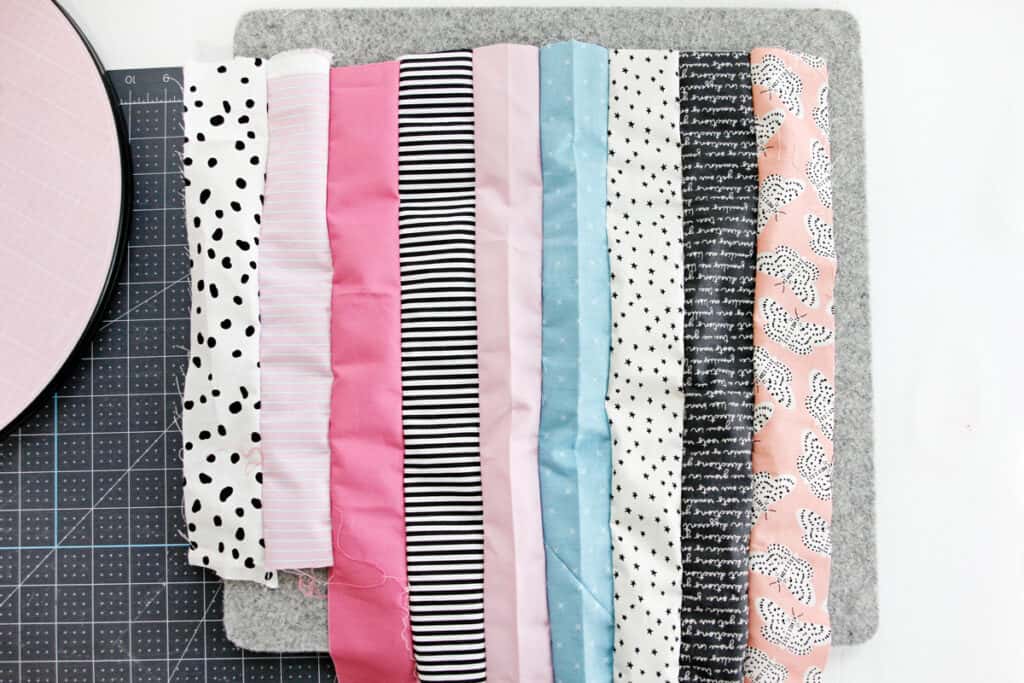
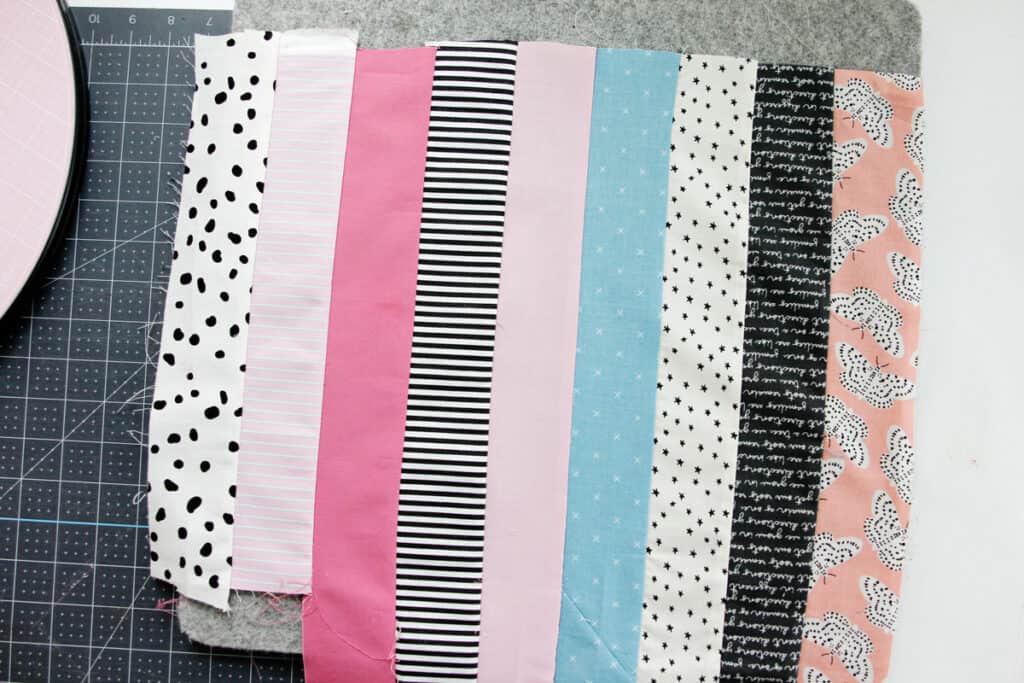
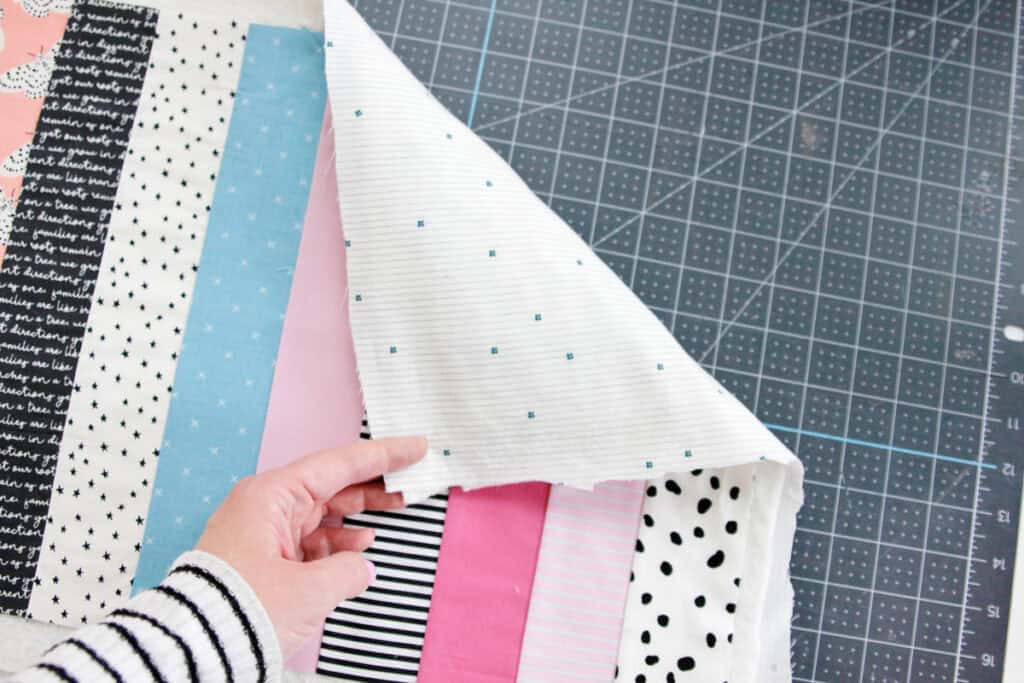
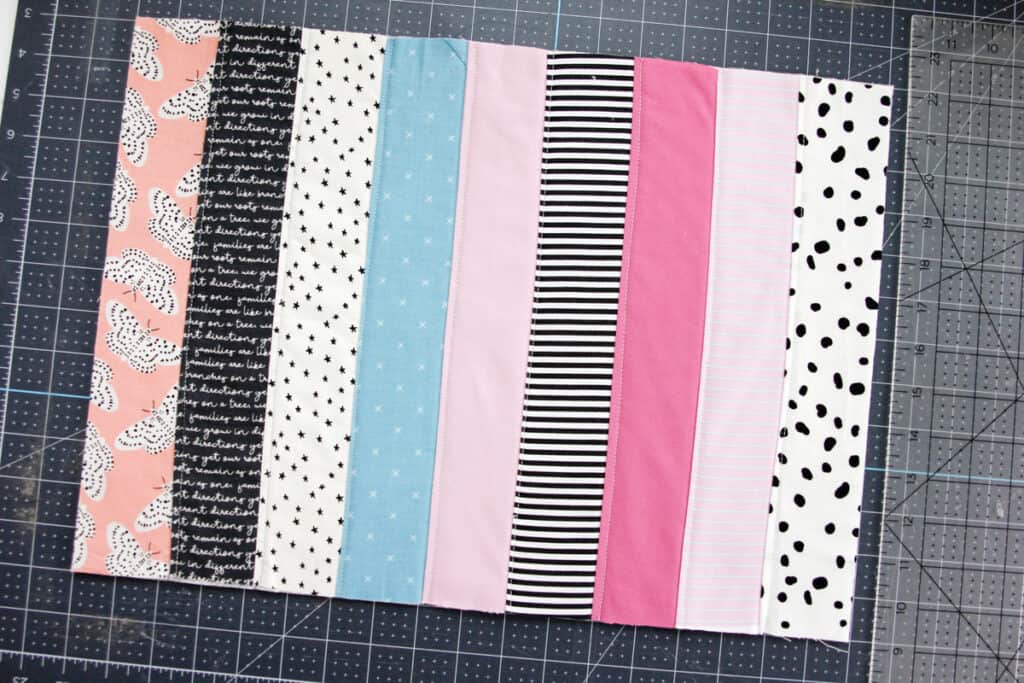
Sew 9 strips together.

Placemat Sewing Tutorial

Press all the seam allowances to one side.

Sewing with Scraps

Then trim the panel down to 13″ by 18.” Use spray baste to attach to a piece of batting and backing fabric.

Sewing with Scraps
Sewing with Scraps

Topstitch along the sides of the strips.

Sewing with Scraps

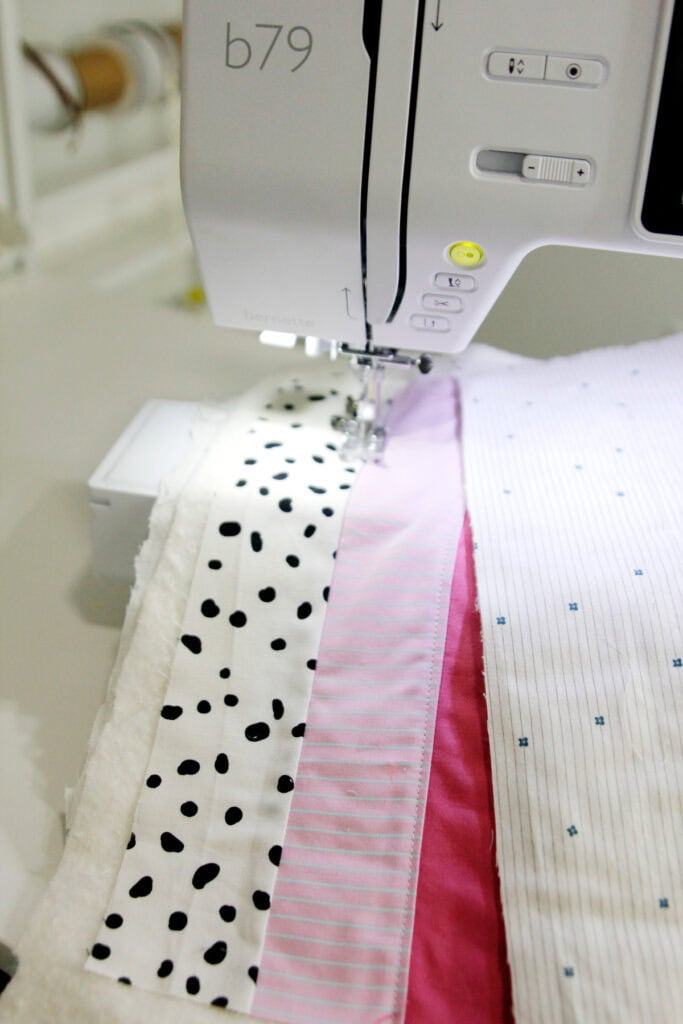
You can really do any topstitching pattern on this project. I love the simplicity of straight line quilting on the side of the strip with the seam allowance under it. It give a sturdy and gorgeous finish.

Now add your binding!

Sewing with Scraps

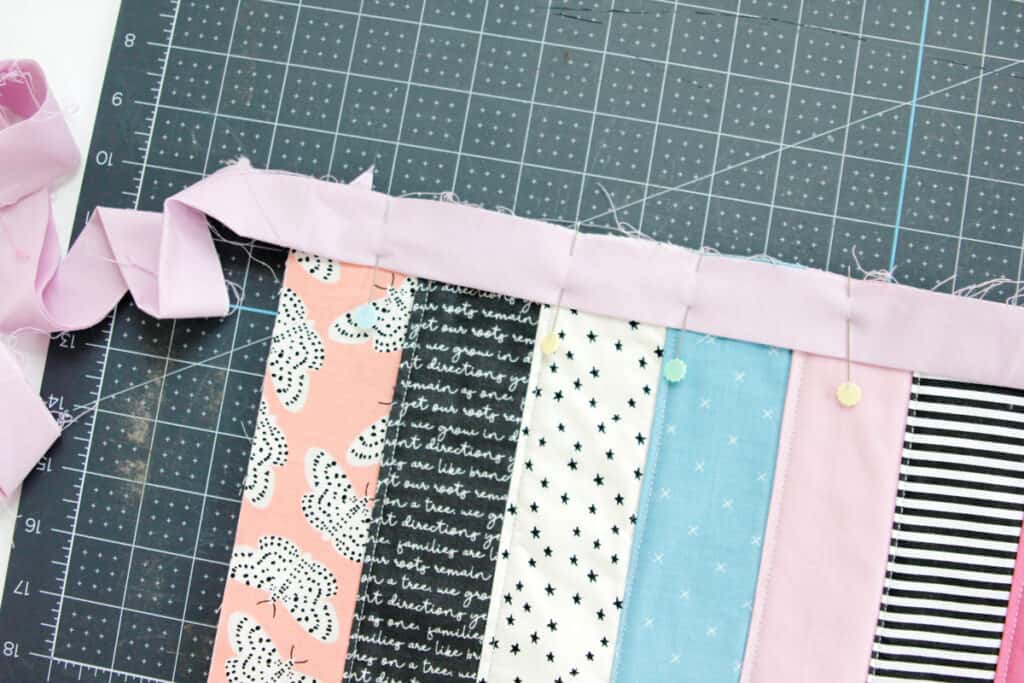
You can sandwich it on around the edges and machine sew, or follow my quilt binding tutorial!

Sewing with Scraps

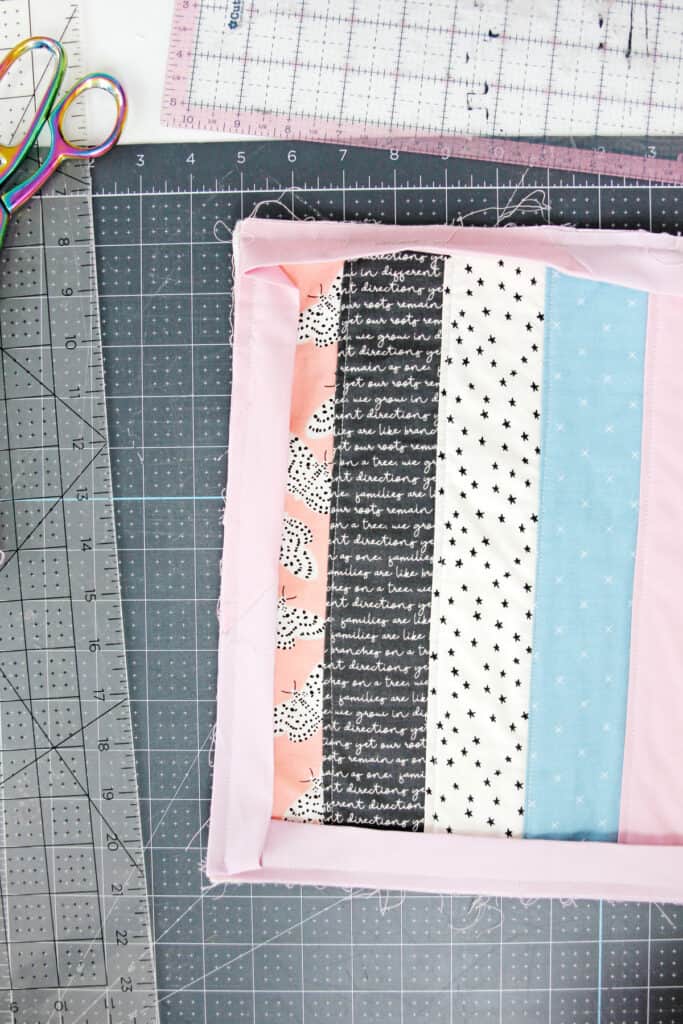
I sewed mine on to the front of my placemat the same way I do with quilts, then I hand stitched the binding to the back of the placemat. I actually enjoy binding quilts by hand while I watch a movie and I think it looks beautiful!

Hello, gorgeous! My kids say it’s too pretty to use since it will get spilled on, but luckily this is washable!

More kitchen sewing ideas

If you enjoyed this project, here are a few more sewing ideas for your home!

  • Microwave Bowl Cozy
  • Reusable “Cling Wrap”
  • DIY Oven Mitt
  • Ice Cream Soda Aprons

Leave a Comment | Free Patterns, Household, Quilting

Exclusive Free PatternRuffled Apron

Sign up for my email newsletter and receive my ruffled apron pattern totally FREE!

We take your privacy seriously. See our privacy policy here. Unsubscribe at any time.

You may also like these posts...

Charm Square Casserole Hot Pad✅ 2 Sewing Ideas For Scrap Fabric That Will Make You Amazed – Pinterest Sewing Projects9 Patch Quilted Zipper Pouches🛍 SIMPLE SEWING – 5 BUDGET SEWING HACKS FROM THE DOLLAR STORE 💰

Primary Sidebar

  • Facebook
  • Twitter
  • Instagram
  • Pinterest
  • Email

Exclusive Free PatternRuffled Apron

Sign up for my email newsletter and receive my ruffled apron pattern totally FREE!

We take your privacy seriously. See our privacy policy here. You can unsubscribe at any time.

Don’t miss these popular posts!

easy baby dress pattern for the summertime

easy baby dress pattern for the summertime

modern ombre + b/w triangle quilt tutorial + pattern

modern ombre + b/w triangle quilt tutorial + pattern

Fabric

Quilted Cosmetic Case Kiss Me KateKiss Me, Kate FabricOne Hour Granny Square Quilt Tutorial | See Kate SewModern Granny Square Quilt Whole Cloth

Pattern Hacks

Easy Baby Summer Dressthe EMMA pattern | See Kate SewThe EMMA Dress

Footer

Hello friends!

My name is Kate, a twenty something fashion lover and mother of two. When I’m not chasing kids you can find me at my sewing table or daydreaming up new designs. You can read more about me here. Thank you for visiting!

8a918f8da8e0e69102dc0f33a718de85a99c31a57283e0e3e2

FOLLOW ME HERE

  • Facebook
  • Twitter
  • Instagram
  • Pinterest
  • Email
  • Blog
  • About
  • Contact
  • FAQ
  • Sponsor

Copyright © 2025 See Kate Sew  •  All Rights Reserved  •  Privacy Policy  •  Site Design by Emily White Designs