This post is sponsored by Craftsy. I’ve partnered with Craftsy to polish up my sewing skills through their online classes and share my experience with you over the next few months. I hope you enjoy!
With the recent release of my Zippy Top (pictured and tucked in), you may have noticed that I love zippers! I think they can be really cute and are really functional. I also just like the word ‘zipper’. I always tell a beginner zipper-installer to start with zipper pouches, because they are a really easy project that yields great results and will (hopefully) make you a little less scared of the zipper. I’m hoping this (simple but useful!) project will do the same! A simple project that you can wear can be a great confidence builder!
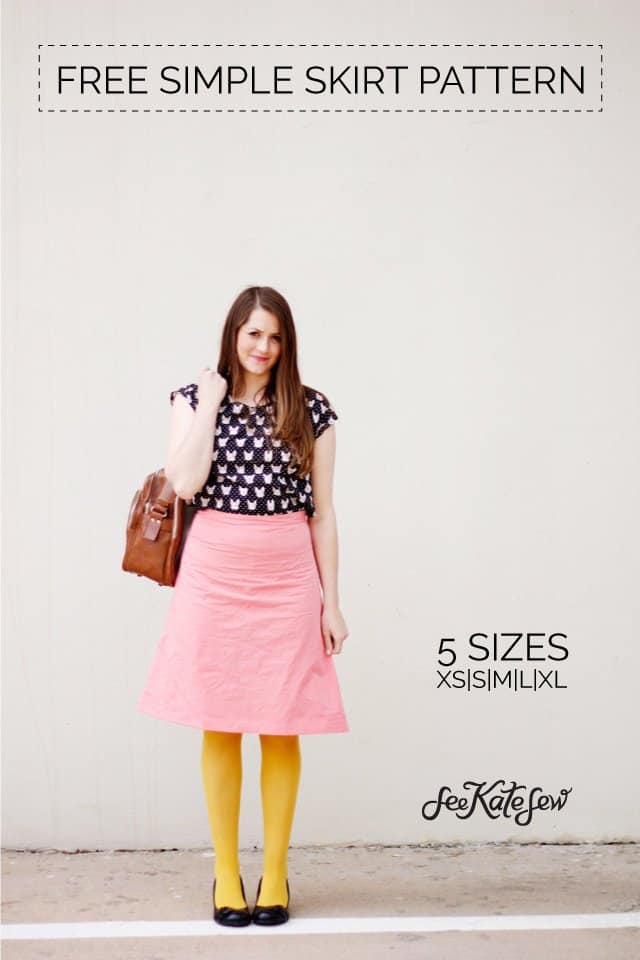
Today I’m sharing a free skirt pattern in 5 sizes! If you’ve never inserted a zipper into a garment before, this is the perfect project to get you started! It’s not too hard and leaves you with a cute bright skirt, just in time for summer!
Craftsy has a free zipper course on their website. It’s totally FREE! How about that! The class is called Mastering Zipper Techniques taught by Sunni from A Fashionable Stitch. I took the course to brush up my zipper skills and learned so many new things. Sunni has such a great and encouraging teaching style, too. The course covers zippers, invisible zippers and both types with garments with linings. I highly recommend this course! In fact, I’m going to send you over there when it comes time to insert the zipper; these instructions are great! I learned a few new things and I didn’t know I loved video tutorials!
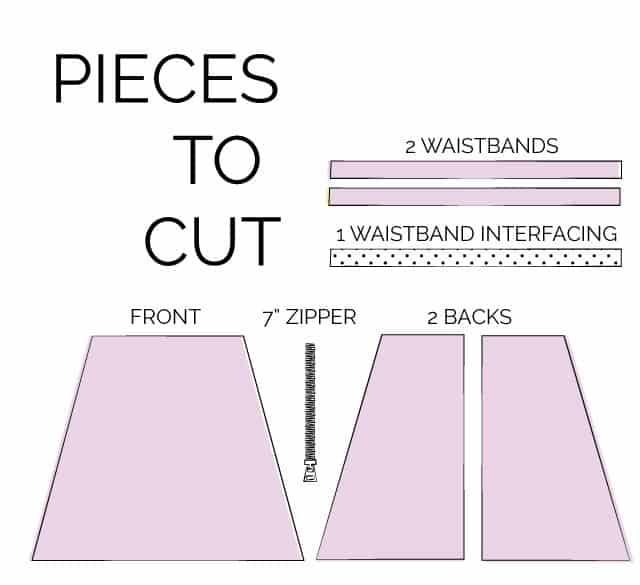
To get started with this free simple skirt pattern, collect your materials. You will need:
-1.5 yards of fabric (60″ wide)
-one 7″ zipper
-fusible interfacing
–simple skirt pattern download
Print your pattern and tape it together. You’ll have to trim a little bit of the edges. This is what it will look like:
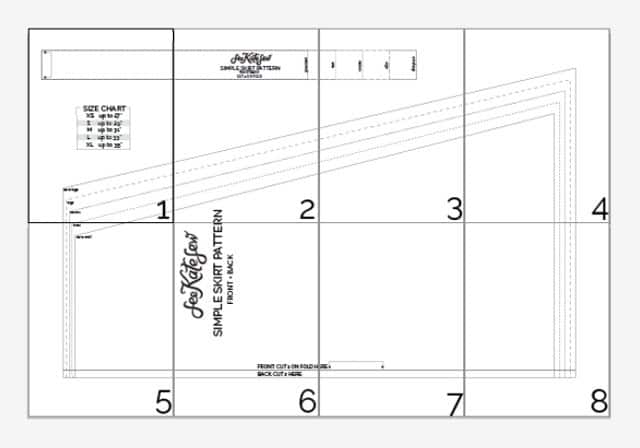
Measure your waist. Your waist is the smallest part of your torso.
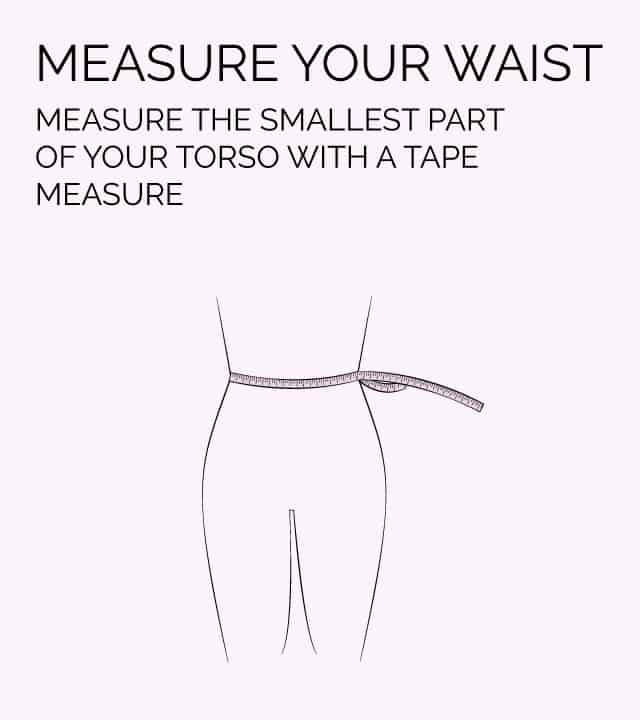
Pick a size based on your waist measurement.
XS- up to 27″
S-up to 29″
M- up to 31″
L- up to 33″
XL- up to 35″
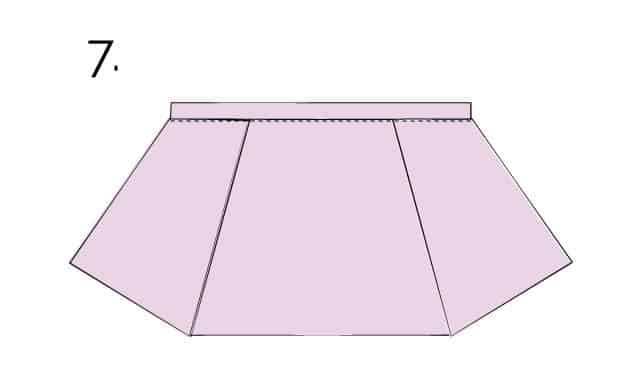
Cut out your fabric.
You need 1 waistband, 1 front and 1 back. Fusible interfacing is optional for the waistband.
Cut the front piece on the fold.
Cut 2 back pieces on the outer line (not on the fold).
Note: 3/8″ seam allowance included in pattern pieces.
Sew waistband.

1. Fuse interfacing to wrong side of one waistband piece.
2. Sew waistbands together at the top.
3. Fold the waistband over and press. Wrong sides will be together. Set waistband aside.
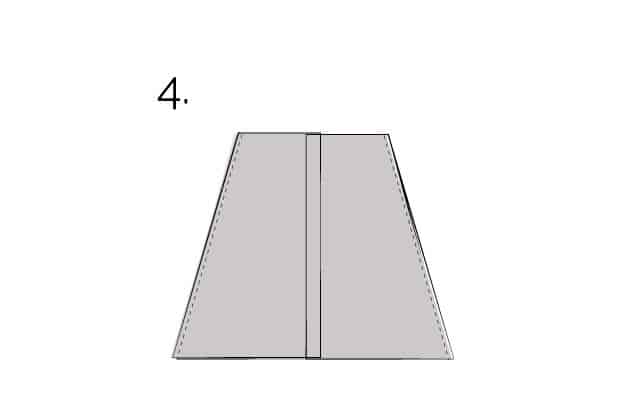
4. Sew skirt side seams together.
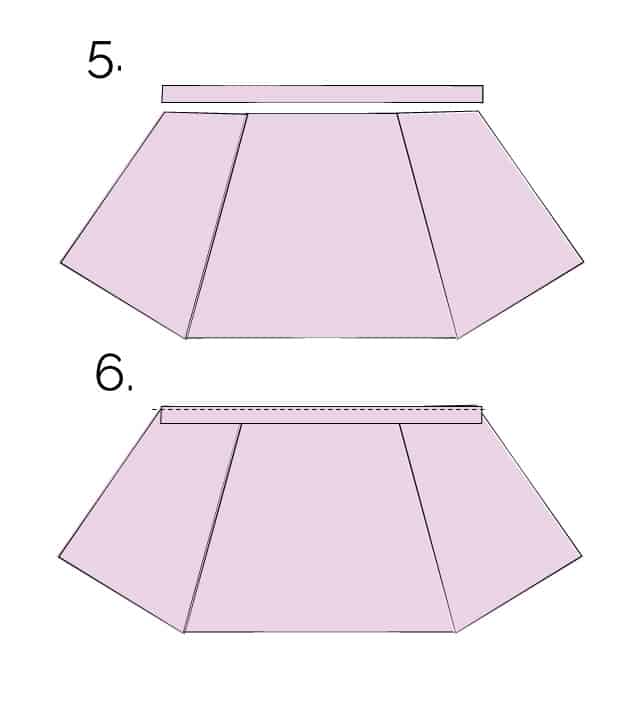
5. Stretch out skirt so it lines up with the waistband easily.
6. Sew waistband to skirt. You may want to ease stitch the skirt top to make matching the waistband a little easier. If your fabric is loosely woven or stretchy I recommend it.
7. Optional: Topstitch underneath wasitband to keep seam allowance down.
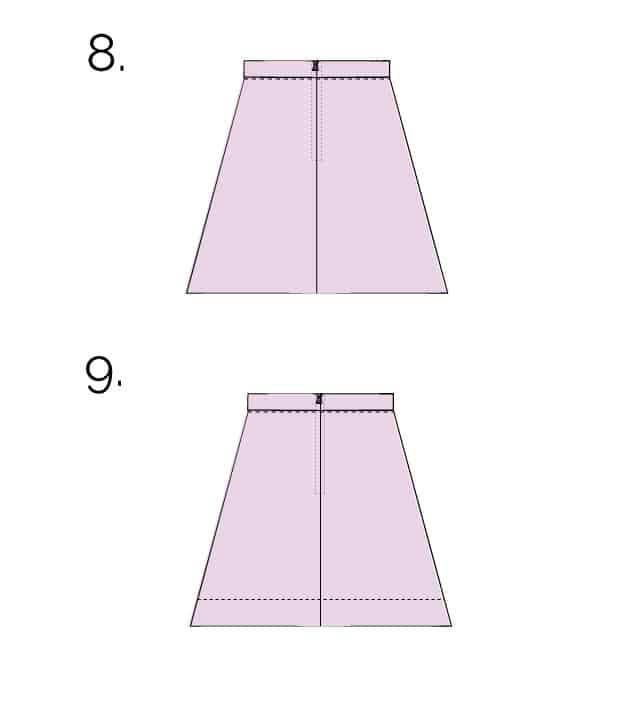
8. Insert zipper. Follow the instructions by Sunni in the Mastering Zipper Technique Class to insert a slot seam zipper or invisible zipper. The course also outlines how to finish the back seam of the garment.
9. Hem the bottom of the skirt. 2.5″ hem allowed on pattern pieces.
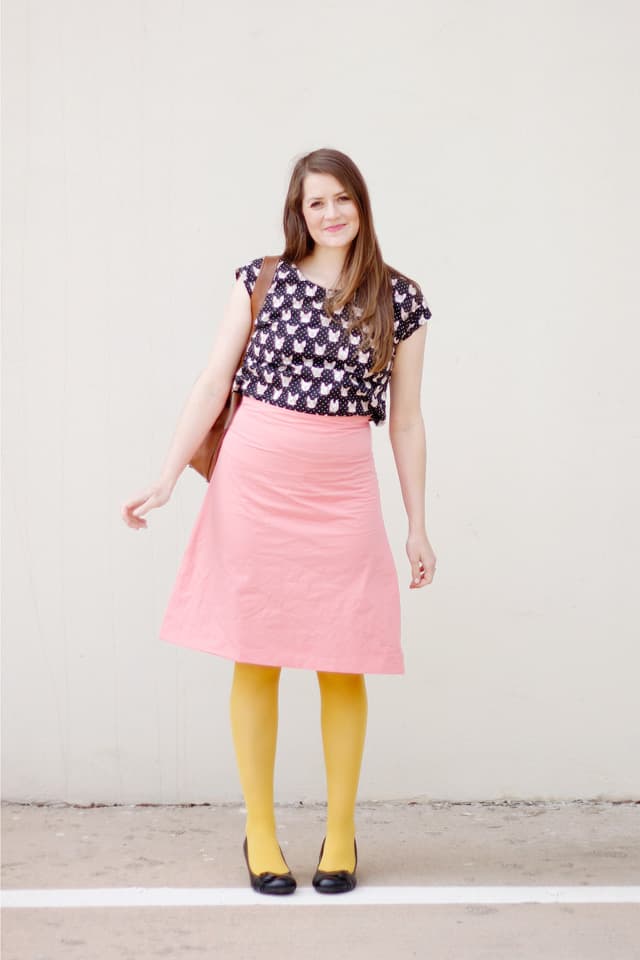
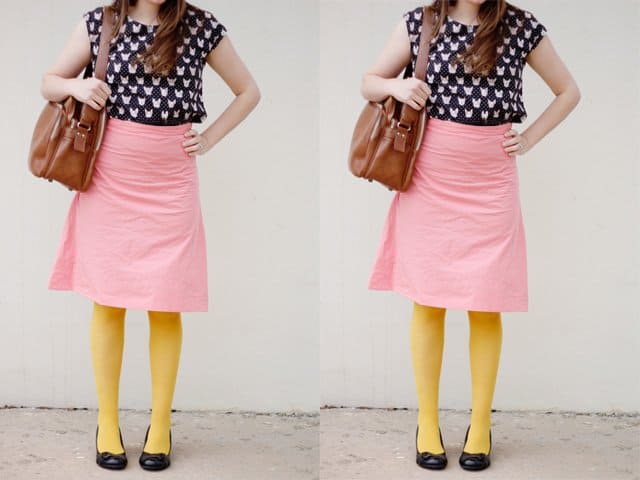
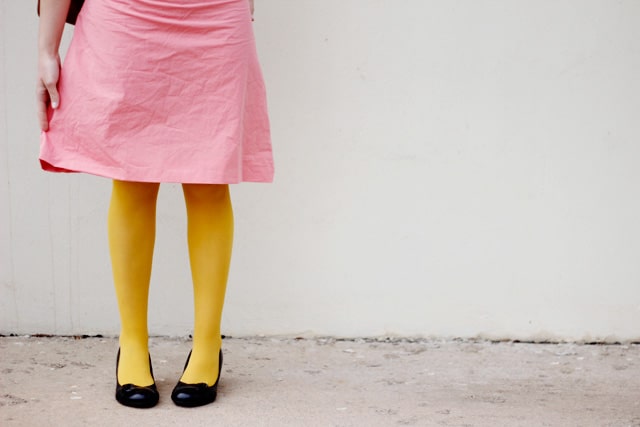
Now try it on! I’m pairing mine with my dog print zippy top, tucked in and yellow tights to match the yellow zipper I used.
I used a bubblegum pink pima cotton for this skirt! I love pima cotton because it is thick enough to not need a slip underneath and keeps a nice aline shape. It gets wrinkly quickly though!
Go over to Craftsy, sign up (free!) and sign up for the FREE Mastering Zippers class.


Congratulations! Craftsy is an amazing classroom indeed. Thank you for sharing this pattern that I’ll in my to-do list.
xxx
Ally
http://allyandwoozle.com
i’ve tried sewing my own clothes before but I failed big time! I don’t exactly know what went wrong maybe the measurements on how I cut the fabrics? But anyways, with this, i’ll surely try my luck again, i hope it will work. Thank you for sharing this. And your end product is really nice!
I love this whole combo, the coral/mustard plus the black and white. Is the shirt a self made? I love that kitty fabric. Where did you get it?
I love the yellow tights!!! An the size guide is really helpful!
L x
http://workingmumy.blogspot.com
Thanks Kate! I haven’t found the right motivation to learn how to do a zipper, but this looks like a great project to test it out with! If I were to line this skirt, would I just baste a lining to my fabric and then go from there? I’ve never lined anything other than a child’s dress bodice…!
Hi
I have a sewing machine that I have hardly used and really want to learn to make clothes. I am so going to have a go at this skirt. Your site is brilliant… I know you are going to be of so much help. Thank you for sharing this.
Hugs
Kim
x
Squeee! That pink is so awesome!! I’ve got a Craft Gossip post scheduled for this morning that links to your tutorial:
http://sewing.craftgossip.com/free-pattern-simple-a-line-skirt/2014/04/01/
–Anne
This is a great tutorial – I have several pieces of fabric that I’m going to be able to use for a skirt – now I just have to master the zipper!
Love it!!! Thank you Kate..