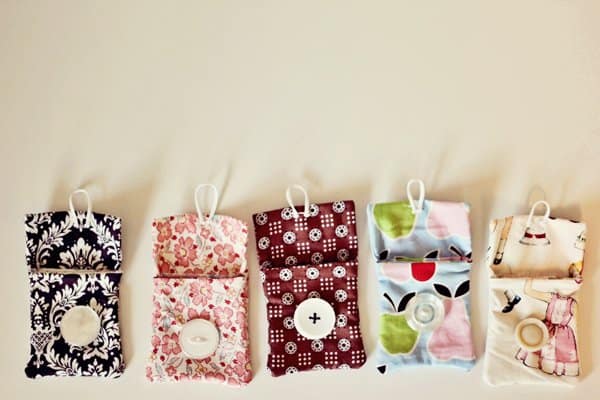
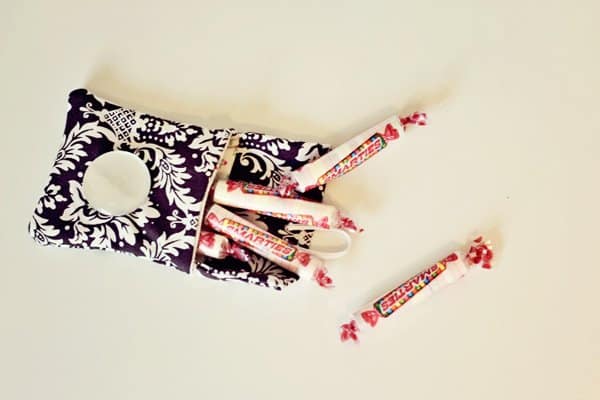
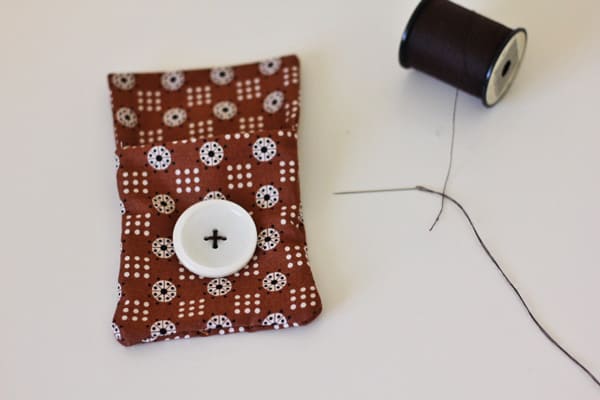
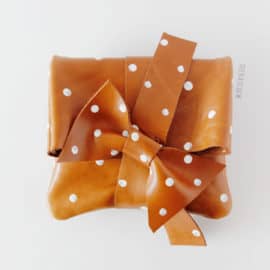
Button pouch. Can you see me/my arms in the background? Hi.
If you were little me growing up, you could never have enough pouches. I always wondered at the irony of spending money on something to put my money in, like a wallet. But I still felt like I needed the wallet, bag or pouch. It would make me a better collector. I like bags. I also had lots of collections that needed storing. My strangest collection was a collection of bread clips. I always wanted one with my birthday on it. They were going to be some big art project eventually. I don’t collect those anymore. And I never did find one with my birthday on it. Weird kid.

So maybe your kid is a little like I was and would get a kick out of this simple button pouch. Or maybe you would! A gum pouch for your purse? A pacifier pouch for a baby shower? A little gift for the mail man?
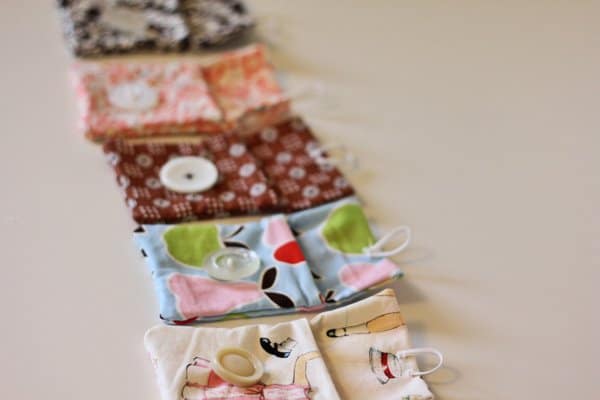
I’ve made up a stack to have on hand for little pick-me-up gifts. Might put little treats in them to send with husband in the morning. I’m sure you can think of a million things to do with them!
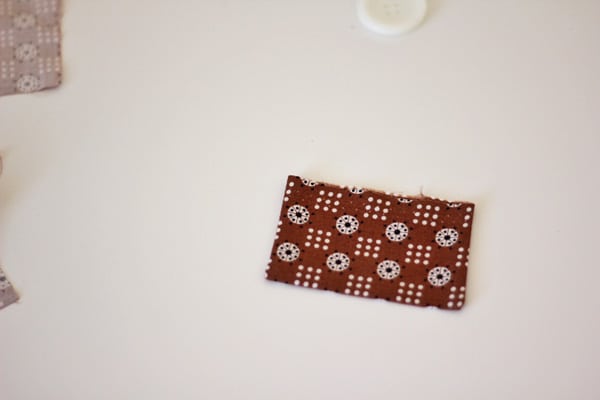
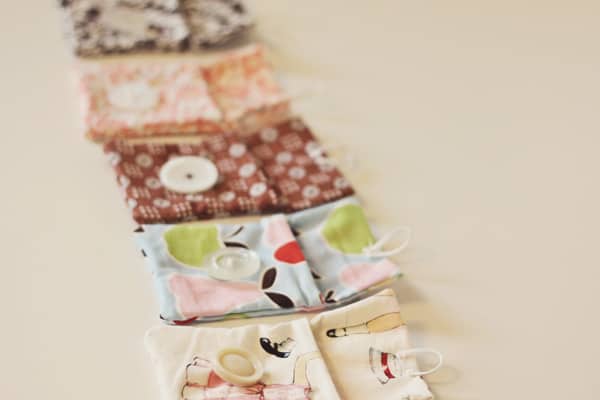
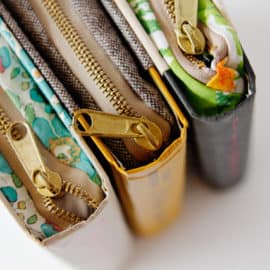
This is a perfect scrap project since you just need 5″ squares. You can mix and match to make a fun little pouch! I made some of my linings extra exciting that way.
little button pouch tutorial
materials:
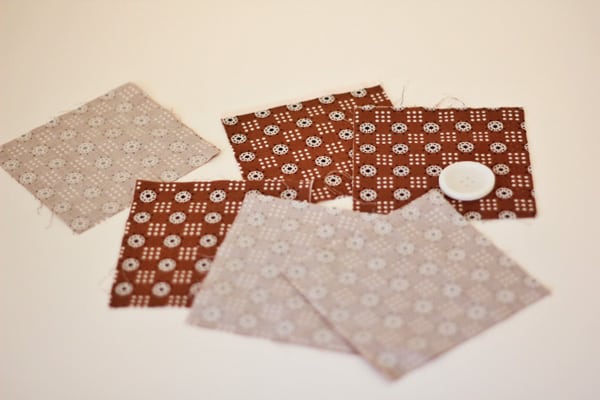
quilting weight cotton (scraps work!)
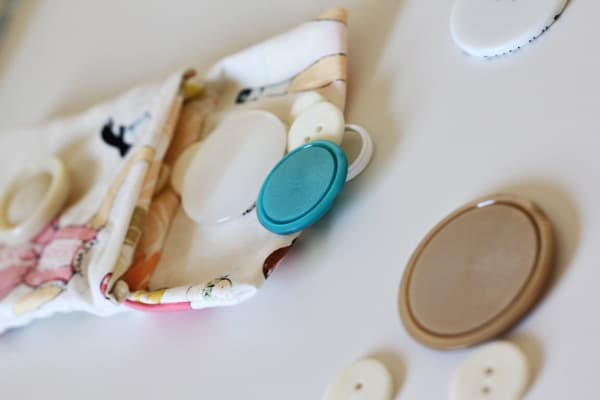
1 big button
a little bit of elastic cording
I used my accuquilt go baby to make these little pouches really fast! It pretty much eliminates cutting. You can read more about it here.
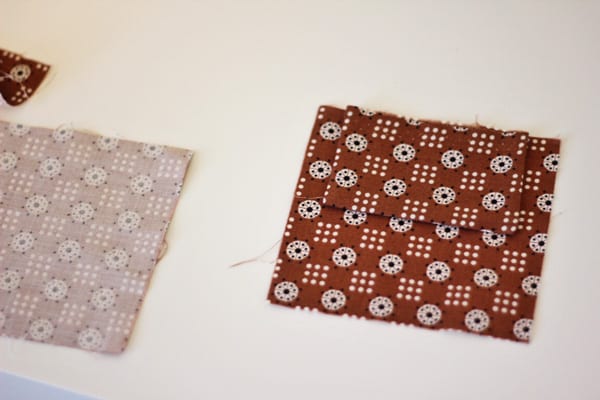
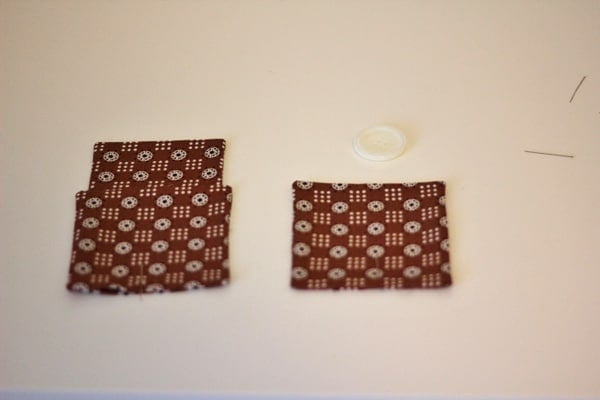
If you don’t have a go! baby (yet..) all you need to do it cut six 5″ squares. I used my value die, which has a big 5″ square along with a little square and triangles. Since the cutter can cut six layers at once, it was pretty easy to whip these out.
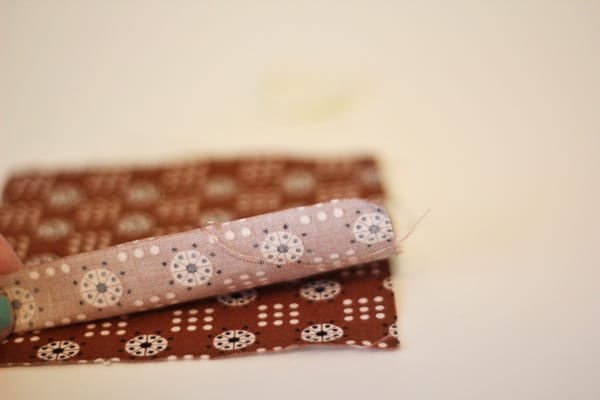
Let’s start out by making the flap. Stack two of your squares on top of each other, both face up. We’re essentially using one of them as an interfacing to make the pouch sturdy.
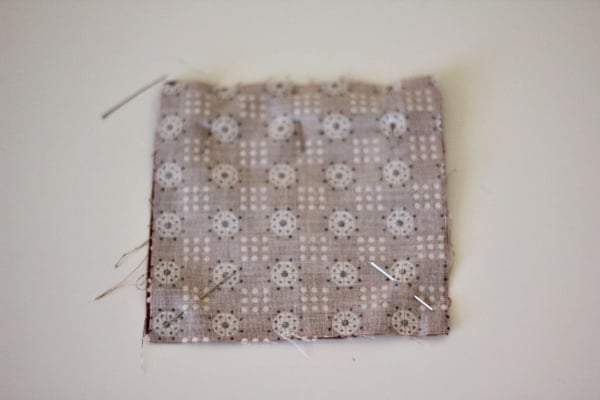
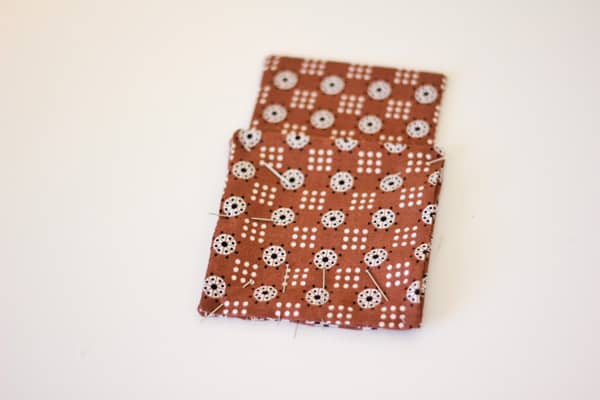
Then fold it in half, so the right sides are together. Pin in place. And sew down both short edges leaving a 1/2″ seam allowance. Backstitch at each end.
Trim the edges so only 1/8″ remains.
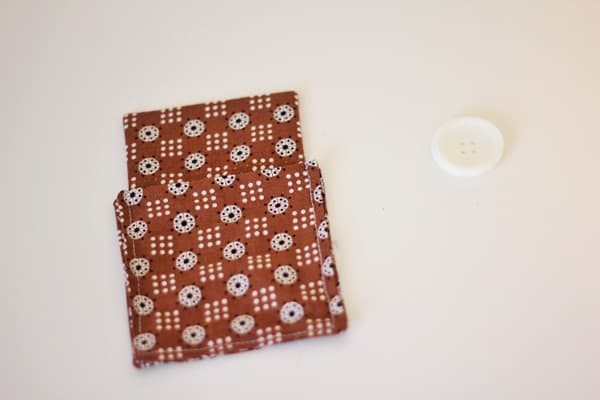
Turn the flap right side out and press. Make sure to get the corners out really well. It might be a little harder since you’re working with a few layers of fabric, but you can do it!
Now put your finished flap on one of your other squares. You’ll be sandwiching it between two squares, right sides together. By putting the flap on the inside of your sandwich, it will end up on the outside of your pouch later.
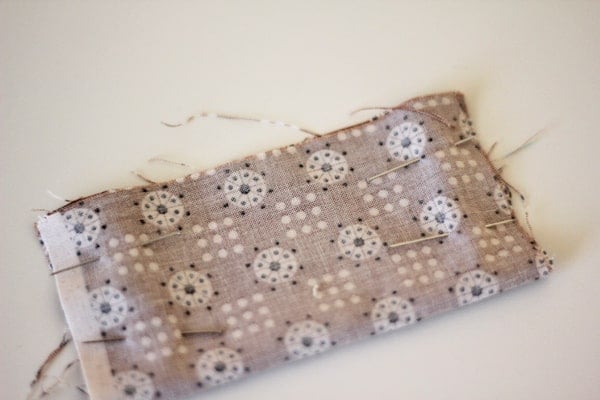
Add the second piece and pin all the way around.
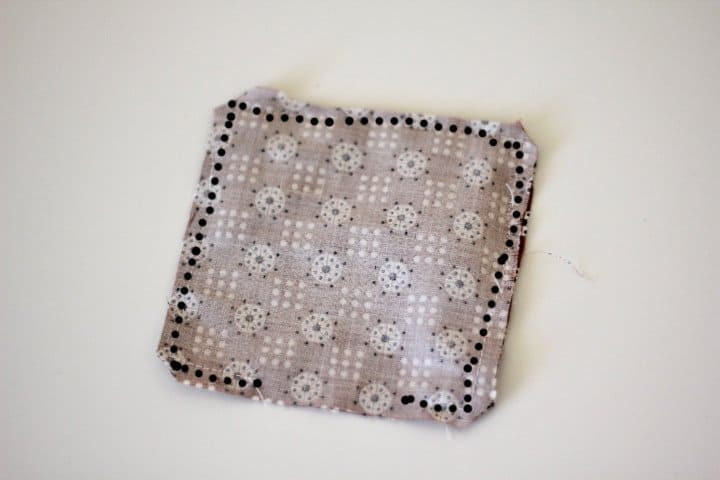
Now sew it up, all the way around, leaving a 2″ opening at the bottom. Use a 1/4″ seam allowance this time. This should give you plenty of room to avoid sewing through the flap on the sides. You will sew through the flap on the top part, which will attach the flap to the top of your pouch. Once you’ve sewn it up, clip the corners and trim your edges to 1/8″. The stitching was hard to see so I traced it with black dots so you know where to sew.
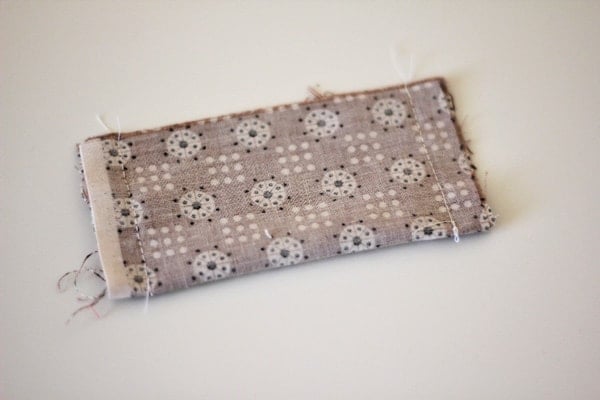
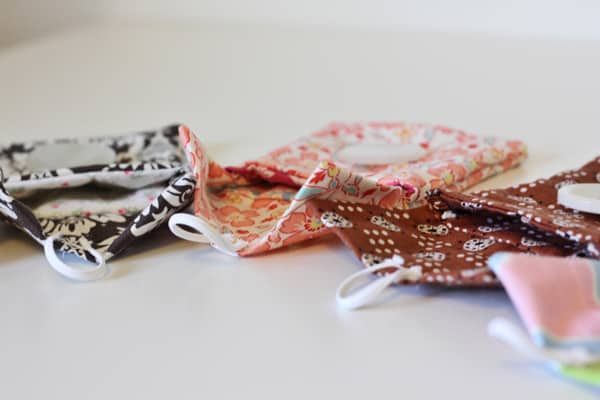
Turn it right side out, press and pin your opening. Your flap will be visible. Now you’ve completed one half of the pouch, the back part.
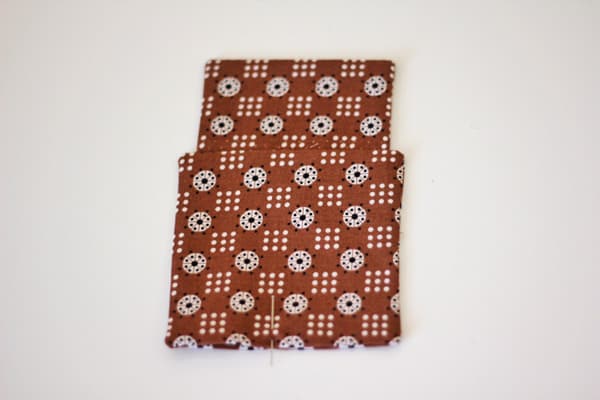
To make the front, sew your other two squares together the same way, just without the flap. Now you’ll have two pieces, one with a flap and one without. Both will have little openings at the bottom.
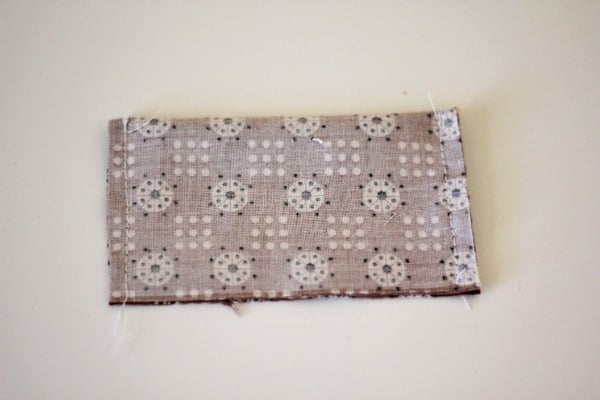
Now sew them together along the sides and bottom. Use 1/4″ seam allowances on the sides and 1/8″ on the bottom. We want to make sure to close up the holes on the bottom. Backstitch at the start and end of your stitching.
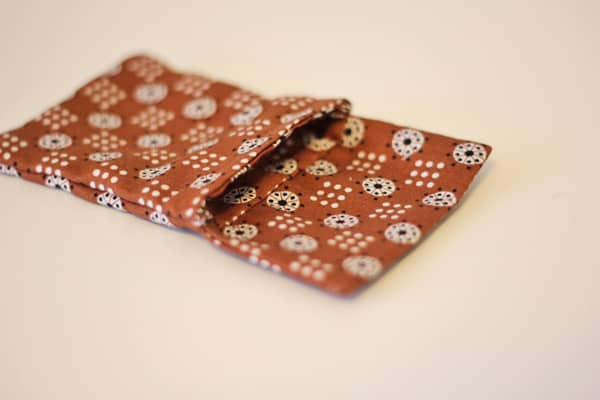
Now turn your pouch! Don’t clip or trim the lining at all. Since we already finished the lining’s edges it will have a nice clean interior. The thickness of the fabric will give the corners a little roundness.
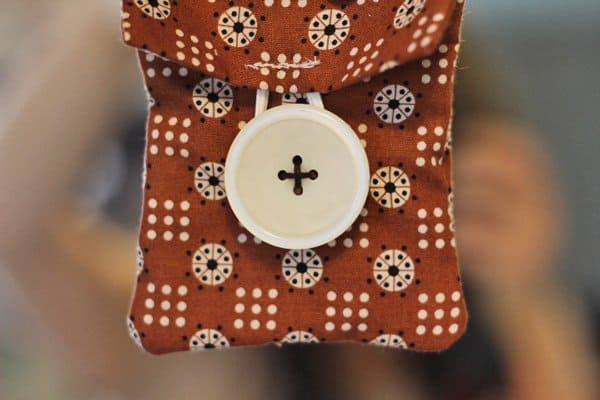
Sew the button smack dab in the middle of the front of your pouch.
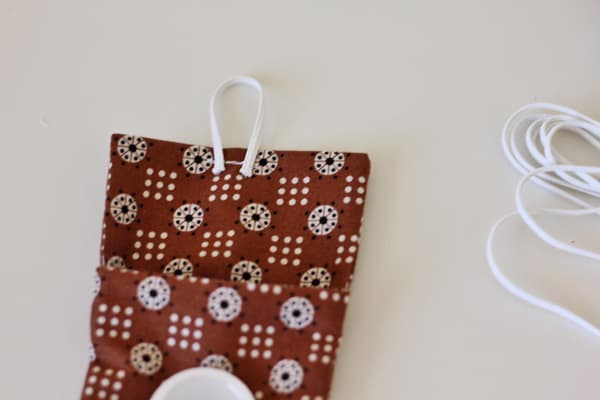
Now attach a little piece of cording to the flap, enough to stretch over and clasp over your button. But not too much that the flap won’t hold down.
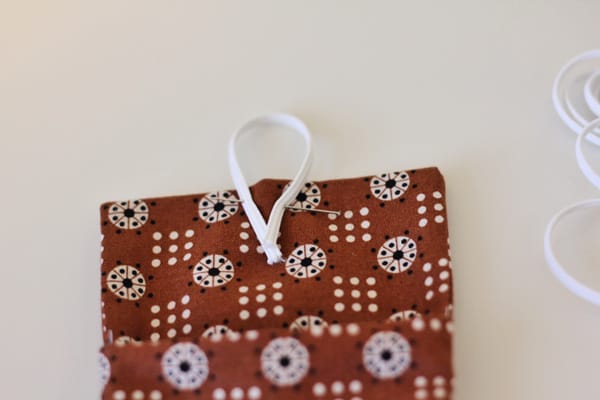
Sew it down and backstitch.
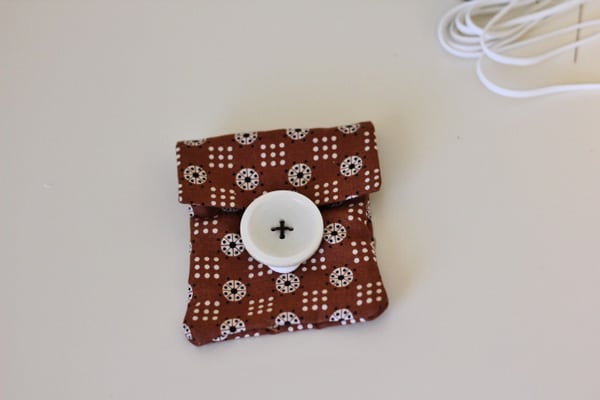
Done!
So make a bunch more!

What would you use a little button pouch for??
………..
Don’t forget to sign up here for 22 FREE patterns from Accuquilt!


I think I will make one to attach to my camera strap for my lens/remote!
I adore these! Great tutorial too, thanks :)
These would make great party treats and also lovely Christmas gifts or even wrapping for little pressies!
Lucy
xx
http://charmaboutyou.blogspot.com
Those would make the perfect pouches for binkies! I may have to make up a few before this baby comes!!
Very sweet little pouch :D
Visiting from Tatertots and Jello Linky Party,
Smiles, Suzanne in NW Illinois
Super cute
these are so stinkin adorable! I know a lot of little girls who would be tickled pink to have some of these!
Will a gift card fit?
Thanks Kate for the tutorial, the pockets are very cute. I’ve made my own and I’ve put tea bags inside!!!
Regards from Spain.
These are so cute and so many possible uses! Thanks for the tutorial!
becky@chaselegaltitle.com
Great tutorial–thank you! They’re super cute :)
So adorable!
I”m not sure what I would use mine for – but I NEED some!!! These are too cute!
So adorable! These are perfect for little collectors like my babies who are always finding something on little outings to collect .. whether it be rocks or bouncy balls .. their little minds are endless! :) Love these!
Samantha
http://www.facebook.com/burpeesbowsboutique
great tutorial and very easy. just made my first one, and i can’t wait to make lots more!
I just came over for the tutorial via Infarrantly Creative and I love these. Definitely an easy project. Somehow I ended up with a bunch of clips, the ones you attach to key rings, and some carabiners hanging around so I think I will attach them to the corner. Now our guys can attach them to whatever their hearts desire!
Thanks for the great idea!!
These are perfect! My friend and I work in a lab together and she just got engaged and since she can’t wear her awesome ring at work (it would rip off her gloves) she asked me to make a small pouch so she could carry it in her bag safely. I am also embroidering her initials on the top part. Thank you so much for the detailed tutorial.
I halved the size and use them to hold hair thingies for yoga! Fits right into the little pocket on my yoga bag and I am never without an elastic, bobby pin or what ever!
Creo que son adorables y perfectas para llevar mi ipod nano :D. me encantan!!
Actually i think these make great sanitary pad bags (in no offense!) At least they are gonna be in cute lil bags when i bring them out fr emergencies!
Muy lindas bolsitas y el tutorial bien explicado.felicidades!