This post, 10 ways to refashion a t-shirt, is sponsored by Fiskars.
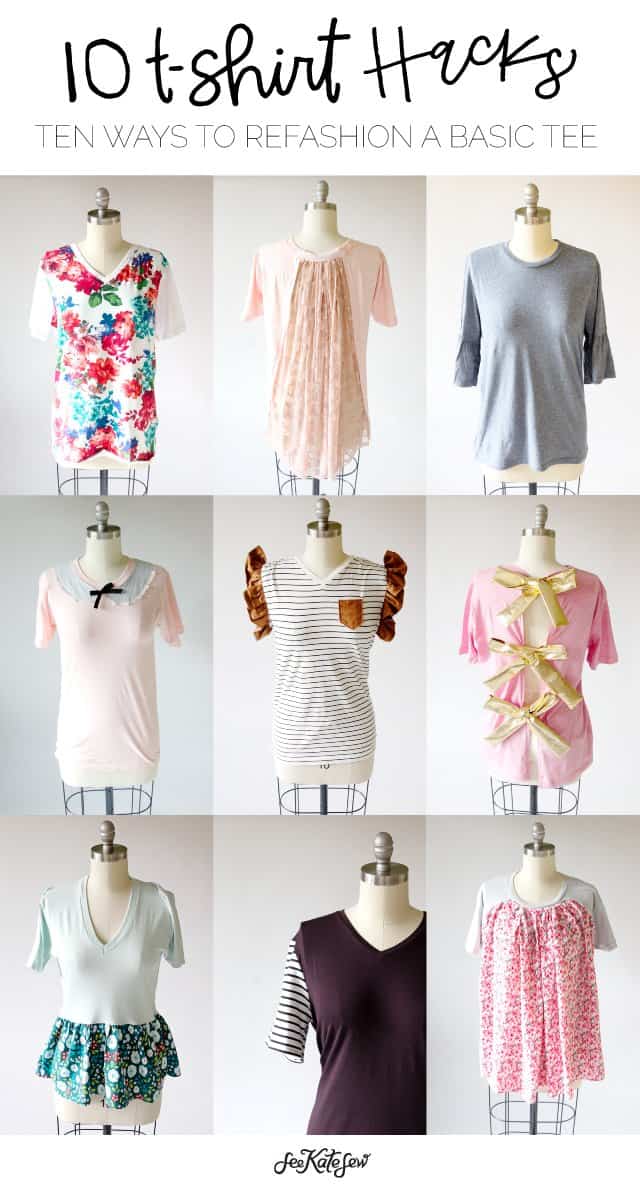
A basic tee it the perfect base for so much creativity. I had fun chopping and sewing and trimming and I’m really excited to share TEN t-shirt refashions with you today!

We’ll get nice and scissor happy by chopping, adding, nipping and more to these tees. Refashions are an easy way to get started sewing, and also a simple afternoon project if you already sew. I started this project with the intention of creating 10 different t-shirt refashions not realizing I would finish with a whole new wardrobe!
I’m so excited to partner with Fiskars for this post to promote the Amplify® RazorEdge™ Fabric Shears! These scissors have been in my sewing area for almost a year now and they are always the ones I reach for first. They are super sharp but lightweight and have quickly become my favorite sewing scissors!




The Amplify Shears are small but mighty, they cut through thick and tough fabrics but are also sharp and precise, making them great for delicates, too!
This post includes tutorials for all ten of these t-shirt hacks. Each one has an illustrated how-to with more details and text in the post text. For tricky techniques, see supplemental photos for more clarification!
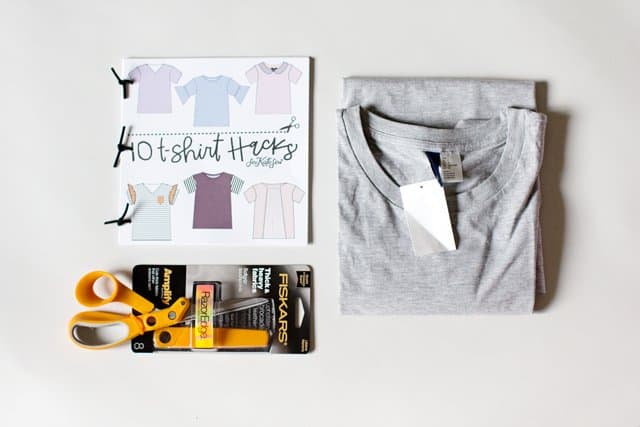
I also created a printable booklet download to print for your reference as you sew, OR to print and staple to give as a gift this Christmas. Just print it out, trim to 8″ by 8″, staple the pages together (or do a japanese stab bind) and gift it with a pair of the orange-handled fabric scissors and a t-shirt for any creative in your life!
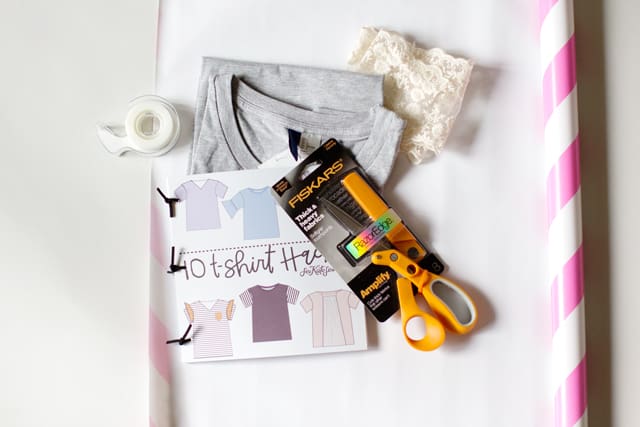
Basic Materials for all tees:
–8″ Amplify Shears
-Sewing Machine
-Pins
-Coordinating Thread
-Steam Iron
-Rotary Cutter + Cutting Mat
-Basic Tee shirt

Let’s start with this simple peter pan collar add-on! This one is one of my favorites. I was inspired by the Stranger Things series for this one (Eleven’s pink dress!) and I love how indie it feels. This one is also a great scrap project, it uses scraps of knit, trim and bias tape.
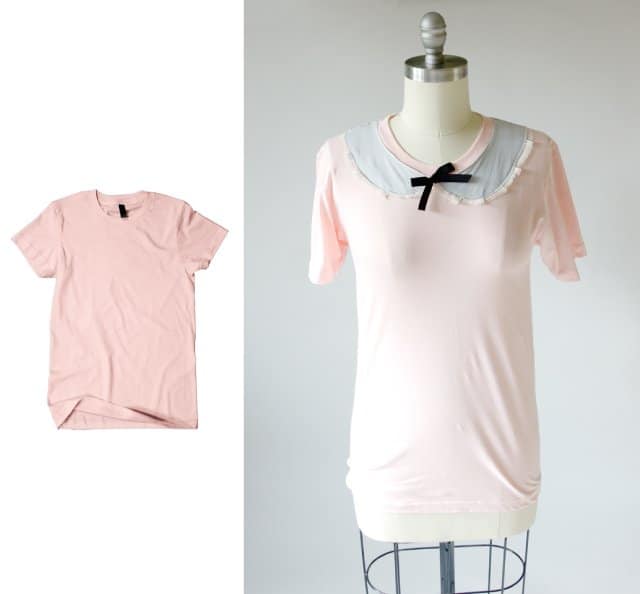
Peter Pan Collar Add-on //
Materials:
-Collar Download
-knit scraps from another tshirt
-lace trim
-bias tape
Cut out 2 collar pieces using the download above. I used scraps from another t-shirt project, but any knit fabric will do.
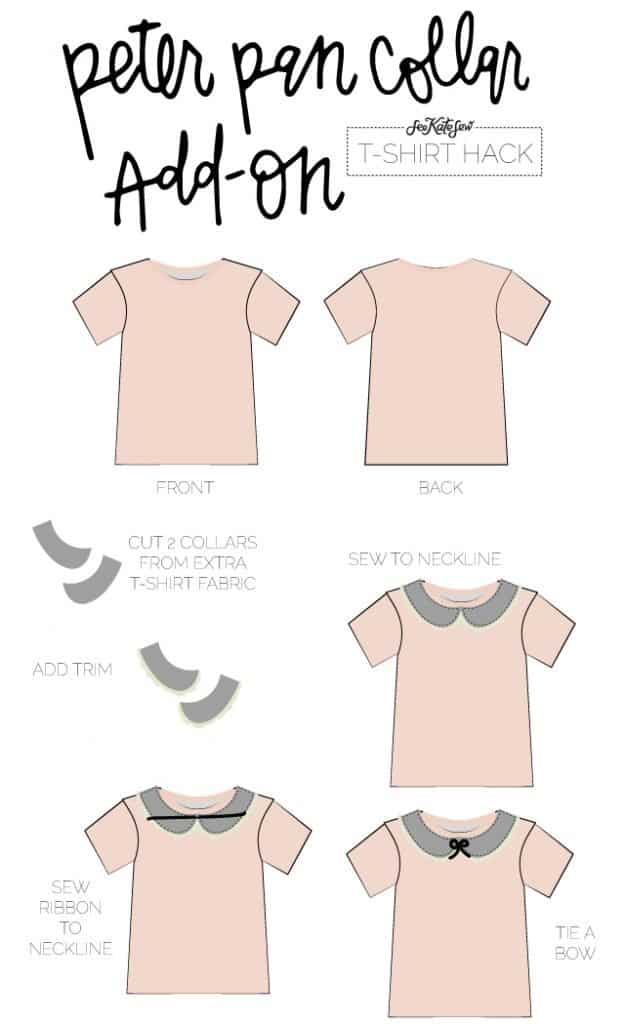
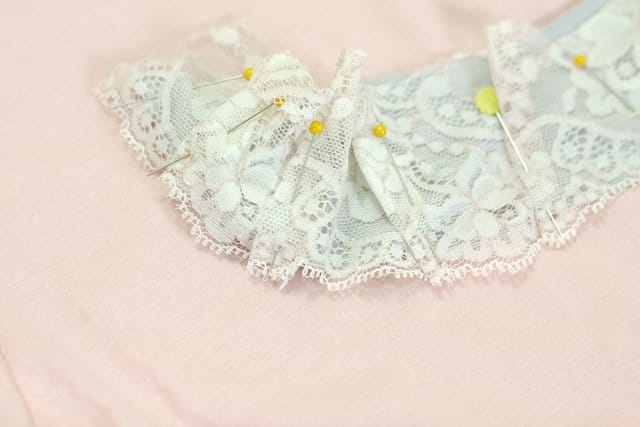
Pin lace around the bottom of the collar piece on the back. Create pleats in the lace to ease the trim around the curve of the collar.
Pin to the front of the t-shirt below neckline ribbing.
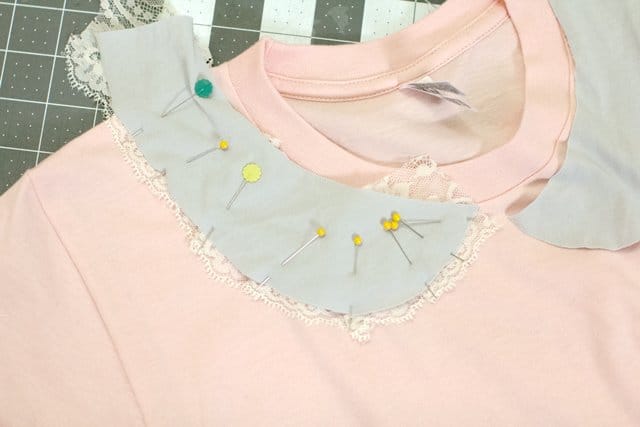
Sew along the bottom curve. Then cut off excess trim behind the faux collar. Trim off the excess collar at the top. Pin the top of the collar down and finish sewing it on.
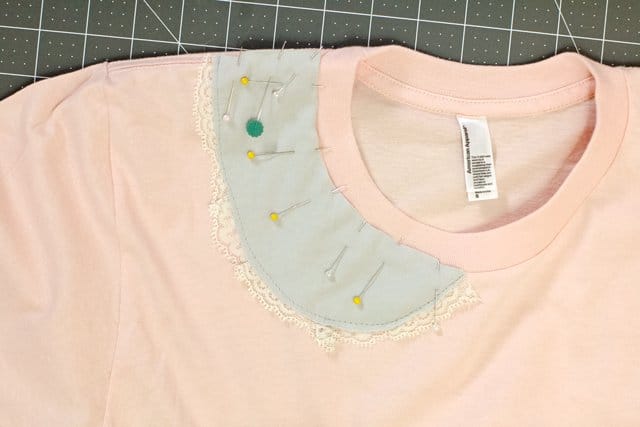
Sew a 10″ piece of ribbon or bias tape to the center of the neckline, right on top of the collar pieces. Tie the ribbon into a bow.

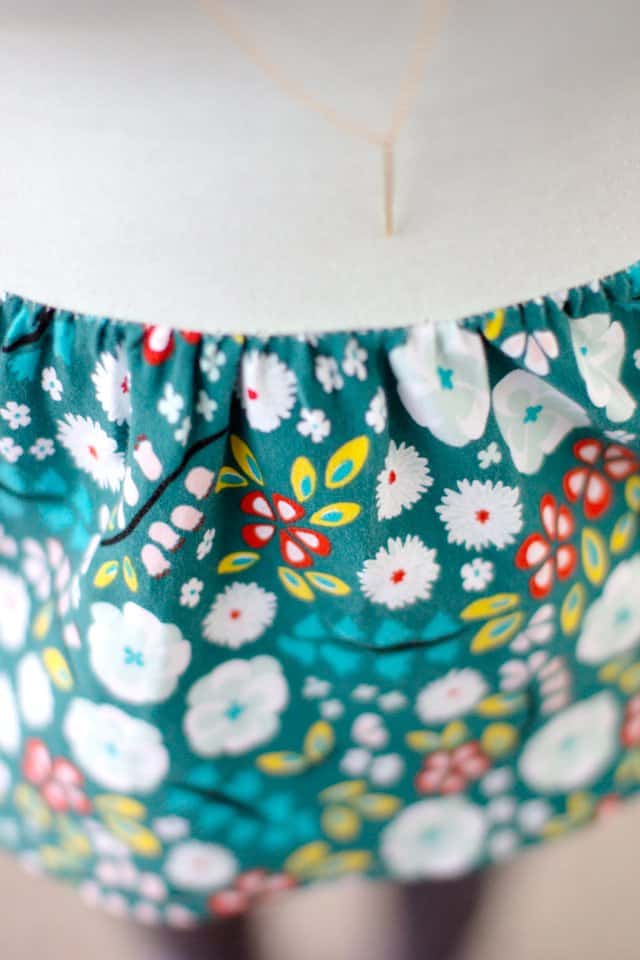
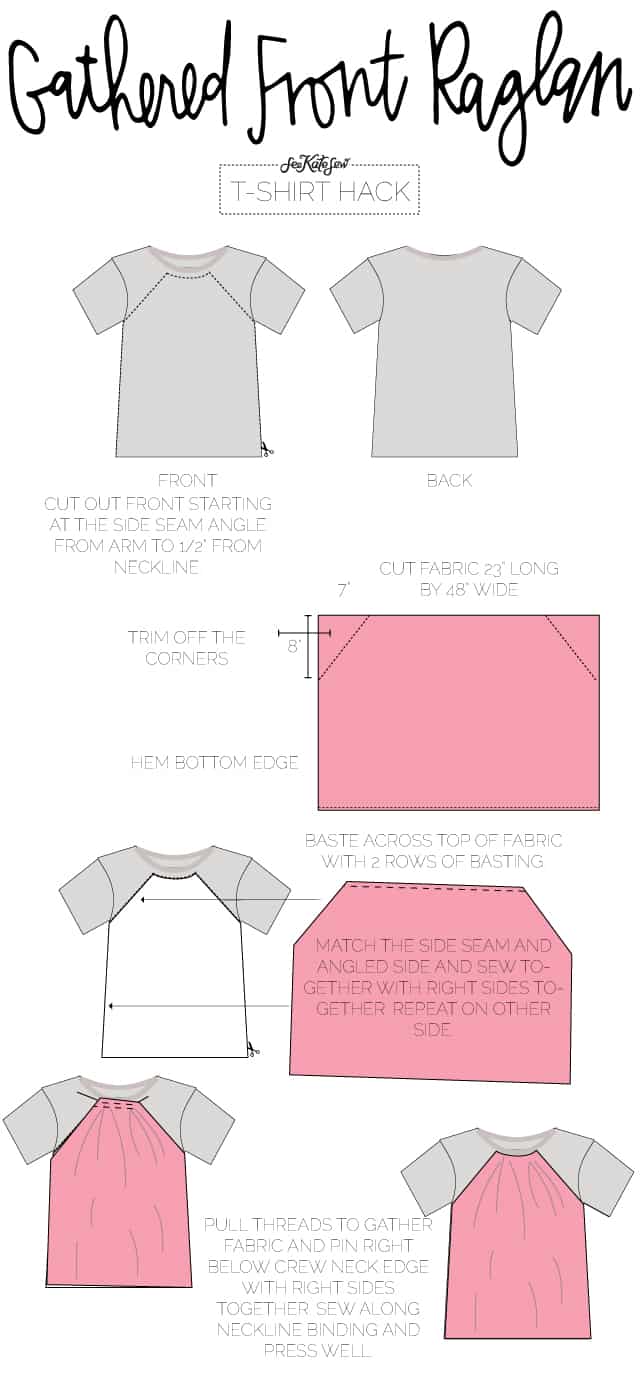
For the floral obsessed! This gathered top uses just 1 yard of fabric, which is so great if you don’t have enough to make a whole shirt! The flowy floral totally transforms this basic tee, you can hardly tell it was ever a plain t-shirt when it’s on!
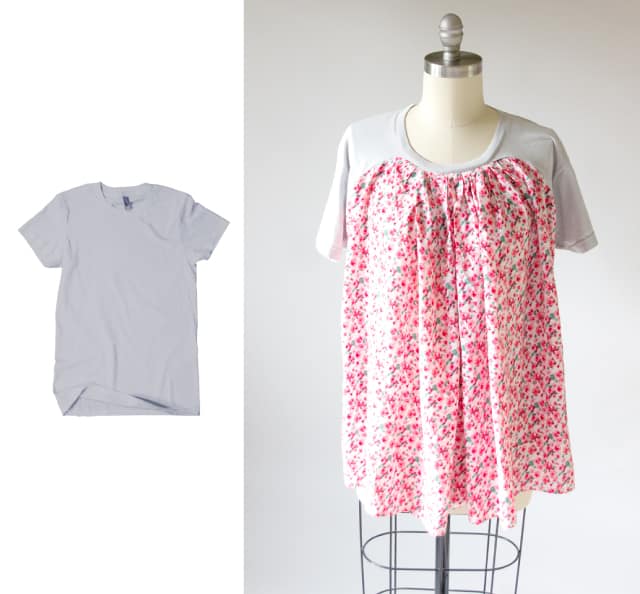
Gathered Front Floral Raglan //
Materials:
-1 yard chiffon, voile, or other lightweight fabric
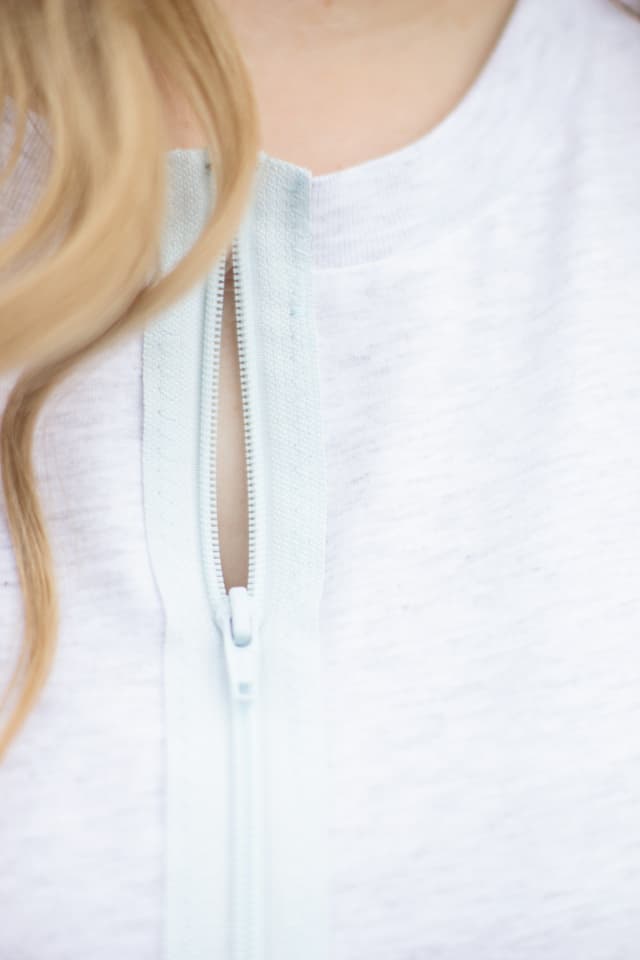
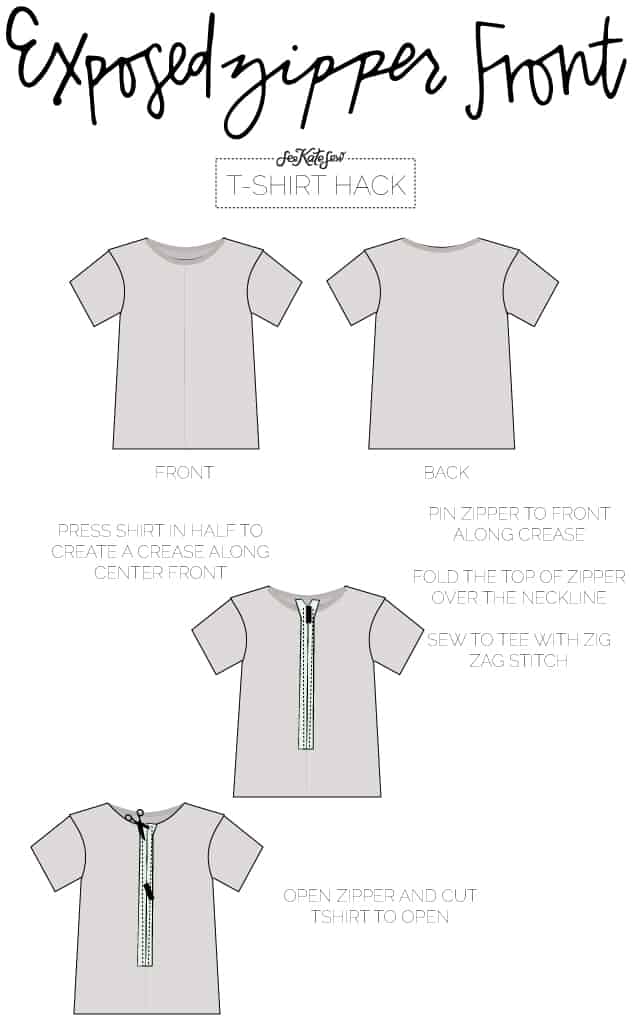
The Exposed Zipper Front hack is the ultimate comfy tee! I sized up 3 sizes for this and added a front zipper. The zipper lets you play with the neckline or layer it over another tee! This shirt sews up super fast and looks great with skinny jeans or leggings!
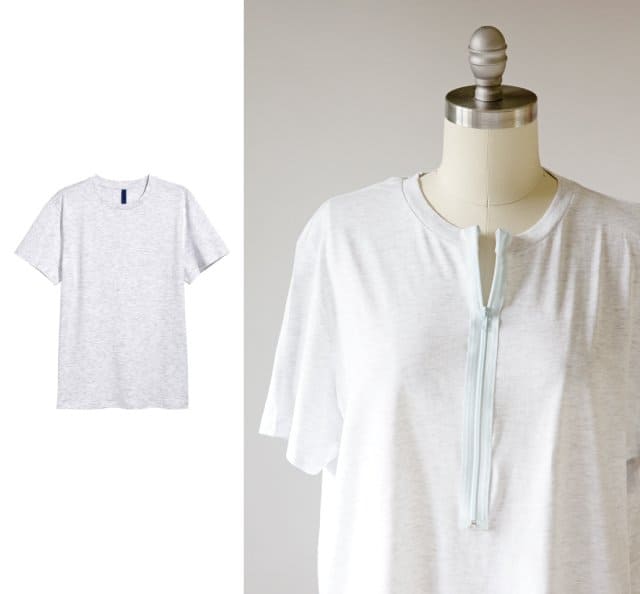
Exposed Zipper Front //
Materials:
-Oversized shirt, 3 sizes up
-15″ zipper

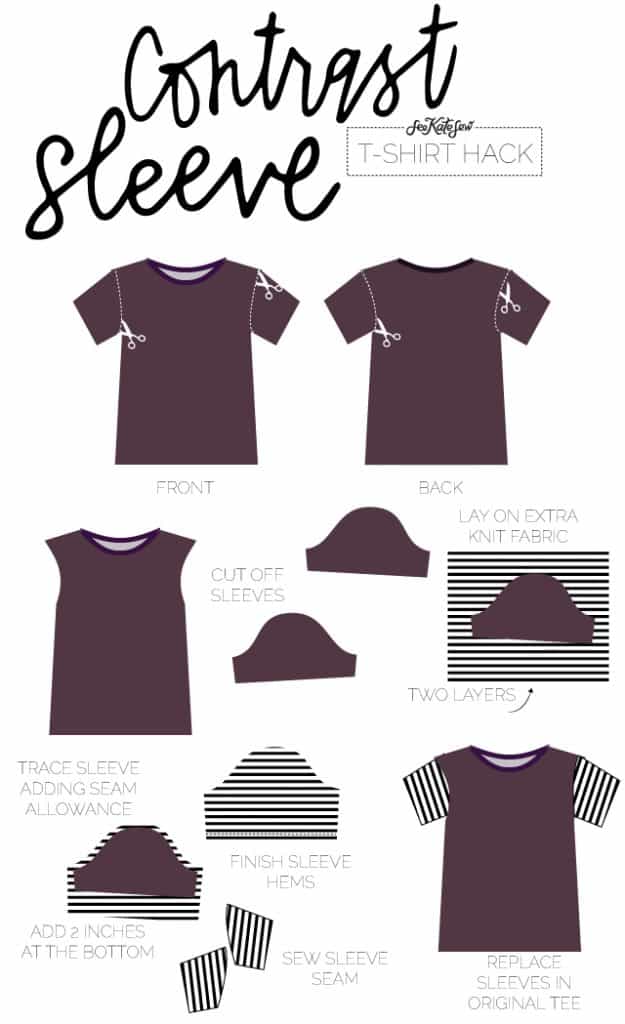
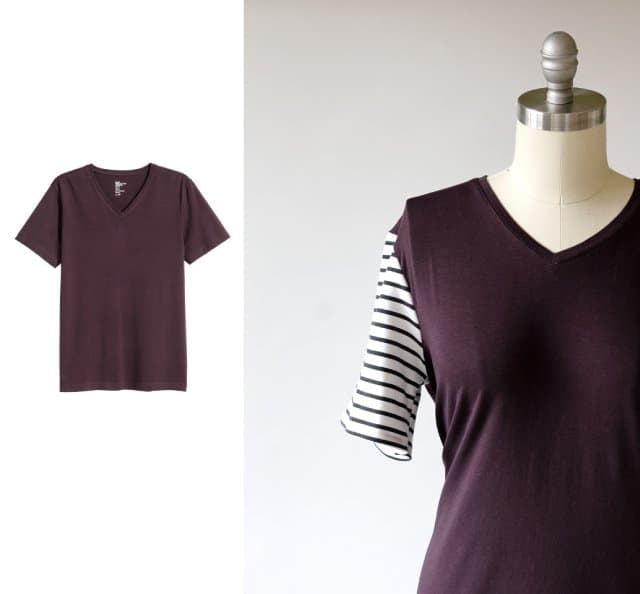
I’ve worn this tee the most of the bunch! The shirt I started with is super stretchy and the color is so fall to me! I love it! I had just enough of this striped fabric left to make 2 sleeves. It’s also super stretchy and comfy to wear so the two fabrics together is ultimate comfort!
This sleeve swap hack is simple but will give you a taste of pattern making! Let’s go!
Contrast Sleeve Swap //
Materials:
-1/4 yard contrast knit fabric
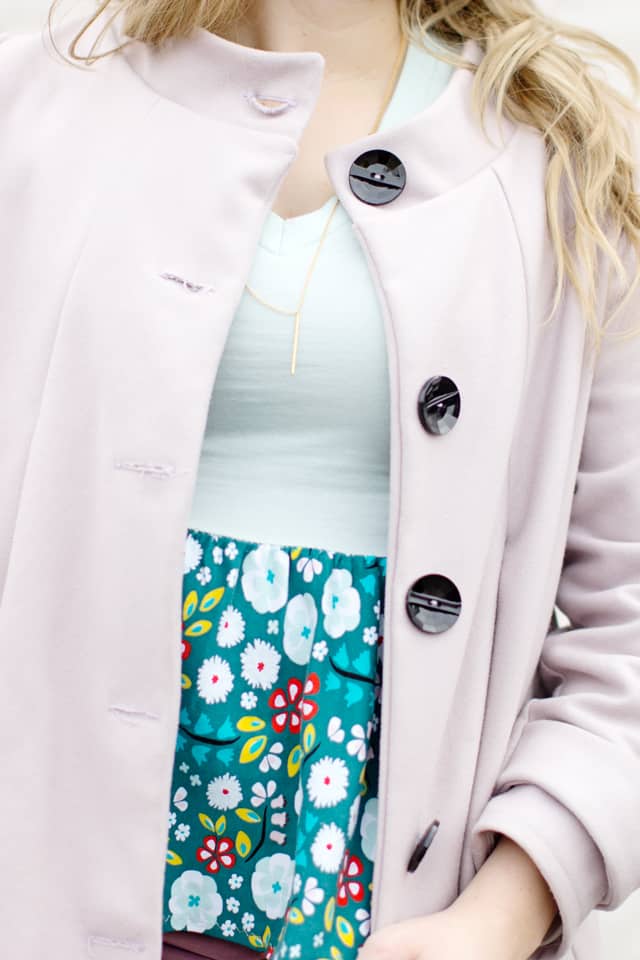
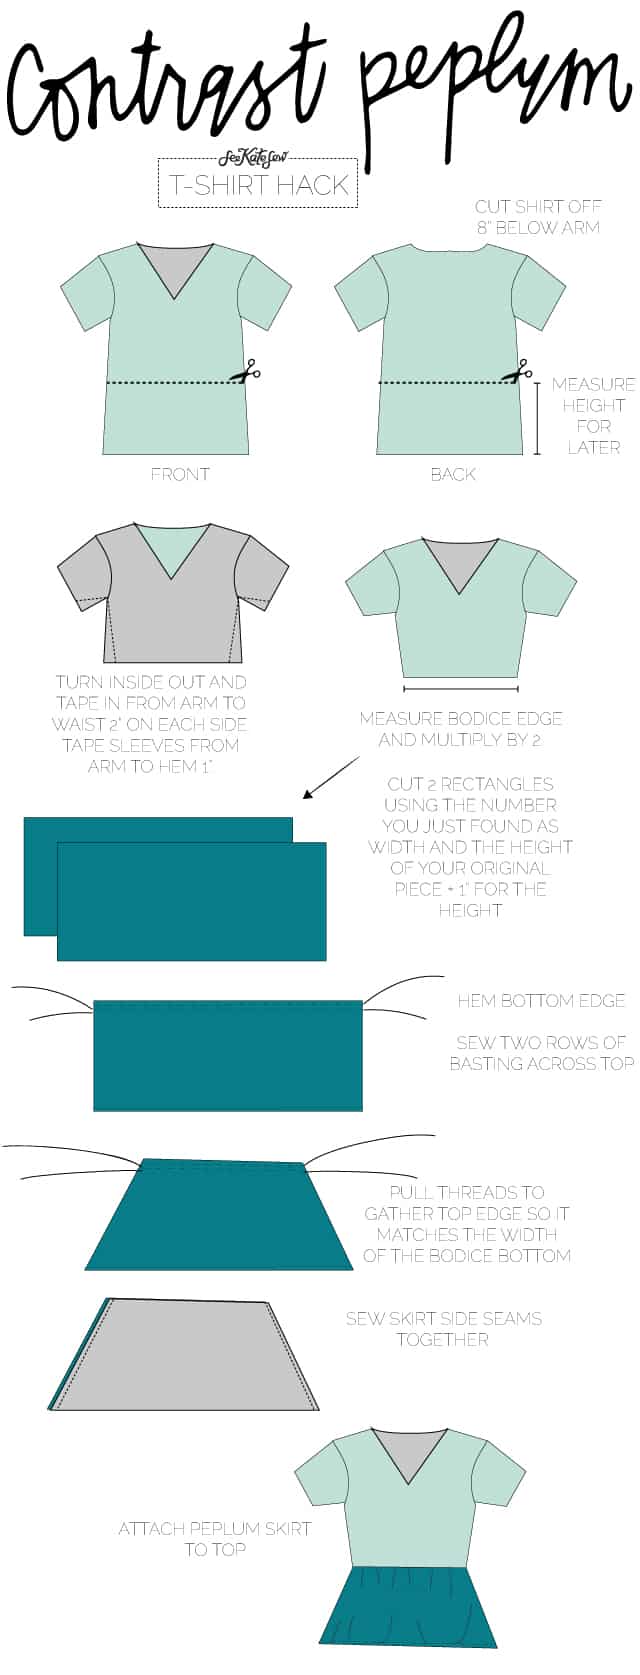
This peplum project is another great way to include some fabric from your stash into your clothing. It’s super fast and has a flattering fit!
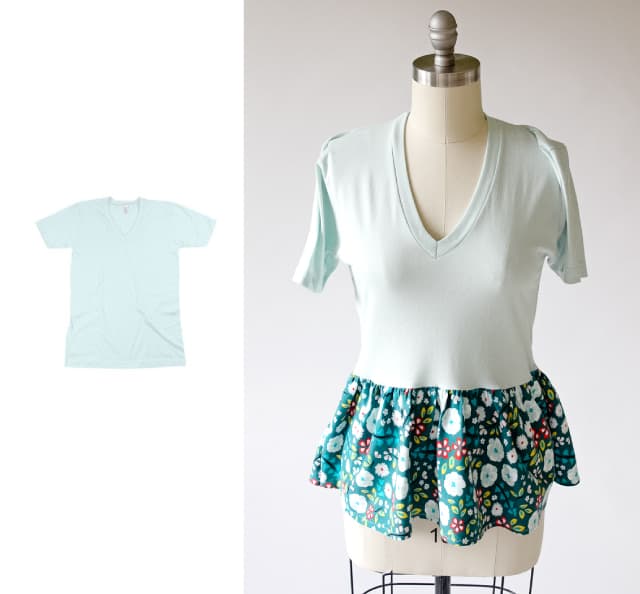
Fitted Contrast Peplum //
Materials:
-1 yard knit fabric
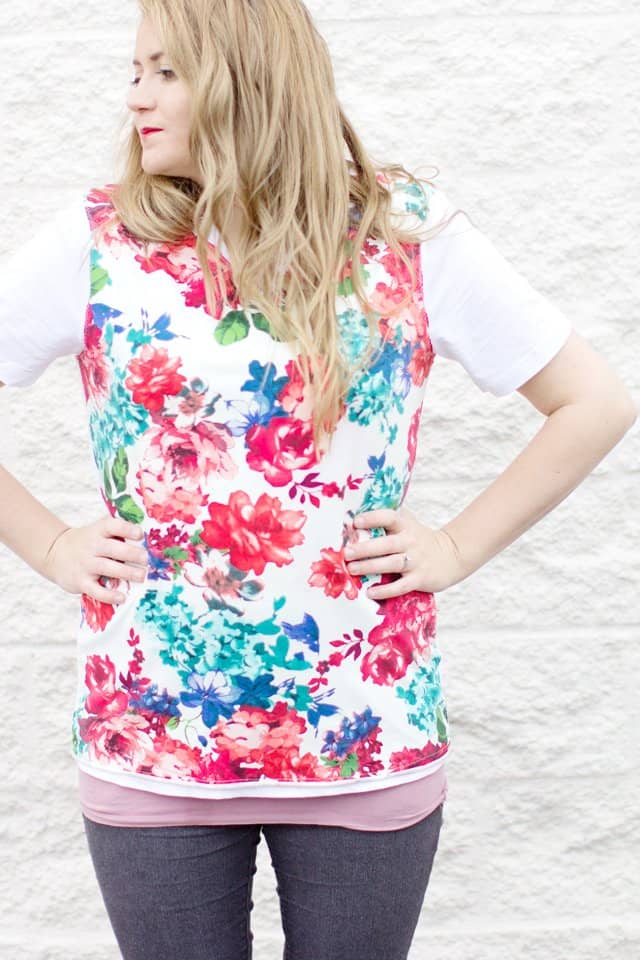
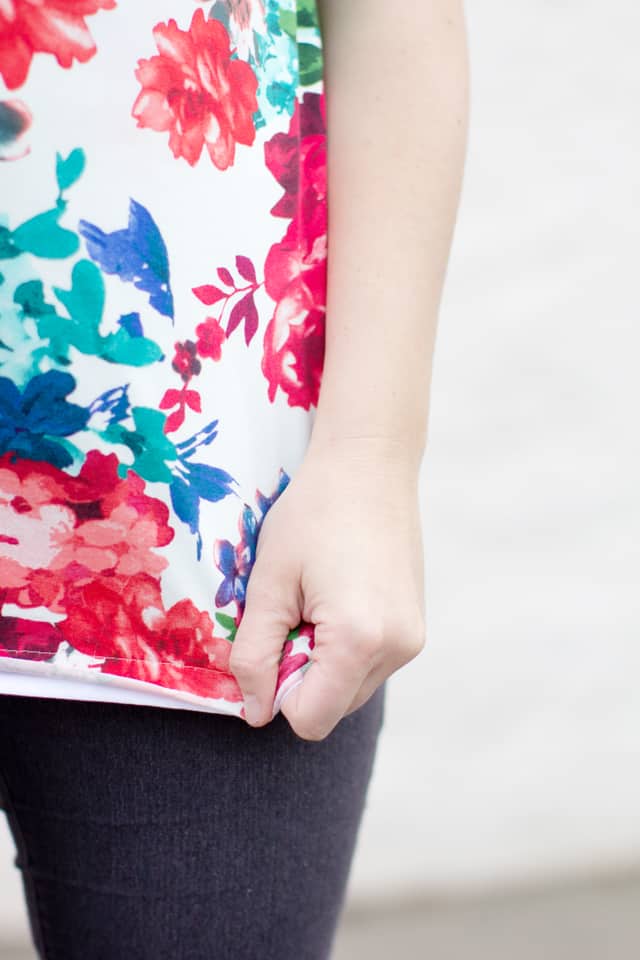
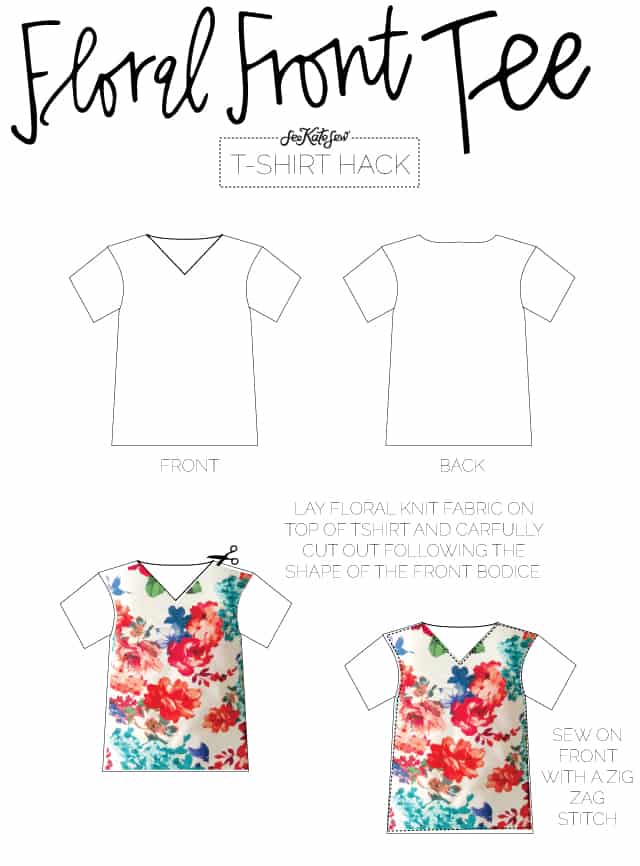
I’ve been hoarding this fabric for almost a year! My friend in Germany sent it and I think it’s just gorgeous! I’ve never seen anything like it in the states so I knew I needed a good project that would really show off the print! Why not sew it to a plain white tee! And bonus, this project only takes about 20 minutes!
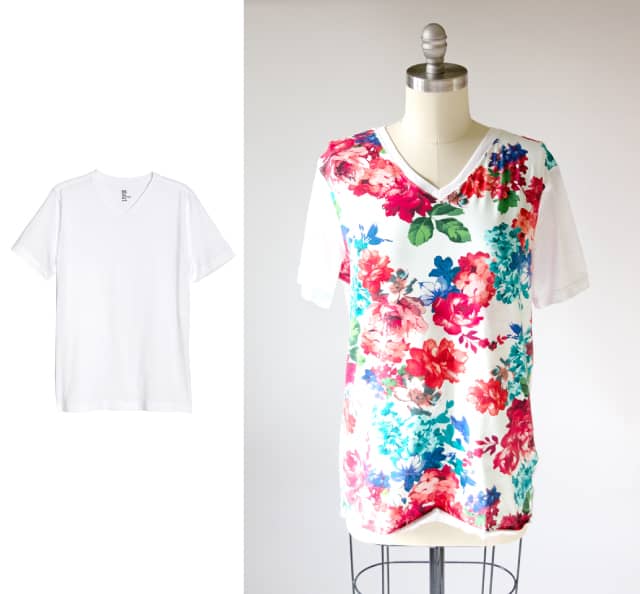
Floral Front //
Materials:
-1 yard floral knit fabric
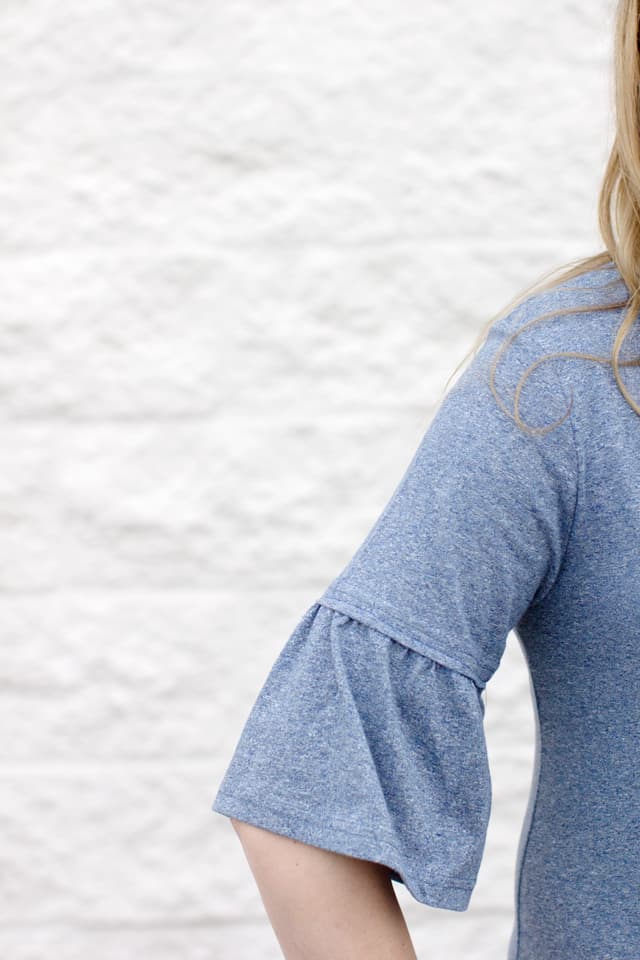
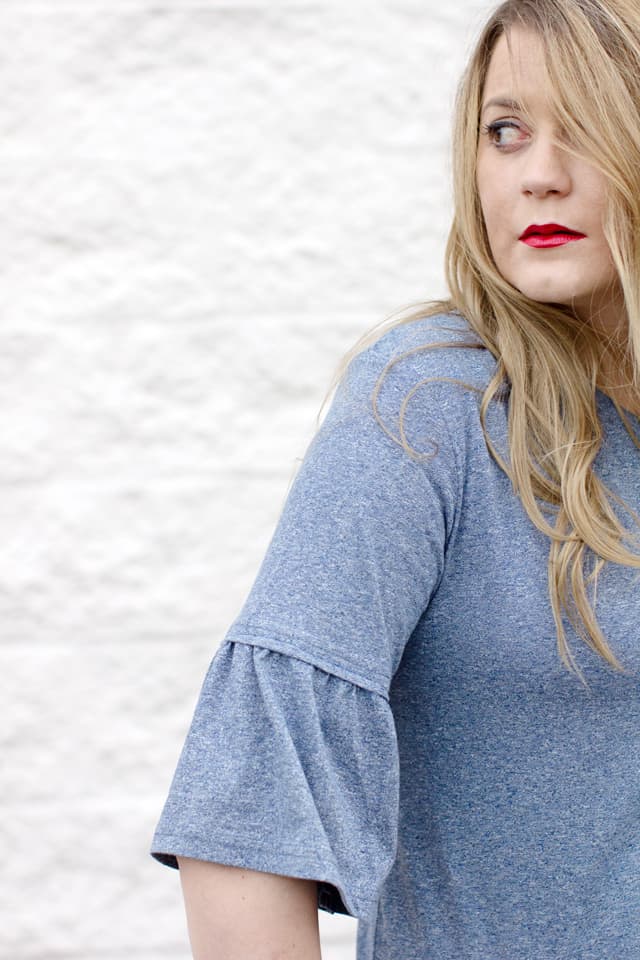
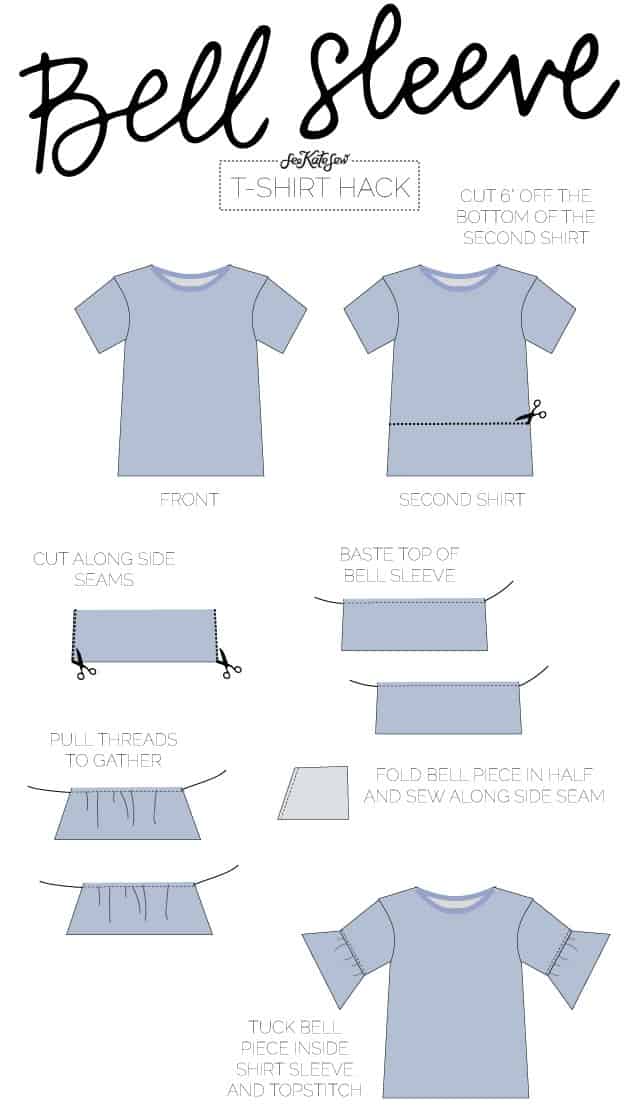
Elbow length sleeves have always been my favorite type of sleeve! This refashion uses TWO tees, one for the base and one for the extra fabric. We’ll utilize the hem of the second so we don’t have to hem the bell sleeve pieces. This shirt is perfect for transition weather!
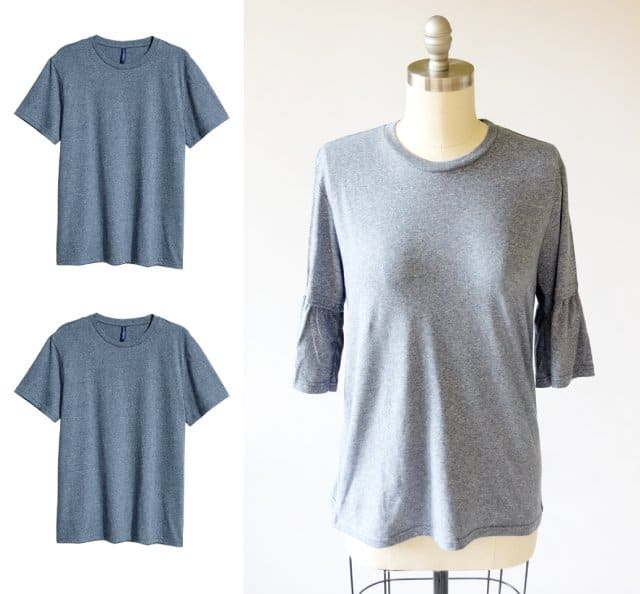
Bell Sleeve Tee //
Materials:
-2 shirts size true
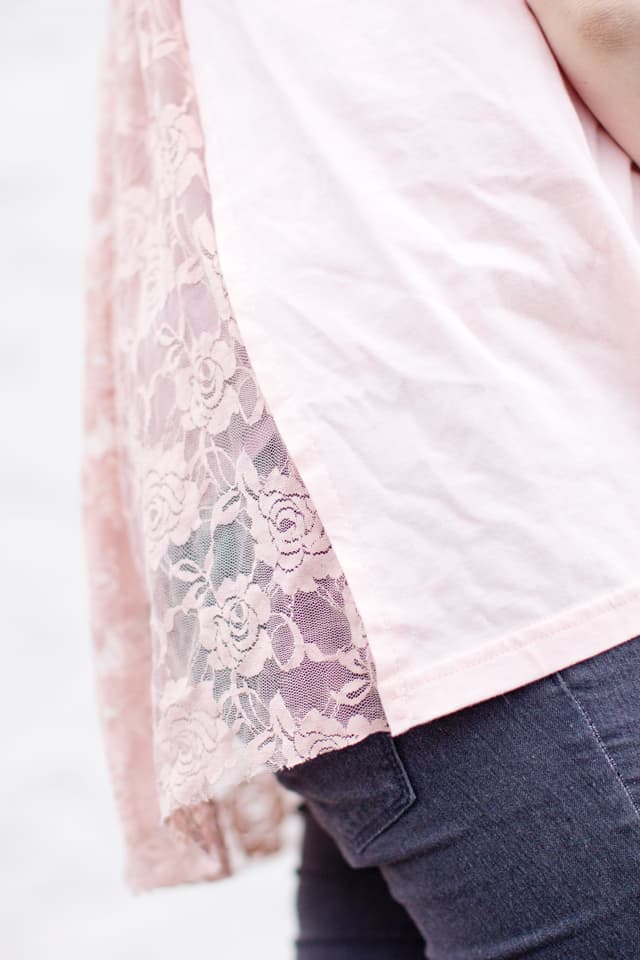
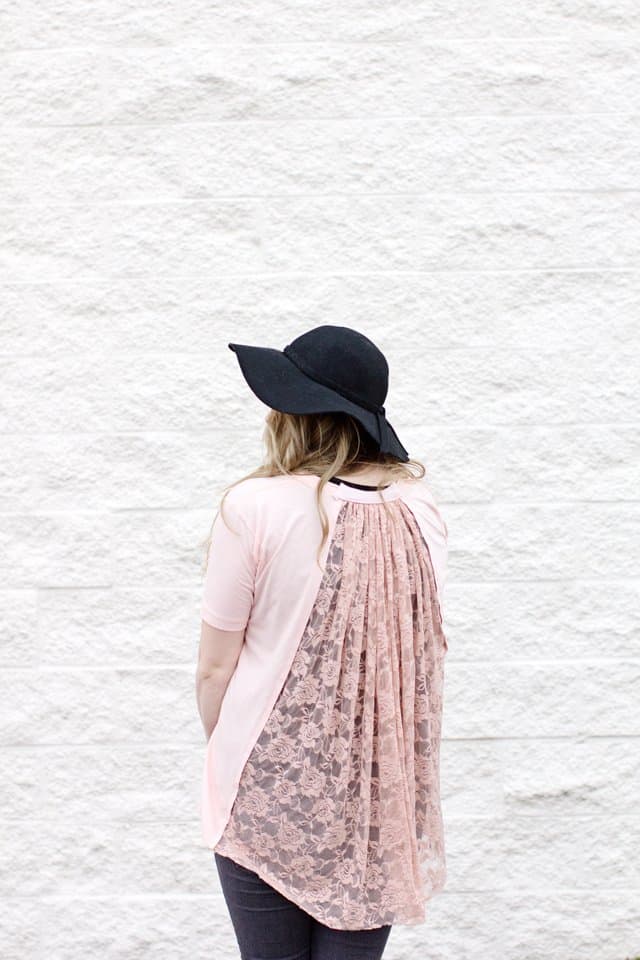
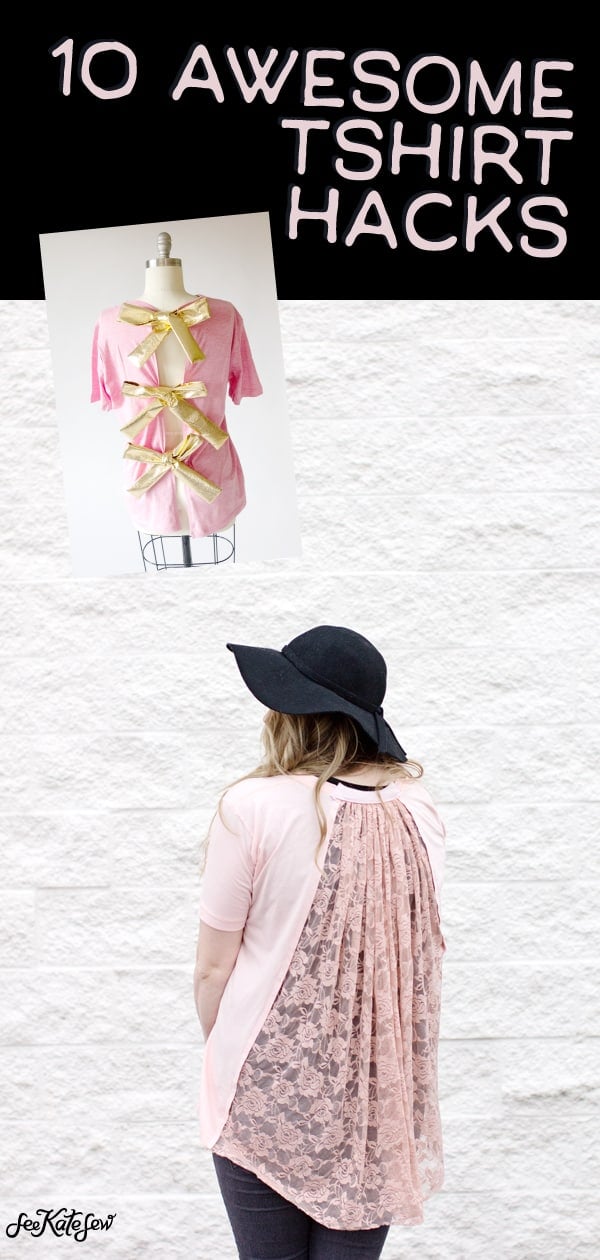
This one is the prettiest refashion if you ask me! I used stretch lace and lots of it to make this flowy tee. The back is where the party is, so the front is plain. Because of the way the lace pulls the fabric the front has a swingy smock affect. It feels like a summer concert tee and is dressy yet so comfy! Pair it with dream
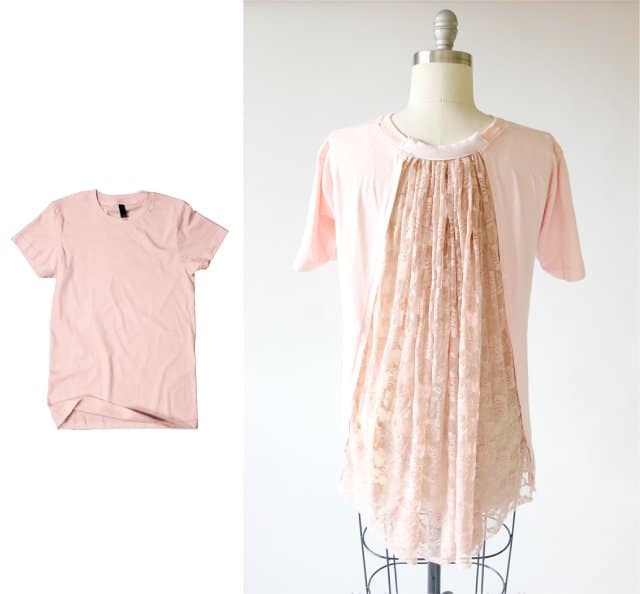
Flowy Lace Back Tee/
Materials:
-Tee, 1 size down
-1 yard lace
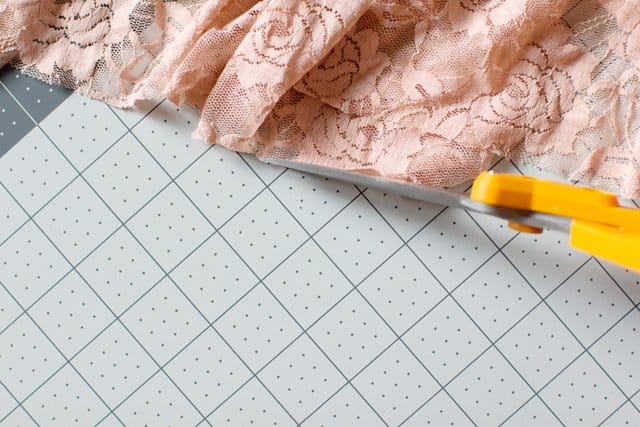
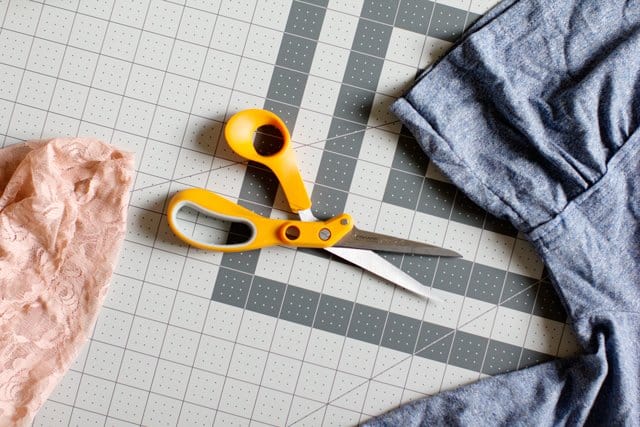
The razor sharp edge of the Amplify Shears make cutting a straight line at the hem of delicate lace so easy!
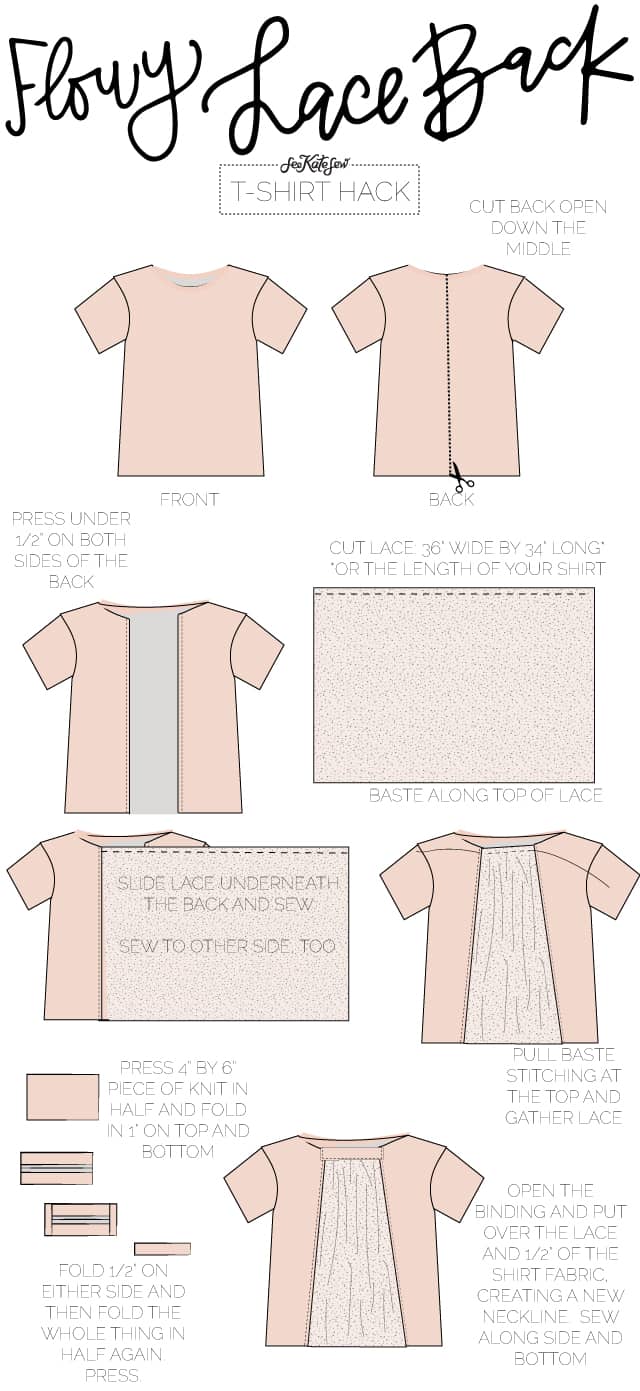
Cut shirt back right up the center back, all the way through the neckline.
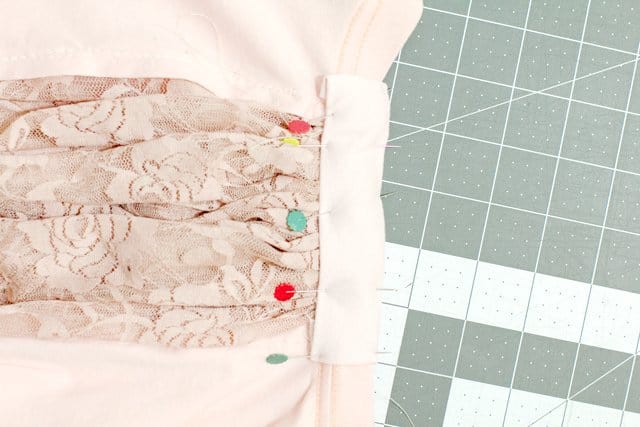
The lace doesn’t need to have a finished edge or hem. Just sew it right to the back of the fabric!
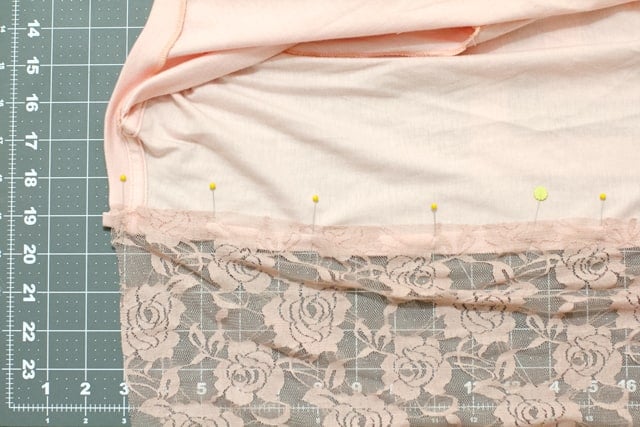
The extra piece of fabric will fill in as binding across the top of the lace and connect the neckline.

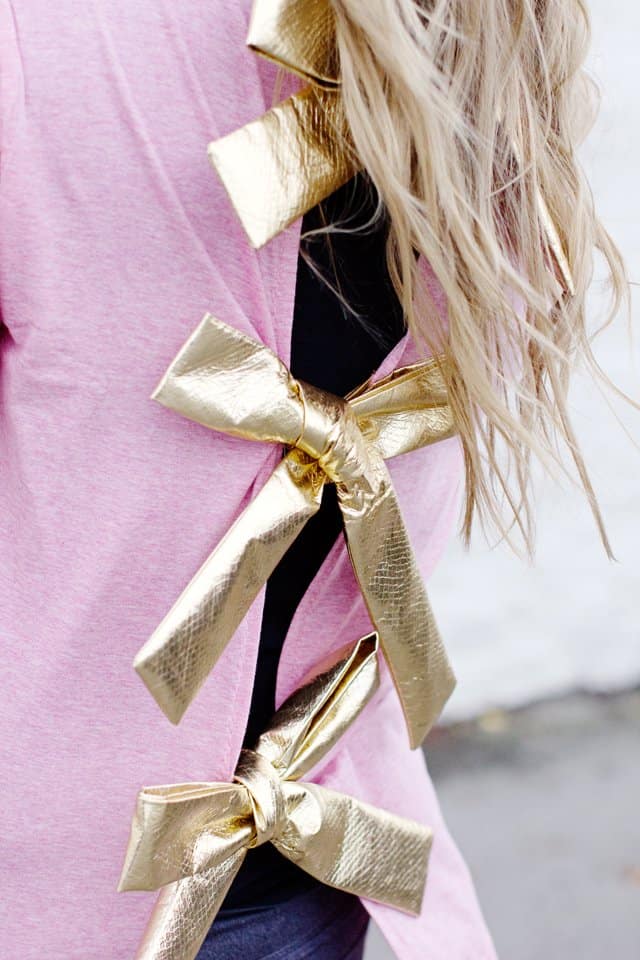
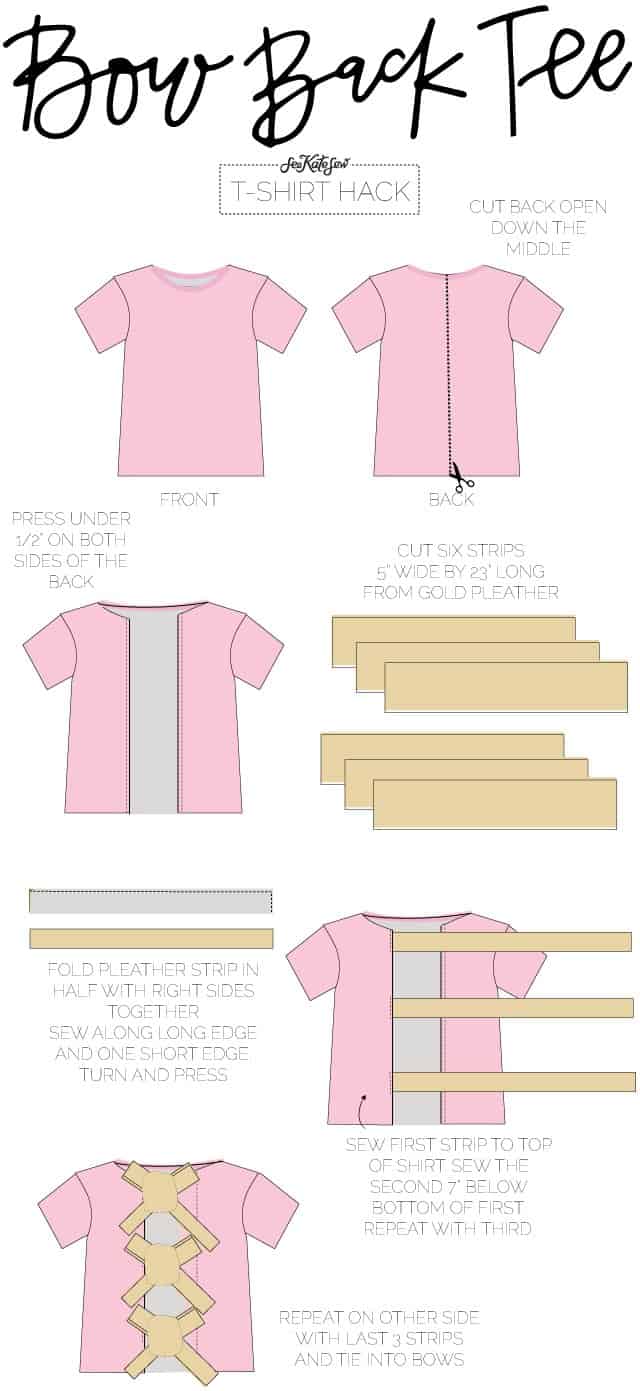
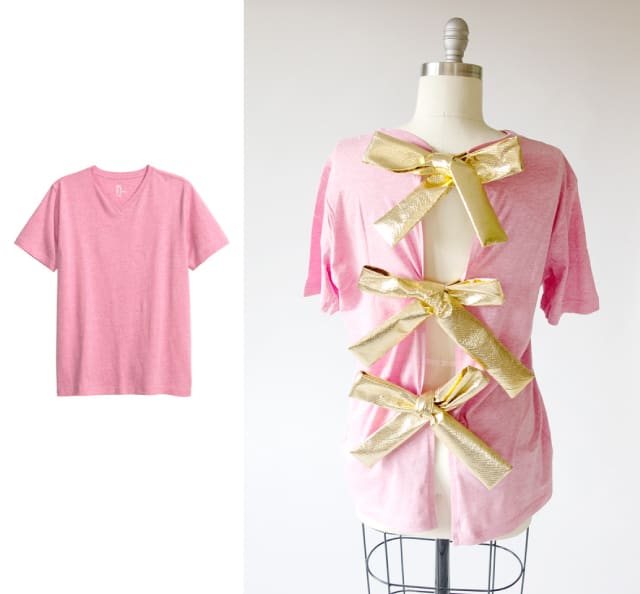
Can you get away with a t-shirt at a holiday party? This might be your ticket! Fancy gold pleather bows create a backwards cardigan in this super fast refashion! The best part: cutting your tee down the back!
Bow Back Tee //
Materials:
-gold pleather, 1 yard
-shirt, sized up 1
Cut shirt back right up the center back, all the way through the neckline.
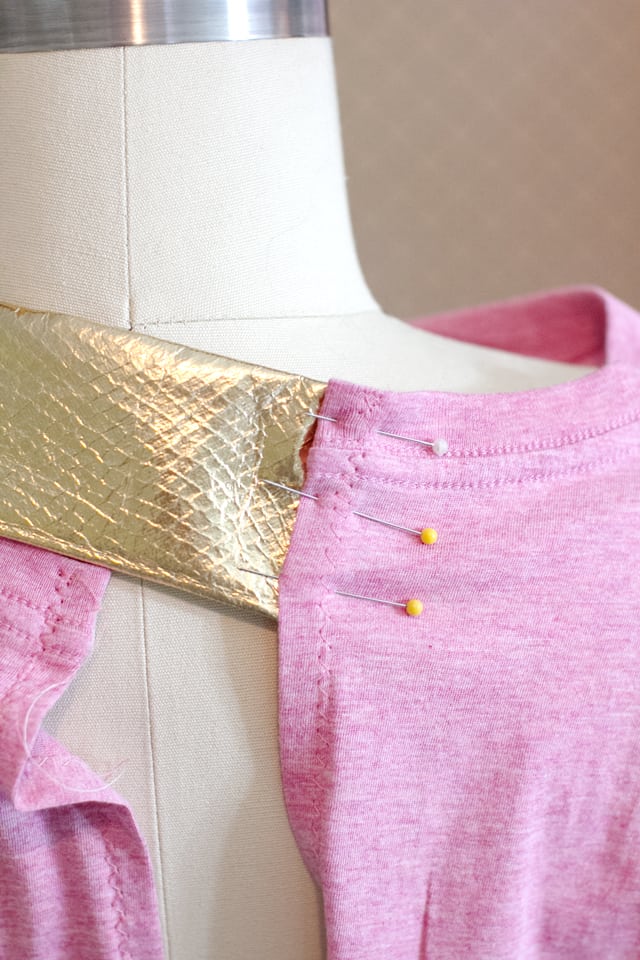
Use a few pins to keep the pleather in place while you sew. Pleather slides around easily!
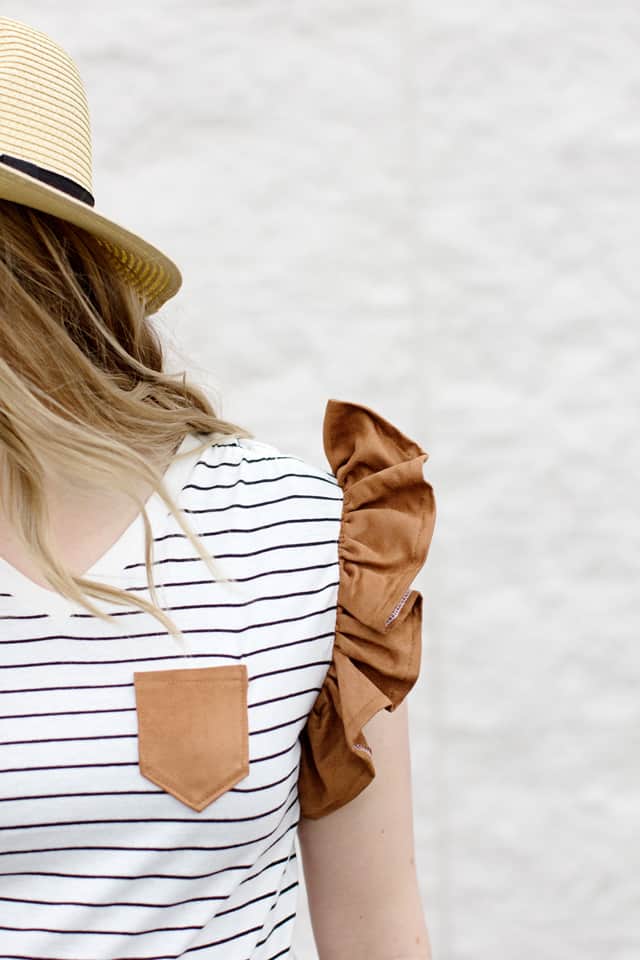
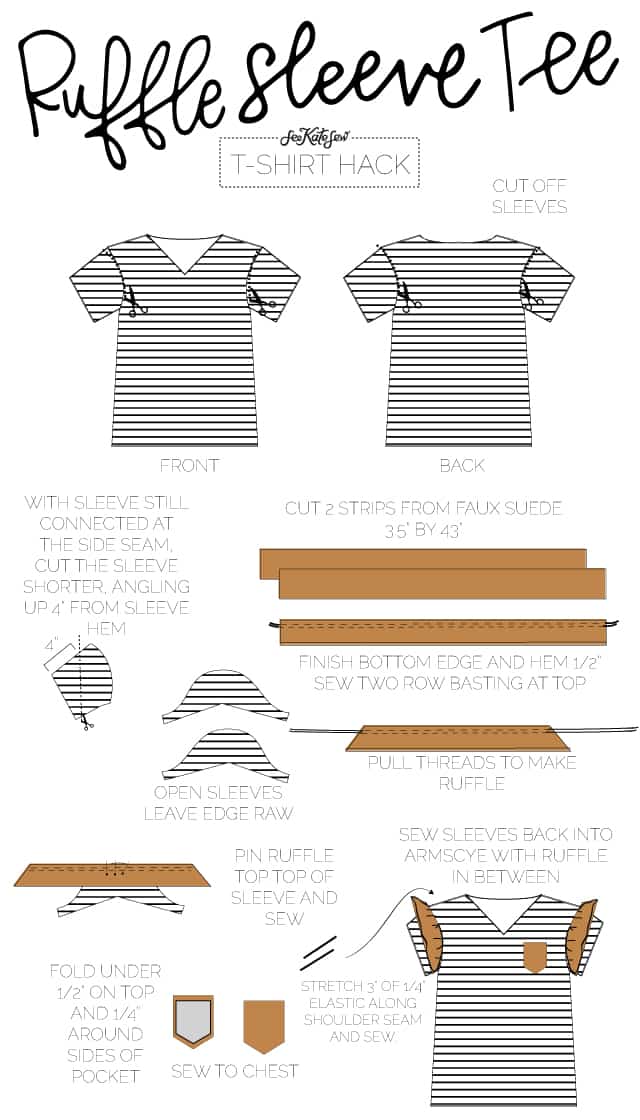
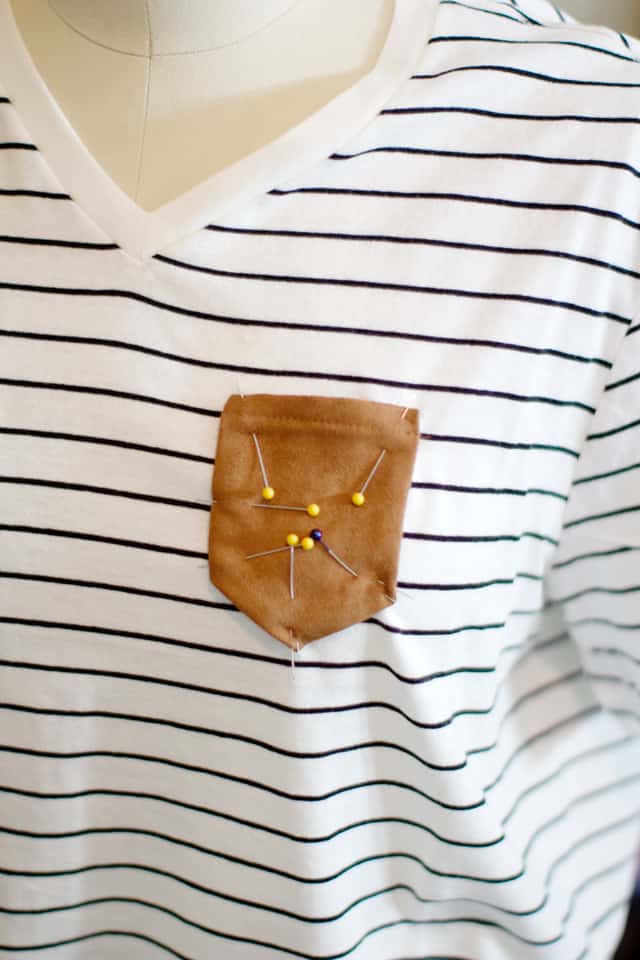
Stripes and suede! This tee is fancied up but still comfy! There are 3 parts to this refashion: sleeves, a pocket and elastic in the shoulder!
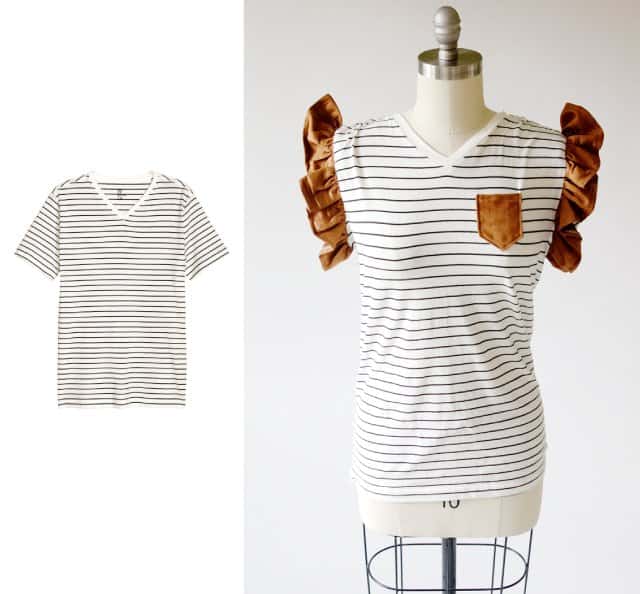
Ruffle Sleeve Tee //
Materials:
-striped shirt, true
-1/2 yard suede
-pocket pattern
-walking foot
-1/4″ elastic
Use a walking foot with thicker fabrics like pleather. The walking foot “walks” right over the layers of fabric so you won’t jam your machine.
Refashioning tees is such a cheap and fun way to fill out your wardrobe! I hope you enjoyed this post and find some inspiration in it! Grab some orange-handled scissors and start hacking! Find Fiskars on Instagram, Facebook and Twitter!
T-shirt and Fabric Sources:
-Tshirts from H&M and American Apparel
-Amplify Sewing Shears
-Lotus Floral c/o Made by Rae
-Cuddle Suede Fabric saddle c/o Shannon Fabrics
*




Tee-shirt pattern link does not work for me
would also like guidelines as to how to take a grew neck to V-neck- and how to decide and make a lower v-neck and to finish off with different treatments
Thank you
No problem downloading