• Skip to main content
  • Skip to primary sidebar
  • Skip to footer
  • Blog
  • About
  • Contact
  • FAQ
  • Sponsor

see kate sew

sewing, crafts, tutorials, DIY

  • Patterns
    • Free Patterns
    • Pattern of the Month
  • Tutorials
    • Accessories
    • Bags and Pouches
    • Clothing
    • Costumes
    • Crafts
    • Cricut Projects
    • Holiday
    • Household
    • Kids
    • Maternity
    • Quilting
  • Topics
    • Baby
    • Boy
    • Christmas
    • dog
    • Dolls
    • Easter
    • Girl
    • Halloween
    • Lookbook
    • Party
    • pet
    • Printables
    • Training
    • women
  • No Sew
  • Sewing 101
  • Sew4Good
  • Pet
  • Sewing Room
    • DreamBox
  • Reviews
Home
  • Patterns
    • Free Patterns
    • Pattern of the Month
  • Tutorials
    • Accessories
    • Bags and Pouches
    • Clothing
    • Costumes
    • Crafts
    • Cricut Projects
    • Holiday
    • Household
    • Kids
    • Maternity
    • Quilting
  • Topics
    • Baby
    • Boy
    • Christmas
    • dog
    • Dolls
    • Easter
    • Girl
    • Halloween
    • Lookbook
    • Party
    • pet
    • Printables
    • Training
    • women
  • No Sew
  • Sewing 101
  • Sew4Good
  • Pet
  • Sewing Room
    • DreamBox
  • Reviews

05.04

little man diaper clutch tutorial

Welcome to See Kate Sew! If you’re new here, sign up for my email newsletter for access to free patterns, tutorials and all the latest sewing news! Tour my sewing room HERE!

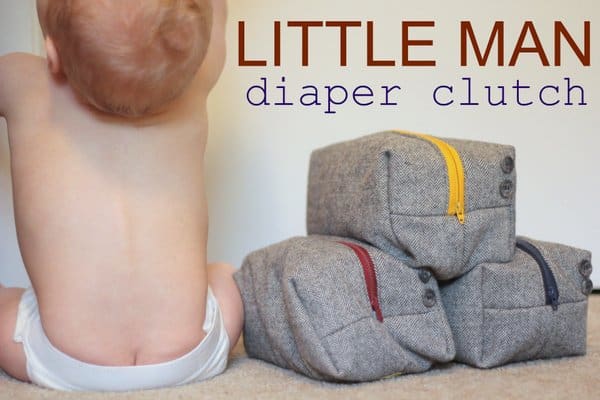
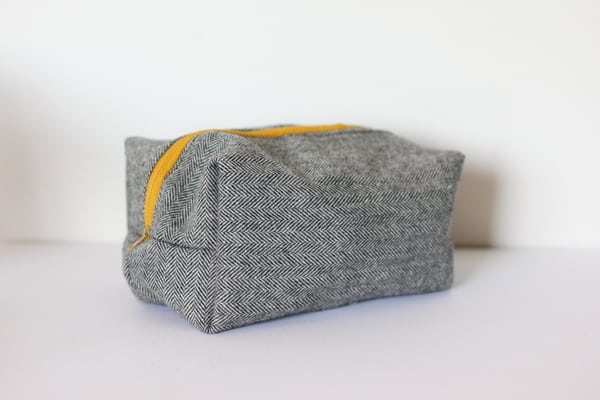
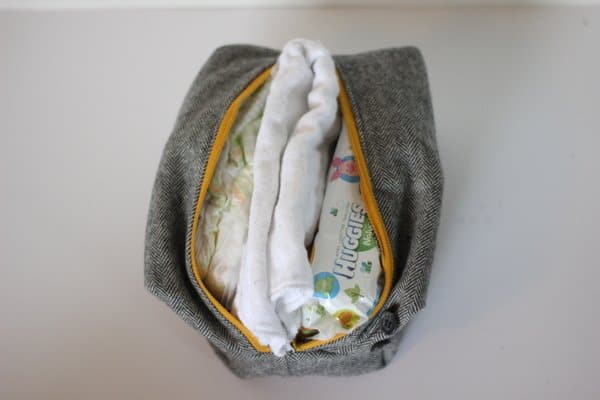
Boxy bags are simple to make and you can really use them for anything! They would be a great makeup bag or lunch box too. But please pick one purpose for it. We don’t want an old diaper clutch becoming a lunch box…

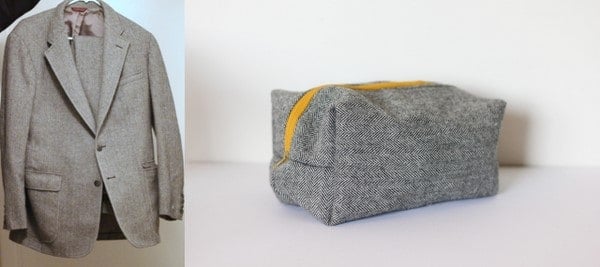
I picked up a beautiful suit for $4 on half price day. I almost felt bad cutting it up. I thought maybe I should get it altered for my husband. But I shut my eyes and snipped into it with my Ginghers. I had so much fun making the first clutch I knew we needed more. The zippers were also from a thrifty escapade at 25 cents a pop. Can’t beat that for high quality vintage materials.

Prewash your suit. If you’re like me you’ll probably boil it as soon as you get home from the thrift store. Since my suit has synthetics in it, it didn’t felt.

Step 1: Cut up your suit. You need 4 rectangles that are 12 inches wide and 9 inches tall. I self-lined the clutch and it turned out nice and sturdy. I tried one with a nylon interior(so it would be wipeable) but I prefer the self-lined one. It’s so sturdy.

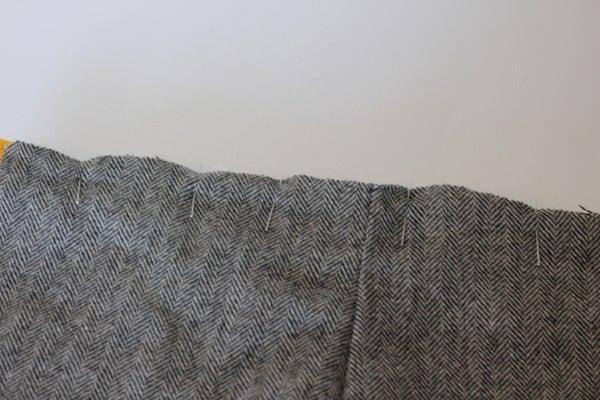
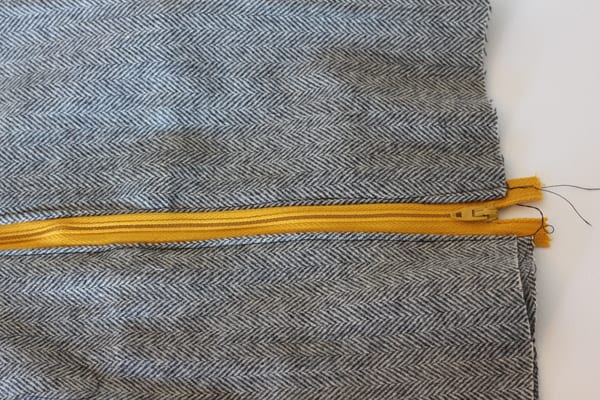
Step 2: To start the pouch, lay one layer of suit fabric down and place the zipper face down lined up at the top. Layer on another piece of fabric and pin them together in a sandwich. Sew at 1/4″ and it will look like this:

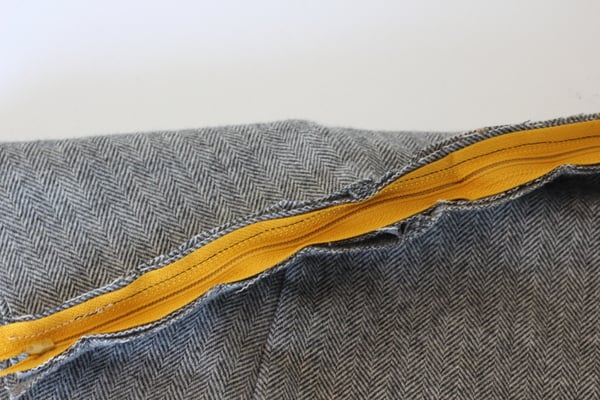
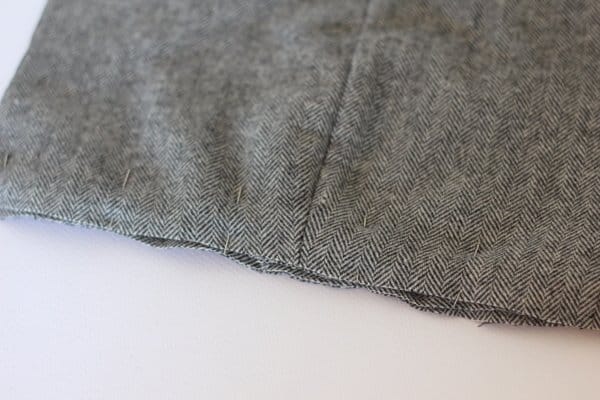
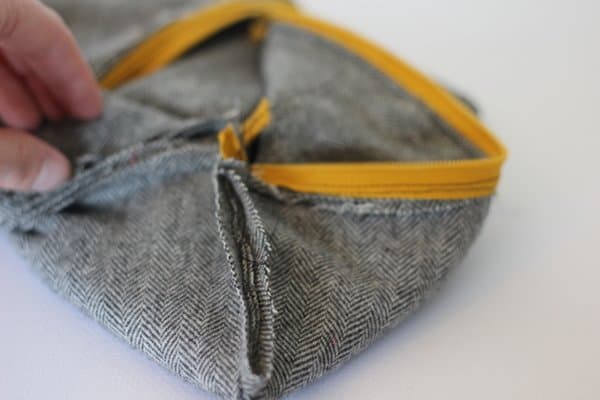
Step 3: Now flip the zipper up and make another sandwich with your remaining two layers, one on each side of the zipper. The fabric you’ve already sewn on will be in the middle.

After you’ve sewn it up, it will look like this:
Step 4: Go ahead and clip the excess fabric back to the zipper. And then open your layers up and topstitch 1/8″ from the zipper. Don’t skip the topstitching! I promise it’s details like these that will make it look slick!
Step 5: Next step is to sew up the bottom. Turn your layers right sides together and stitch straight across. (Ignore that seam in the middle, that is just from the pant leg!)
Step 6: Now fold you pouch like this. The zipper will be flat on the bottom seam you just made. Make sure to open the zipper, then pin the sides shut and sew them both up.
You essentially have a usable pouch right now, but to make it boxy and masculine, fold the corners into triangles like so:
Step 7: The side seam will be right in the middle of the fold. You want to create a line parallel to the top of your bag. So pinch it down, then pin it down and measure up 1 1/2 to 2 inches from the point of the triangle.
Step 8: Repeat for all the other corners and then clip them down. Finish seam allowances with serger or zig zag stitch.
That’s all! Turn your clutch right sides out and go change some poopy diapers! (Or hand it to the husband and get outta dodge!)
What would you put in yours?

28 Comments | Bags and Pouches, Kids

Exclusive Free PatternRuffled Apron

Sign up for my email newsletter and receive my ruffled apron pattern totally FREE!

We take your privacy seriously. See our privacy policy here. Unsubscribe at any time.

You may also like these posts...

FREE baby bonnet brim patternSpider-Man: No Way HomeInterchangeable Quote Wall Decor with Spider-Man: No Way Homeburp cloth tutorialKnit Headbands for Baby + Toddler

Reader Interactions

28 Comments

  1. happyfind

    05/04 at 3:48 PM

    I’m bookmarking this tutorial! I have an old wool skirt that’ll be perfect for this clutch.

    Thank you for sharing! ;)

  2. ilene

    05/04 at 4:03 PM

    i’ve been waiting for this tutorial to come out! I can’t wait to try it. Great idea to use a suit, since I can’t find cute herringbone fabric anywhere!

  3. Life In The Thrifty Lane

    05/04 at 5:40 PM

    Thank you for sharing the tutorial! such a great idea, they are super cute :)

  4. CaseyWiegand

    05/04 at 8:10 PM

    im going nuts over these! in a good way!!! obsessed!

  5. Ashleys Under the Stars

    05/05 at 12:29 AM

    these are so adorable! ps.. Love the little tushie shot :p

  6. The Wonderful World of Wampler

    05/05 at 2:45 AM

    Yeppieee…..stuff for a baby BOY! :) Great post. I can’t wait to go yard selling to find me an old suit so I can make one.

    ((HUGS))

  7. Danielle Renee

    05/05 at 3:30 AM

    Very cute and functional.

  8. Becky

    05/05 at 8:24 PM

    Ha, I love the baby bumcrack. So cute. Would you want to share something with us that you’ve made recently? ‎{Share the Love} link up party is starting tomorrow at mydomesticdesign.com! Please come link up!

  9. Kim

    05/06 at 1:38 AM

    This is perfect for so many things OTHER than diapers too! Very cool! Thanks for sharing :o)

  10. Shauna@shwinandshwin

    05/07 at 5:37 PM

    I love this! It’s perfect since I only need a few diapers with me these days… Thanks!

  11. someonesgottapay

    05/14 at 3:34 AM

    Okay. I loved these. So… I got my mom to help me make my own.

    Here’s how ours turned out: http://someonesgottapay.wordpress.com/2011/05/13/making-old-things-new-suit-coat-to-diaper-pouch/

  12. Jayna Rae

    05/15 at 6:45 AM

    I just made one!!!! I had to cut my rectangles 12×7 because of the size of the jacket I cut it from. However it is perfect because I am going to use it as a wet bag for my gdiaper liners that I just started using last week.

  13. trina

    07/29 at 4:05 PM

    I would make a stash of these to fill with art supplies for ready to go kids’ birthday presents. I only fantasy sew – my machine has not been uncovered since my kids were born, and I think may have recently moved to the garage. But I just love this idea and am now sending it to my best pal that actually sews. Thanks so much for sharing such a cool project!

  14. LittleB

    09/09 at 12:38 AM

    What size zipper is needed for these?

  15. kate

    09/09 at 12:41 AM

    @littleb 12-14″ will work. I usually buy long and trim it down! good luck :)

  16. shantel

    09/10 at 4:46 PM

    I featured this on my my blog!
    seemesew.blogspot.com

  17. Feuerstein Family

    11/09 at 12:25 AM

    I’d love to sew, but don’t. Can I buy one? :)

  18. kate

    11/09 at 4:19 AM

    I think I have one I could sell you! Convo me via etsy!

  19. Whitney

    11/11 at 11:22 PM

    Saw it, pinned it, sewed it! And I love it =] I am also gonna use mine as a diaper clutch but once I’m not doing diaper duty anymore it can be a cosmetics bag! Thanks so much for the tutorial.

  20. Nokkonen

    01/18 at 5:11 PM

    Wonderful clutch and so simple to do! Lovin it!

  21. Brienne Witt

    03/05 at 4:37 AM

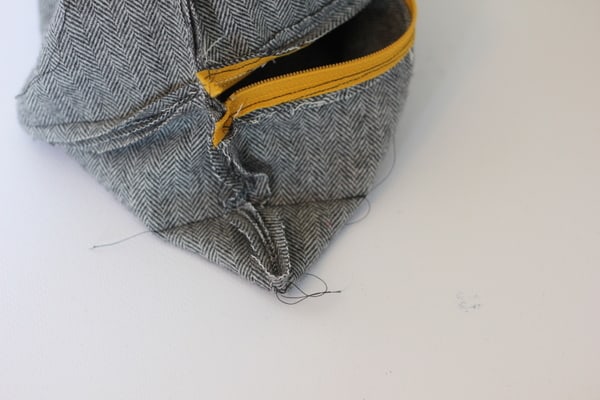
    I’m having troble with the corners….any tips?

  22. joylyn

    05/02 at 6:45 AM

    This is just what I was looking for it’s great. I have a new great great great boy (not the niece) you know no frells for him. But I know where a suit is and no one can wear it anymore, perfect!!!! thank you

  23. bsgarrett

    09/11 at 11:43 PM

    If you’d sell one of these please email me cause I don’t sew but I love these!!! Email is bsgarrett7@gmail.com. Thanks!!

  24. bsgarrett

    09/11 at 11:45 PM

    I don’t sew :( so if you’d be interested in selling of these cause they’re adorable! Please email me bsgarrett7@gmail.com. Thanks :)

  25. Briana

    10/01 at 3:45 PM

    So wish I knew how to sew lol. If you ever decide to sell, please let me know! You have fantastic things!

  26. Sommer

    12/26 at 11:55 PM

    What size zipper did you use for this?
    Thanks:)
    Sommer

    • kate

      12/27 at 11:39 AM

      12″ or 14″ I usually just trim off the extra if it is too long :)

  27. Janel

    04/27 at 12:24 PM

    Hi, I am so excited to make this clutch but I am fairly new to sewing and had a few questions:
    1. In the tutorial you do not put in a lining, correct?
    2. How would you put in a lining?
    3. By “self-lining” you mean the same fabric as the outside?

    Thanks for your help.

Primary Sidebar

  • Facebook
  • Twitter
  • Instagram
  • Pinterest
  • Email

Exclusive Free PatternRuffled Apron

Sign up for my email newsletter and receive my ruffled apron pattern totally FREE!

We take your privacy seriously. See our privacy policy here. You can unsubscribe at any time.

Don’t miss these popular posts!

easy baby dress pattern for the summertime

easy baby dress pattern for the summertime

modern ombre + b/w triangle quilt tutorial + pattern

modern ombre + b/w triangle quilt tutorial + pattern

Fabric

Quilted Cosmetic Case Kiss Me KateKiss Me, Kate FabricOne Hour Granny Square Quilt Tutorial | See Kate SewModern Granny Square Quilt Whole Cloth

Pattern Hacks

Easy Baby Summer Dressthe EMMA pattern | See Kate SewThe EMMA Dress

Footer

Hello friends!

My name is Kate, a twenty something fashion lover and mother of two. When I’m not chasing kids you can find me at my sewing table or daydreaming up new designs. You can read more about me here. Thank you for visiting!

8a918f8da8e0e69102dc0f33a718de85a99c31a57283e0e3e2

FOLLOW ME HERE

  • Facebook
  • Twitter
  • Instagram
  • Pinterest
  • Email
  • Blog
  • About
  • Contact
  • FAQ
  • Sponsor

Copyright © 2023 See Kate Sew  •  All Rights Reserved  •  Privacy Policy  •  Site Design by Emily White Designs