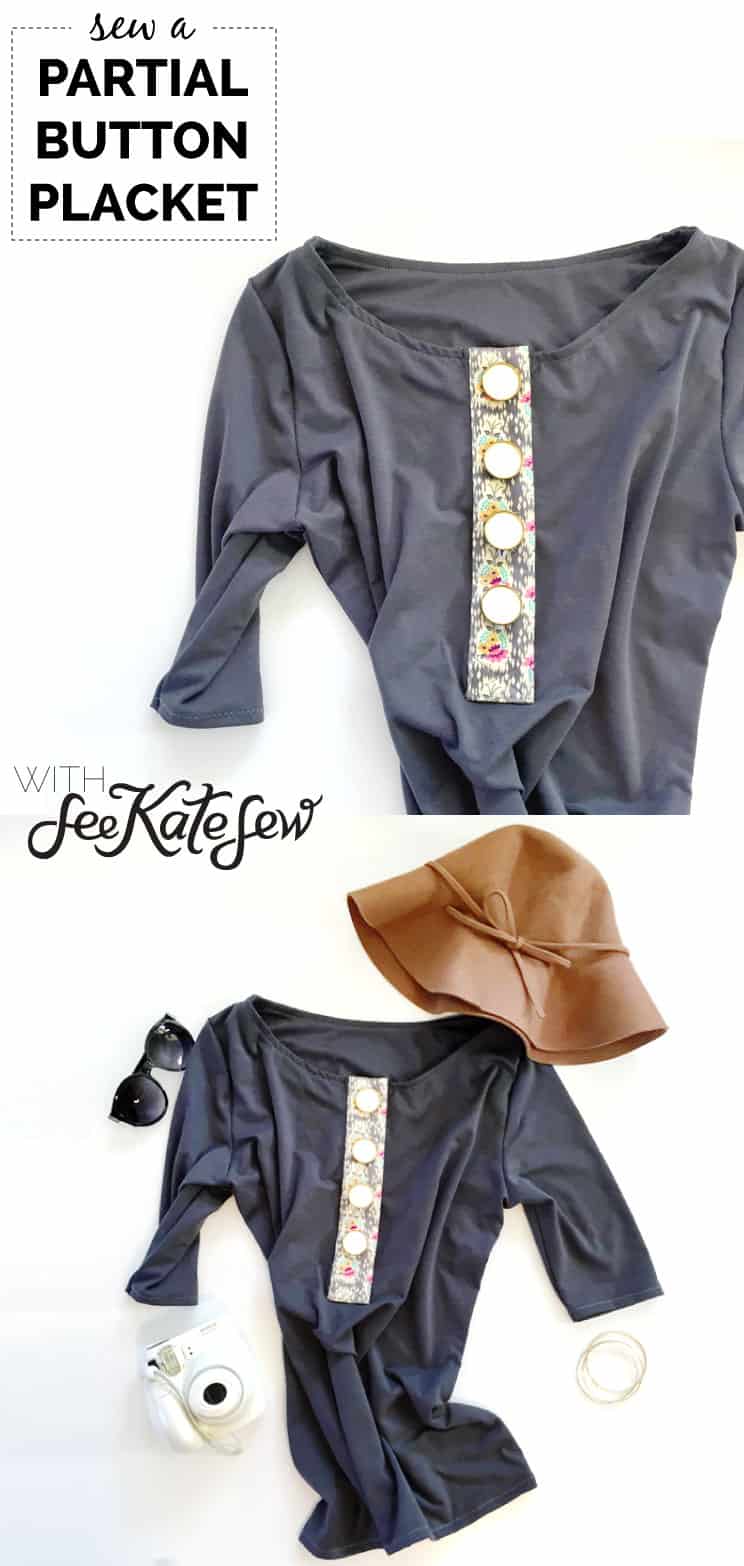
My newest pattern comes out Friday..I’m so excited to reveal this pattern! There are a bunch of options and it will be your fall capsule wardrobe staple! I can’t stop making them. Tops and dresses, tops and dresses! It will be available in an awesome bundle so stay tuned for details!


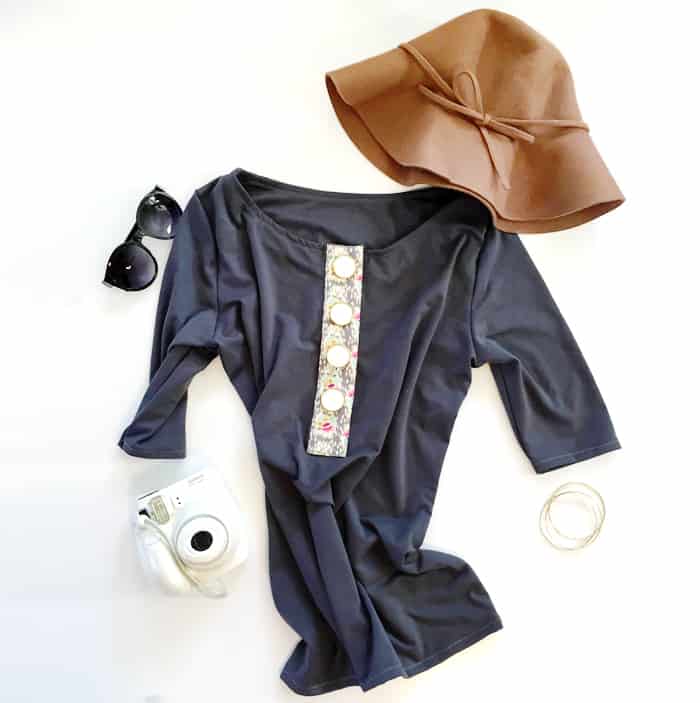
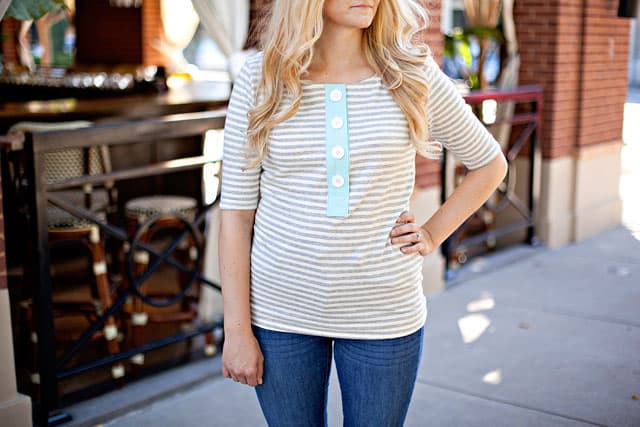
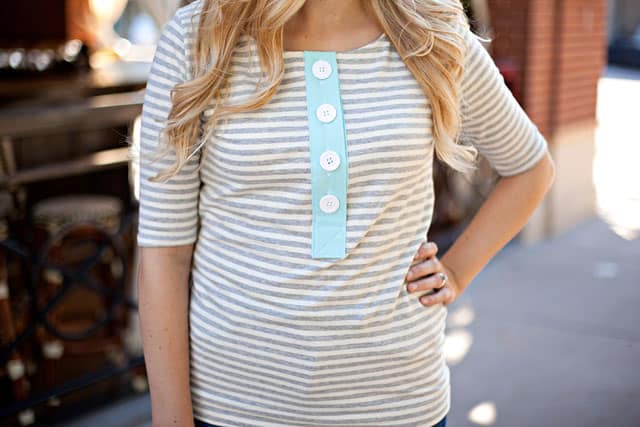
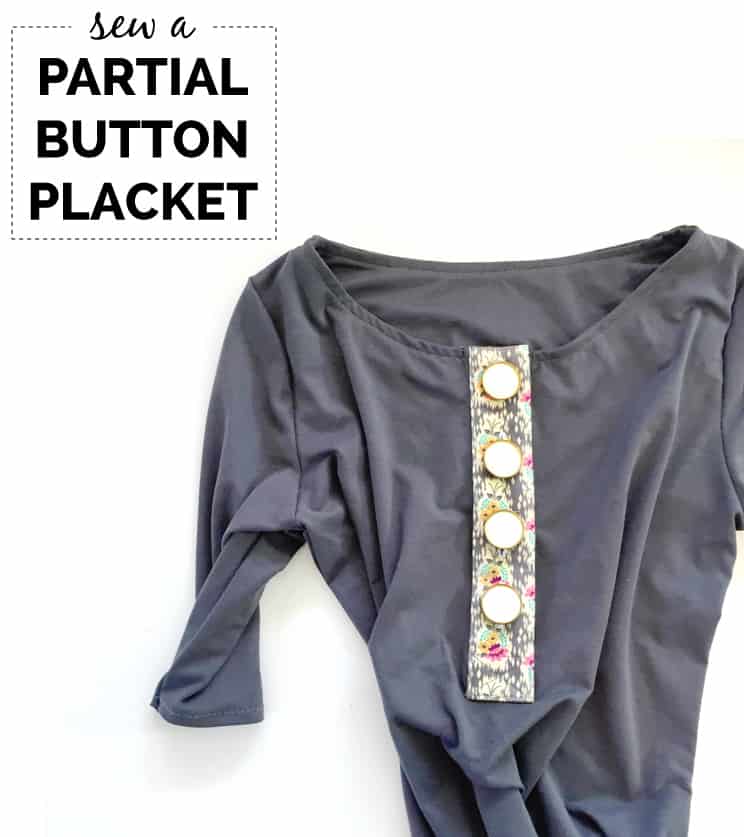
One of the options in the pattern is a partial button placket on the front. This is a working placket so you can button it up or wear something underneath and leave a button undone. It also makes the top/dress nursing friendly, if you need that! There are a whole lot of options to this pattern, so I’m not really giving much away with this variation, you’ll have to come back on Friday to see the rest!
I really love this top because you can use a woven fabric for the placket, even though it’s a knit top pattern! So you get all the comfy of knit fabric with a little pop of color or pattern. And cute buttons, of course! You can kind of dress it up or down depending on the type of button you use. Something fancy like pearlized buttons for a date night dress or casual plastic for an everyday top! So many fun possibilities.

Here is a detailed step-by-step tutorial with photographs! The pattern itself has illustrations. Sometimes for tricky things I like to have illustrations AND photographed instructions. Sometimes it is easier to see a concept with photographs and sometimes it is easier with illustrations, so this way you’ll have access to both to fit your learning style!
So let’s go!
Partial Button Placket Tutorial //
Some helpful materials:
-Ruler
-Disappearing ink pen
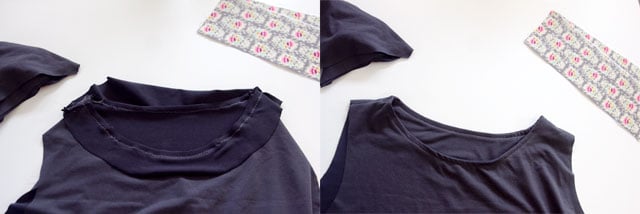
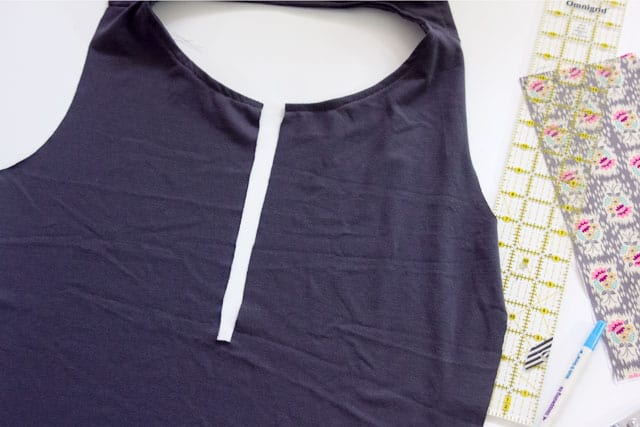
To prep your top complete the facing and shoulder seams.
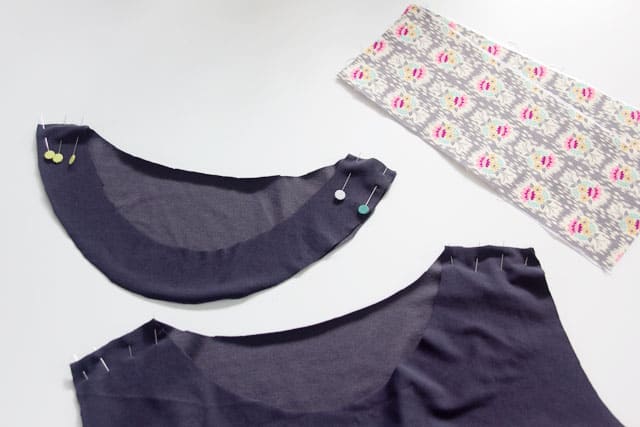
Pin facing to neckline with right sides together and sew.
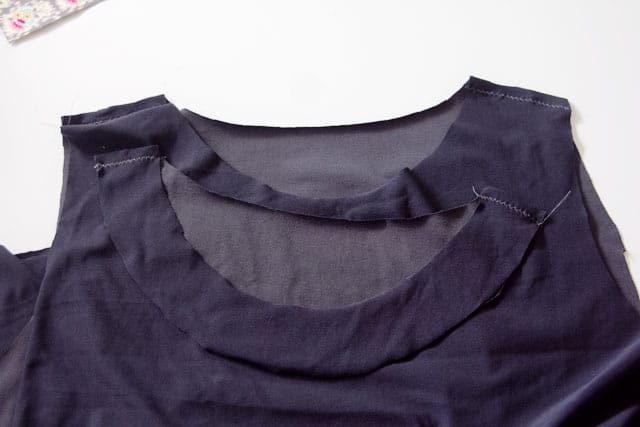
Flip facing to inside of dress and press well. Topstitch along top neckline about 1/8″ to 1/4″ from neckline edge. Pin and stitch along the back facing to keep it down.
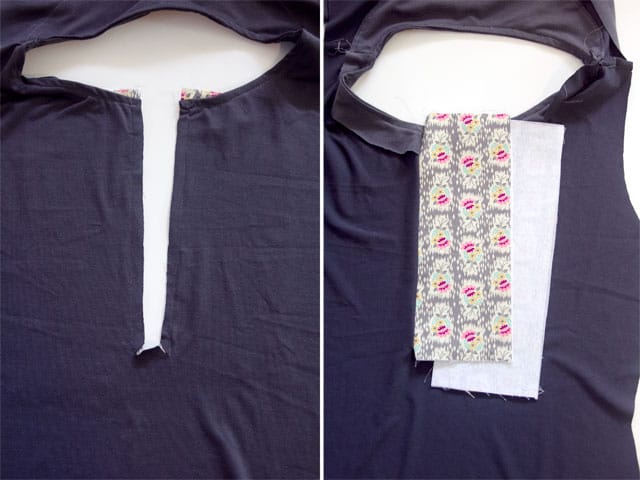
Following the line on the pattern piece, use a ruler to draw a box 1/2″ wide by 9.5″ long in the center of the bodice. This space is where the placket will go.
I like to fold the front bodice in half, making sure all the sides match up correctly.
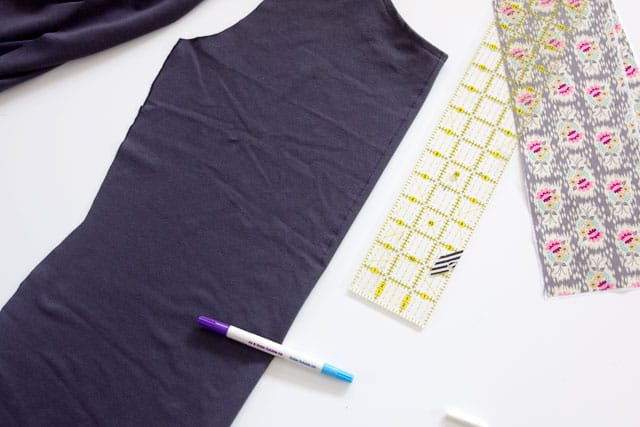
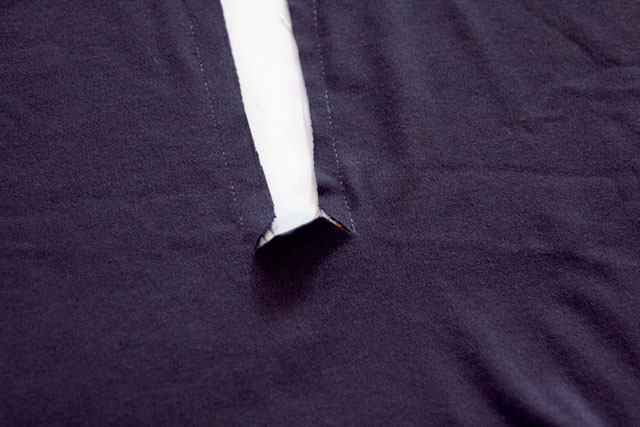
Then draw a line 1/4″ from the center and cut it out while the shirt is still folded in half.
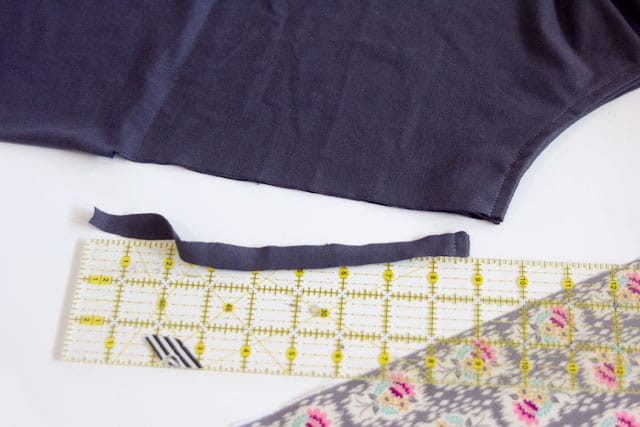
Now you’ll have a gap that looks like this:
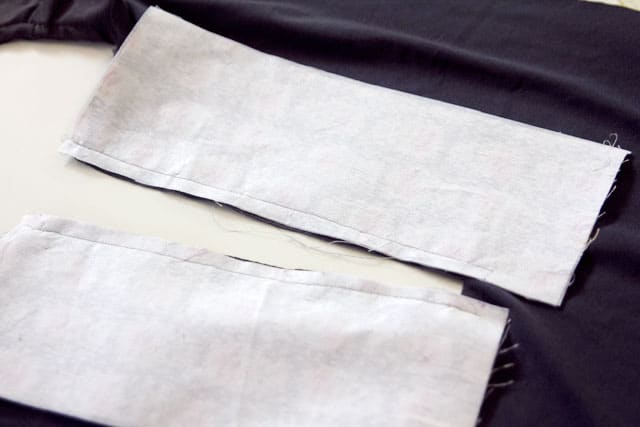
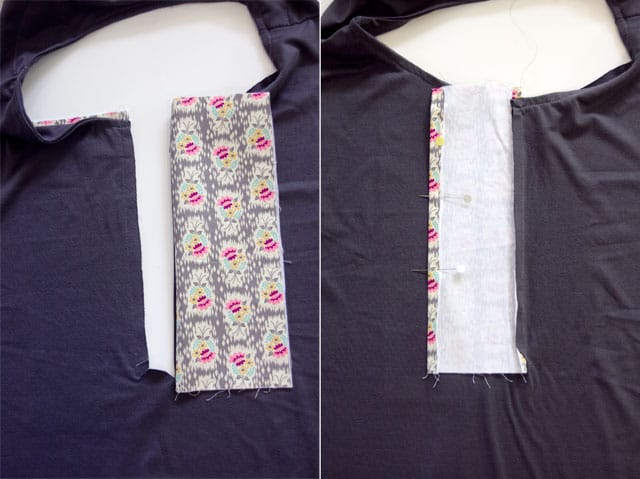
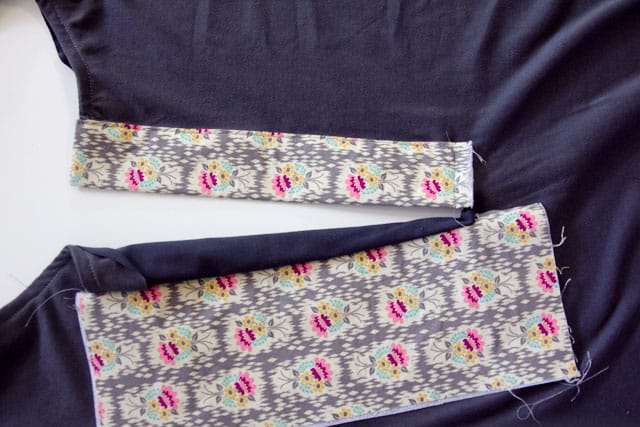
Fuse interfacing to the placket pieces.
On the WRONG SIDe of the bodice, pin the short placket piece (#1) to the left side of the opening. Place the placket piece 1/2″ above the neckline RIGHT SIDE DOWN. The placket will extend past the opening that you just cut.
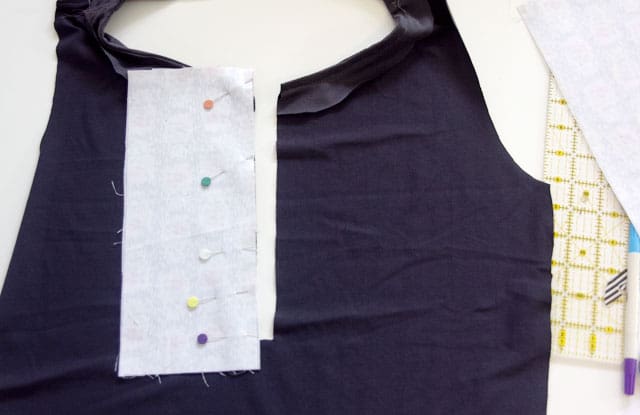
Repeat on the other side with the second placket.
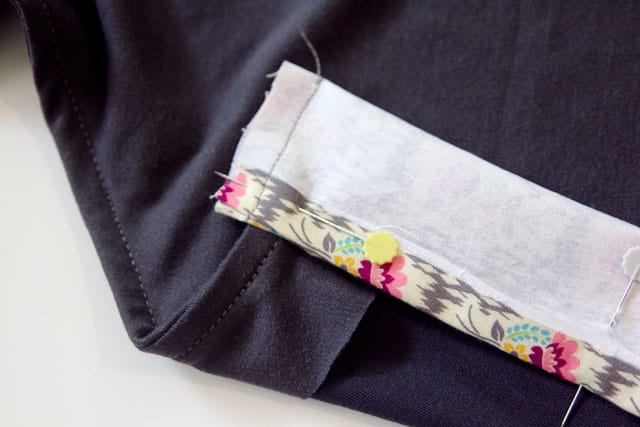
Make a little mark on each placket 1.2″ past the gap. 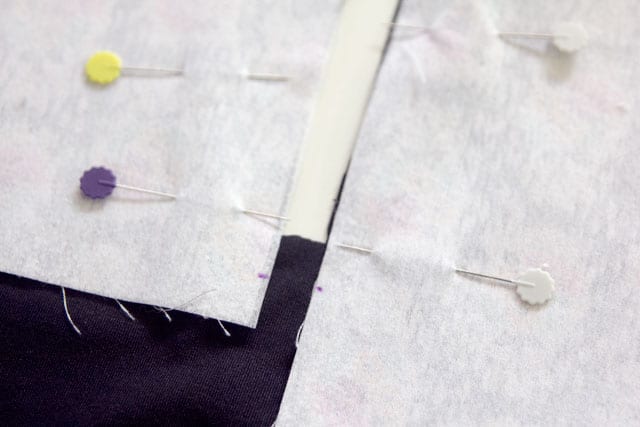
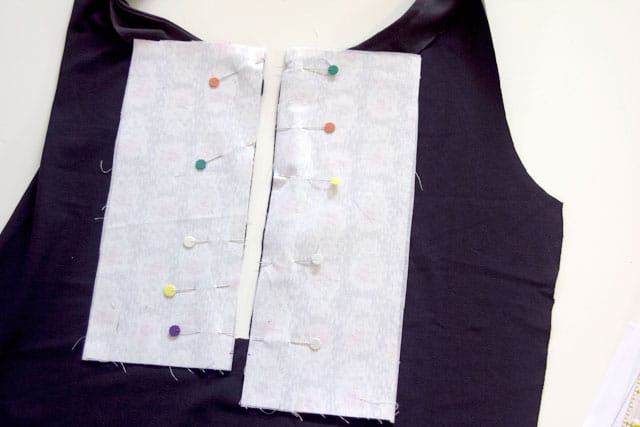
Then you’ll sew the placket pieces to the bodice front with a 1/2″ seam allowance.
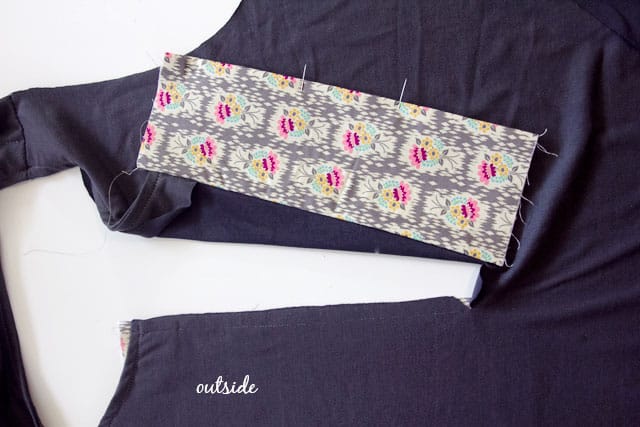
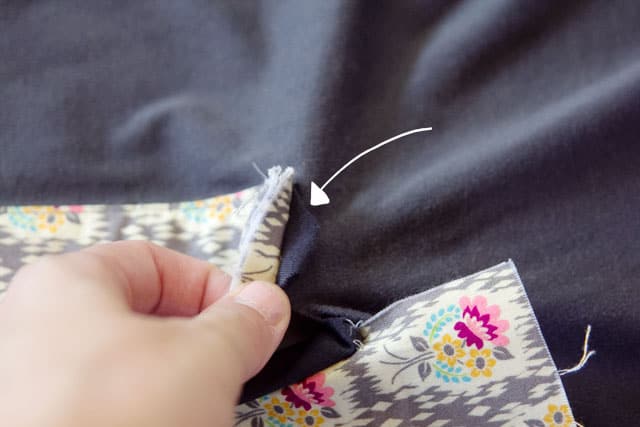
Snip two lines down from you current center cut to the bottom edges of the stitching that you just created. You’ll snip diagonally and create a little triangle of fabric.
Turn bodice over so you see the inside fabric. Fold the piece on the left over so you see the right side of the fabric. Press along seam.
Turn shirt to outside again and pull placket #1 through to the front. You’ll see the wrong side of the placket. Pull bottom of the shorter placket strip through the diagonal cut and over the little triangle of fabric you made in step 13.
Fold the raw edge of the placket strip over 1/2″ and press.
Now fold placket piece in half over itself with right sides together.

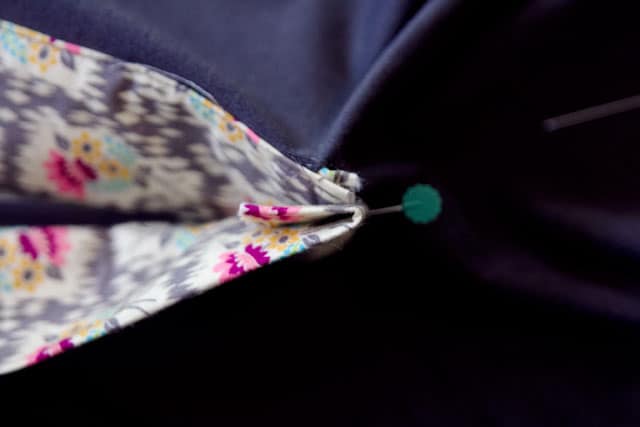
Stitch across top of placket at 1/2″, right along the neckline edge. Backstitch at each end and clip corners.
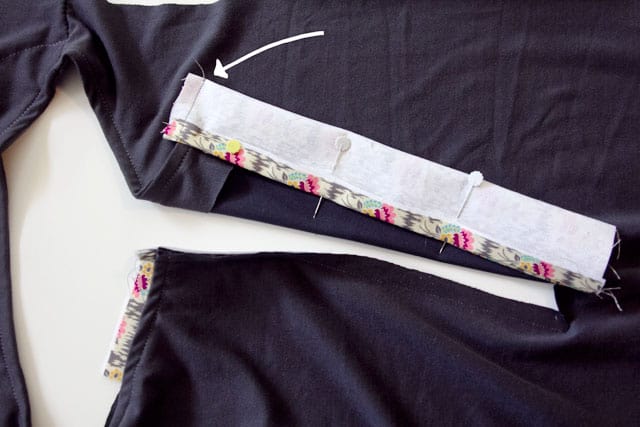
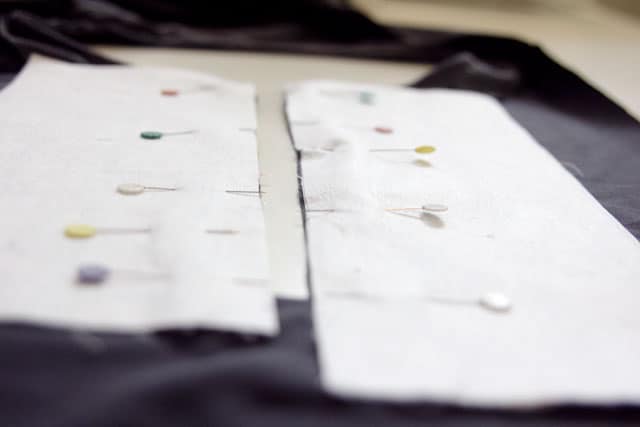
Turn placket right side out and press. Pin in place so the edge of the plackets line with with each other.
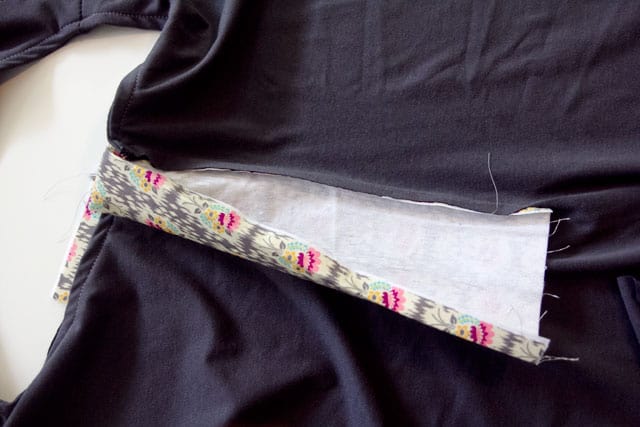
It should look nice and neat like this:
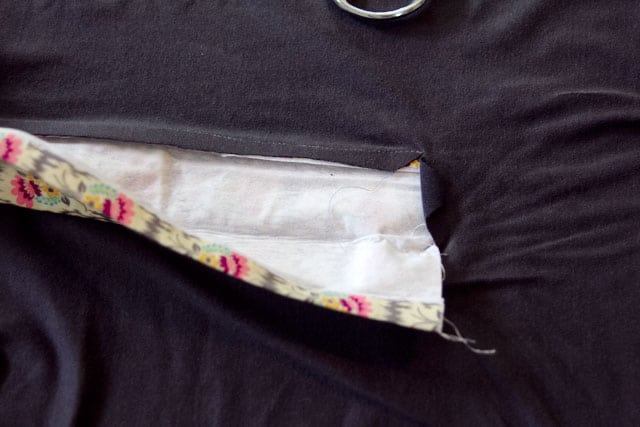
On the inside, fold the triangle piece down.
 ]
]
Topstitch along open edge of placket at 1/8″ and across the bottom edge, catching the triangle a tiny bit as you sew.
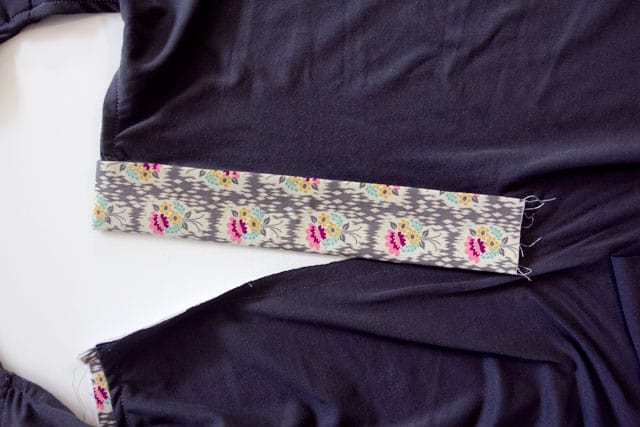
This is what it will look like close-up:

And if you flip up the bottom of the placket, you can see how the triangle piece flips down. You will have sewn over the long edge of the triangle. This creates a clean finish on the inside of the bodice.
Now repeat all those steps with the other placket. 
Topstitch along the top of placket #2 until approximately 1.5″ above bottom of the placket. 
Fold under 1″ on placket #2 and tuck under.

Now sew around this piece, creating a rectangle. Then sew through the box to make an X.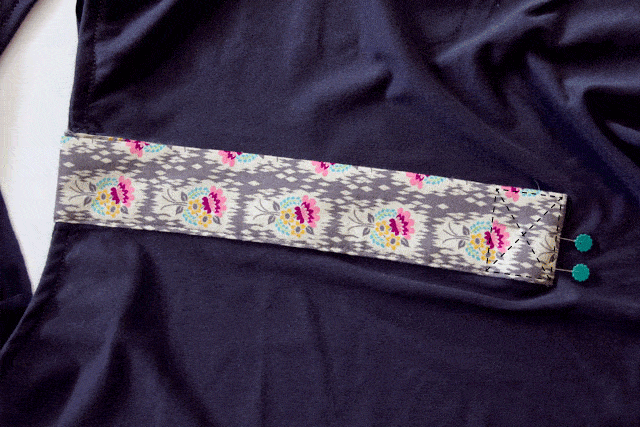 ‘
‘
Now finish it with buttonholes and buttons!


Bam! Partial Button Placket!


I’m getting really excited about this pattern. It may be exactly what I’ve been looking for. Looking forward to seeing more on Friday!
WOW I love this top so much! Do you remember what that gray striped knit is or where you got it? Great job–can’t wait for the pattern.
Paydayloan that is authentic support why you will need extra cash You can find unlimited main reasons.
Here is my weblog: car Loan with bad credit
First Bank of De is really in receiving a personal loan, a firm that can also assist you.
My site :: auto loans bad credit low interest
Coach Purses On Sale
Сoach Purses Store Online sale,Super Discount For You!
Coach Purses On Sale