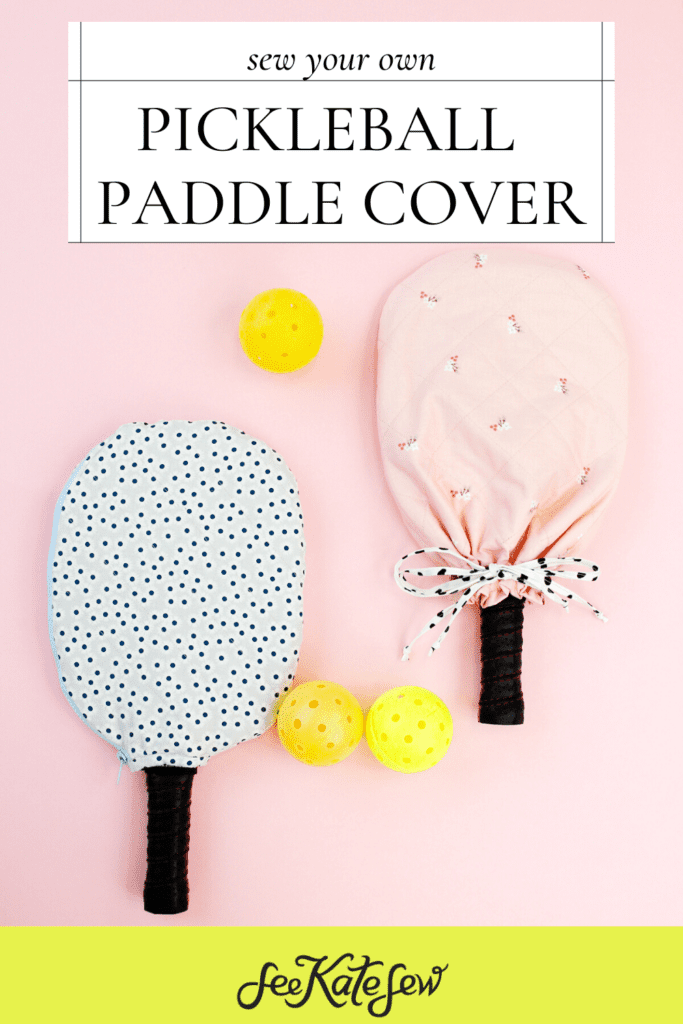
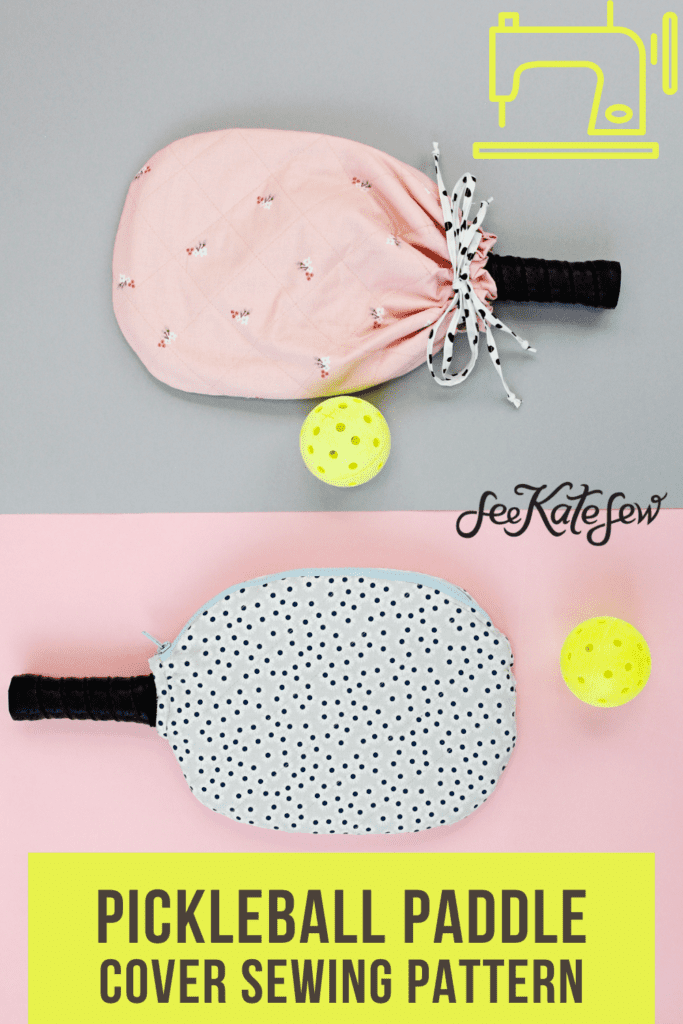
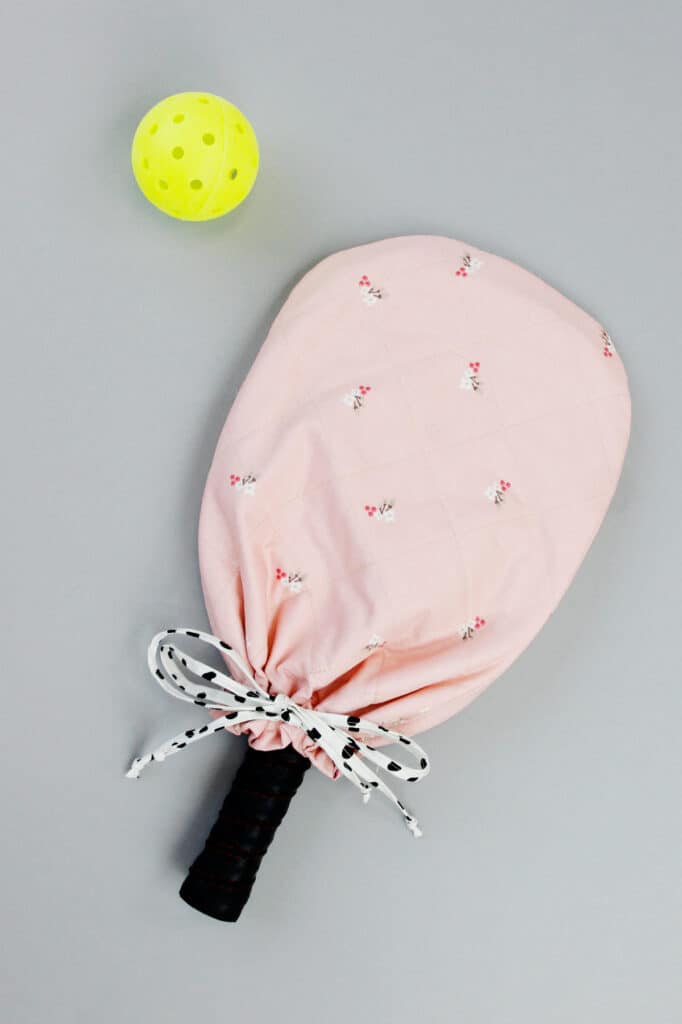
Do you play pickleball? It’s so fun to play this game and you don’t have to have a lot of skill to start! Make your own pickleball paddle cover with this pattern download to make the game extra fun and keep your paddle from getting scuffs.
Pickleball is like a mix of ping pong and tennis. The court is small and it’s a fun game to play with your kids or friends.
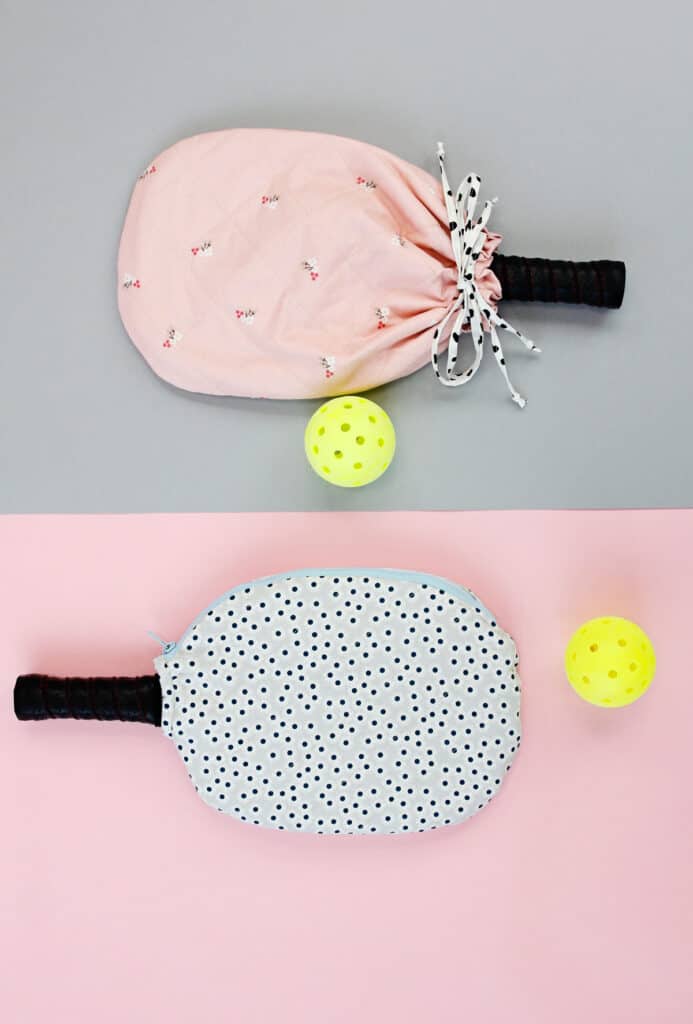
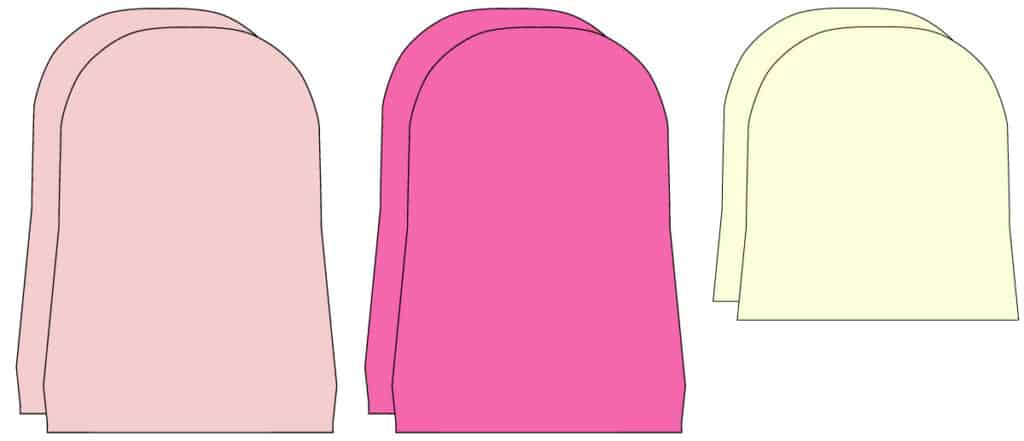
These easy pickleball paddle cases will give your pickleball raquet extra padding in your pickleball bag and help prevent dings, scrapes, bumps and dents. Customize your case and make them for friends with different patterns and fabrics. There are two different styles in this post – a drawstring version (easy and great for beginners!) and a zippered paddle case!

Make sure your pickleball paddle is aways at it’s best and scratch-free by storing it in a padded pickleball cover. This cover will extend the life of your paddle surface. Download the free pattern and let’s get sewing!
Custom Pickleball Paddle Cover – Drawstring Version
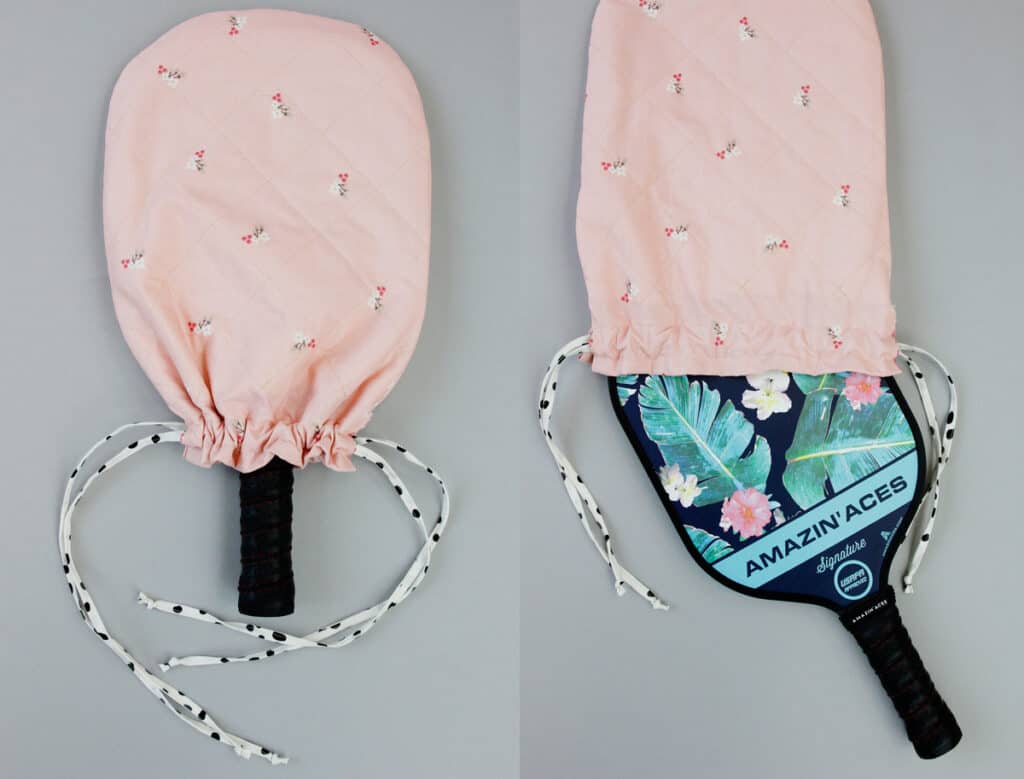
This pattern has a snug fit at the top and a drawstring that cinches around your grip, protecting your paddle face but not covering the entire paddle – the grip will be exposed for easy access. There is no zipper required so it’s easy and fun to sew!
Supplies for Drawstring Pickleball Case
- 1/2 yard cotton fabric for main
- 1/2 yard cotton fabric for lining
- 1/4 yard coordinating cotton for drawstring, optional
- 1/2 yard -1 yard batting
- I prefer needle felted batting such as Warm and Natural(affiliate)
- Drawstring (Affiliate link), or make your own with the instructions below
- Drawstring threader (This is LIFE CHANGING – affiliate link) or safety pin
- Fabric marker
Fabrics used in this post

If you need some pickleball gear, this is a great starter set at a great price (affiliate links). We have this set and love it, it would be a great gift, too. Gift a set along with a few DIY paddle covers for a thoughtful gift!
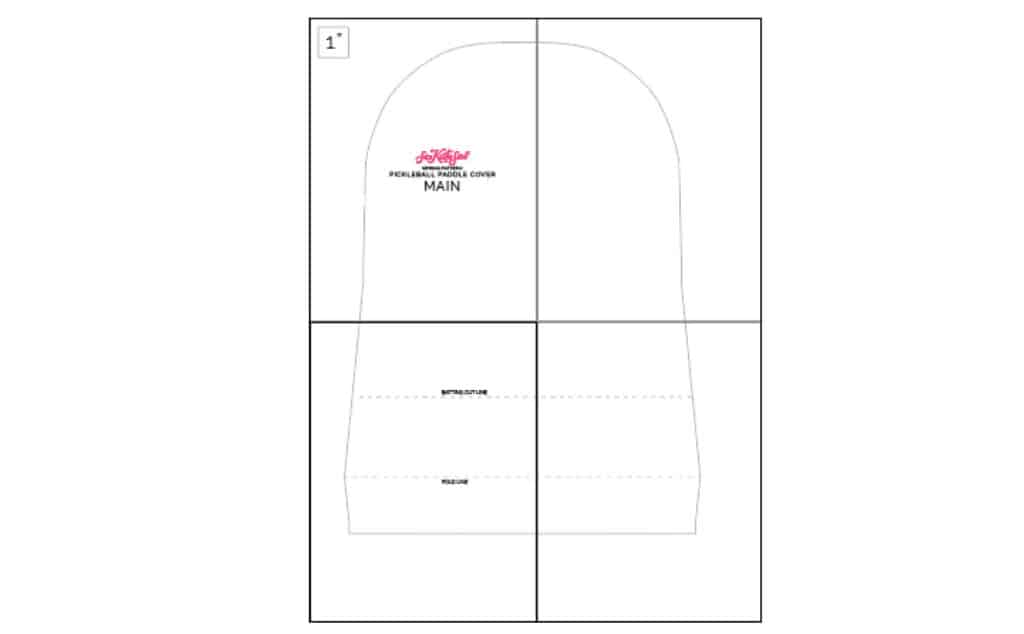
Pickleball Paddle Cover Pattern Download
Download the pattern below and print it out at 100%. The pattern will print on 4 pages and works with A4 or Standard Letter paper. It’s a funny shaped pattern piece that looks a little like a Pac-Man ghost!
Trim along the dashed lines and tape the pages together as shown below:
How to Make a Pickleball Paddle Cover
Cutting Instructions
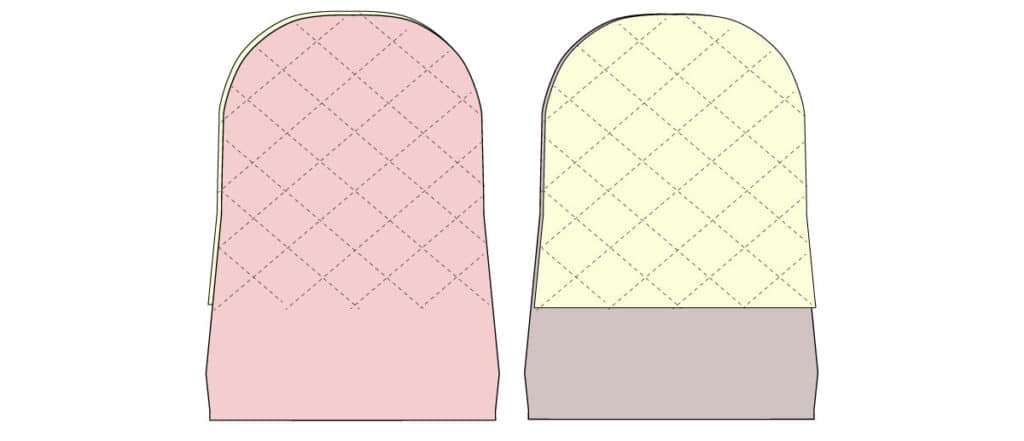
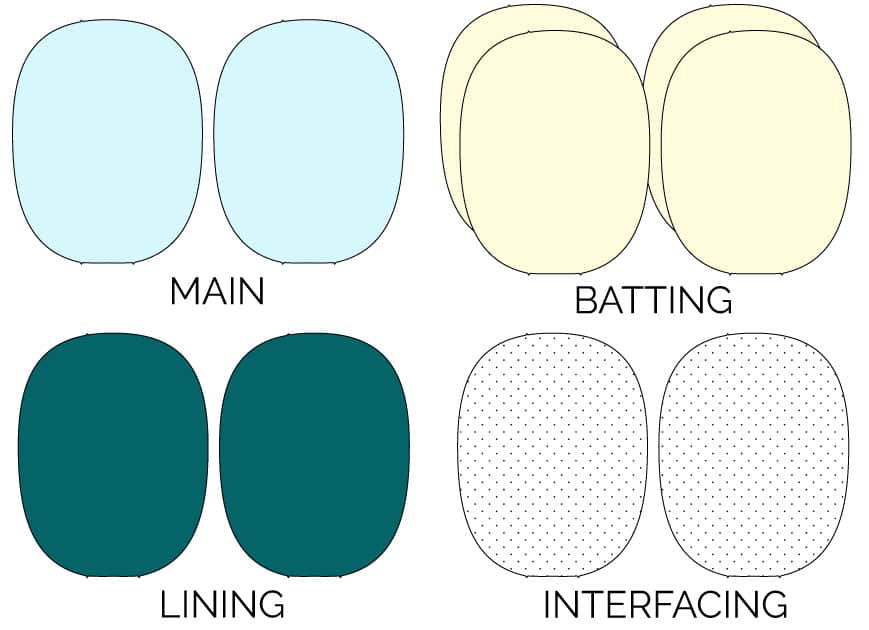
Cut 2 layers of each main and lining fabric. Cut 2 layers of batting on the dotted line. If you want an extra padded case, cut 4 layers of batting and use 2 on each side of the paddle cover.
Quilt the main fabric
Line up the batting on the back of the main pieces at the top. Draw a grid pattern with 2″ squares with a fabric marker. You can choose any pattern for quilting the batting to the fabric, such as lines, a smaller grid or an abstract design. Sew over the lines to quilt the layers together. Repeat on both main pieces.
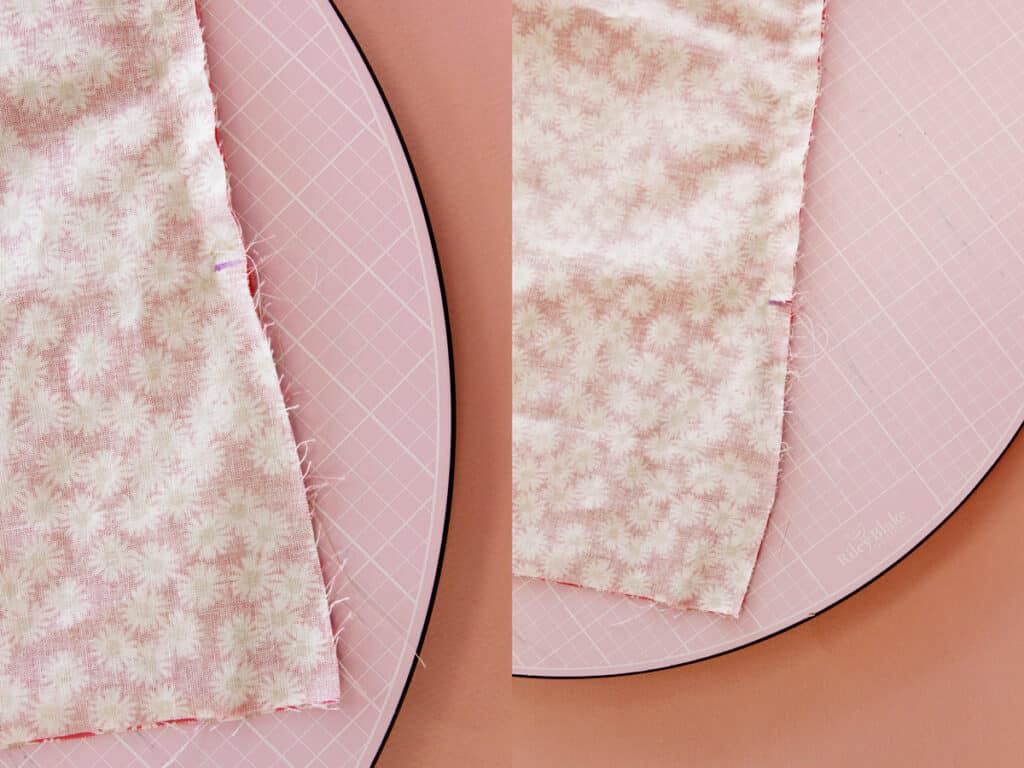
Lay main fabrics together with right sides together (the batting will be on the other sides of this fabric) and sew together 3/8″ from the edges, stopping at the bottom of the batting. Backstitch at each end of the stitching line.
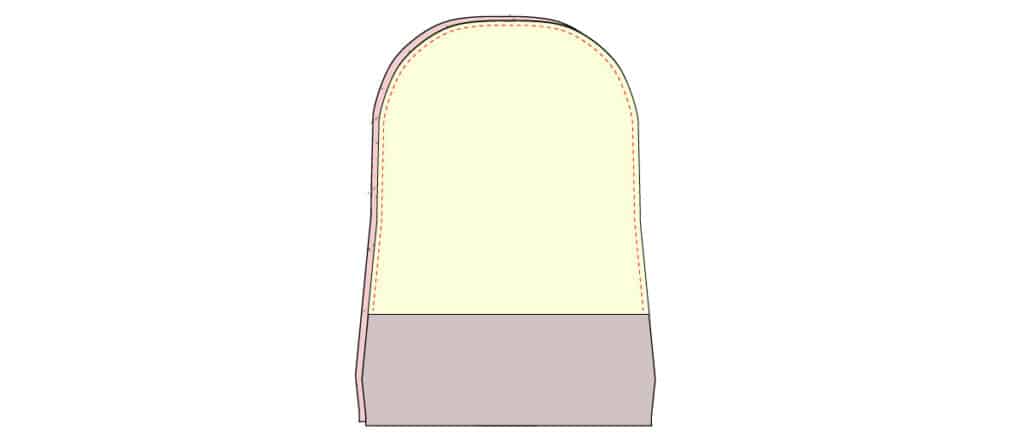
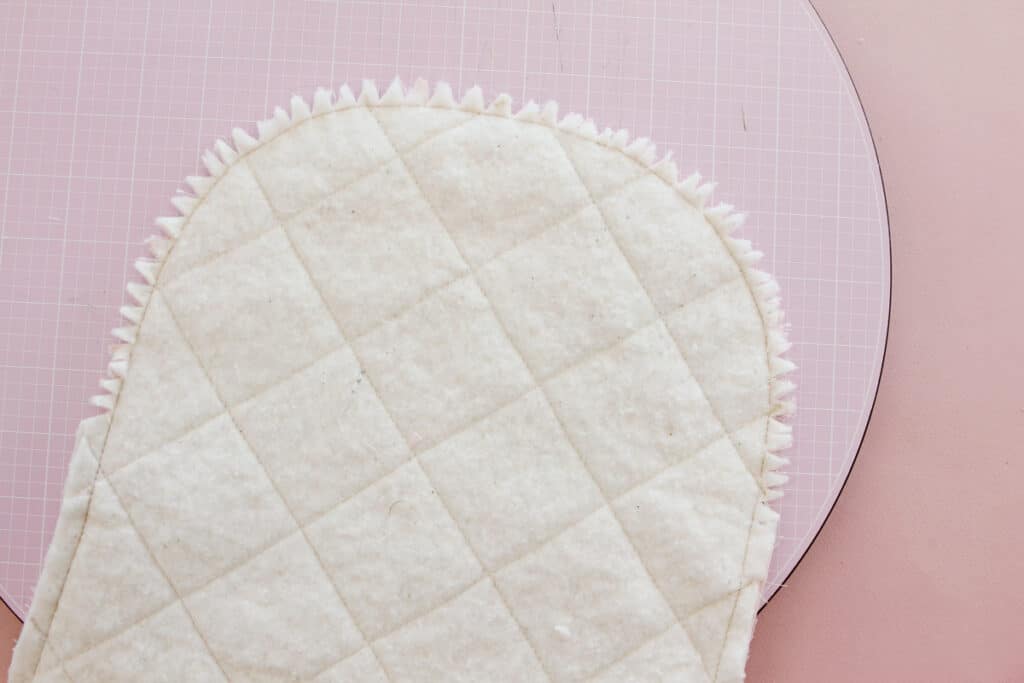
Clip and notch the top curve of the paddle cover. This area can get thick with the batting and fabric layers so notching it around the curves is a good way to reduce bulk. After you’ve notched it, you can trim the seam allowance down to about 1/4″. I like to notch first and trim second because I think it’s easier to make the notches without clipping through the stitching, but you can trim first if you prefer.
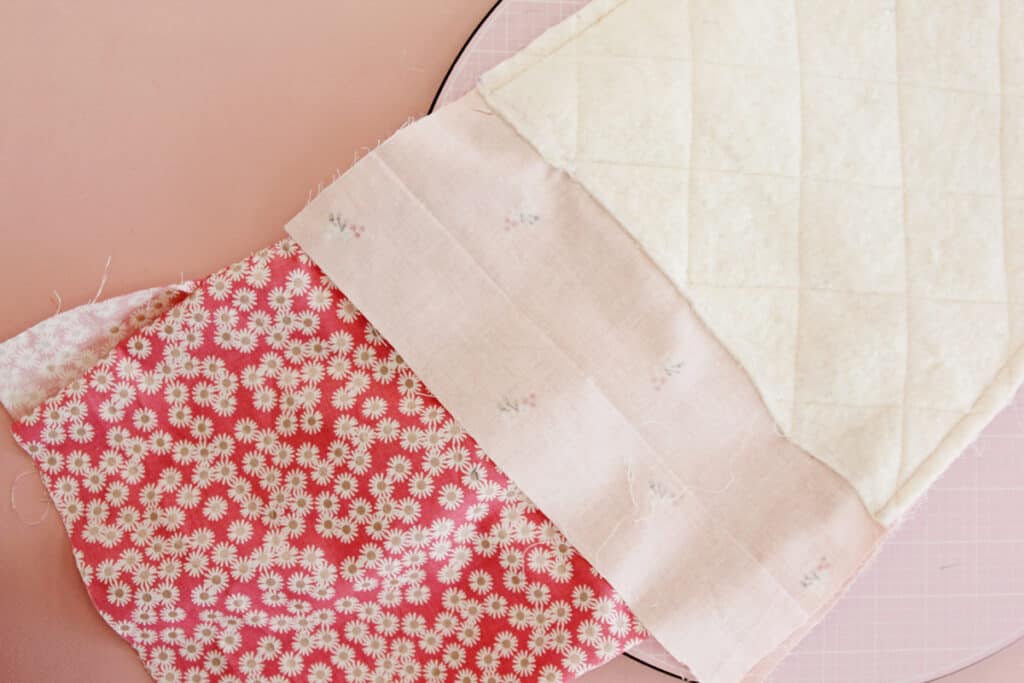
Mark where the dotted line hits on the lining pieces, then sew lining pieces together the same way you did the main pieces.

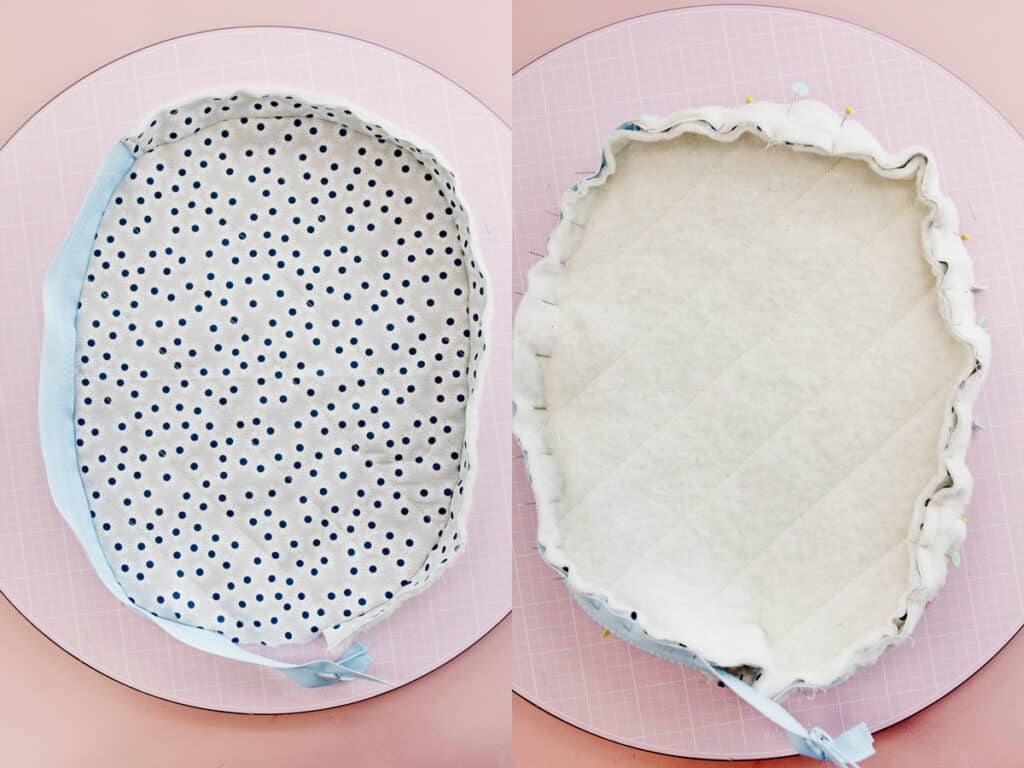
Turn lining right side out. Leave the main inside out.
Insert lining
Clip into the seam allowance right where the batting line is marked on the pattern piece. This should be right where your stitching ends. Cut into both the lining and main layer right at the same spot. Clip just under 3/8″ into the seam allowance.
Slip the lining into the main cover and line up the raw edges at the bottom of the covers.
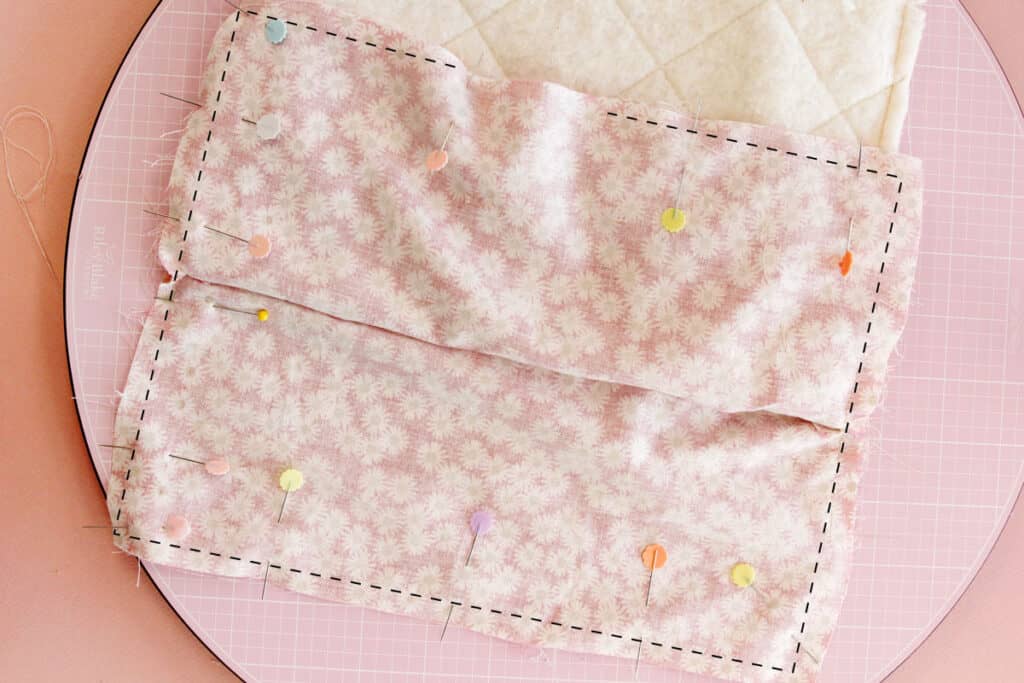
The clipped seam allowances will allow you to open this up as shown above. Sew around the bottom edges and the side flaps, leaving a small 2-3″ opening on one of the long sides.
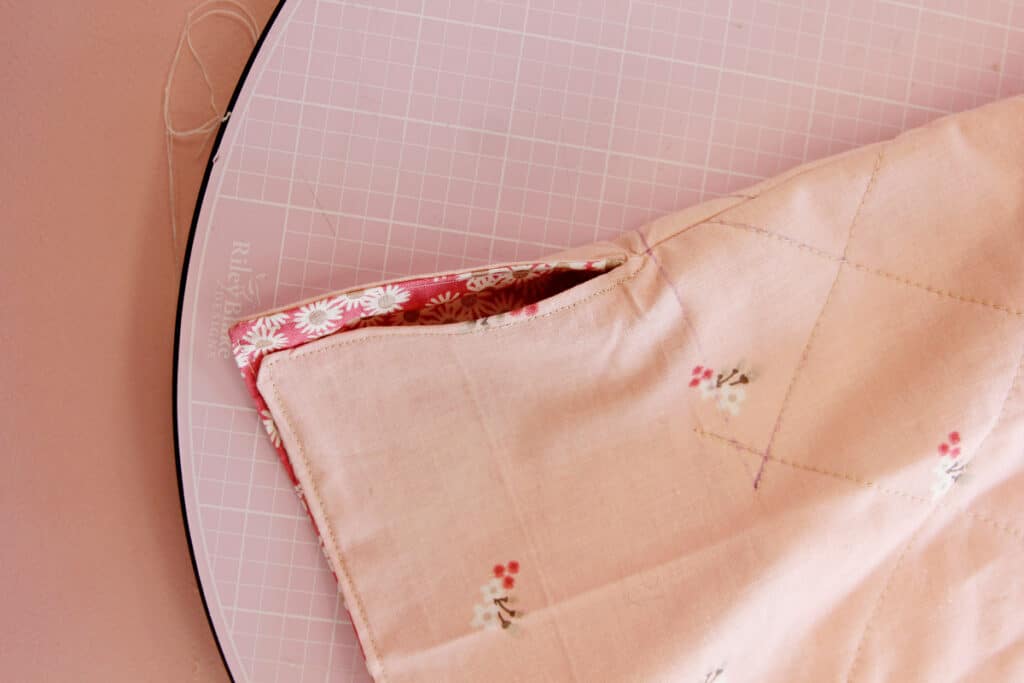
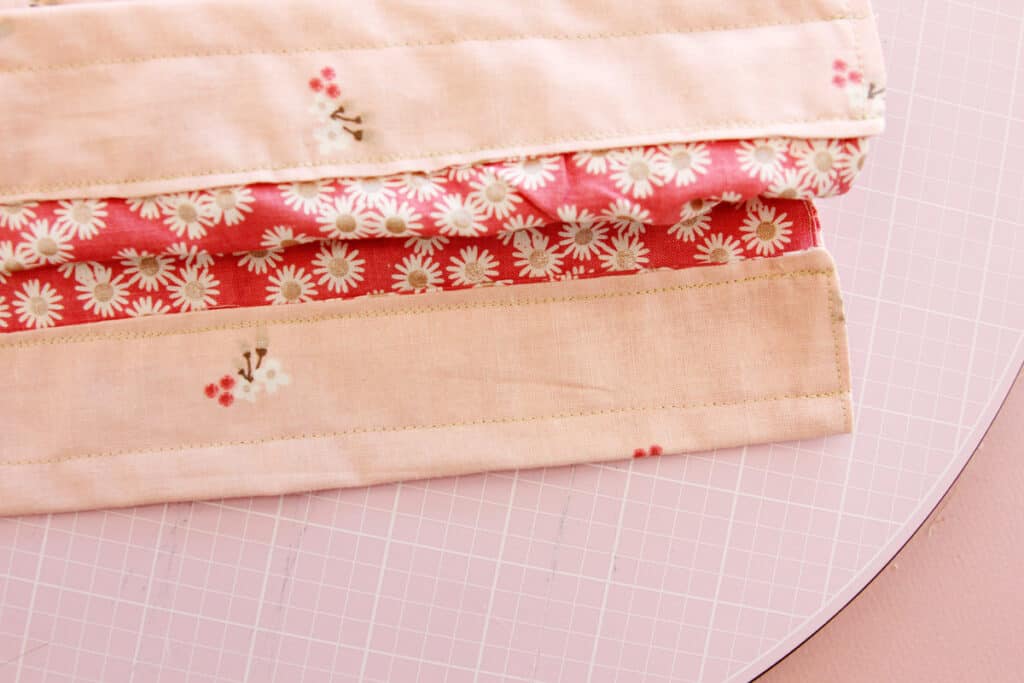
Turn the case through the opening and then press well. Topstitch around the bottom and side edges 1/8″ from edges, closing the opening used to turn.
Create casing
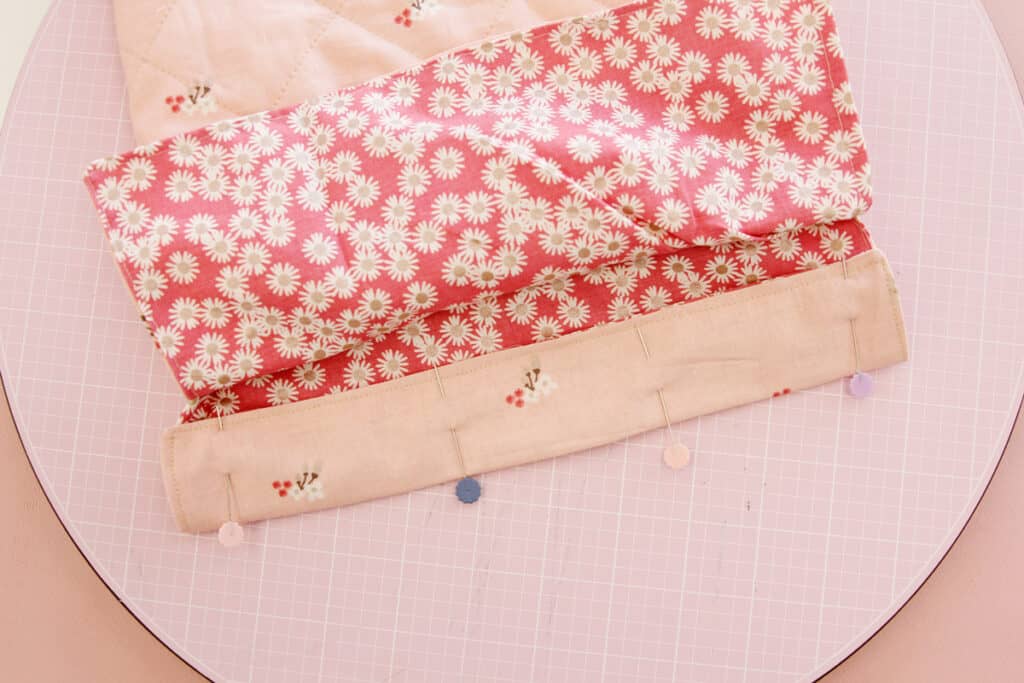
To create a drawstring casing, fold the bottom of the flap up 1.5″ and pin in place. Sew in place right on top of the topstitching. Backstitch at the ends.
Sew another line of stitching about 1/2″ from the bottom of the folded edge. Repeat on the other side.
Make the drawstring
Cut two pieces of fabric about 38″ by 1″, you can trim later if needed.
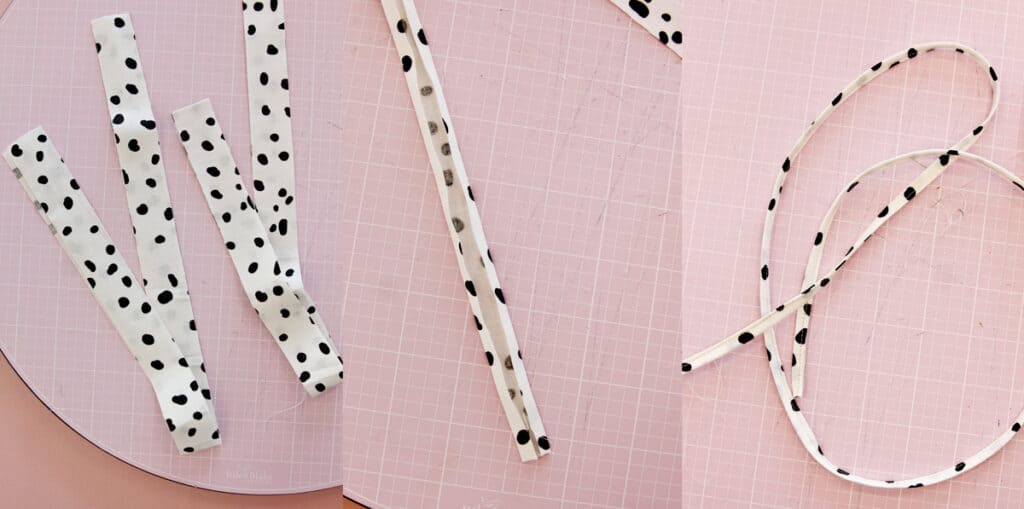
Fold the long sides into the middle and press. Then fold in half again. Sew the folded edges together to create a drawstring.
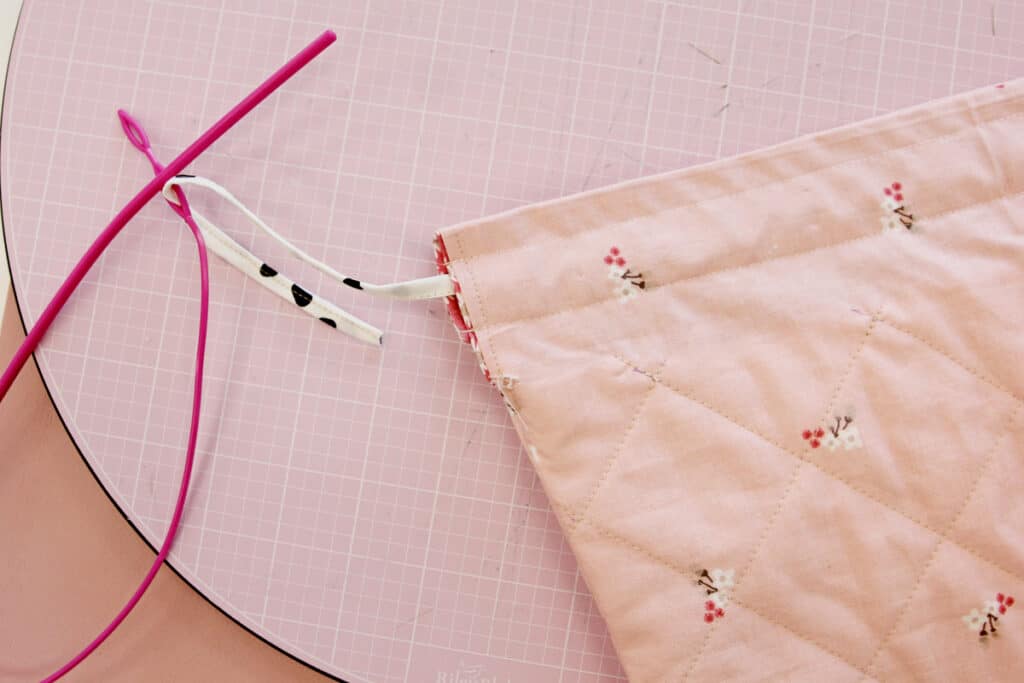
Thread the drawstring into the casing and around the other side.
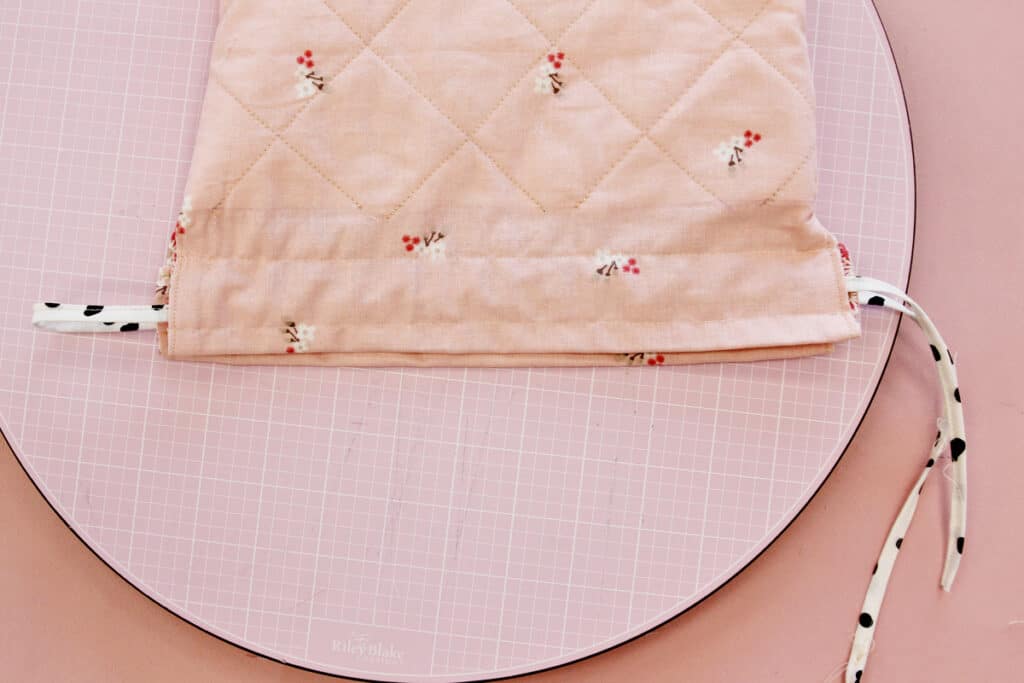
The ends of your drawstring will meet on one side of the cover and the other side will have a loop.
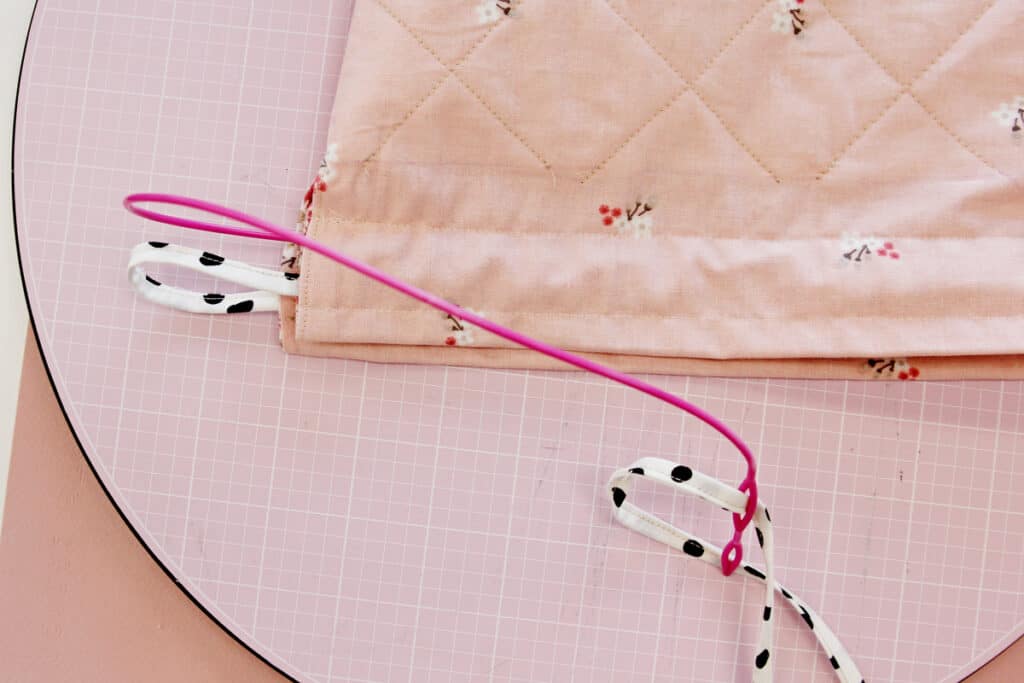
Repeat with the second drawstring, starting at the side with the loop. Thread this the opposite way, creating a loop on the other side.
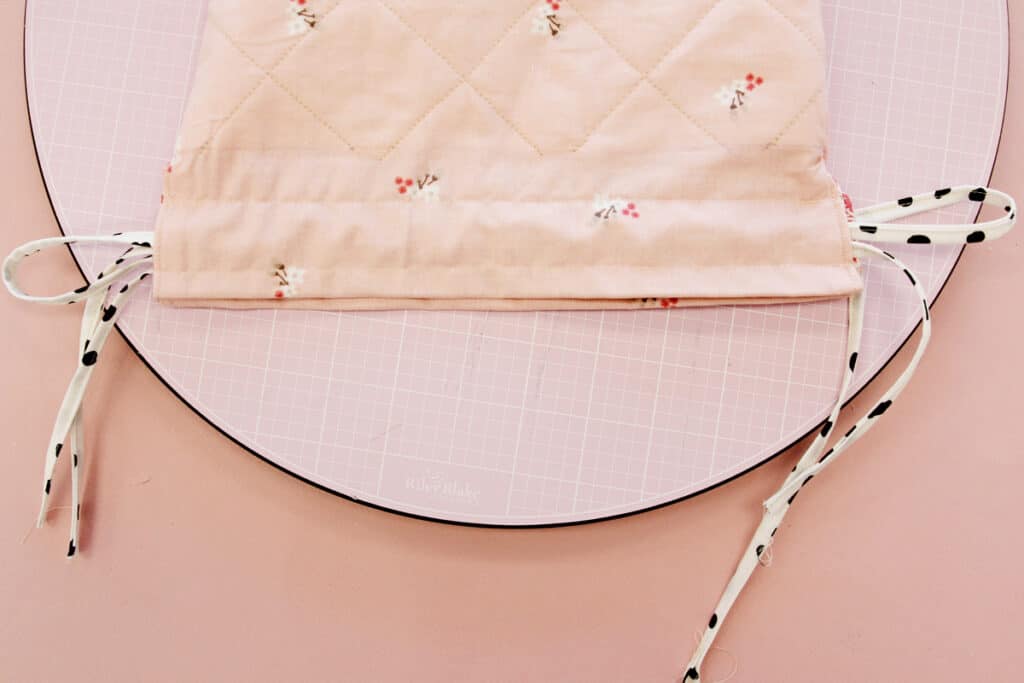
When your drawstrings are both in, they will look like the above photo. Tie little knots at the ends of the drawstrings. Pull the drawstrings to secure the case. You can also tie them into a cute bow at the front!
Zippered Pickleball Paddle Cover
This zippered pickleball case is more fitted and closes with a zipper. This style is more classic but it is a little harder to put together.

Zipper Paddle Cover Materials
- 1/3 yard cotton fabric for main
- 1/3 yard cotton fabric for lining
- 1/2 yard -1 yard batting
- Fabric marker
- 18″ Long Zipper with a 1.25″ wide zipper tape
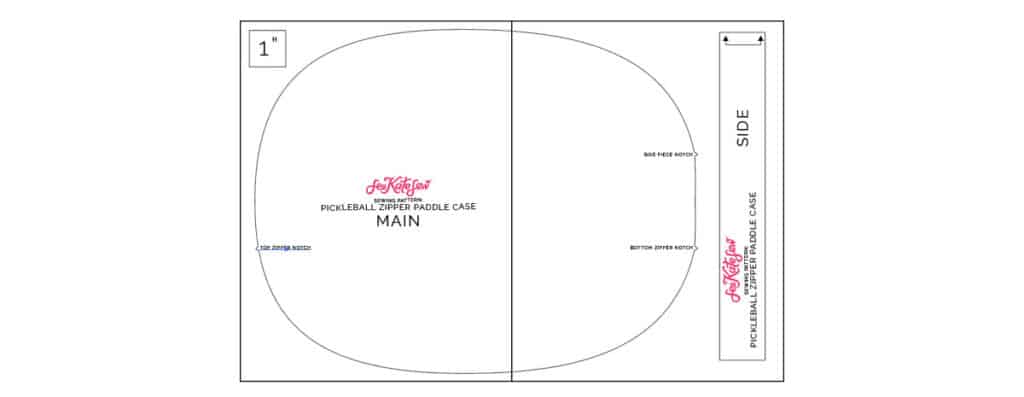
Download the Zipper Paddle Case Pattern
Download the pattern below and print it out at 100%. The pattern will print on 2 pages and works with A4 or Standard Letter paper.
Tape the pages together as shown:
Zipper Pickleball Case Tutorial
Cut out 2 main, 2 lining, 2-4 batting and 2 interfacing pieces.
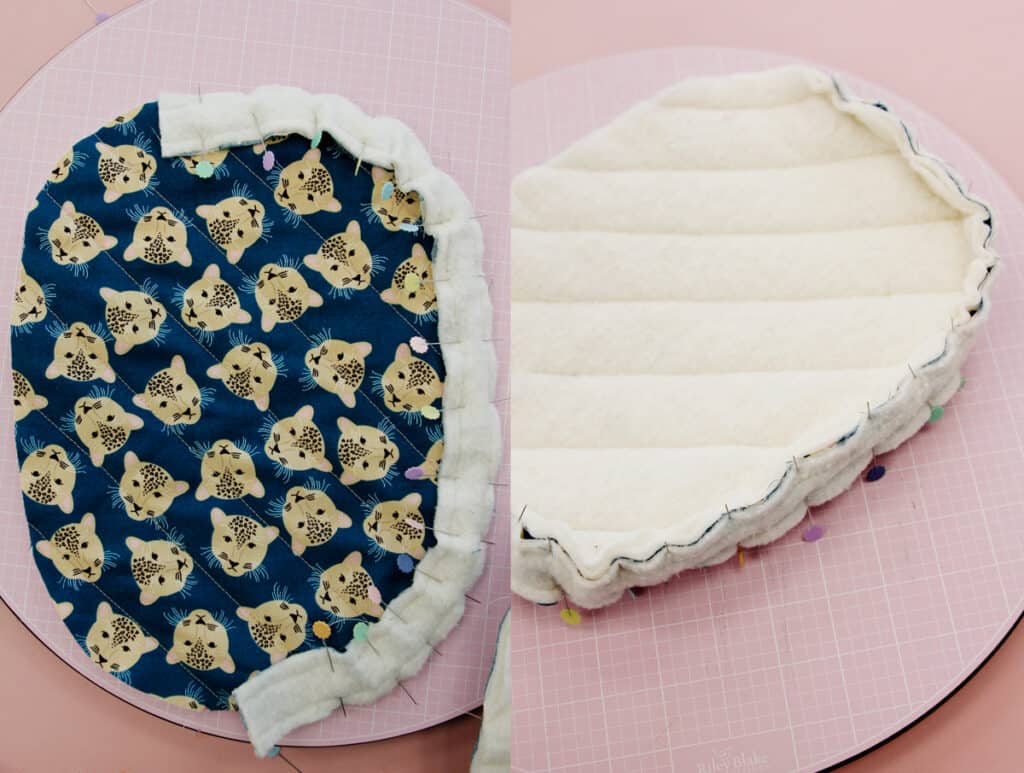
Stack the main, interfacing and batting and pin together. Draw lines for quilting. You can choose any pattern you want. I drew diagonal lines 1.5″ apart. Stitch over the lines to quilt the fabric. Repeat with the lining and remaining batting pieces. Baste around the case edges to help you ease the seams later.

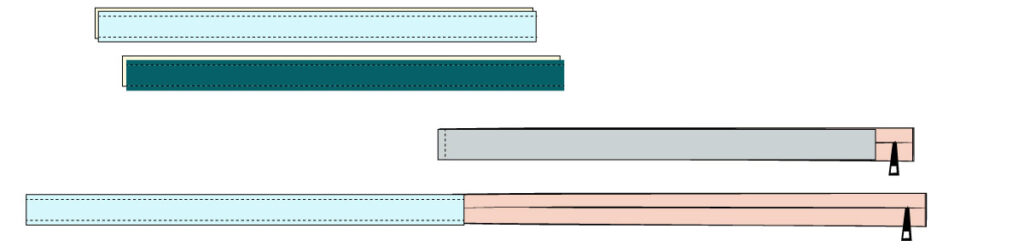
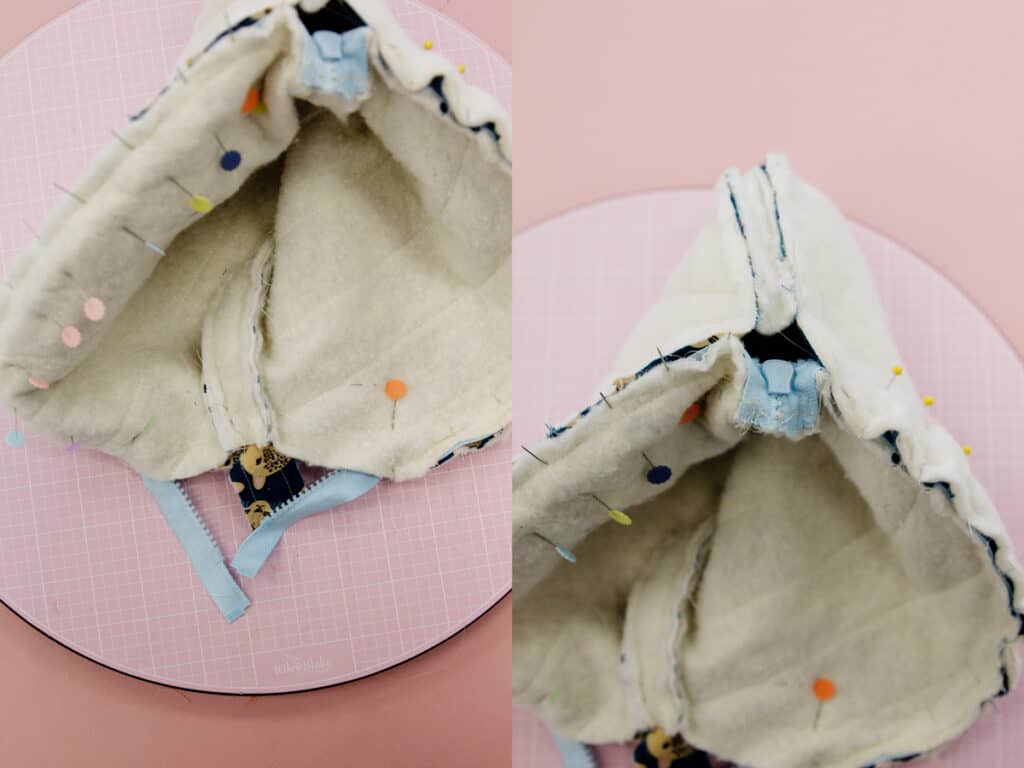
Cut out 1 side piece from each main and lining and 2 batting pieces. Baste the fabric and batting together along the long edges. Sew main to zipper at the short edges.
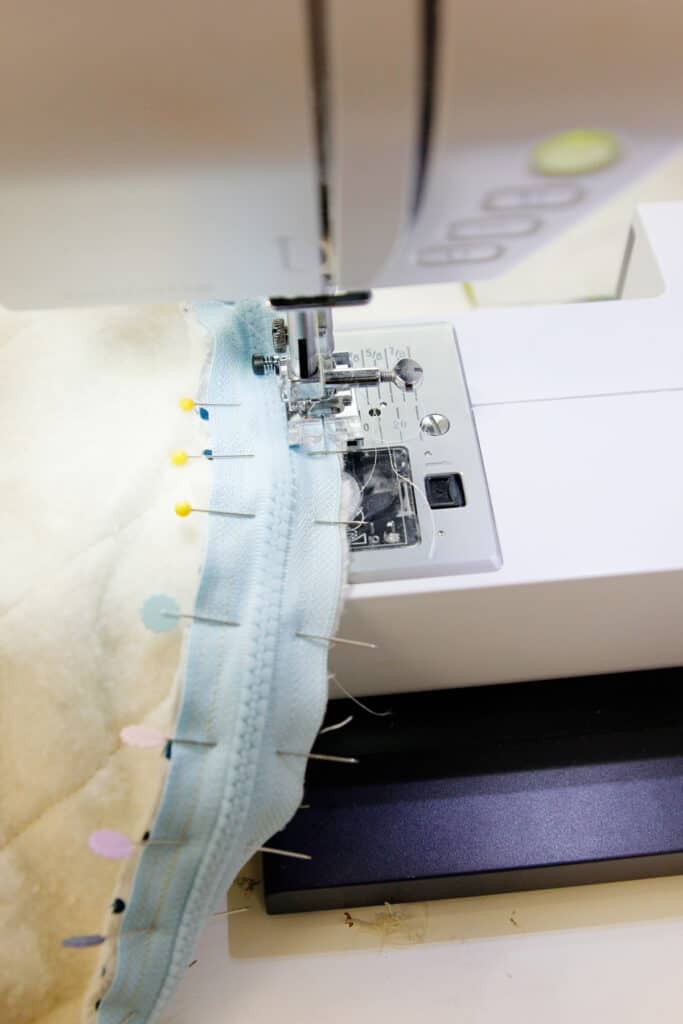
Pin the side piece with zipper around the main paddle piece starting at the bottom side notch and ending at the bottom zipper notch. The end of the zipper should hit right around the top zipper notch. Your zipper should extend past the bottom zipper notch – we’ll trim it later. Use lots of pins and pull your baste stitching as needed to get the two pieces to fit correctly. This can be tricky but don’t be scared to adjust as you go!
When sewing the zipper to the main case piece, align your needle all the way to the left and line up your presser foot with the zipper teeth.
Sew the lining side piece to the lining main pieces starting at the top notch. Pin the side piece 1/2″ beyond the notch but start sewing at the notch. Sew all the way down to the bottom notch. Then sew the other case piece to the other side.
Sew the lining to the main fabric
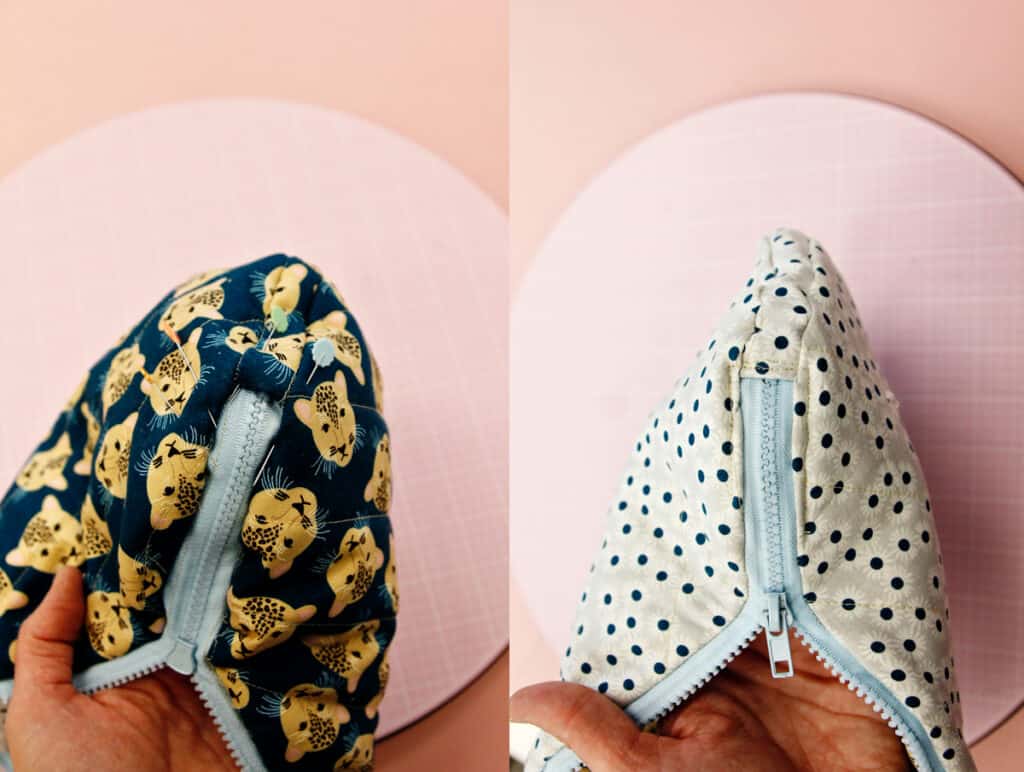
Leave the lining wrong sides out. Turn the main section right side out and slip inside the lining.
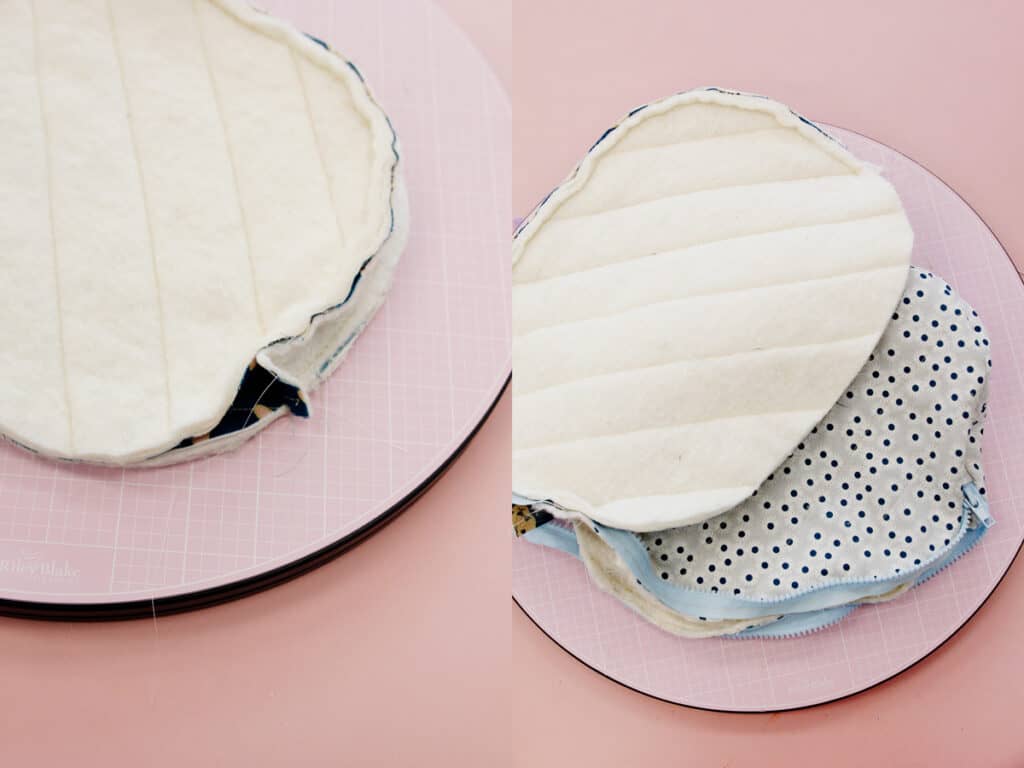
Line up the notches and pin the pieces together along the zipper tape.
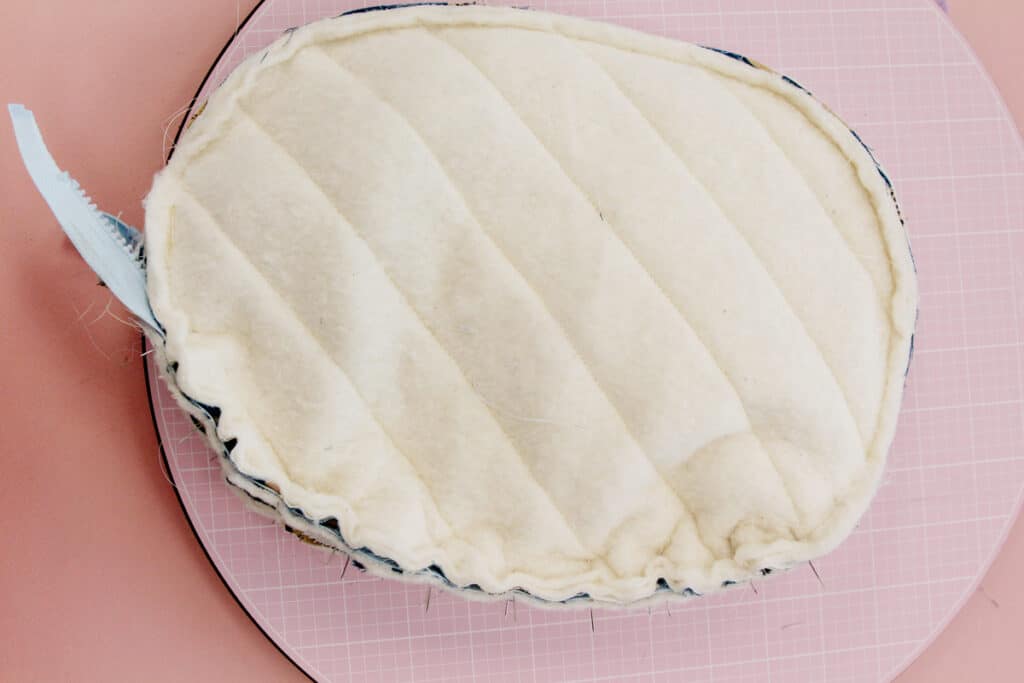
The bottom edges will be open. Leave about 1-2″ open at the top of the zipper tape. Sew to attach the lining to the main zipper tape. Leave the bottom open between the notches.
Turn the case right side out through the opening at the bottom. Then turn the case inside out so the lining in on the outside. At the end of the zipper, fold under the 1/2″ of the side piece that you left unsewn. Align the unsewn portion of the lining and zipper tape and pin well. Then turn it right side out and carefully topstitch around the end of the zipper, 1/8″ from the zipper tape, extending down about 1.5″ on the sides. Sewing from the exterior fabric will help you get a nicer stitch but also close up the lining on the inside. Remove pins.
Line up all the pieces at the bottom of the case. Trim zipper tape if needed.
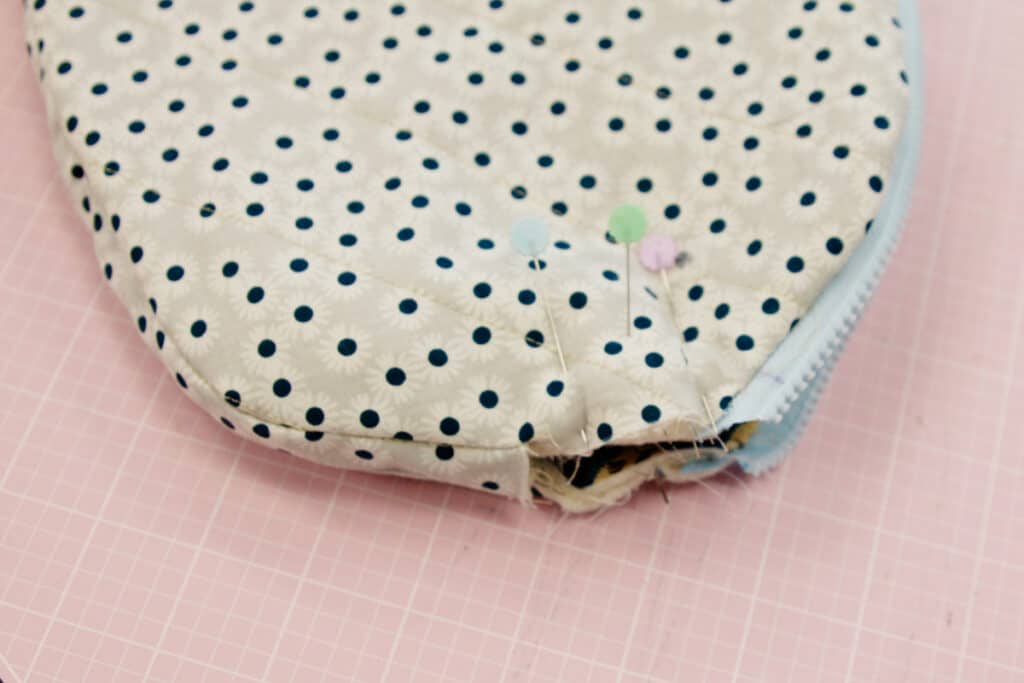
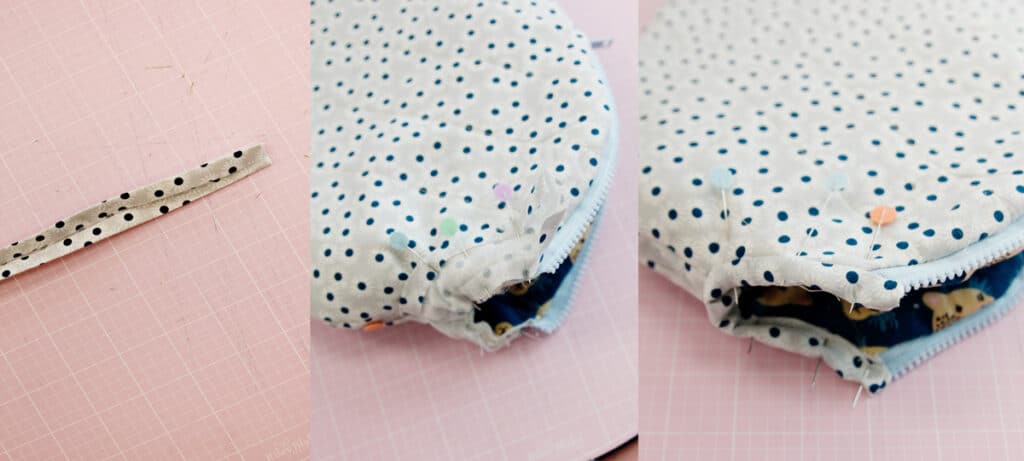
Cut a piece of fabric for the binding measuring 1.75″ by 8″ and fold the long edges in to meet in the center. Press, then pin the binding on the exterior fabric. Sew at 3/8″. Unpin and fold the ends of the binding in and then fold the binding into the inside of the paddle case. Pull and pin. Then topstitch to finish. Backstitch at each end.
Done! Stylish pickleball covers are so fun! Share yours in the See Kate Sew Facebook Community Group!