Jess from Craftiness is not Optional is here today! She’s a two-girl momma with some serious sewing skills! This toddler sweatshirt is adorable and might be my favorite of her projects. I want one of these in my size, do you think I could pull it off? Jess also has sew alongs every month or so and free patterns on her website. She makes me want a baby girl every time I read a post!

………………

Hi there! I’m Jess, and I blog over at Craftiness is not Optional. I want to thank Kate for inviting me to join in on her Pleat Week! I love me a good pleat. Especially when it’s done simply, it can add so much to a project.

So I made this simple little top-perfect for the last hot days of summer-and would be equally cute over a long sleeve top for fall too.

You could add buttons on the front, but I chose to keep mine simple and sweet. :)

Plus the back has buttons-that might be a little button overload! ;)
You’ll need:
1-1.5 yards of fabric (I used 1 yard with some scraps. Of course it depends on the size of your child)
matching thread
5-6 buttons
shirt to use for pattern making

First fold your shirt in half, and lay it out on some paper. (this is actually medical exam paper I got from Kate herself…she’s such a sweetie and sent me some. :) It’s perfect for patterns!)
Then trace around your top, adding seam allowances (I usually use 3/8″). Draw a slight A-line on the side, and add length for your hem on the bottom. Also draw in your back and front necklines.

Cut it out and label. Cut 1 of front on fold, and 2 of back.

When you cut the back pieces though, make sure to use a ruler to add 1.5″ beyond the pattern, like so. This is for the buttons. (ignore the writing on the pattern. lol)

Then fold a piece of fabric in half, and make sure it’s big enough for your pattern. Now we’ll make the pleats.

Iron on the fold to mark the middle, then on one side fold about 1/2 under. Press to make a line, then pin where you want to make the pleats. I pinned a little above where my front neckline would start, and then 5″ down from there.

Then sew along 3/8″ from the edge.

Repeat with the other side.

Then repeat the folding, pressing, pinning, and sewing until you’ve made enough pleats to your liking. I did 2 on each side.

Then fold in half again and cut out the front piece. The front piece will have extra fabric because of the pleats.

Then on the back pieces, finish the middle edges by serging or zig zag stitching.

Fold over 3/4″ and iron.

Then pin the shoulder seams right sides together, sew them together, and finish by serging or zig zag stitching.
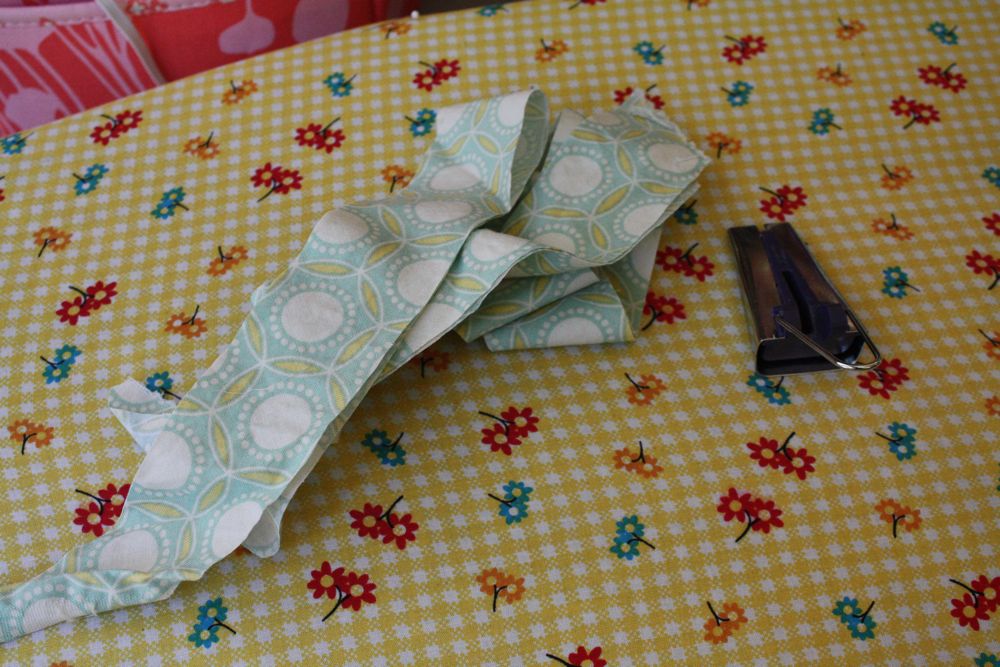
Next cut out some strips of bias tape for the raw edges of your top. Reference this tutorial for more info and a how to!

Then pin the bias tape to the armholes, sandwiching the raw edges inside. Finish the collar using this tutorial.

This is what you should have now!

Next, pin your sides right sides together, and sew.


Then add your buttons and buttonholes.

Hem the bottom by folding and pressing up 1/4″, then another 1/2-3/4″, and sewing that down.
Tada! Easy peasy and cute. Come visit me at Craftiness is not Optional for more girls clothes tutorials! Thanks again for having me, Kate!


……………
Thanks Jess!
You can find more of Jess here:
Blog: Craftiness is not Optional
Facebook: Craftiness is not Optional
Pinterest: Jess on Pinterest
Etsy shop: bits for baby


This is so beautiful, and the fabric is darling!
love the top! what a cute design!
What size bias tape would you recommend for such a project? (I’m new to bias tape making, and looking into buying a tape maker, but having trouble deciding on the size- is 1/4 inch or 1/2 inch better for clothing?)
Thanks!
Jess it the best! I LOVE this top.
So fun! Pleats are amazing. Like the sophisticated version of a ruffle!
I cut my strips 1.75″ wide-hope this helps! Thanks everyone!
I’m having an internal battle about putting everything to the side to make this top. I want it more for me than my kids, though!
This is such a beautiful top! I love how dainty it looks. Your daughter is such a cutie.
How lovely, and what a cutie! Great fabric and tutorial.
I love pleats, great theme! :)
Every project Jess touches turns to gold. Adorable top.
Like the others have said, this is just beautiful! Thanks for sharing!