Today’s guest is one of my classmates from college, Michael Ann from michael ann made! We used to sit next to each other in sewing class. It was so funny to get a comment from her saying “Hey, I think I know you!” Made my day to reconnect with old buddies online. Michael Ann’s has a fun crafty blog full of ombre dip dyes, collections of pretty things,and lots of restyles!

………….
good morning everyone!
i’m michael ann from the blog michael ann made
where i love to share projects and tutorials on sewing, refashioning, and making cute things!

kate and i had sewing classes together in college a couple years ago,
but didn’t find each other in blog land until recently!
she is such a fantastic seamstress and has such a fun blog,
i am just so excited she asked me to share a project with you today :]
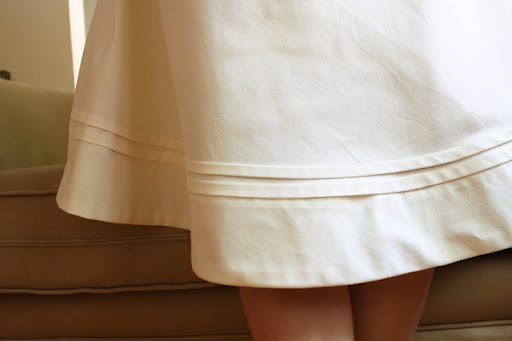
i love a good refashion project,
and thought it would be fun to share a tutorial on using horizontal pleats to shorten or lengthen a skirt.
simple clothes with little intricate details are my favorite,
and a little grouping of tiny knife pleats along the hem of a skirt can add a lot to a plain skirt.
if your skirt is too long, you can add more pleats to use up more fabric and raise the hem.
if your skirt is too short you could cut the skirt a couple inches above the hem
and add a panel of pleated fabric, maybe in a contrasting color to add extra spice!
SUPPLIES –
– skirt that needs an update, any silhouette works (full, a line, straight)
– pins
– ruler
– iron
– sewing machine

i recently finished this cream cotton circle skirt,
but the hem hit my calves at a silly spot and it was just a little too plain.
perfect formula for a refashion!
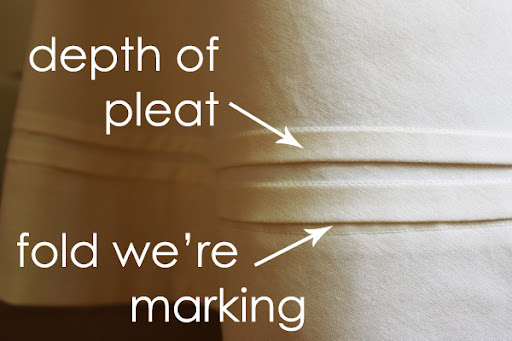
1 – as with all pleating projects, you need to start with a little math.
we are going to fold the fabric along what will become the bottom of each pleat
and will be sewing what will become the depth of each pleat.

i knew i wanted pleats that were a small width, with a little bit of fabric in between each pleat.
i decided on 3/8″ pleats with a 1/4″ space between them.
3/8″ for the pleat + 3/8″ for the space the pleat will cover + 1/4″ space = 1″
so i marked with pins 1″ from where the stitching of my hem was all the way around the skirt.
glad that’s over!
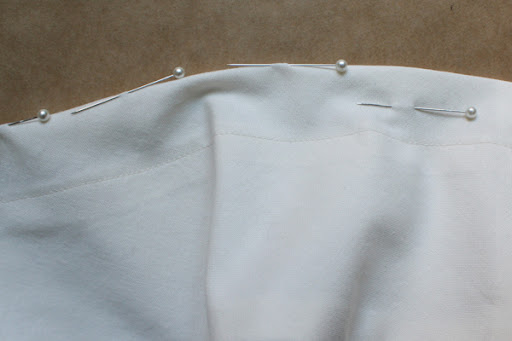
2 – now for ironing!
fold along the line that you just marked with the pins, ironing in a good crease.
then just pin along your fold to keep it together nice and pretty.
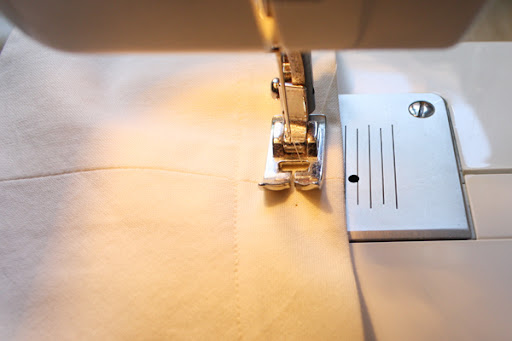
3 – when you have your fold all ironed take it to your sewing machine.
line up the fold with the guide on your machine to be the pleat depth you decided.
so i sewed with my fold hitting the 3/8″ mark on my machine.
now you have a pleat!

4 – iron the pleat you just finished really well so that the pleat folds down towards the hem.
if you want to make more pleats, follow steps 1 – 4 for each pleat,
now measuring from the previous pleat’s stitching line.
for my skirt i only did two rows of pleats to bring the hemline to hit the bottom of my knee,
but you could do as many rows as you like!
i hope this tutorial got your pleating wheels turning,
and you’re more than welcome to stop by and say hi at my site anytime you have questions :]

………………
Thanks Michael Ann!
You can find more of Michael Ann here:
etsy – http://http://www.etsy.com/shop/michaelannmade
twitter – http://twitter.com/#!/michael_anns
pinterest – http://pinterest.com/michaelannn/





oh my! How delicate. I need to improve my sewing skills. I love this little how to :)
I’m SO going to do this one. I LOVE this skirt. So simple and pretty!