• Skip to main content
  • Skip to primary sidebar
  • Skip to footer
  • Blog
  • About
  • Contact
  • FAQ
  • Sponsor

see kate sew

sewing, crafts, tutorials, DIY

  • Pattern Shop
  • Pattern of the Month
  • Tutorials
  • Free Patterns
  • Sew4Good
  • YouTube
Home
  • Pattern Shop
  • Pattern of the Month
  • Tutorials
  • Free Patterns
  • Sew4Good
  • YouTube

04.28

Sew Ready: Machine Basics Craftsy class review and a DIY bow shirt!

Welcome to See Kate Sew! If you're new here, sign up for my email newsletter for access to free patterns, tutorials and all the latest sewing news!

This post is sponsored by Craftsy. Craftsy offers online sewing classes that you will love, check them out here.

see kate sew // DIY BOW SHIRT

I’m back today reviewing another FREE Craftsy Course titled “Sew Ready: Machine Basics“. This class is a super great resource to get you started sewing (if you are a very beginner), or to have on hand for routine maintenance and troubleshooting (if you are more advanced). I’m also sharing a really fast bow project along with this review. The bow refashion project is something that anyone can tackle, even if it is the first project you’ve ever sewn! So the idea is…take out your machine, take the Craftsy Sew Ready: Machine Basics class and then tackle this bow project!

Sew Ready: Machine Basics


Even if you’ve sewn 1 million things, Sew Ready: Machine Basics is helpful because it covers so many topics related to the sewing machine. They are all basic things, but things even people who sew every day (like me!) might not be doing regularly (like …uh cleaning and oiling my machine, whoops!)

craftsy machine basics class review

Here’s a little run-down of what you’ll learn in this class:

–Getting started with your machine (inserting bobbins, etc). Since I have sewn on lots and lots of machines I didn’t pay much attention to this part of the video, but I definitely recommend this to a new sewer! Instead of staring at your new machine in it’s box, this section will give you the confidence to plug it in and start sewing.

–Needles, Feet and Stitches – This section has some great information, I learned a few new things! A basic overview of stitches and feet always reminds me of things I had forgotten and so many new feet I need to buy! The needle review is great because as you get into a wider variety of fabrics, you need to know about more needles.

–Troubleshooting – The troubleshooting section covers most of the problems that you might run into while sewing. You know the pull-your-hair-out situations like when the machine isn’t moving, thread is breaking, etc. Instead of panicking, just turn on the video. Once you are enrolled you can access it forever (like I said, it’s still free). Then you’ll have it handy when the machine beeps at you.

–Machine Maintenance – Finally this course takes the fear out of machine maintenance. Amy just makes this so easy, walking you through all the steps with tips and supplies.

A few other great things in the class are:
-Tips on keeping your stitches straight.
-Printable handouts plus printable swatch guide
-Advice on how often to clean and tune-up your machine.
-So many great machine feet that I need to add to my list! I thought I had them all, nope!

Click here to sign up for Sew Ready! Machine Basics by Amy Alan!

Now for a little project so you can use your skills! 
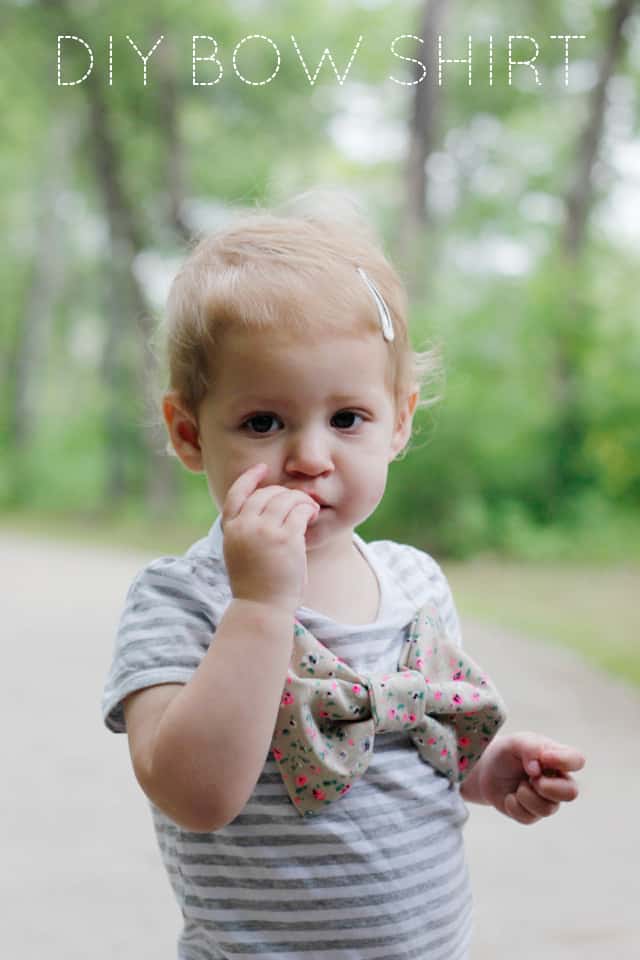
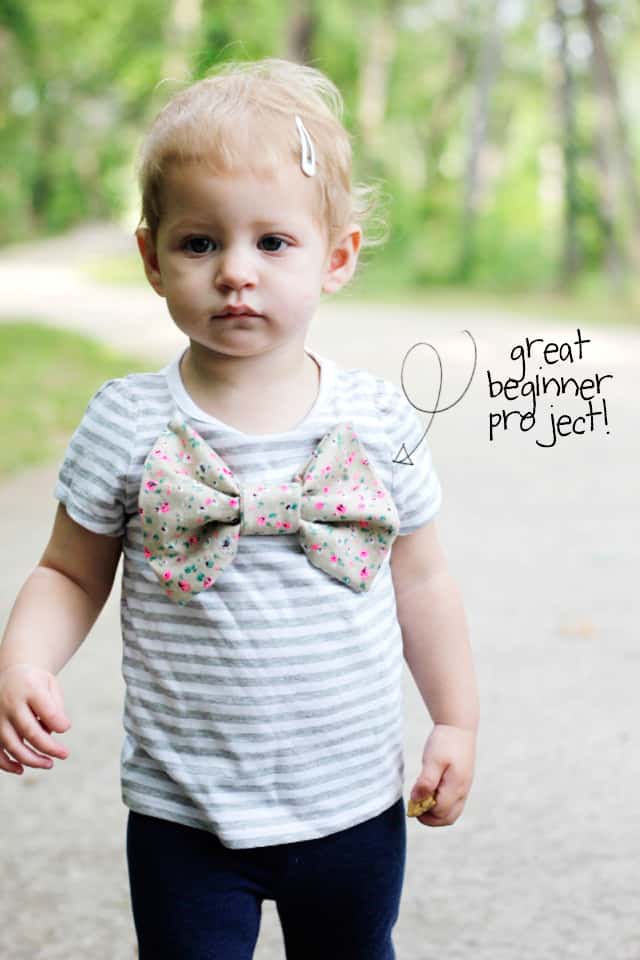
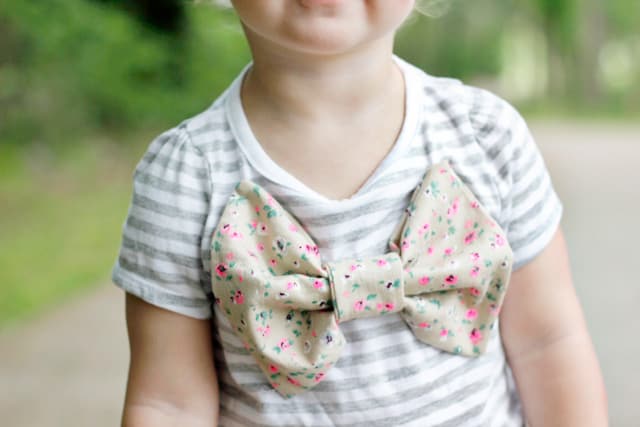
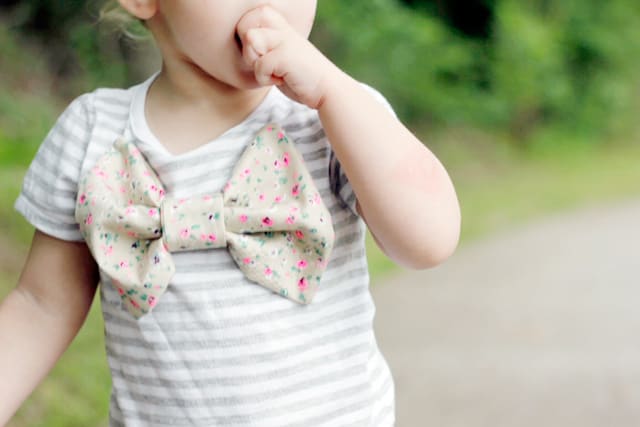
I love bows, as you probably know. This bow project is a girls top refashion. It involves straight stitches and a little handsewing.Of course, beginner projects are fun for everyone! I bought a simple blank shirt at Target and used scrap material.

bow shirt refashion


DIY BOW SHIRT TUTORIAL

Materials:
-1 blank top (or one with a stain on the front even!)
-scrap fabric
-printable pattern pieces

DIY BOW SHIRT // seekatesew.com


SEE KATE SEW // HOW TO SEW A BOW

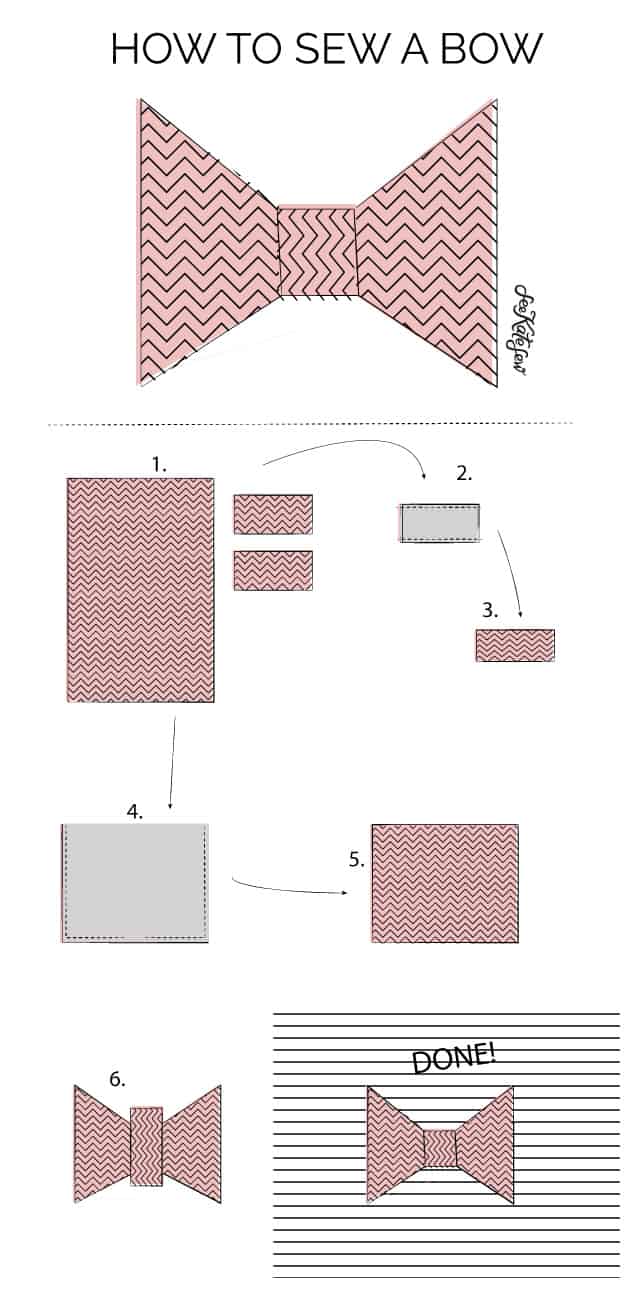
1. Cut out two middle pieces and 1 main bow piece. Use printable pattern pieces if desired.

2. Sew bow middle pieces together along long edges with right sides together.

3. Turn right sides out and press.

4. Fold main bow piece onto itself matching up side seams and bottom edges. Sew all the way around leaving a 1.5″ opening at the middle bottom edge.

5. Turn and press.

6. Wrap bow middle around center of bow piece. Cinch bow and match bow middle ends at the back. Hand stitch these ends together then sew your bow onto your top!

DIY BOW SHIRT // seekatesew.com

Fabric used in this post//
Neon Floral Stretch Twill c/o Miss Matatabi


Don’t forget to sign up for Craftsy’s Free Sew Ready! Machine Basics class here!


4 Comments | tutorial

Exclusive Free PatternRuffled Apron

Sign up for my email newsletter and receive my ruffled apron pattern totally FREE!

We take your privacy seriously. See our privacy policy here. Unsubscribe at any time.

You may also like these posts...

skirt pattern for elf on the shelf – no sewGIRLY NURSERY | See Kate SewDIY Floral Monogram + Levana Baby Monitor ReviewFAUX FUR CROPPED JACKET PATTERN (free!)faux fur cropped jacket for GIRLS! (free pattern!)pleat trend:: heat set pleats

Reader Interactions

4 Comments

  1. Anne

    04/29 at 10:27 AM

    Soooo cute!! I’ve got a Craft Gossip post that links to your tutorial scheduled for later this morning:
    http://sewing.craftgossip.com/tutorial-little-girls-big-bow-t-shirt/2014/04/29/
    –Anne

  2. Chelsea

    05/21 at 11:13 PM

    This is so cute! I am a total beginner, meaning things that should be so simple, I still have questions on :)
    Where along the bow do you sew to the shirt? I doesn’t seem like its sewn all the way around..is it just in the middle part of the bow?

    Thanks!

    • kate

      05/23 at 10:19 AM

      I sewed it on in the back of the middle and then tacked it with a few stitches on the ends of the bow :)

Primary Sidebar

  • Facebook
  • Twitter
  • Instagram
  • Pinterest
  • Email

Exclusive Free PatternRuffled Apron

Sign up for my email newsletter and receive my ruffled apron pattern totally FREE!

We take your privacy seriously. See our privacy policy here. You can unsubscribe at any time.

Don’t miss these popular posts!

easy baby dress pattern for the summertime

easy baby dress pattern for the summertime

modern ombre + b/w triangle quilt tutorial + pattern

modern ombre + b/w triangle quilt tutorial + pattern

Fabric

Quilted Cosmetic Case Kiss Me KateKiss Me, Kate FabricOne Hour Granny Square Quilt Tutorial | See Kate SewModern Granny Square Quilt Whole Cloth

Pattern Hacks

Easy Baby Summer Dressthe EMMA pattern | See Kate SewThe EMMA Dress

Footer

Hello friends!

My name is Kate, a twenty something fashion lover and mother of two. When I’m not chasing kids you can find me at my sewing table or daydreaming up new designs. You can read more about me here. Thank you for visiting!

8a918f8da8e0e69102dc0f33a718de85a99c31a57283e0e3e2

FOLLOW ME HERE

  • Facebook
  • Twitter
  • Instagram
  • Pinterest
  • Email

Copyright © 2021 See Kate Sew  •  All Rights Reserved  •  Privacy Policy  •  Site Design by Emily White Designs