• Skip to main content
  • Skip to primary sidebar
  • Skip to footer
  • Blog
  • About
  • Contact
  • FAQ
  • Sponsor

see kate sew

sewing, crafts, tutorials, DIY

  • Patterns
    • Free Patterns
    • Pattern of the Month
  • Tutorials
    • Accessories
    • Bags and Pouches
    • Clothing
    • Costumes
    • Crafts
    • Cricut Projects
    • Holiday
    • Household
    • Kids
    • Maternity
    • Quilting
  • Topics
    • Baby
    • Boy
    • Christmas
    • dog
    • Dolls
    • Easter
    • Girl
    • Halloween
    • Lookbook
    • Party
    • pet
    • Printables
    • Training
    • women
  • No Sew
  • Sewing 101
  • Sew4Good
  • Pet
  • Sewing Room
    • DreamBox
  • Reviews
Home
  • Patterns
    • Free Patterns
    • Pattern of the Month
  • Tutorials
    • Accessories
    • Bags and Pouches
    • Clothing
    • Costumes
    • Crafts
    • Cricut Projects
    • Holiday
    • Household
    • Kids
    • Maternity
    • Quilting
  • Topics
    • Baby
    • Boy
    • Christmas
    • dog
    • Dolls
    • Easter
    • Girl
    • Halloween
    • Lookbook
    • Party
    • pet
    • Printables
    • Training
    • women
  • No Sew
  • Sewing 101
  • Sew4Good
  • Pet
  • Sewing Room
    • DreamBox
  • Reviews

05.15

DIY Patchwork Potholder

Welcome to See Kate Sew! If you’re new here, sign up for my email newsletter for access to free patterns, tutorials and all the latest sewing news! Tour my sewing room HERE!

Written by Michael Ann of Michael Ann Made.
Patchwork Potholder project // seekatesew.com #quilting #sewing
Patchwork Potholder project // seekatesew.com #quilting #sewing Patchwork Potholder project // seekatesew.com #quilting #sewing  Patchwork Potholder project // seekatesew.com #quilting #sewing
Hey crafty friends, Michael Ann here, from Michael Ann Made, with a cheery little kitchen craft.A handmade potholder may seem like the cheesiest beginning sewing project ever, but I love giving darling, extra special potholder as gifts. My mother in law still uses the potholders I gave her a couple Christmases ago! With bright cheerful fabrics it’s so easy to make a little potholder that looks more Anthropologie and less old Aunt Betsy…The extra bonus is that potholders are basically teenie tiny quilts. If you’ve ever wanted to make a quilt but have been too intimidated, make a couple potholders to practice. So let’s get stitching!

Patchwork Potholder project // seekatesew.com #quilting #sewing

DIY Patchwork Potholder

Supplies You’ll Need –

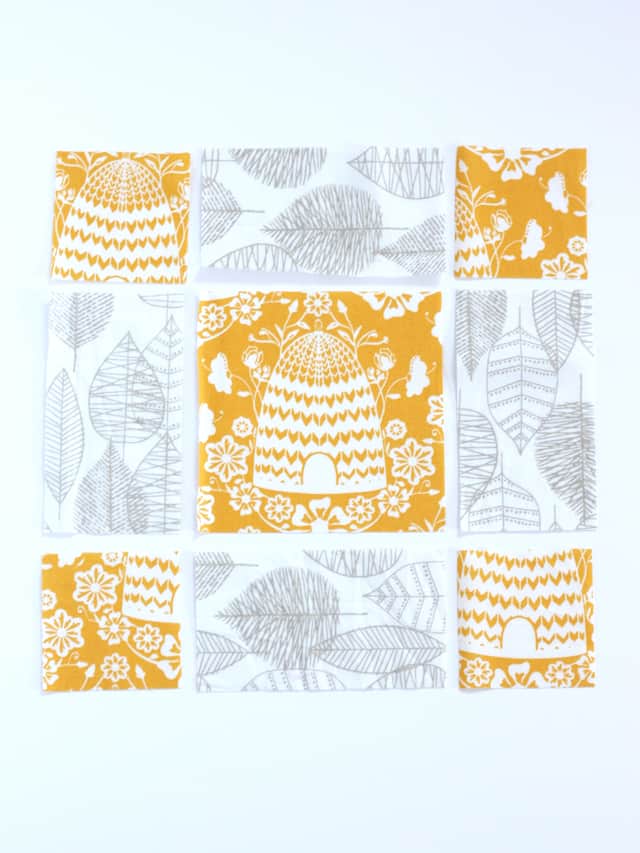
1 – 4.5″x4.5″ center square
4 – 2.5″x2.5″ corner squares
4 – 2.5″x4.5″ contrast rectangles

1 – 9″x9″ background square

3 – 9″x9″ batting squares
40″ strip of 2″ binding

Patchwork Potholder project // seekatesew.com #quilting #sewing
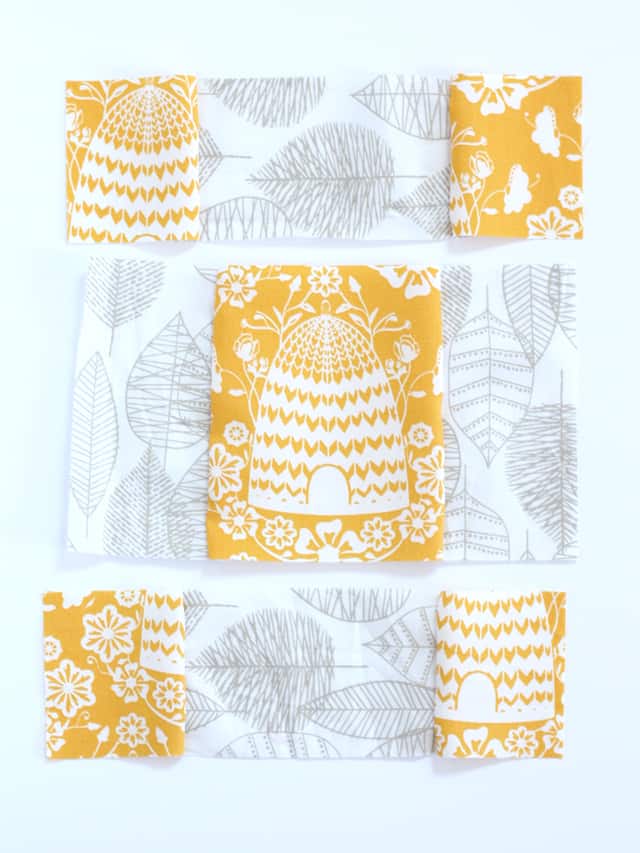
Layout the squares for the front patchwork piece as pictured. Sew together each row using 1/4″ seam allowance. I like to press my seams open.
Patchwork Potholder project // seekatesew.com #quilting #sewing
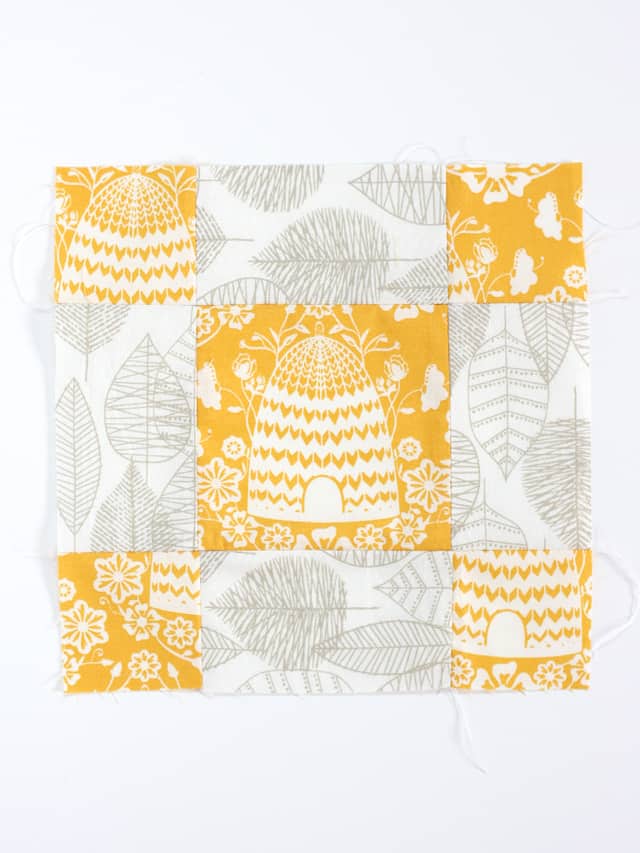
Sew your three rows together and press the seams open. And look! You’ve just made a quilt block!
Patchwork Potholder project // seekatesew.com #quilting #sewing
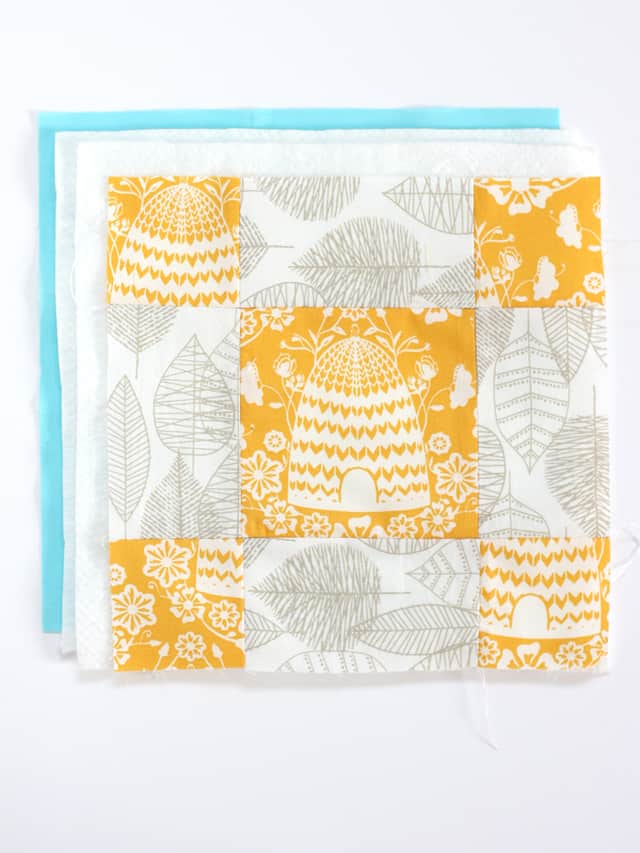
Now to make your “quilt sandwhich”. Place your background fabric face down, and place your batting on top. Center your patchwork top on top, right side facing up.
Patchwork Potholder project // seekatesew.com #quilting #sewingPatchwork Potholder
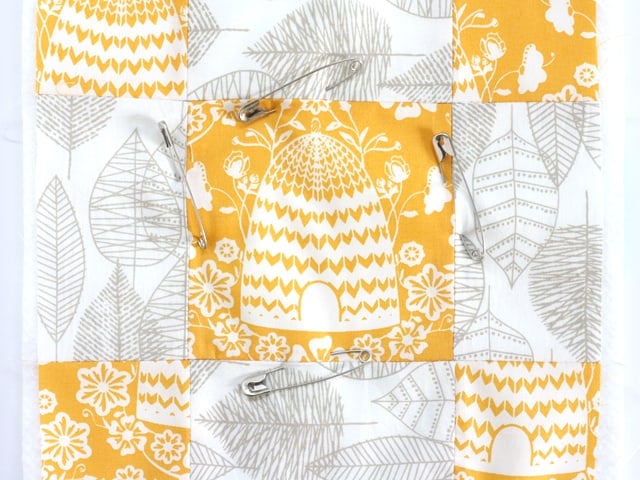
Baste your layers together with a couple large safety pins to keep it all together while you sew.
Patchwork Potholder project // seekatesew.com #quilting #sewing
Now for the quilting! Quilts have stitching on top of them to keep the layers of top, batting, and backing together while you use it. A project of this size is very easy to quilt on your own machine with no special equipment. It helps to have a sharp needle, and to use a bit longer stitch length.
Decide on a pattern and stitch it on top, through all layers. I echoed the lines of the top patchwork pattern, a 1/4″ away from the seam lines.When you’re done, trim away the excess batting and backing, using a rotary cutter and ruler to make sure it’s all nice and straight.
Patchwork Potholder project // seekatesew.com #quilting #sewing
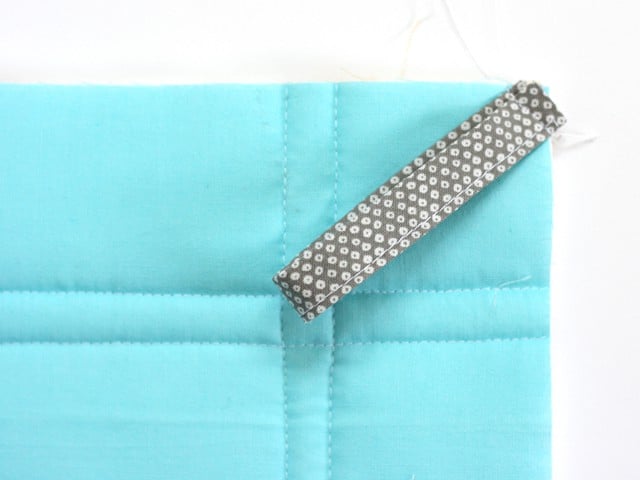
Make a little loop from a couple inches of your binding by stitching it together on the long end, folding it, and then tacking it to the top corner.
Patchwork Potholder project // seekatesew.com #quilting #sewing
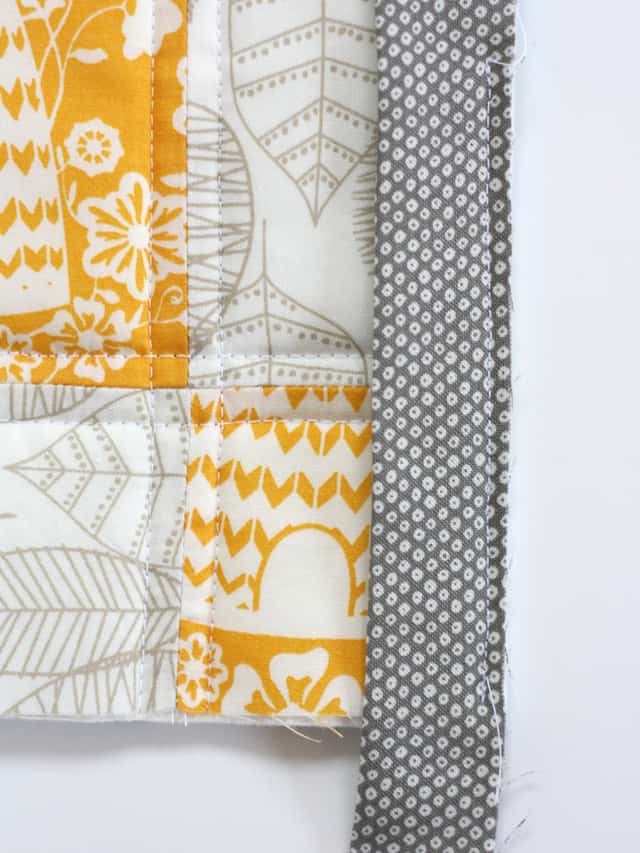
Begin binding your potholder by stitching the unfolded edge of your double fold binding to the raw edge of the top of the potholder. Stitch a little less than a 1/4″ away, and leave a couple inches of binding free at the top of your stitching.
Patchwork Potholder project // seekatesew.com #quilting #sewing
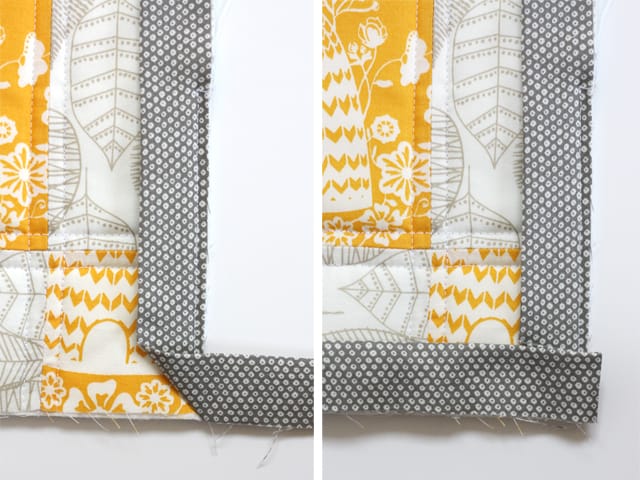
To make fancy mitered corners, stop sewing and backstitch when you hit the end of a side. Fold the binding away from the corner, and then back towards it, creating two extra triangles of fabric at the corner. When you flip this all over, it will make a neatly folded corner! Now just continue stitching from the end you just folded.
Patchwork Potholder project // seekatesew.com #quilting #sewing
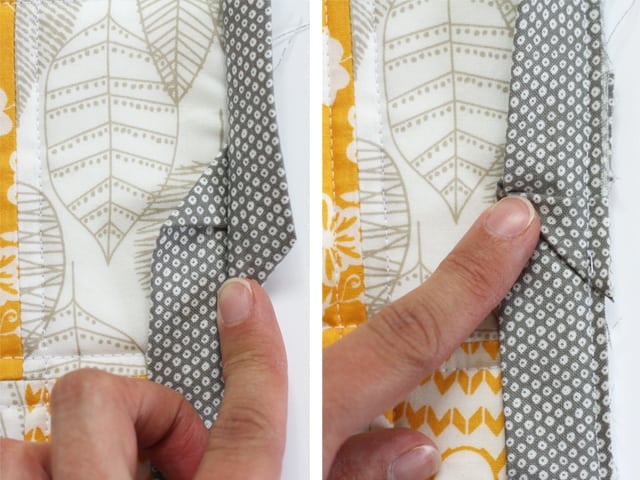
Right before you hit the place you began stitching, create a triangle fold with the extra fabric from the beginning. Then create a triangle fold with the end strip of binding. Stitch both of these down and the ends of your binding will be neatly folded under.
Patchwork Potholder
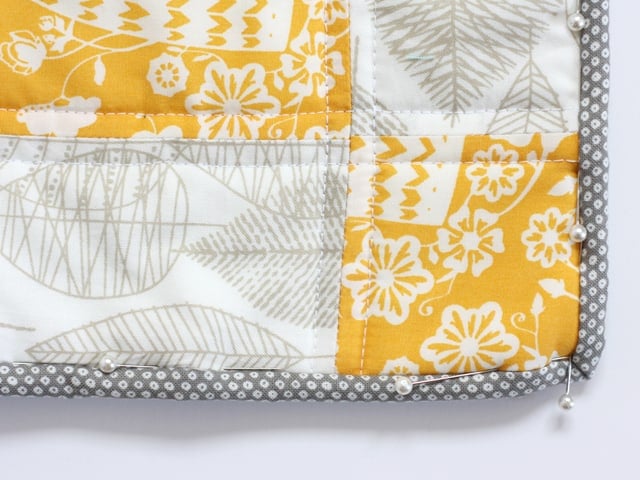
To finish the binding we will fold it around to the back and then stitch it in the ditch from the top. To do this, first iron the binding over to the back of the potholder. Make sure that it hangs over the original stitching line. You can make sure that it does by placing pins from the top side along the stitching line.
Patchwork Potholder
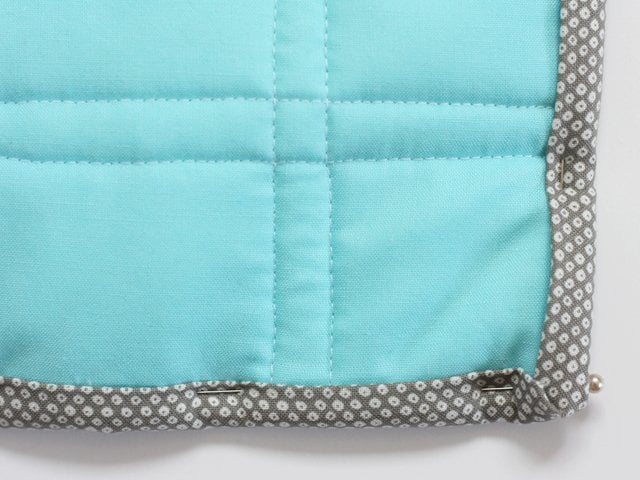
When you flip the potholder over, you should be able to see the pins poking through the binding.
Patchwork Potholder
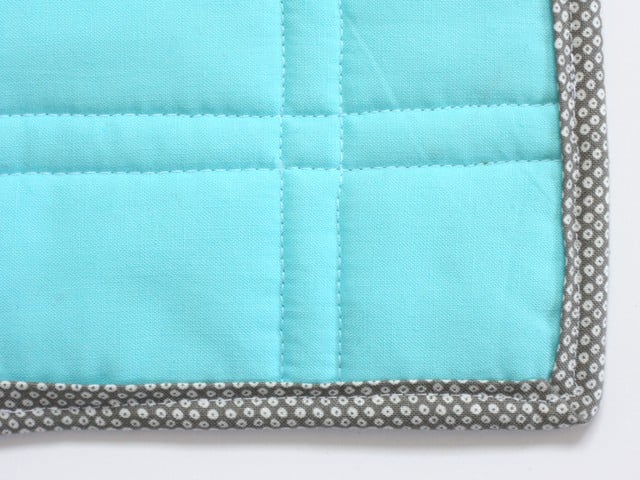
Now we will stitch it all down, from the front, by placing the stitching line right inside the stitching line of the top and binding. When you reach a corner, keep your needle down and turn the potholder around to continue on the other side. Once you hit the beginning, backstitch and you’re done!
Patchwork Potholder

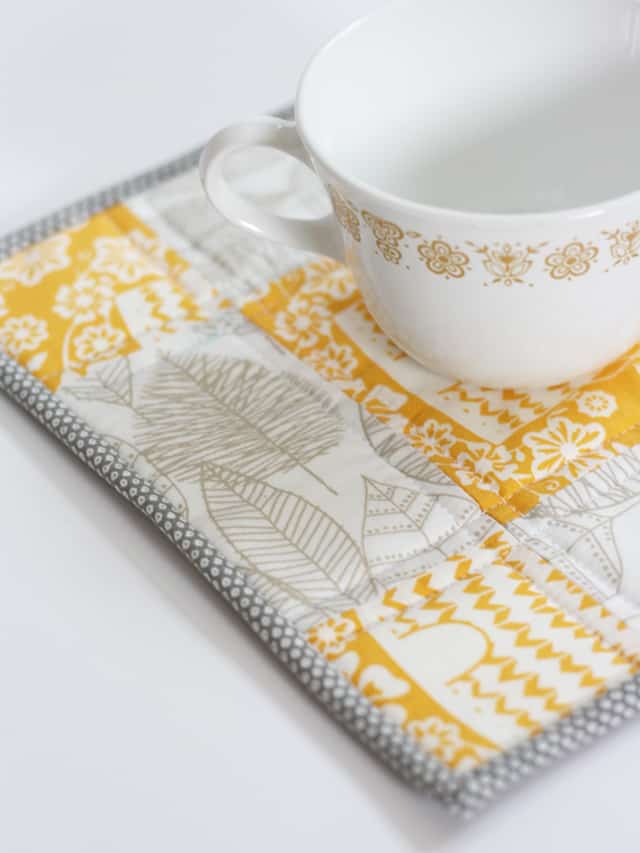
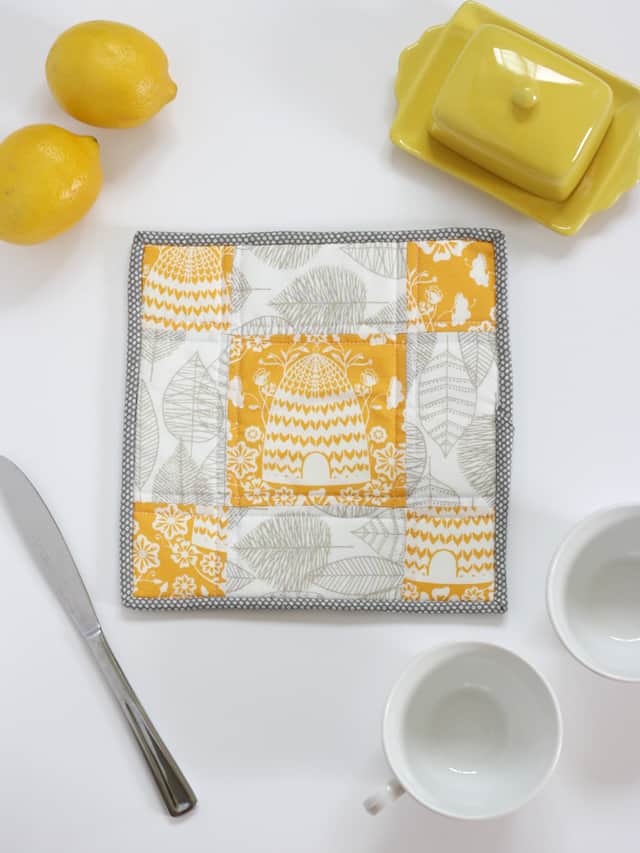
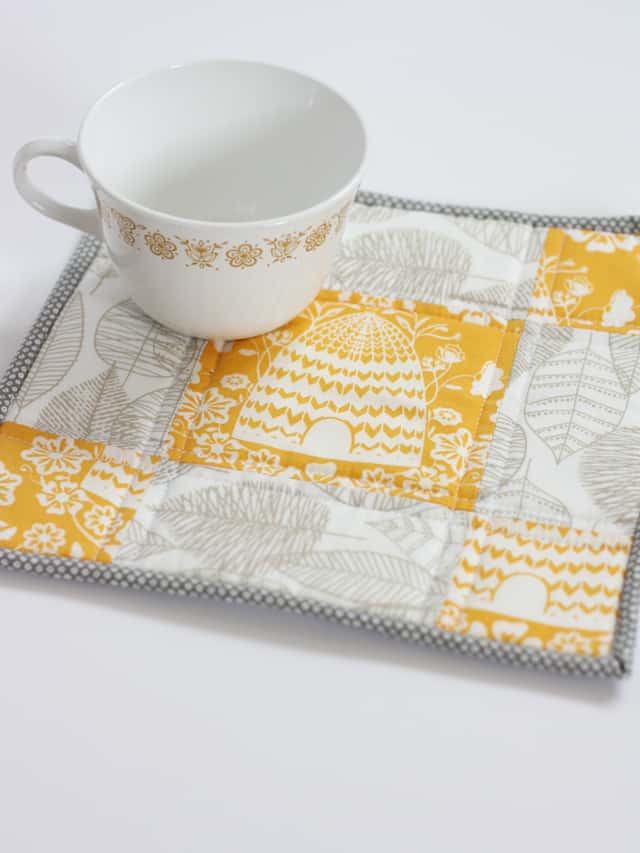
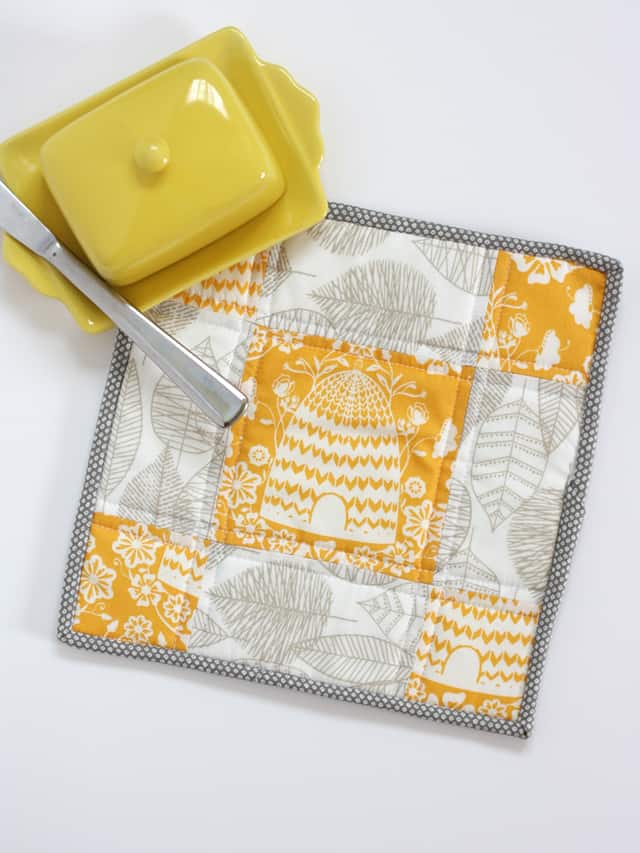
And there you have it, you’ve just made the tiniest quilt ever! And you can use it to serve delicious baked treats straight from the oven, even better, yum! Good luck with your stitching and hope you have fun!

2 Comments | Household, Quilting

Exclusive Free PatternRuffled Apron

Sign up for my email newsletter and receive my ruffled apron pattern totally FREE!

We take your privacy seriously. See our privacy policy here. Unsubscribe at any time.

You may also like these posts...

Jelly Roll Quilt PatternJelly Roll Strip Quilt PatternDoll Sleeping Bag Tutorial | See Kate SewEasy Doll Sleeping Bag Tutorial – Easy Sewing PatternMountain Town Quilt PatternMountain Town and More Mountain Quilt Patternsfree quilt block pattern // Makers Gonna Make Quilt Block

Reader Interactions

2 Comments

  1. Evolution Weight Loss Pills

    05/16 at 3:39 AM

    What’s up to all, how is everything, I think every
    one is getting more from this web site, and your views are fastidious in favor
    of new viewers.

  2. Jess

    05/21 at 10:28 AM

    love the fabric! Fun project, I’m going to have to add this to my summer list. Thank you for the inspiration.

Primary Sidebar

  • Facebook
  • Twitter
  • Instagram
  • Pinterest
  • Email

Exclusive Free PatternRuffled Apron

Sign up for my email newsletter and receive my ruffled apron pattern totally FREE!

We take your privacy seriously. See our privacy policy here. You can unsubscribe at any time.

Don’t miss these popular posts!

easy baby dress pattern for the summertime

easy baby dress pattern for the summertime

modern ombre + b/w triangle quilt tutorial + pattern

modern ombre + b/w triangle quilt tutorial + pattern

Fabric

Quilted Cosmetic Case Kiss Me KateKiss Me, Kate FabricOne Hour Granny Square Quilt Tutorial | See Kate SewModern Granny Square Quilt Whole Cloth

Pattern Hacks

Easy Baby Summer Dressthe EMMA pattern | See Kate SewThe EMMA Dress

Footer

Hello friends!

My name is Kate, a twenty something fashion lover and mother of two. When I’m not chasing kids you can find me at my sewing table or daydreaming up new designs. You can read more about me here. Thank you for visiting!

8a918f8da8e0e69102dc0f33a718de85a99c31a57283e0e3e2

FOLLOW ME HERE

  • Facebook
  • Twitter
  • Instagram
  • Pinterest
  • Email
  • Blog
  • About
  • Contact
  • FAQ
  • Sponsor

Copyright © 2023 See Kate Sew  •  All Rights Reserved  •  Privacy Policy  •  Site Design by Emily White Designs