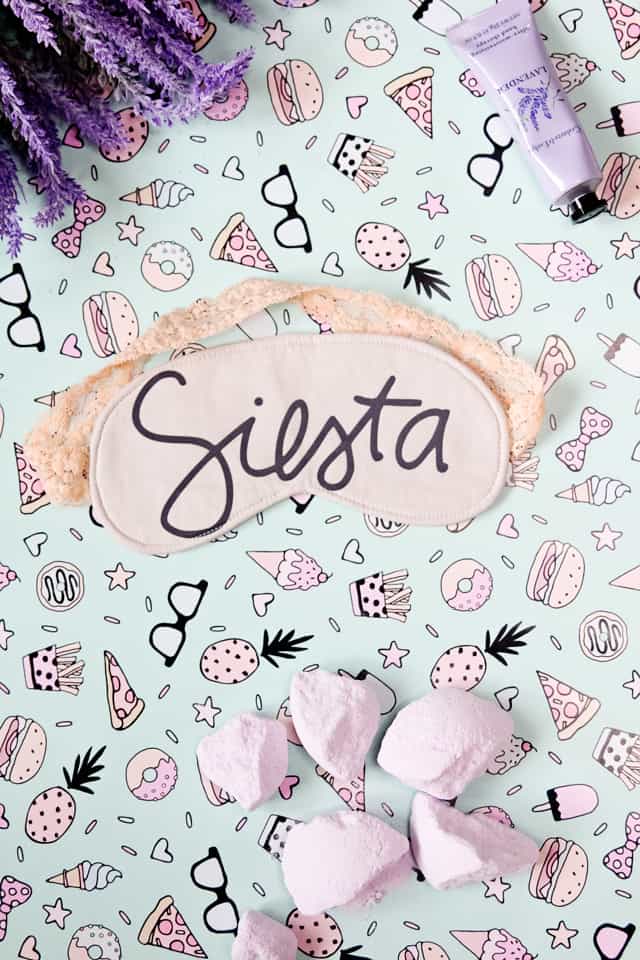
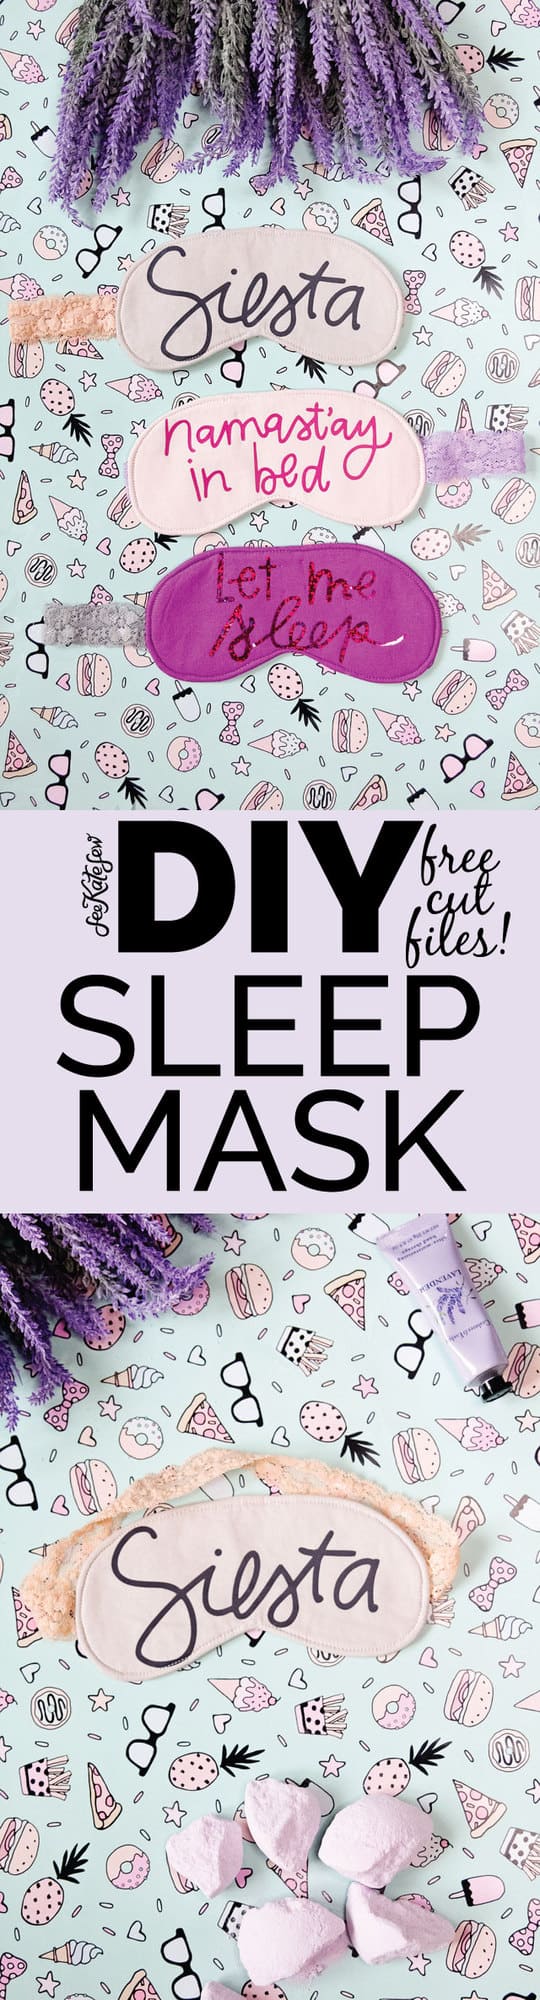
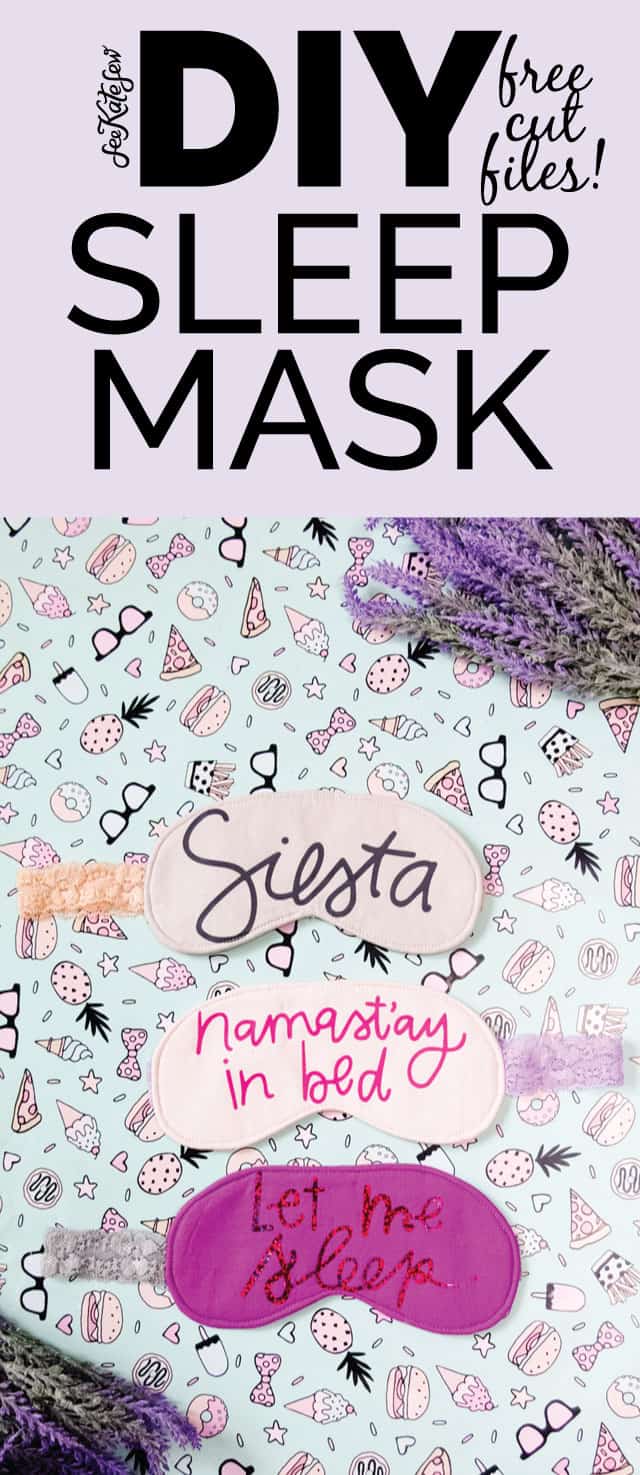
SLEEP, one thing we all want and can’t seem to get enough of! I have been having a hard time sleeping lately so little things like sleep masks (and lavender baths!) are helping! This little DIY sleep mask pattern is super fast, super fun and has a few different SVG file options. There is no guarantee it will get you any more sleep, but a girl can dream(<—see what I did there? ha!) !

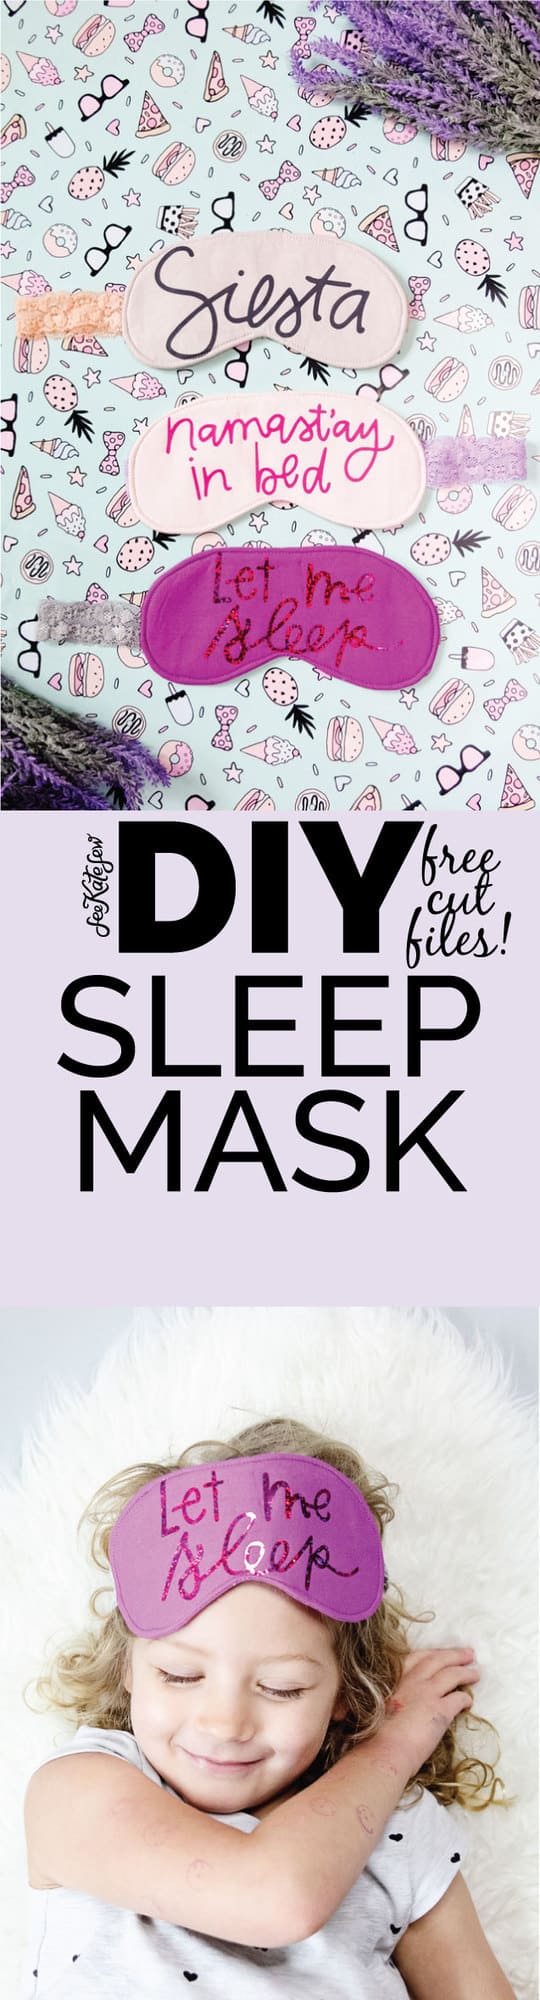
You can easily create a bunch of these DIY Sleep Masks for sleepover party favors, create a spa themed gift basket for Christmas or neighbor gifts, or just make one for yourself!
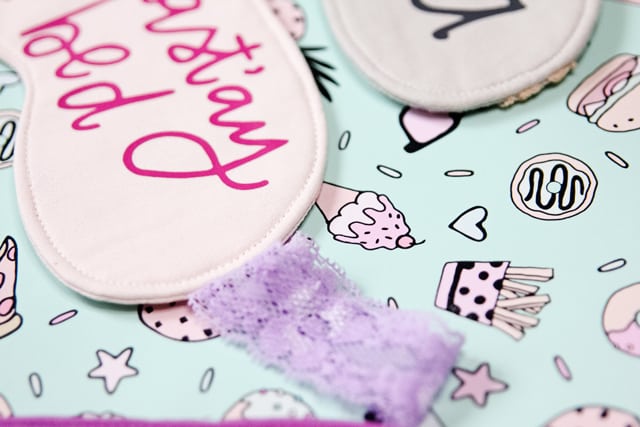
These sleep masks have a soft layer of felt and soft lace elastic, so pretty! The Cricut Maker draws the seam allowances on with a washable fabric pen, so you have a tracing line for your stitching!
This DIY Sleep Mask has a soft layer of felt and soft lace elastic, so pretty! The 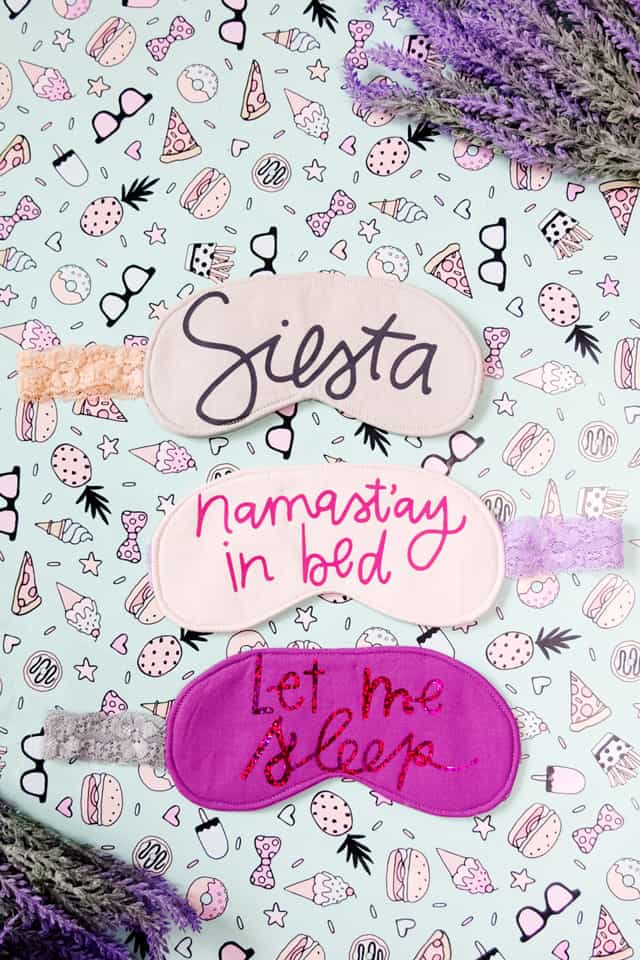
This is one of my favorite features of the Maker, the ability to change any cut line to a draw line! I’ll show you how in this tutorial!
This is a MAKER MADE project. You can totally make it without the Cricut Maker, but the Maker makes it easier and more precise. Here’s what I used the Maker for in this project:
This is a MAKER MADE project. You can totally make it without the Cricut Maker, but the Maker makes it easier and more precise. Here’s what I used the Maker for in this project:
- Cutting all fabric layers, including the felt and interfacing.
- Drawing seam allowance lines and elastic placement lines with the water soluble fabric marking pen
- Cutting the iron-on vinyl
- Precise cuts

All the rest was sewing! 
 Drawing seam allowances onto your fabric takes it from a simple project to an even simpler one! Stitching lines are also great for teaching kids how to sew! And as a more advanced seamstress, I really love the stitching lines, it’s like a fun game to follow them! These make the perfect gift topper, too! Just wrap them around your gift! I recommend wrapping up your PJs with one of these on top this holiday season! Add some lavender sprigs, bath rocks or lavender lotion for a sleepy spa theme!
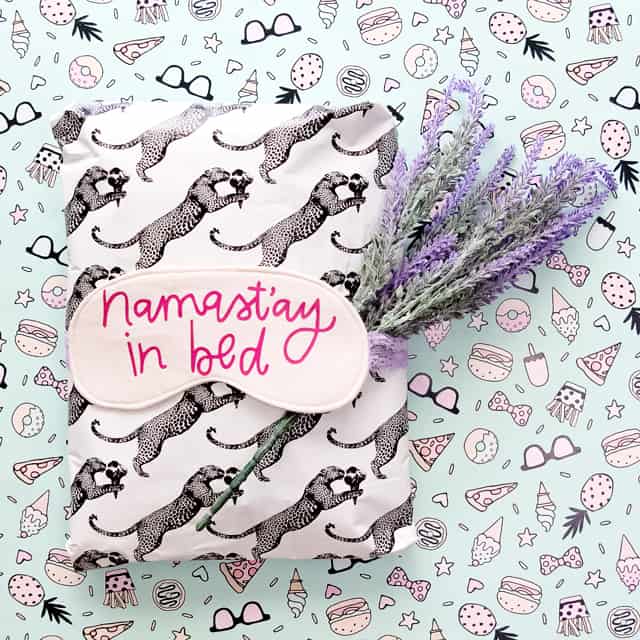
Sleep Mask Pattern Supplies
- Cricut Maker with fine point blade and rotary blade (both come in the box!)
- Cricut EasyPress (optional but recommended!)
- Cotton fabric
- Lightweight fusible interfacing (affiliate links)
- soft felt or batting
- Cricut Fabric Marking Pen
- Iron-on Vinyl (I’m using neon pink, holographic pink and charcoal grey)
- Colorful lace elastic
- SVG files or PDF files, download below
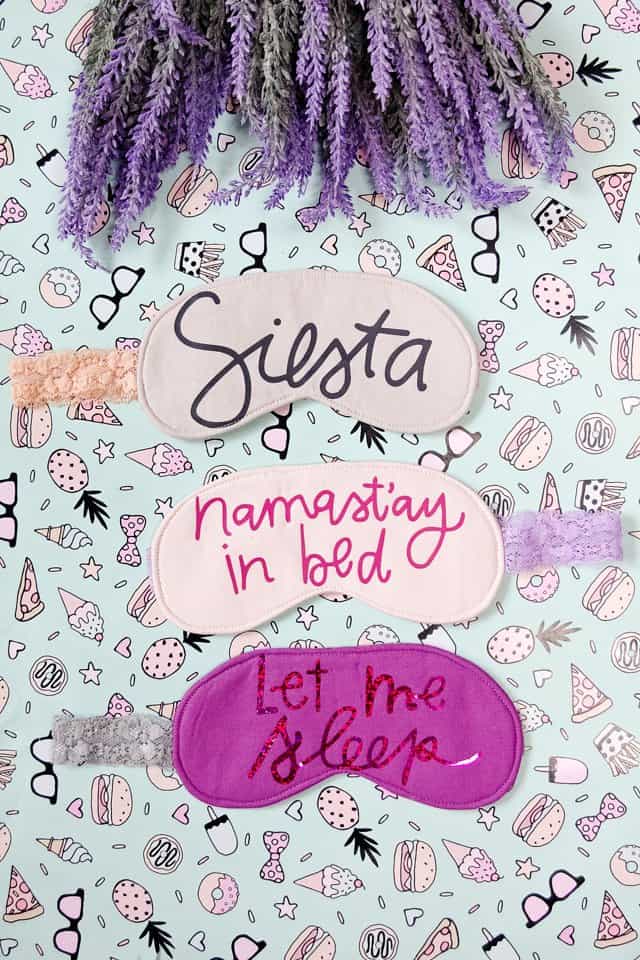
 3 designs to choose from// -“Namast’ay in Bed” -“Siesta” -“Let me Sleep”
 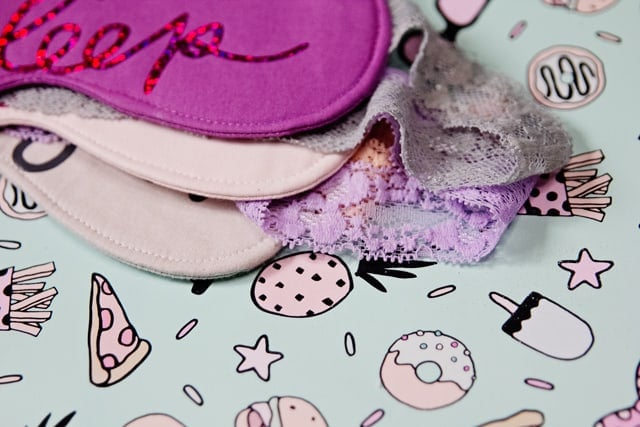 Cut it out// Upload the Sleep Mask main file to Design Space. Design Space is a free interface that connects wirelessly to your Cricut machine! The Sleep mask file pulls up like this: To the right there are 2 red arrows. The first points to the color of the shape and the second points to the function of the shape. Change the first ones to white so you can see what you’re doing.
 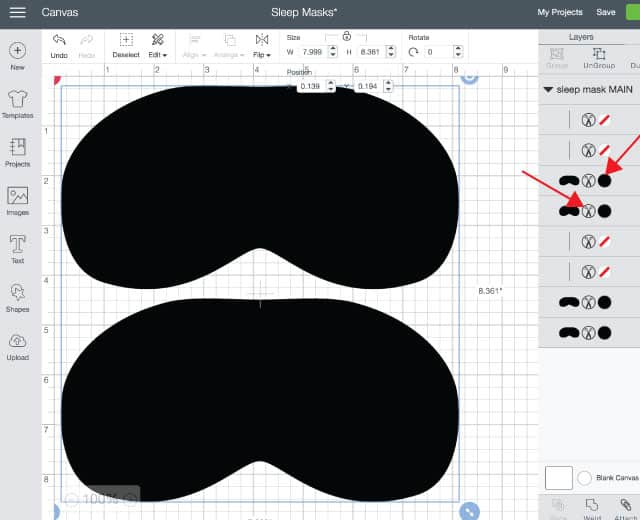 Change the second function to WRITE and then choose the BLUE WASHABLE FABRIC MARKER. Click on the elastic placement lines on either side of the mask and change those to WRITE also. When they both look like the second one in the photo above you are ready to hit the GREEN button at the top right. This button will walk you through the cutting process. Cut 2 layers of cotton with the sleep mask MAIN.svg file. When cutting the cotton layers, load your washable fabric pen and place your fabric RIGHT SIDE DOWN. This will make sure the fabric pen goes on the back of the fabric. (I did mine on the right side and it’s fine, it’s just easier to see the lines if they are on the backside where you sew!)
 Cut 1 layer of batting and 1 layer of lightweight fusible interfacing using the same file. You can skip the writing part by taking the pen out of the machine.
 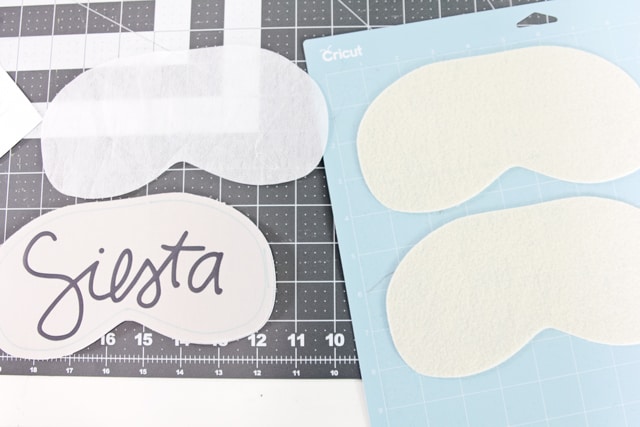 Once you’ve cut all the fabric layer, leave the sleep mask file in Design Space. Upload the SVG file that you are using.
 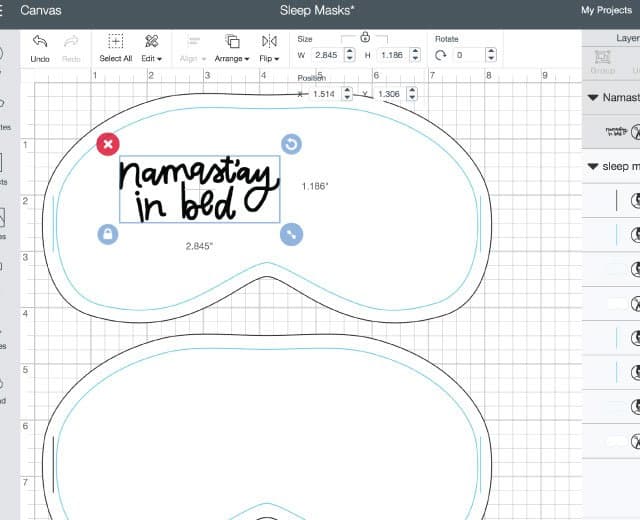 Use the mask lines to guide your size and placement of the words. Delete the mask layer so all you have left is the words.
 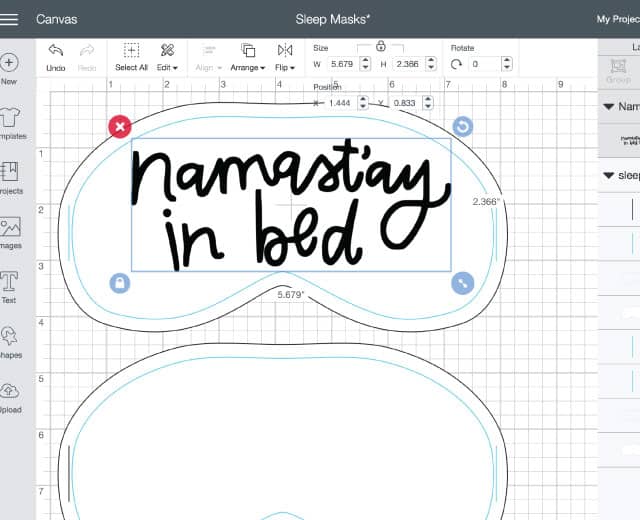 Cut 1 layer of iron-on vinyl with your choice of saying using MIRROR IMAGE ON. Don’t forget this step!
  Weed the iron-on by pulling all the excess vinyl from around the words. Instructions// Fuse the interfacing to the back of your front piece with an iron (or use
  Use the marking lines to keep the words inside the seam allowance. Now you’ll have: -1 Front piece with interfacing on the back and iron-on vinyl on the front -1 Felt piece -1 Cotton back piece -14″ of lace elastic
 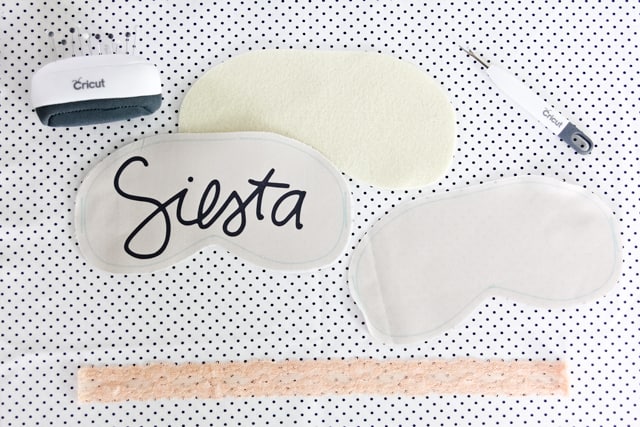 Line up the elastic on the two elastic placement lines on either side, with the rest of the elastic in the middle of the sleep mask. Arrange on top of the felt piece and treat them as one.
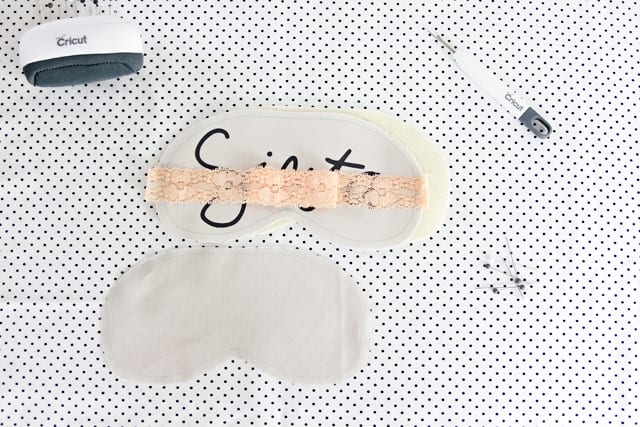
 Pin elastic and sew it on, backstitching at each end.
  Trim the elastic flush with the fabric and repeat on the other side.
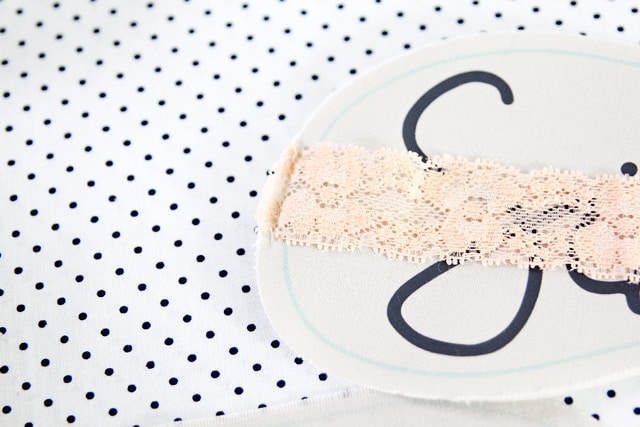
Pin the back piece right side down on top of the main piece (with the elastic tucked inside). Pin around and then stitch. 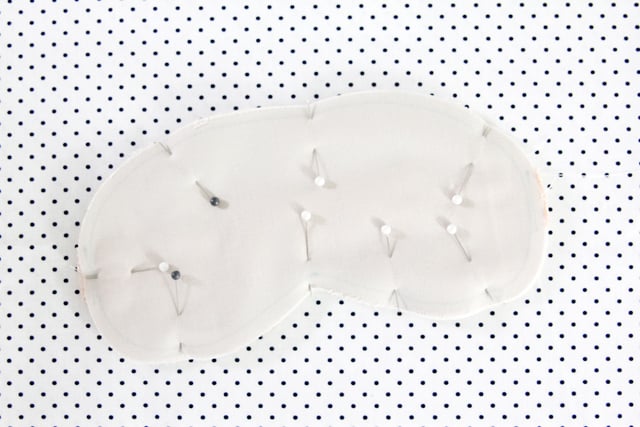 Use a 1/4″ seam allowance and leave a 1.5-2″ opening at the top of the eye mask. The top is the most straight part so it will be the easiest to close nicely.
 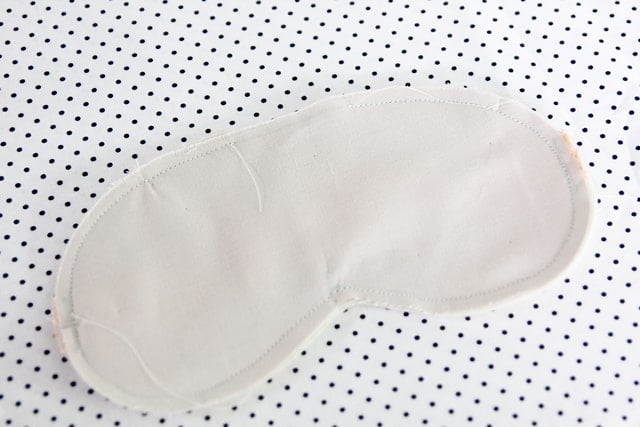 Clip all the way around the eye mask, right up to the stitching (but not through it!). Then trim the seam allowance down to 1/8″.
 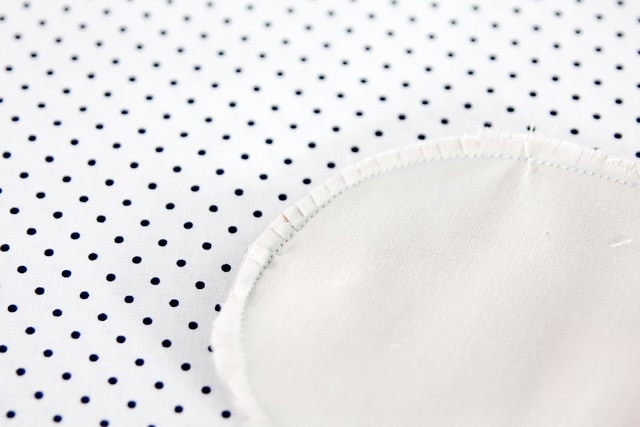 Turn the mask right side out and press well. Pin the top opening closed and topstitch around the mask 1/8″ from the edge. Press well!
Ta-da! Now make a few more for your gift stash! 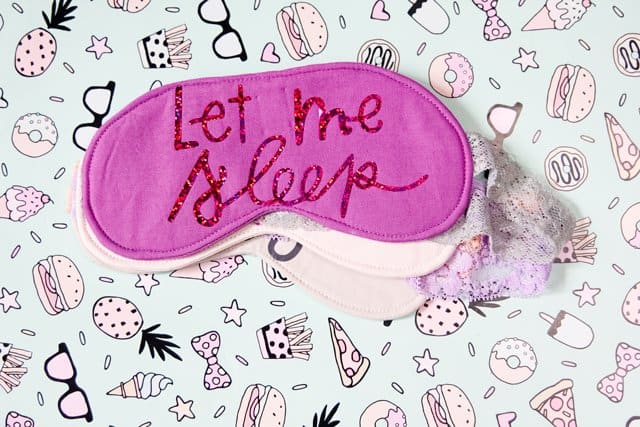 Sleep tight!
Sleep tight!
Sleep tight!
Use a 1/4″ seam allowance and leave a 1.5-2″ opening at the top of the eye mask. The top is the most straight part so it will be the easiest to close nicely. Clip all the way around the eye mask, right up to the stitching (but not through it!). Then trim the seam allowance down to 1/8″. Turn the mask right side out and press well. Pin the top opening closed and topstitch around the mask 1/8″ from the edge. Press well! Ta-da! Now make a few more for your gift stash! Sleep tight!
– 3 designs to choose from// -“Namast’ay in Bed” -“Siesta” -“Let me Sleep” Cut it out// Upload the Sleep Mask main file to Design Space. Design Space is a free interface that connects wirelessly to your Cricut machine! The Sleep mask file pulls up like this: To the right there are 2 red arrows. The first points to the color of the shape and the second points to the function of the shape. Change the first ones to white so you can see what you’re doing. Change the second function to WRITE and then choose the BLUE WASHABLE FABRIC MARKER. Click on the elastic placement lines on either side of the mask and change those to WRITE also. When they both look like the second one in the photo above you are ready to hit the GREEN button at the top right. This button will walk you through the cutting process. Cut 2 layers of cotton with the sleep mask MAIN.svg file. When cutting the cotton layers, load your washable fabric pen and place your fabric RIGHT SIDE DOWN. This will make sure the fabric pen goes on the back of the fabric. (I did mine on the right side and it’s fine, it’s just easier to see the lines if they are on the backside where you sew!) Cut 1 layer of batting and 1 layer of lightweight fusible interfacing using the same file. You can skip the writing part by taking the pen out of the machine. Once you’ve cut all the fabric layer, leave the sleep mask file in Design Space. Upload the SVG file that you are using. Use the mask lines to guide your size and placement of the words. Delete the mask layer so all you have left is the words. Cut 1 layer of iron-on vinyl with your choice of saying using MIRROR IMAGE ON. Don’t forget this step! Weed the iron-on by pulling all the excess vinyl from around the words. Instructions// Fuse the interfacing to the back of your front piece with an iron (or use Use the marking lines to keep the words inside the seam allowance. Now you’ll have: -1 Front piece with interfacing on the back and iron-on vinyl on the front -1 Felt piece -1 Cotton back piece -14″ of lace elastic Line up the elastic on the two elastic placement lines on either side, with the rest of the elastic in the middle of the sleep mask. Arrange on top of the felt piece and treat them as one. Pin elastic and sew it on, backstitching at each end. Trim the elastic flush with the fabric and repeat on the other side. Pin the back piece right side down on top of the main piece (with the elastic tucked inside). Pin around and then stitch. Use a 1/4″ seam allowance and leave a 1.5-2″ opening at the top of the eye mask. The top is the most straight part so it will be the easiest to close nicely. Clip all the way around the eye mask, right up to the stitching (but not through it!). Then trim the seam allowance down to 1/8″. Turn the mask right side out and press well. Pin the top opening closed and topstitch around the mask 1/8″ from the edge. Press well! Ta-da! Now make a few more for your gift stash! Sleep tight!
– 3 designs to choose from// -“Namast’ay in Bed” -“Siesta” -“Let me Sleep”
Cut it out// Upload the Sleep Mask main file to Design Space. Design Space is a free interface that connects wirelessly to your Cricut machine! The Sleep mask file pulls up like this: To the right there are 2 red arrows. The first points to the color of the shape and the second points to the function of the shape. Change the first ones to white so you can see what you’re doing.
Change the second function to WRITE and then choose the BLUE WASHABLE FABRIC MARKER. Click on the elastic placement lines on either side of the mask and change those to WRITE also. When they both look like the second one in the photo above you are ready to hit the GREEN button at the top right. This button will walk you through the cutting process. Cut 2 layers of cotton with the sleep mask MAIN.svg file. When cutting the cotton layers, load your washable fabric pen and place your fabric RIGHT SIDE DOWN. This will make sure the fabric pen goes on the back of the fabric. (I did mine on the right side and it’s fine, it’s just easier to see the lines if they are on the backside where you sew!) Cut 1 layer of batting and 1 layer of lightweight fusible interfacing using the same file. You can skip the writing part by taking the pen out of the machine. Once you’ve cut all the fabric layer, leave the sleep mask file in Design Space. Upload the SVG file that you are using. Use the mask lines to guide your size and placement of the words. Delete the mask layer so all you have left is the words. Cut 1 layer of iron-on vinyl with your choice of saying using MIRROR IMAGE ON. Don’t forget this step! Weed the iron-on by pulling all the excess vinyl from around the words. Instructions// Fuse the interfacing to the back of your front piece with an iron (or use Use the marking lines to keep the words inside the seam allowance. Now you’ll have: -1 Front piece with interfacing on the back and iron-on vinyl on the front -1 Felt piece -1 Cotton back piece -14″ of lace elastic Line up the elastic on the two elastic placement lines on either side, with the rest of the elastic in the middle of the sleep mask. Arrange on top of the felt piece and treat them as one. Pin elastic and sew it on, backstitching at each end. Trim the elastic flush with the fabric and repeat on the other side. Pin the back piece right side down on top of the main piece (with the elastic tucked inside). Pin around and then stitch. Use a 1/4″ seam allowance and leave a 1.5-2″ opening at the top of the eye mask. The top is the most straight part so it will be the easiest to close nicely. Clip all the way around the eye mask, right up to the stitching (but not through it!). Then trim the seam allowance down to 1/8″. Turn the mask right side out and press well. Pin the top opening closed and topstitch around the mask 1/8″ from the edge. Press well!
Ta-da! Now make a few more for your gift stash! Sleep tight!
Sleep tight!
This is a sponsored conversation written by me on behalf of Cricut. The opinions and text are all mine.


These are totally adorable! Thank you for sharing your pattern and finishing technique :)
I loved these so much i tried them and loved it! I gave them away as Christmas gifts thanks for the pattern! can’t wait to see more cute accessories!