• Skip to main content
  • Skip to primary sidebar
  • Skip to footer
  • Blog
  • About
  • Contact
  • FAQ
  • Sponsor

see kate sew

sewing, crafts, tutorials, DIY

  • Patterns
    • Free Patterns
    • Pattern of the Month
  • Tutorials
    • Accessories
    • Bags and Pouches
    • Clothing
    • Costumes
    • Crafts
    • Cricut Projects
    • Holiday
    • Household
    • Kids
    • Maternity
    • Quilting
  • Topics
    • Baby
    • Boy
    • Christmas
    • dog
    • Dolls
    • Easter
    • Girl
    • Halloween
    • Lookbook
    • Party
    • pet
    • Printables
    • Training
    • women
  • No Sew
  • Sewing 101
  • Sew4Good
  • Pet
  • Sewing Room
    • DreamBox
  • Reviews
Home
  • Patterns
    • Free Patterns
    • Pattern of the Month
  • Tutorials
    • Accessories
    • Bags and Pouches
    • Clothing
    • Costumes
    • Crafts
    • Cricut Projects
    • Holiday
    • Household
    • Kids
    • Maternity
    • Quilting
  • Topics
    • Baby
    • Boy
    • Christmas
    • dog
    • Dolls
    • Easter
    • Girl
    • Halloween
    • Lookbook
    • Party
    • pet
    • Printables
    • Training
    • women
  • No Sew
  • Sewing 101
  • Sew4Good
  • Pet
  • Sewing Room
    • DreamBox
  • Reviews

05.19

Modern Granny Square Quilted Pillow Cover Tutorial

Welcome to See Kate Sew! If you’re new here, sign up for my email newsletter for access to free patterns, tutorials and all the latest sewing news! Tour my sewing room HERE!

Quilted Pillow Tutorial | See Kate Sew Quilted Pillow Cover Tutorial | See Kate Sew Quilted Pillow Cover Tutorial | See Kate Sew

Quilted Pillow Tutorial | See Kate Sew

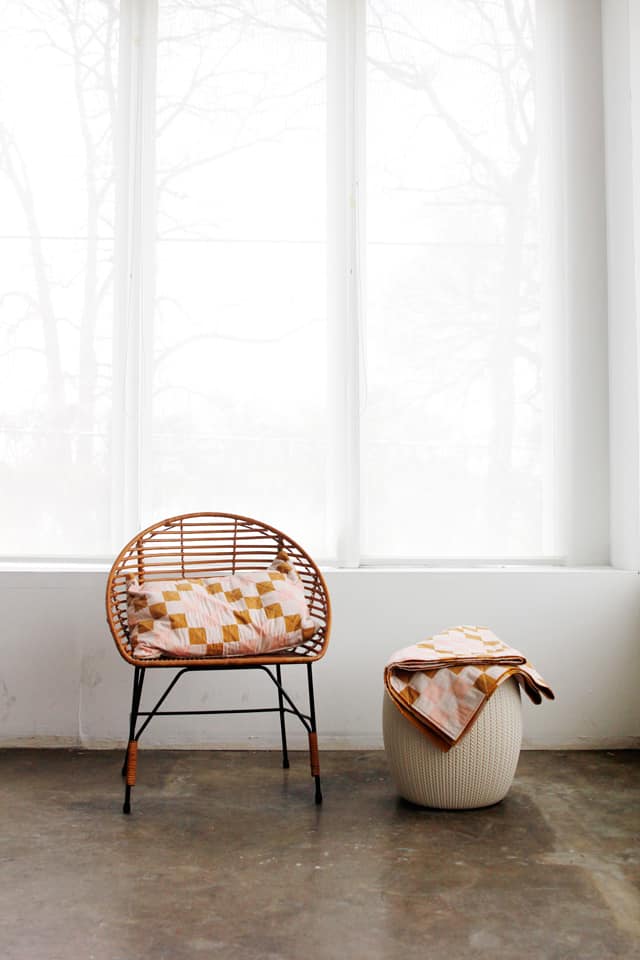
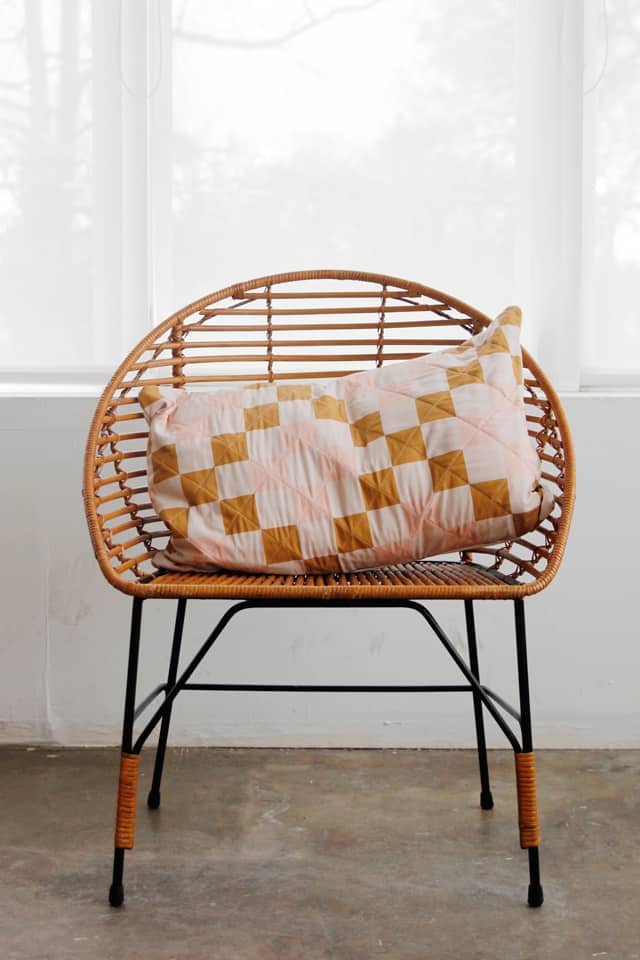
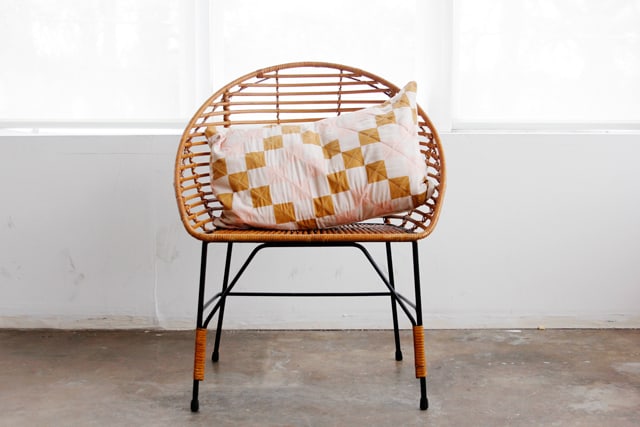
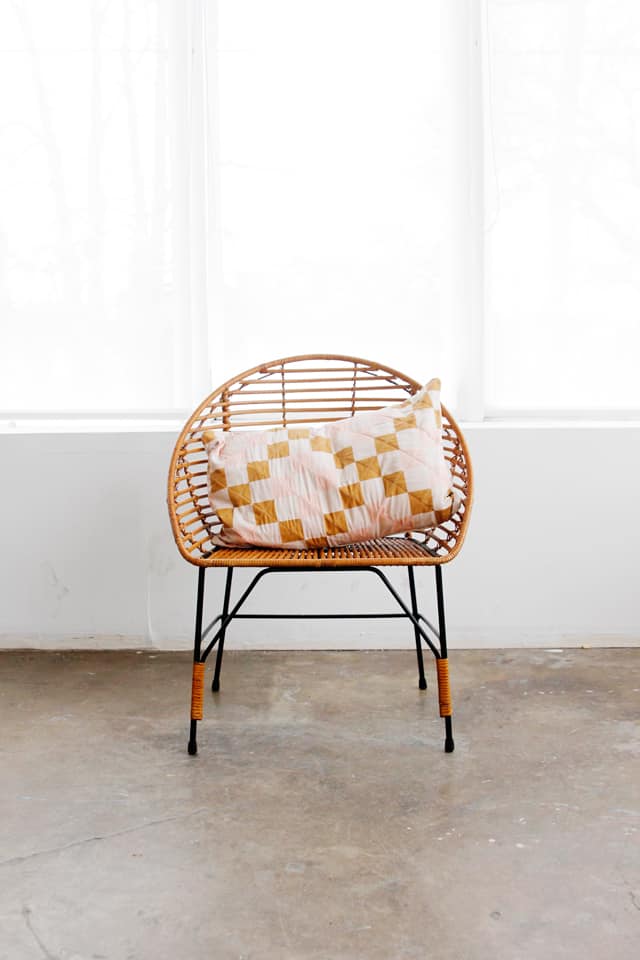
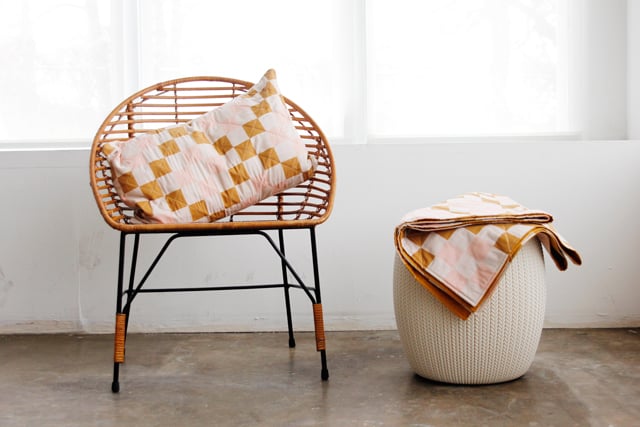
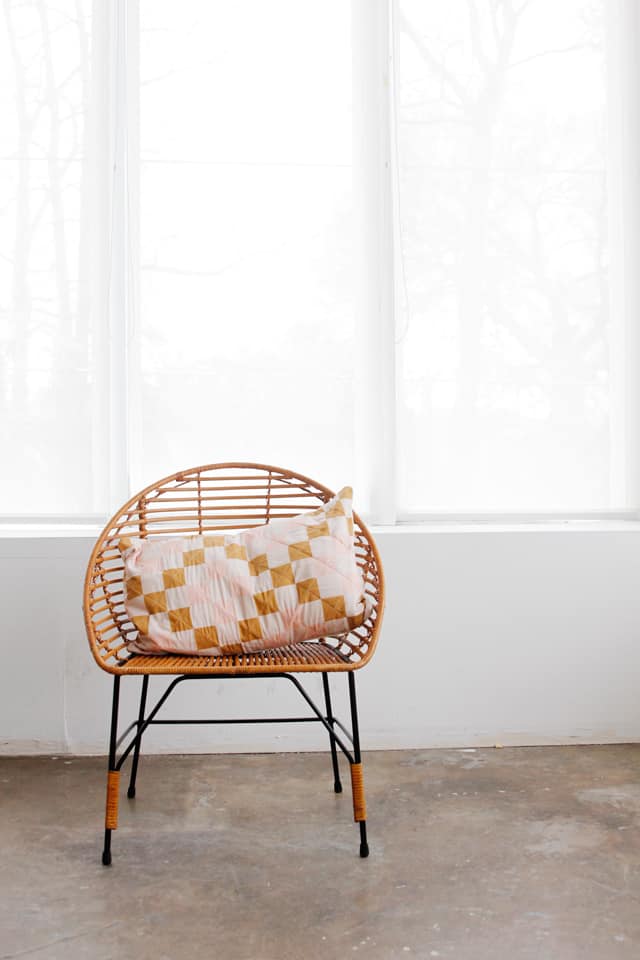
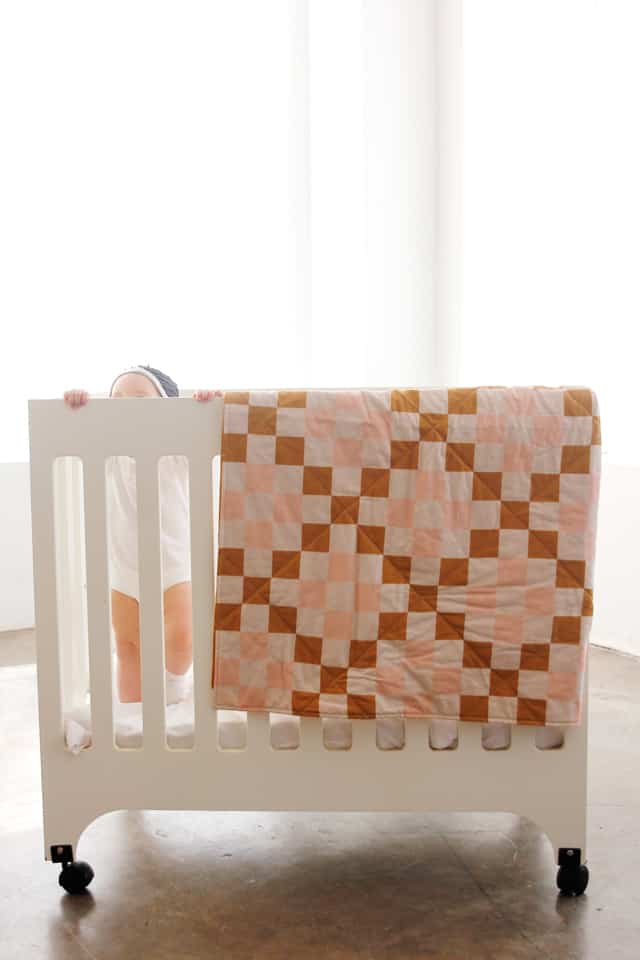
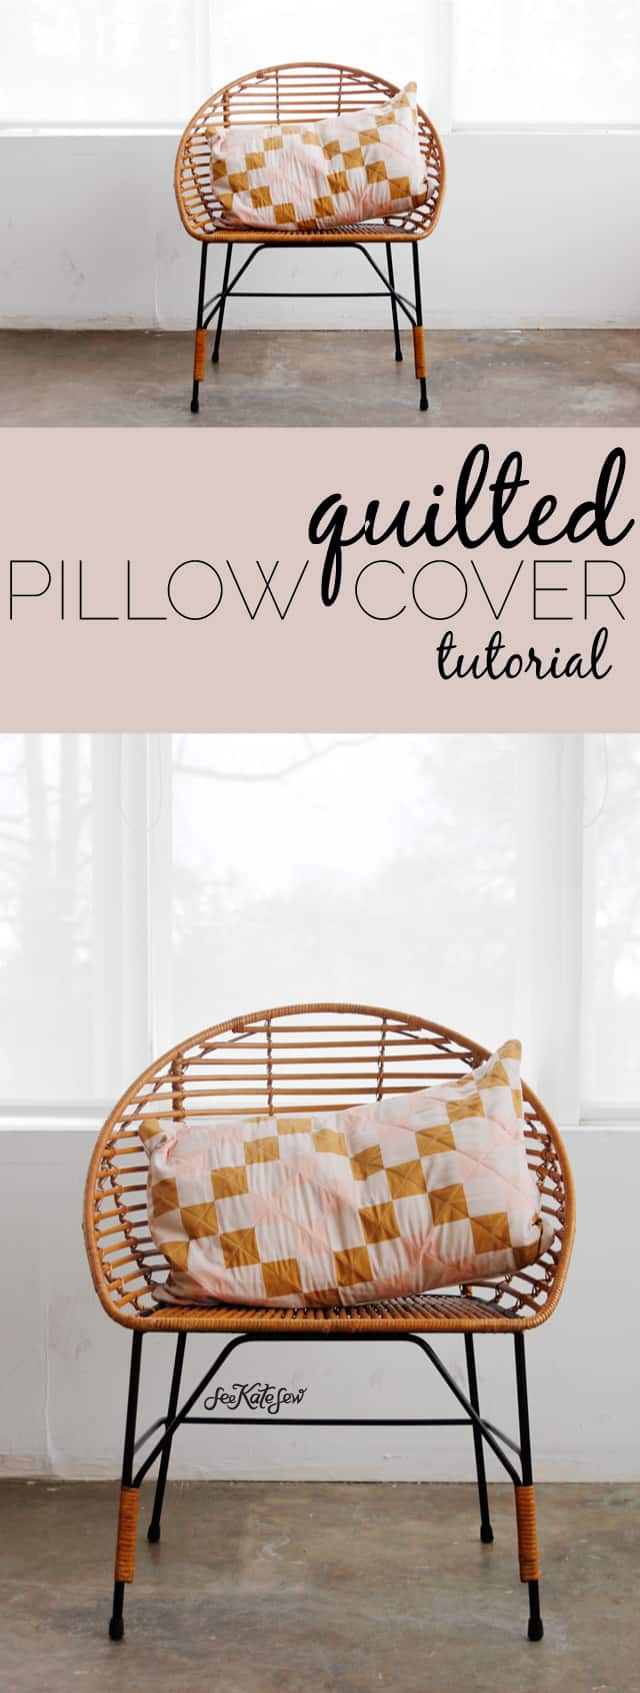
I made this pretty pillow with the leftover fabric from my Modern Granny Square Quilt. The quilt is a cheater quilt, meaning the fabric is just printed with a quilty pattern, instead of being pieced together. (i.e. it is super fast and equally pretty as a real quilt!) So this pillow is also a cheater pillow! Since it’s quilted with batting in between it’s super nice and soft to lay on!

Quilted Pillow Tutorial | See Kate Sew

Quilted Pillow Cover Tutorial //

Materials:
-1/2 yard granny square fabric
-1/2 yard lining fabric
-1 yard canvas fabric
-1 yard granny square fabric

Pattern Measurements:
This pillow cover is designed to fit a 16″ by 26″ IKEA down pillow form. If you don’t have access to IKEA, this one should work, too!
Front: 16.5″ by 26″
Left Back: 16.5″ by 17″
Right Back: 16.5″ by 13″


Quilted Pillow Tutorial | See Kate Sew

Sewing Instructions:

Step 1: Cut out the following pieces:

Quilted Pillow Tutorial | See Kate Sew
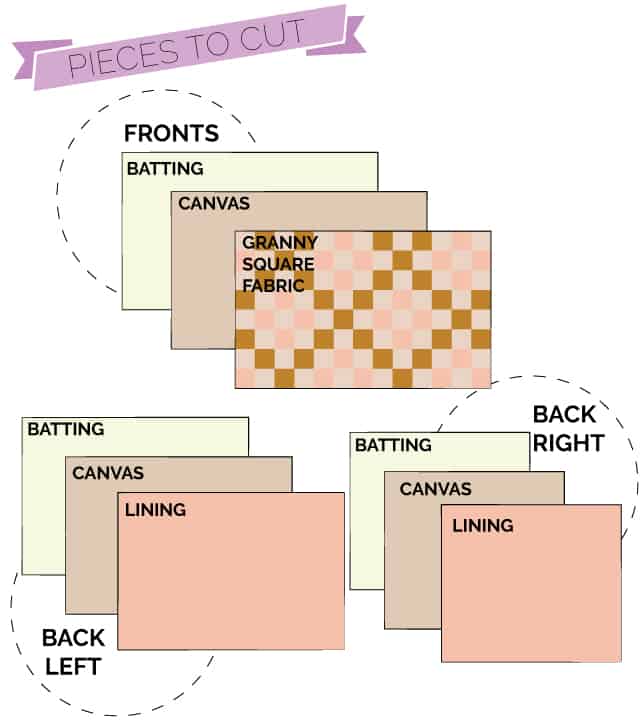
-1 front from square fabric
-1 front from batting
-1 front from lining
-1 back right from canvas
-1 back right from batting
-1 back right from lining
-1 back left from canvas
-1 back left from batting
-1 back left from lining

Step 2: Make a stack with the front pieces. Square fabric will be on top, face up. Lining fabric will be on the bottom, face down. Batting in the middle. Use randomly placed pins to hold together.

Step 3: Quilt the fabric using a 3.5mm stitch length. There are lots of ways to quilt this, including following the squares or freeform quilting. I chose to sew along the diagonals as shown below.

Quilted Pillow Tutorial | See Kate Sew

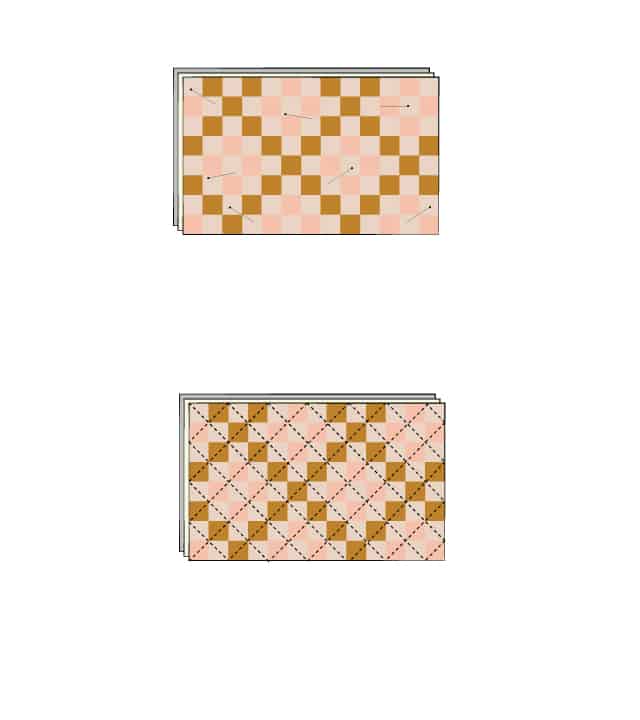
Step 4: Serge all fronts together around the outer edges.

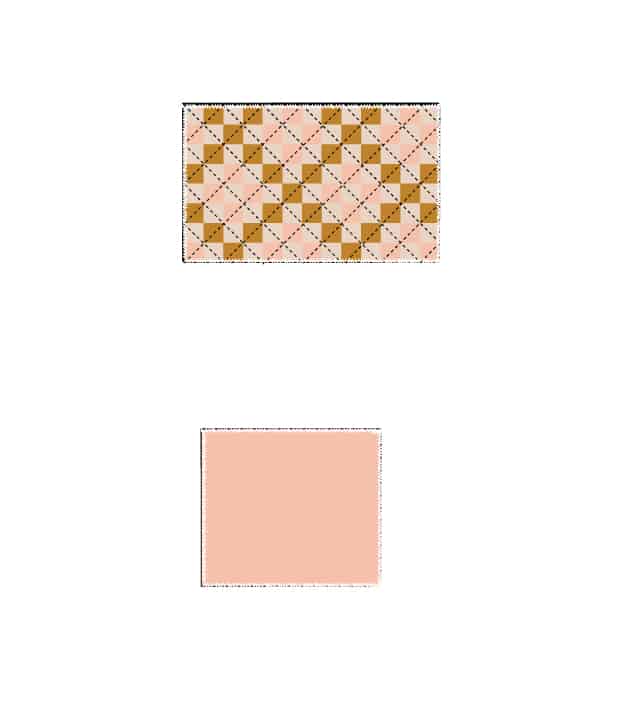
Step 5: Repeat steps 2-4 with back RIGHT pieces (the smaller ones). Skip the quilting step if you want!

Quilted Pillow Tutorial | See Kate Sew

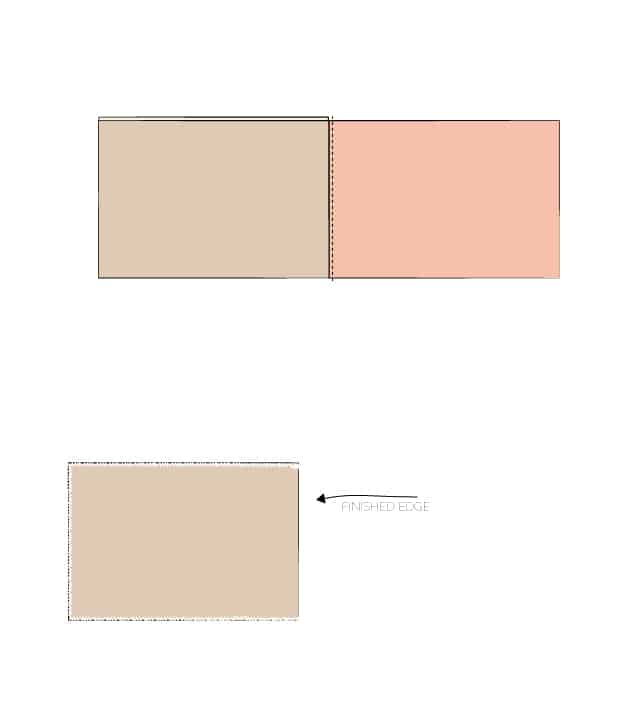
Step 6: With the back LEFT pieces (the longer ones), pin together the canvas and lining with RIGHT SIDES together. Pin the batting to the back of the canvas fabric and sew all three layers together along the pillow opening’s edge.

Quilted Pillow Tutorial | See Kate Sew

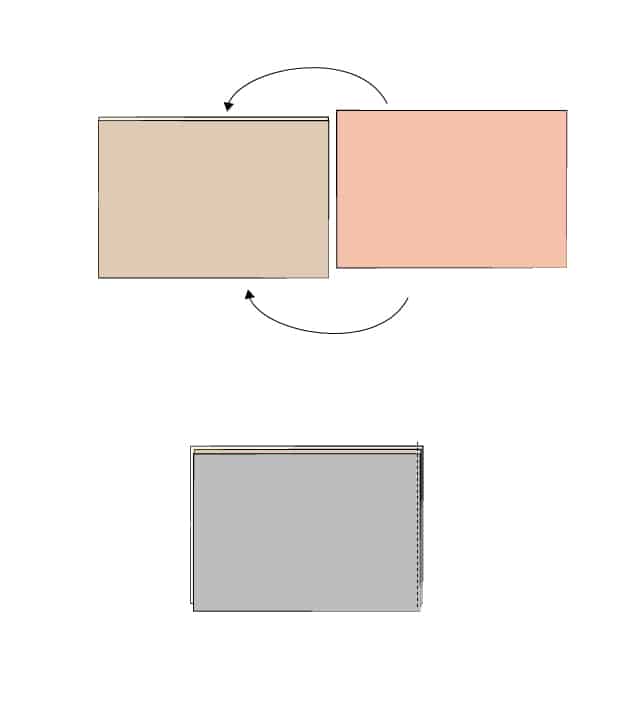
Step 7: Open. Press seam allowance to the lining side and sew seam allowance to lining with a line of topstitching. Then fold canvas and lining so both right sides are facing out. Press well and serge remaining 3 edges.

Quilted Pillow Tutorial | See Kate Sew

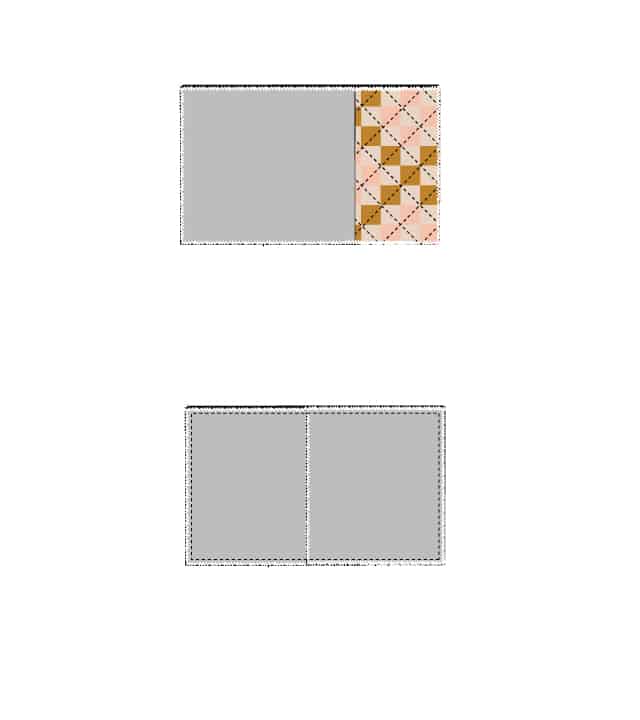
Step 8: Lay front panel down with right sides UP. Then lay back LEFT (the longer side) down with right sides DOWN, lined up with the left of the front panel. Lay back RIGHT on the right side and pin layers together all around. Sew with a 1/2″ seam allowance and turn right sides out. All of your edges are already finished, so stuff your pillow in and you’re done!

Quilted Pillow Tutorial | See Kate Sew

Quilted Pillow Tutorial | See Kate Sew

One Hour Granny Square Quilt Tutorial | See Kate Sew

Here’s the matching quilt tutorial!

Quilted Pillow Cover Tutorial | See Kate Sew

1 Comment | Household, Quilting

Exclusive Free PatternRuffled Apron

Sign up for my email newsletter and receive my ruffled apron pattern totally FREE!

We take your privacy seriously. See our privacy policy here. Unsubscribe at any time.

You may also like these posts...

NEW PATTERN! The Farmhouse Quilt PDF Pattern!DIY Circle Playmat with Fringe!Chloe Quilted Clutch Patternthe Chloe Quilted Clutch PatternOven Mitt Tutorial | Sew an oven mittoven mitt pattern DIY

Reader Interactions

1 Comment

  1. tin tuc

    05/22 at 5:41 PM

    Hello mates, good piece of writing and nice arguments commented
    at this place, I am genuinely enjoying by these.

Primary Sidebar

  • Facebook
  • Twitter
  • Instagram
  • Pinterest
  • Email

Exclusive Free PatternRuffled Apron

Sign up for my email newsletter and receive my ruffled apron pattern totally FREE!

We take your privacy seriously. See our privacy policy here. You can unsubscribe at any time.

Don’t miss these popular posts!

easy baby dress pattern for the summertime

easy baby dress pattern for the summertime

modern ombre + b/w triangle quilt tutorial + pattern

modern ombre + b/w triangle quilt tutorial + pattern

Fabric

Quilted Cosmetic Case Kiss Me KateKiss Me, Kate FabricOne Hour Granny Square Quilt Tutorial | See Kate SewModern Granny Square Quilt Whole Cloth

Pattern Hacks

Easy Baby Summer Dressthe EMMA pattern | See Kate SewThe EMMA Dress

Footer

Hello friends!

My name is Kate, a twenty something fashion lover and mother of two. When I’m not chasing kids you can find me at my sewing table or daydreaming up new designs. You can read more about me here. Thank you for visiting!

8a918f8da8e0e69102dc0f33a718de85a99c31a57283e0e3e2

FOLLOW ME HERE

  • Facebook
  • Twitter
  • Instagram
  • Pinterest
  • Email
  • Blog
  • About
  • Contact
  • FAQ
  • Sponsor

Copyright © 2023 See Kate Sew  •  All Rights Reserved  •  Privacy Policy  •  Site Design by Emily White Designs