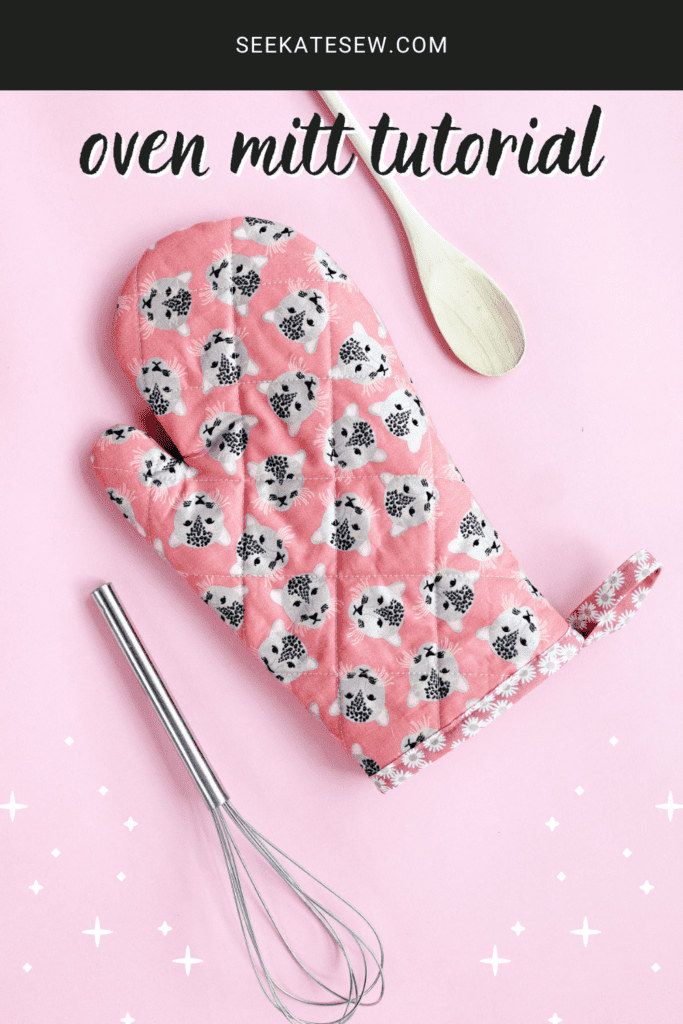
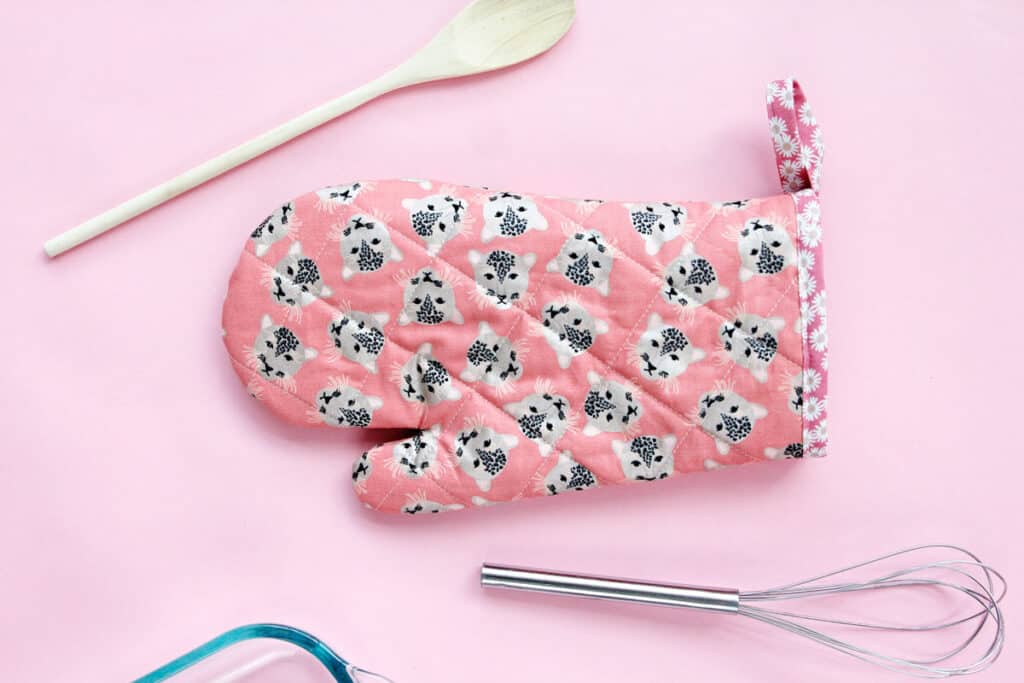
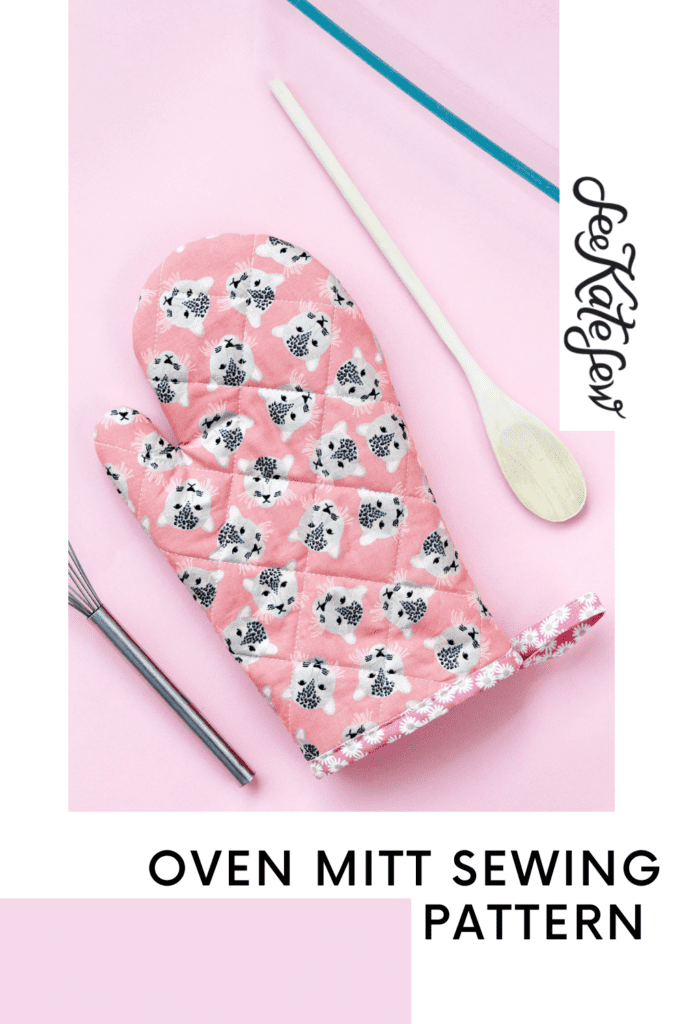
Sew a new oven mitt for your kitchen! Sewing your own gives you the freedom to use any fabric you want for a custom oven mitt. This blog post includes a free oven mitt pattern – download the template and follow the easy sewing instructions below.

Quilted oven mitts are a great gift idea especially when you can customize the fabric. Use the same fabric to make a matching apron or casserole heat pad.
Oven Mitt Pattern Materials
- 1/4 yard or 1 Fat Quarter Main Cotton Fabric
- The exterior fabric I’m using is Leopard Faces Sparkle in Pink (affiliate)
- 1/4 yard or 1 Fat Quarter Lining Cotton Fabric
- I’m using Spotted Stripes White with Pink Sparkle
- 100% cotton batting (I prefer needle-felted) or Insul-bright insulated batting
- 1/2″ binding or bias tape
- Hera marker or chalk
- Ruler
- Rotary cutter, mat and scissors
- Spray baste
Free Oven Mitt Sewing Pattern
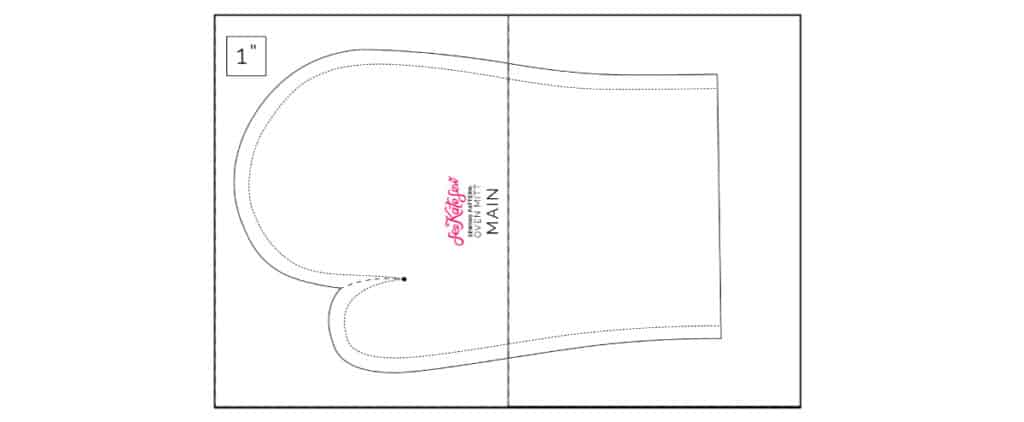
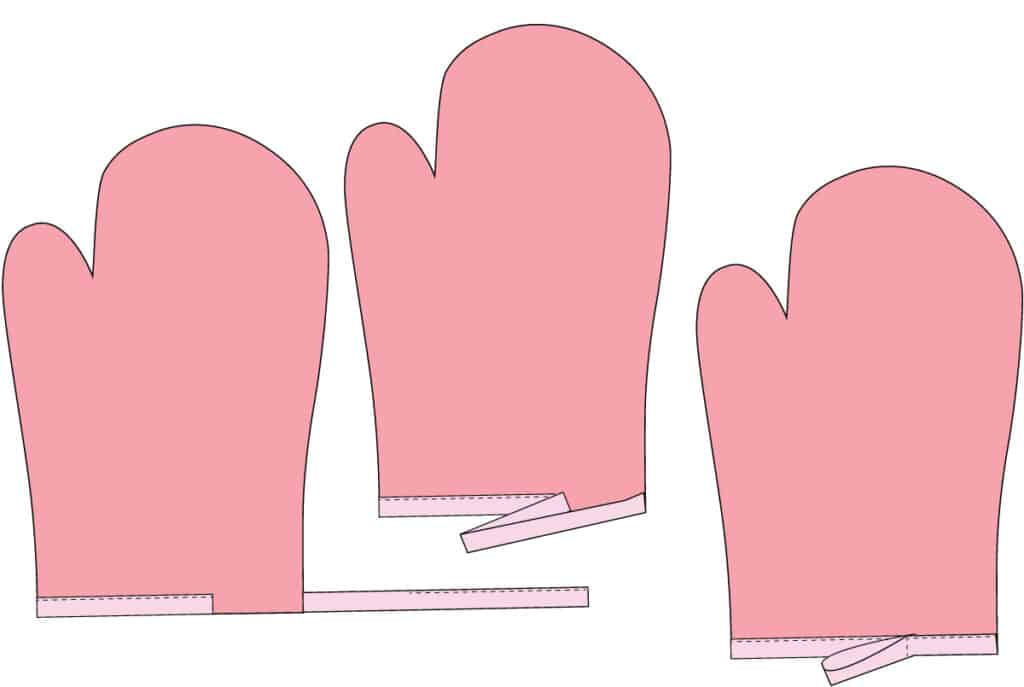
Download the oven mitt pattern by clicking on the link below. The oven mitt shape is hard to perfect, so be sure to use the template provided! The free PDF pattern is exclusive to newsletter subscribers, so put in your email and you’ll be taken to the download page. Print the oven mitt pattern at 100% or DO NOT SCALE. Use the 1″ box to make sure you have printed it at the correct size. This download only includes the templates, not the instructions. Want to print the templates AND the instructions? Click here to get the full pattern.
Trim the edges off of the pattern pages and tape it together in the layout shown:
Quilted oven gloves are so fun to make! I love quilting the fabric for more texture. This free sewing pattern works for fat quarters or larger fabric scraps.
how to make oven mitts
Use a 3/8″ seam allowance.
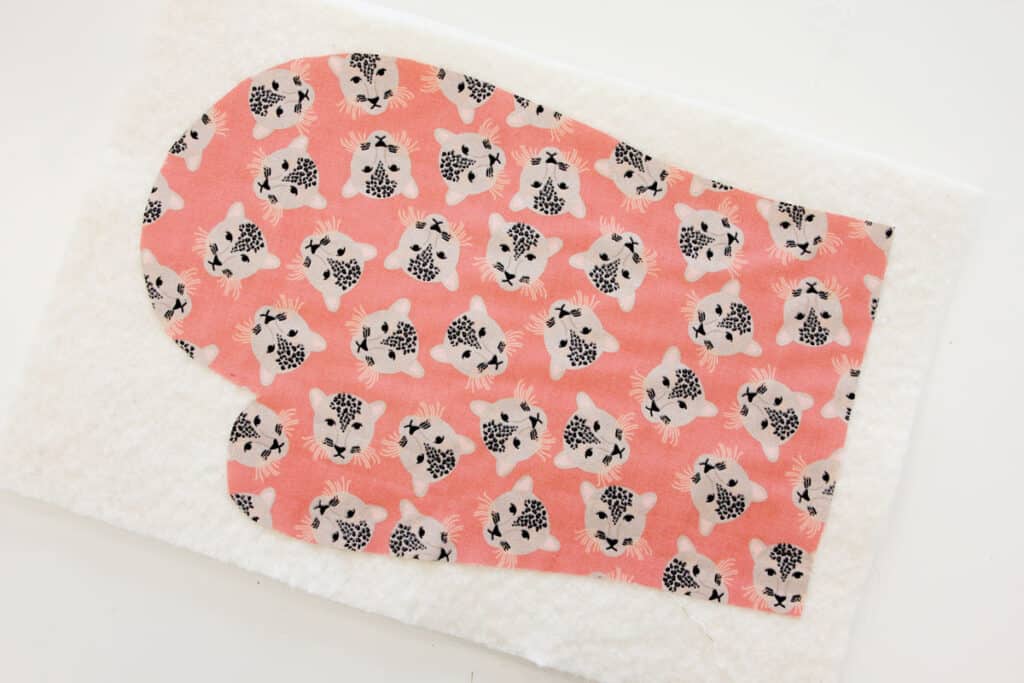
Cut 2 layers of each outer fabric and lining fabric. Be sure the gloves are mirror image of each other, so cut on a fold or flip the pattern over for the second mitt.
Spray baste the main fabric to two layers of batting. Don’t worry about precutting the batting, just baste the fabric glove piece to a rectangle of batting.
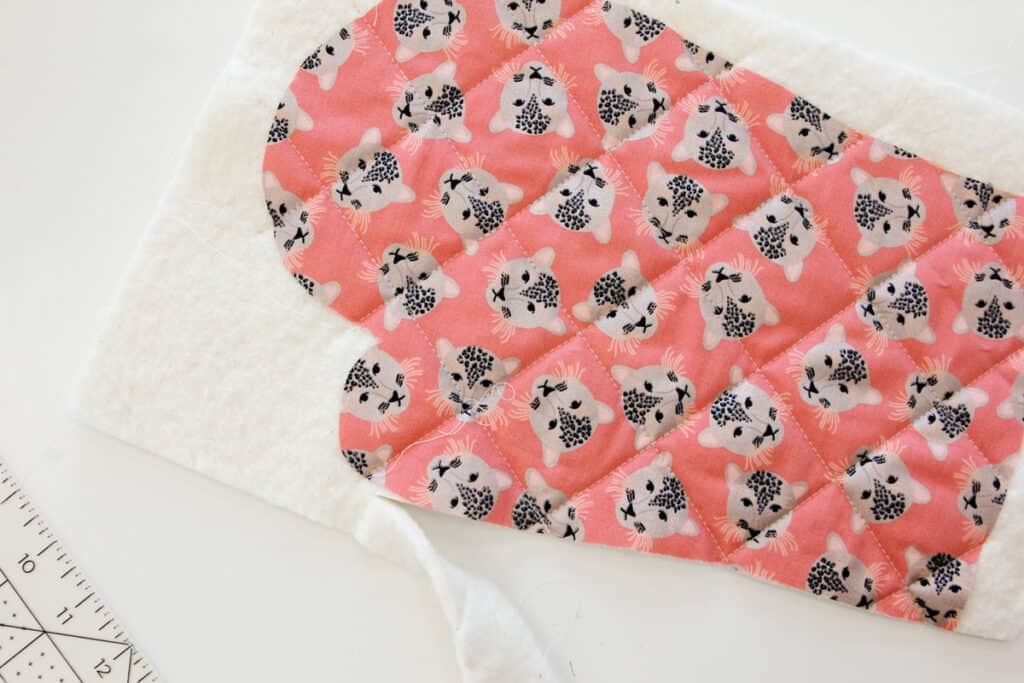
Quilt the fabric to the batting pieces using a 2″ grid. Use a fabric marker or a Hera marker to mark your lines. Sew over the lines to create the grid. Then trim off the excess batting.
Repeat with the other side of the oven mitt.
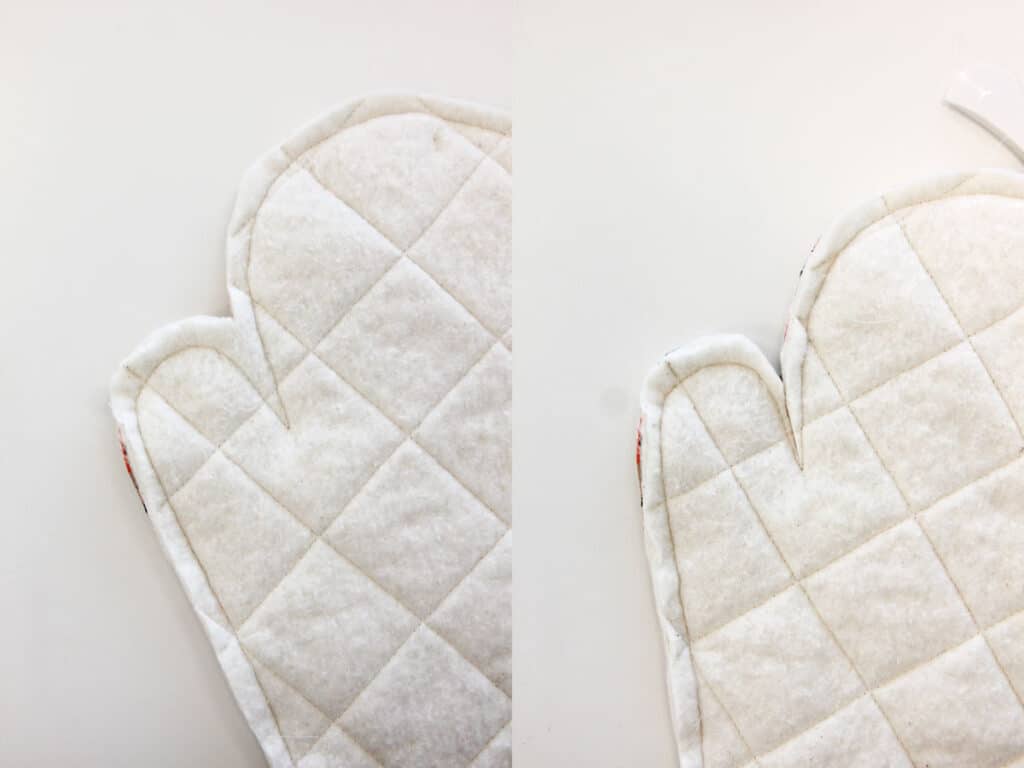
Pin the gloves together right sides together. Sew around the glove 3/8″ from the raw edges. Leave the bottom of the glove open, but backstitch at the beginning and end of your stitching. Pivot around the thumb at the dot on the pattern piece. The pattern page has markings for the stitching line, the seam allowance changes at the thumb area.
Trim the seam allowance and clip into the thumb to the dot. Then clip the curved edges of the seam allowance.
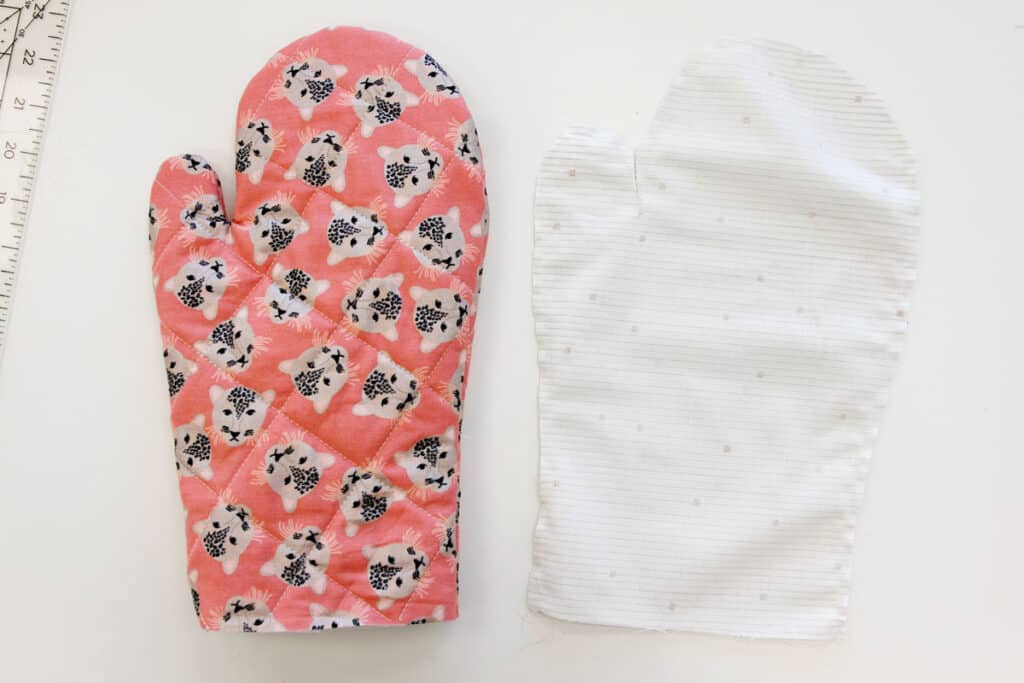
Turn the main fabric right side out. Sew together the lining pieces with right sides together. Clip the thumb down to the dot on the pattern piece.
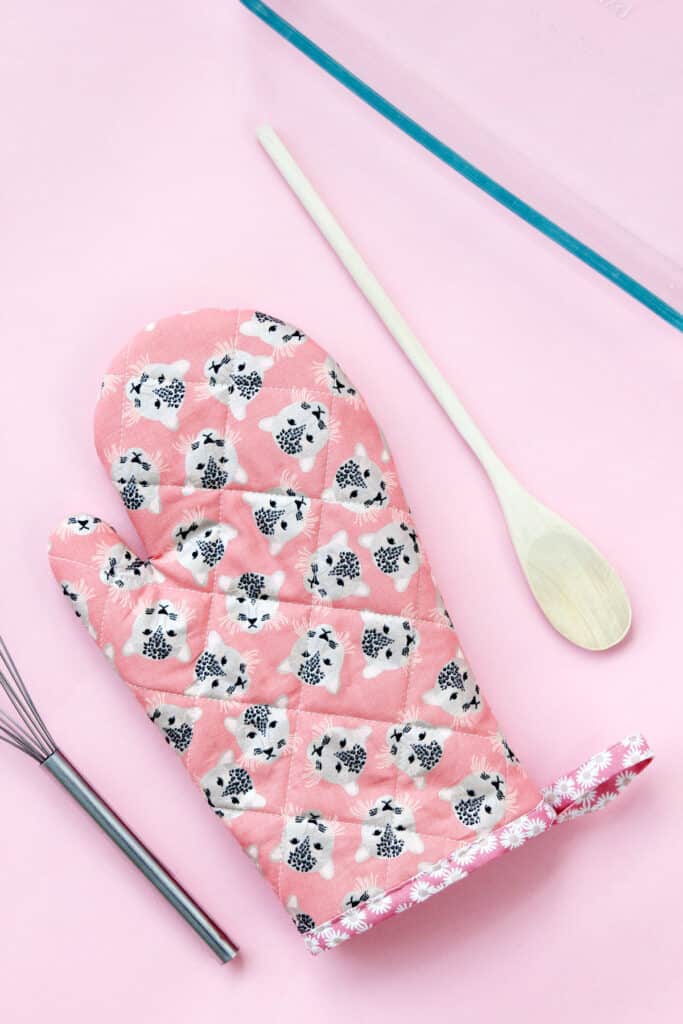
Finish and bind oven mitt
Leave the lining inside out and push it into the main glove. The wrong sides will be facing. Pin together at the bottom and baste the main to the lining.
Attach your binding starting at a side seam. Clip into place and sew to your glove. To add a hanging loop, stop sewing when you have about 2″ left to where you started. Trim the binding leaving 6″ extra. Sew the binding together along the open edges.
Loop the end of the binding to match where you started the binding. Tack the end down. Finish sandwiching the binding over the oven mitt, also covering the looped end. Sew.
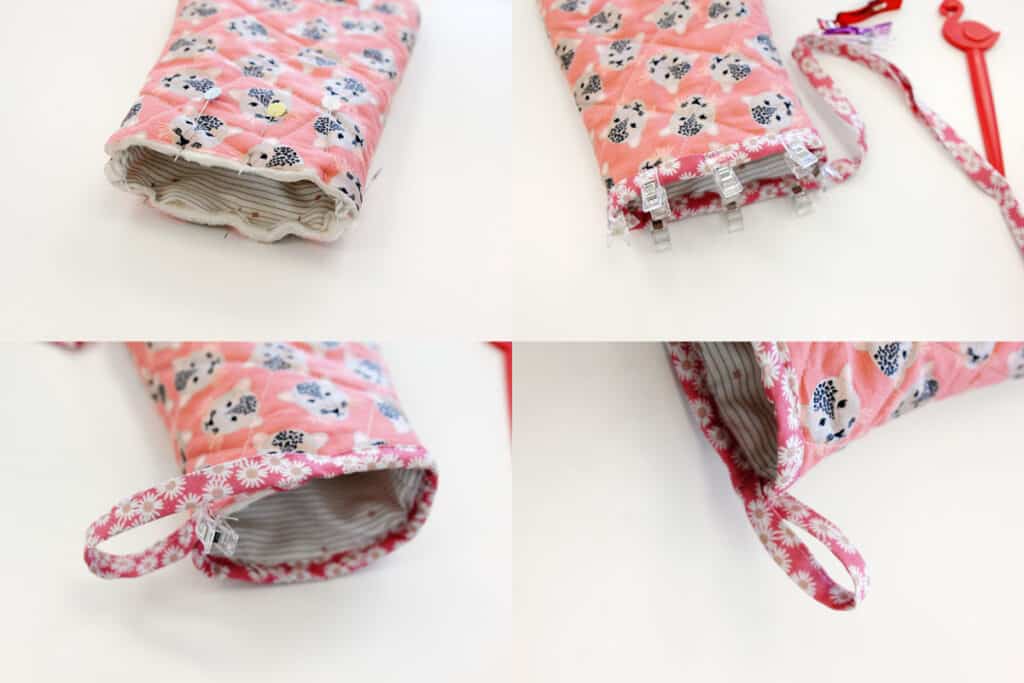
I made my own binding with the print Daisy Fields Pink Sparkle. To make your own 1/2″ binding, cut a strip of fabric 2″ wide. Then fold the raw edges in and press. Fold in half and press.

You can omit the loop if you want, but it does give your finished oven mitt a way to hang on a hook.
Where to buy Spotted Fabric
- Spotted Leopard Faces Rose Gold *sparkle*
- Leopard Faces Teal
- Leopard Faces Gold *sparkle*
- Spotted Leopard Spots Pink
- Gold spots *sparkle*
- Rose Spots
- Spotted Zig Zag Pink *sparkle*
- Zig Zag Black and White
- Zig Zag Gold *sparkle*
- Spotted Daisy Fields Pink *sparkle*
- Daisy Fields Black *sparkle*
- Daisy Fields Teal
- Spotted Bouquet Pink *sparkle*
- Bouquet Teal *sparkle*
- Bouquet Gold *sparkle*
- Leopard Print Pink
- Leopard Print Tan
- Leopard Print Teal
- Spotted Stripes Teal
- Spotted Stripes White *sparkle*
- Spotted Stripes Gold *sparkle*
- Butterflies Pink
- Butterflies Black
- Butterflies Grey