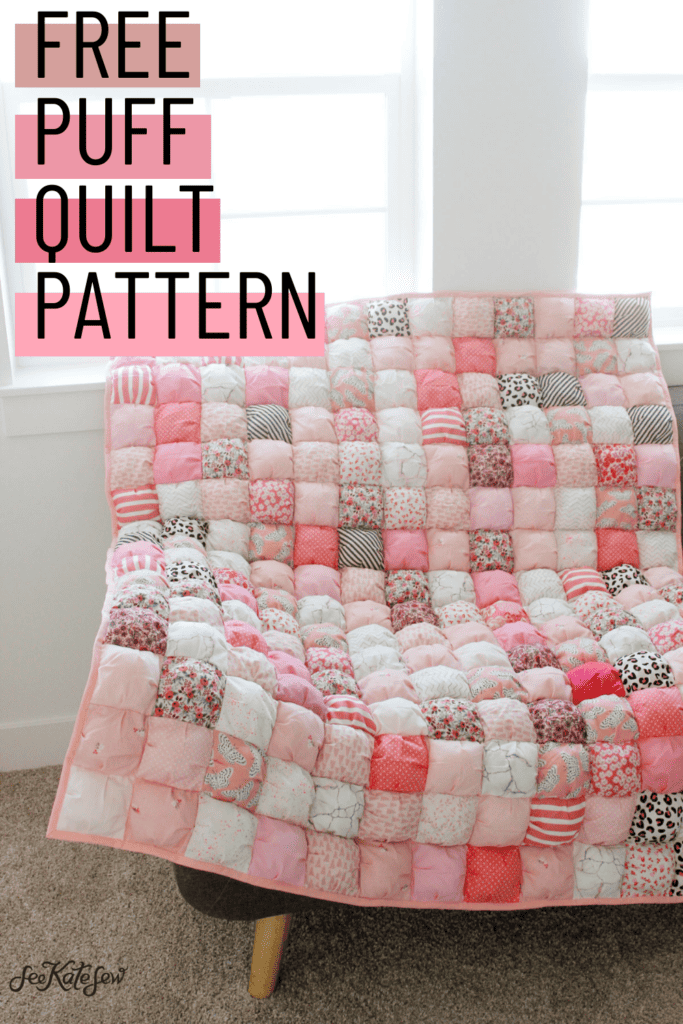
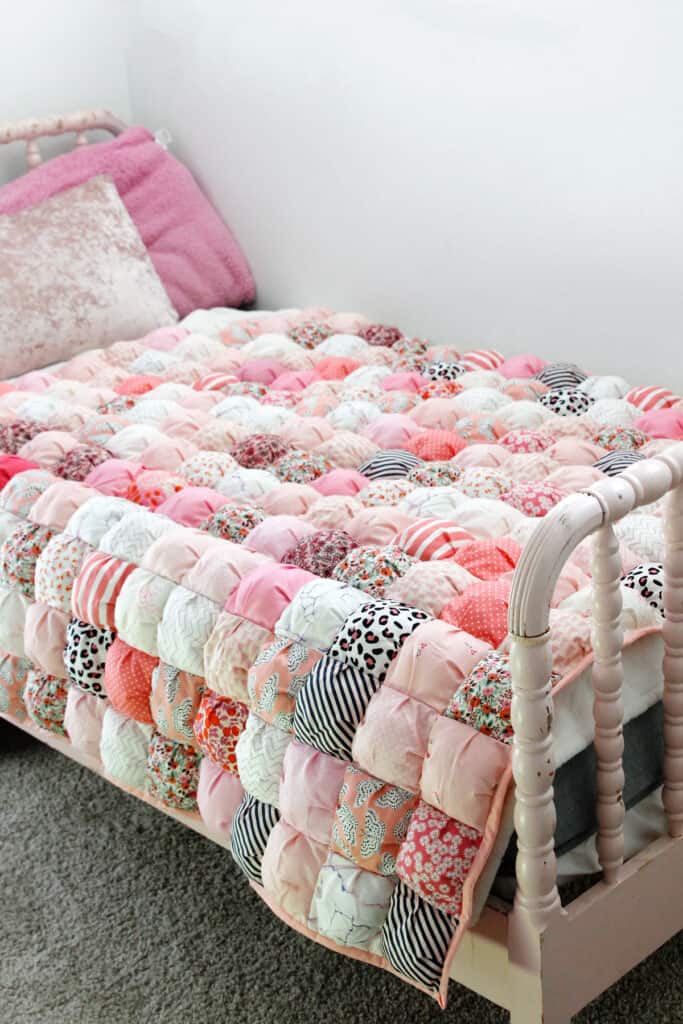
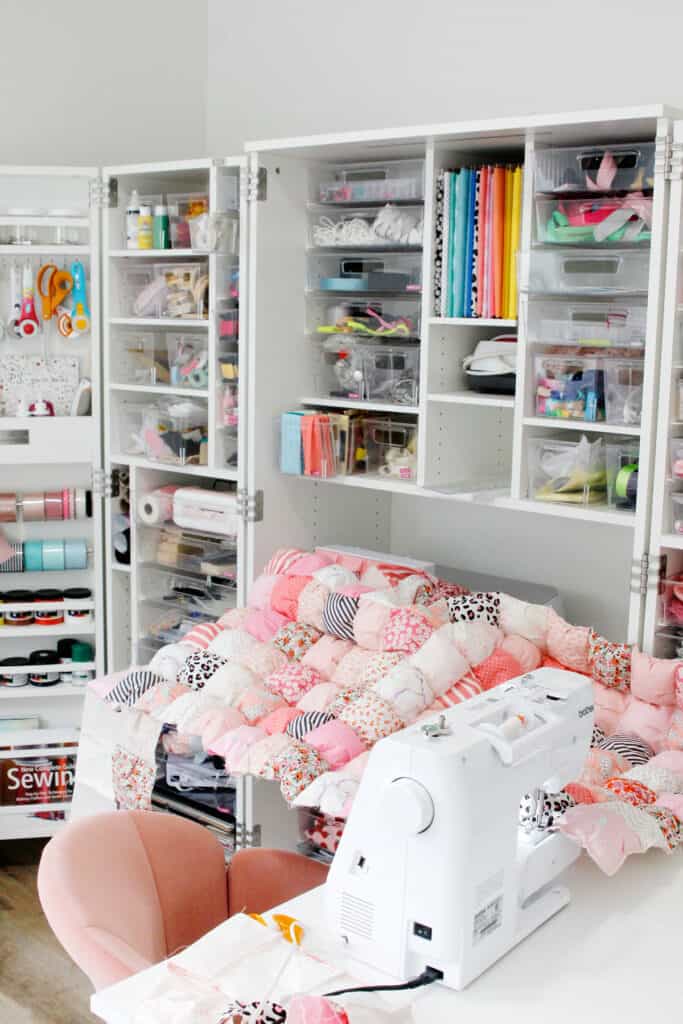
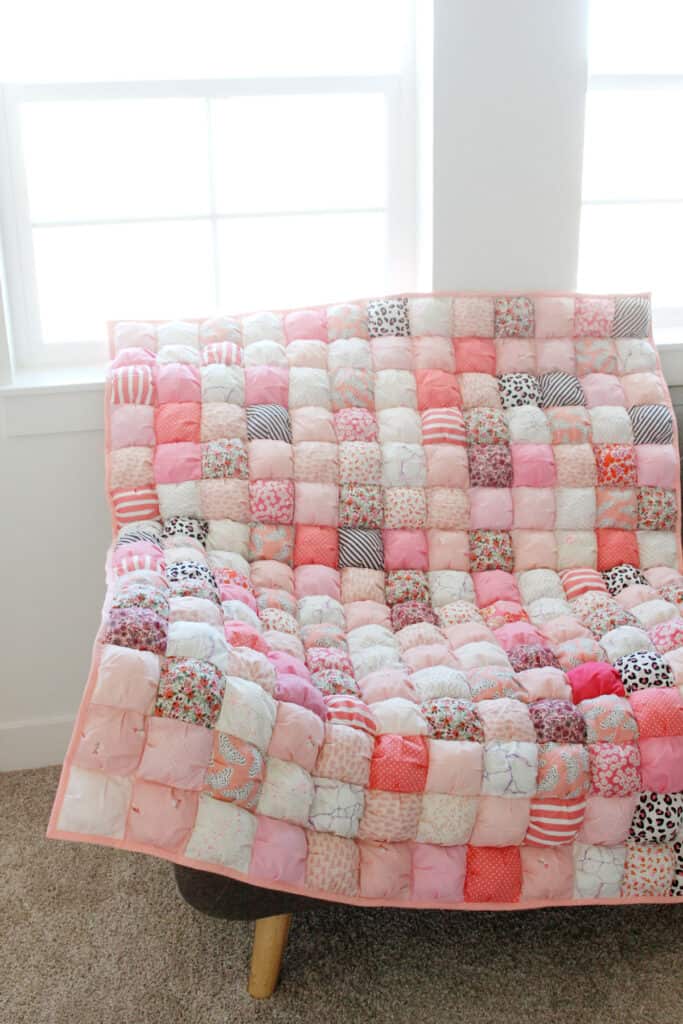
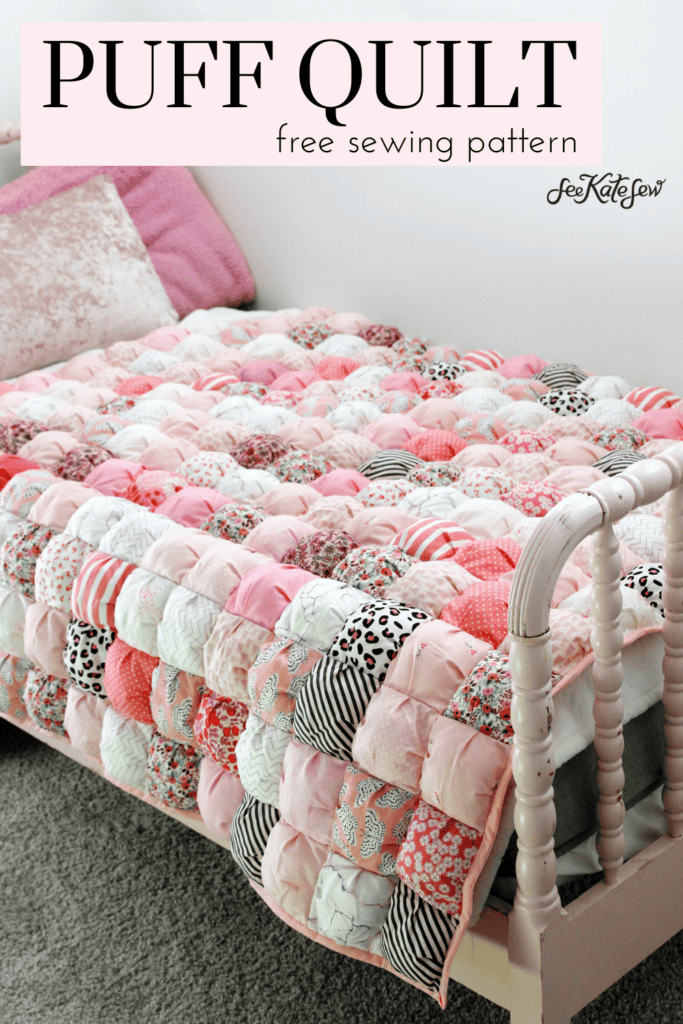
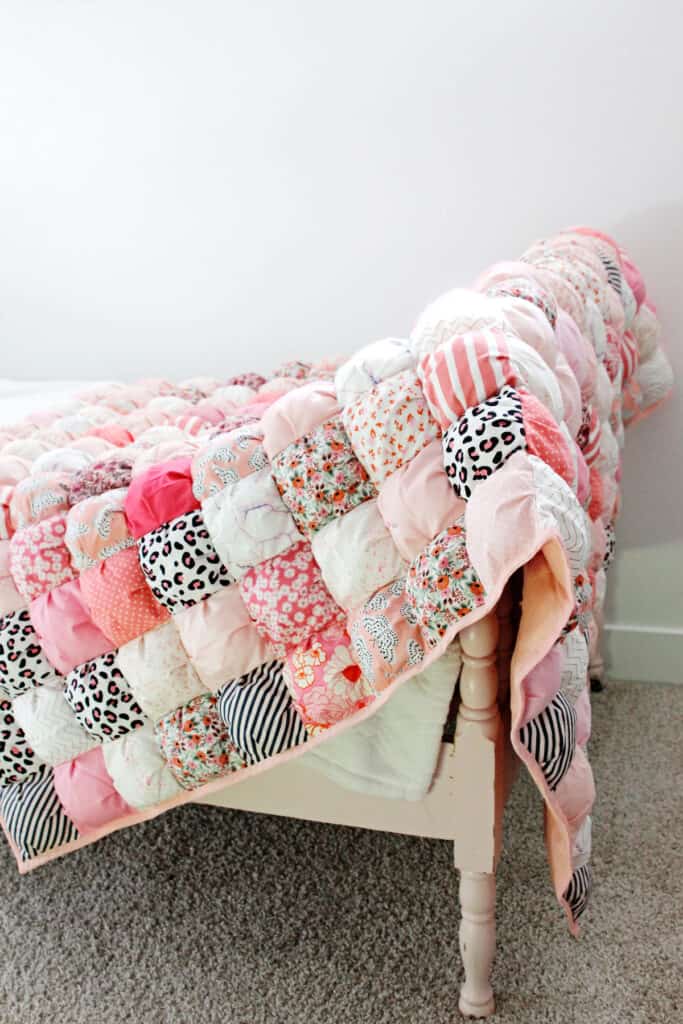
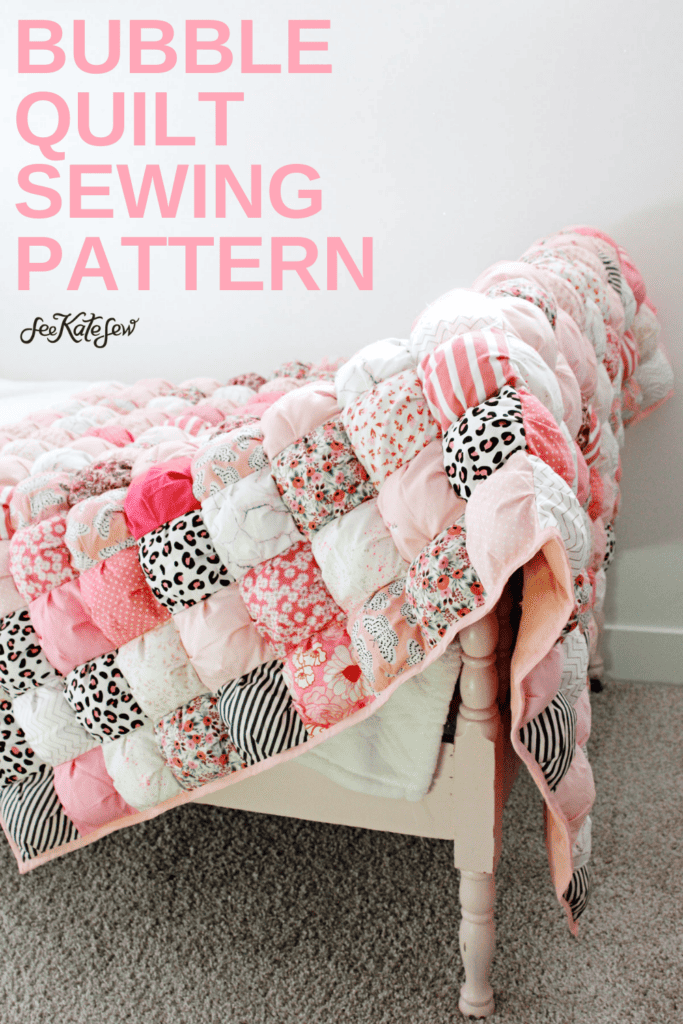
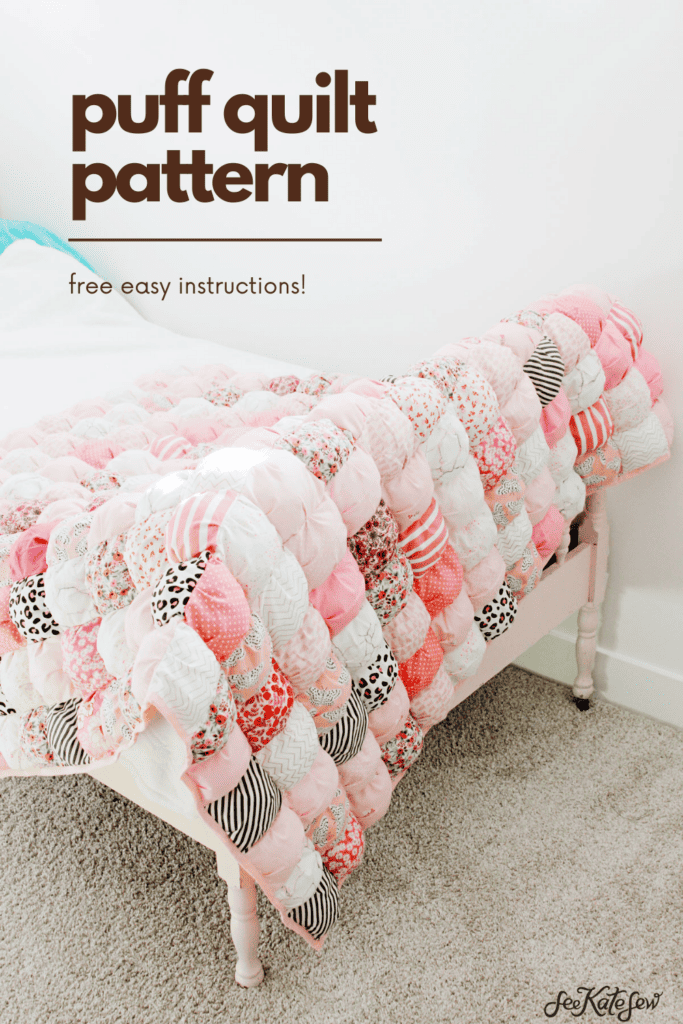
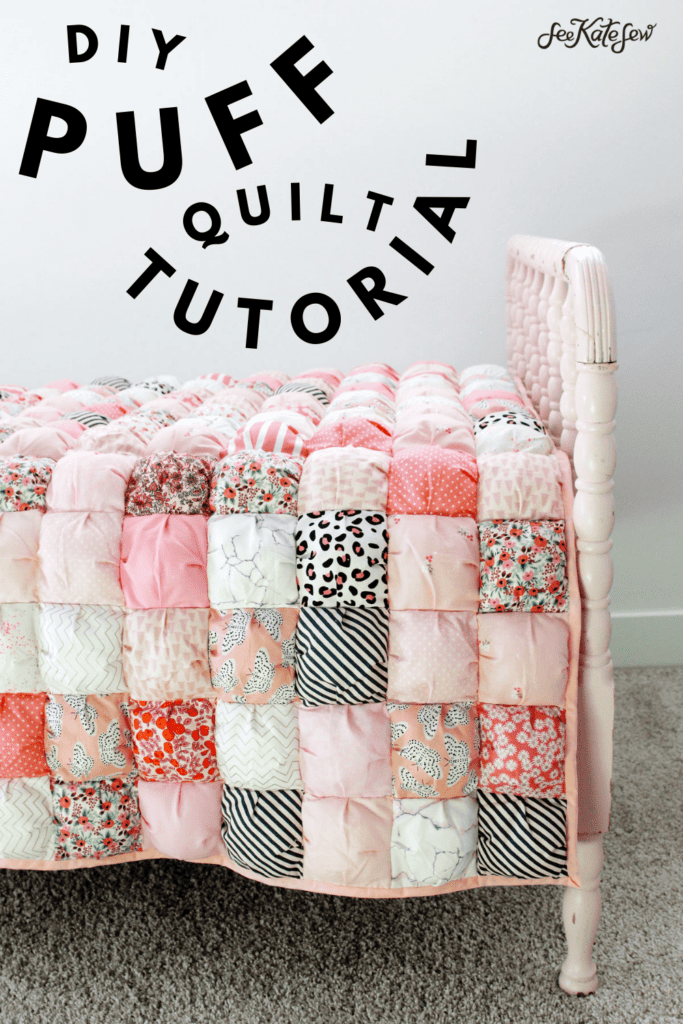
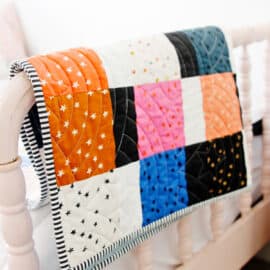
It’s bubble time! A puff quilt, or bubble quilt, is a dimensional quilt that is so fun to make! In this post I am sharing a puff quilt tutorial so you can make your own stuffed quilt with a free pattern.
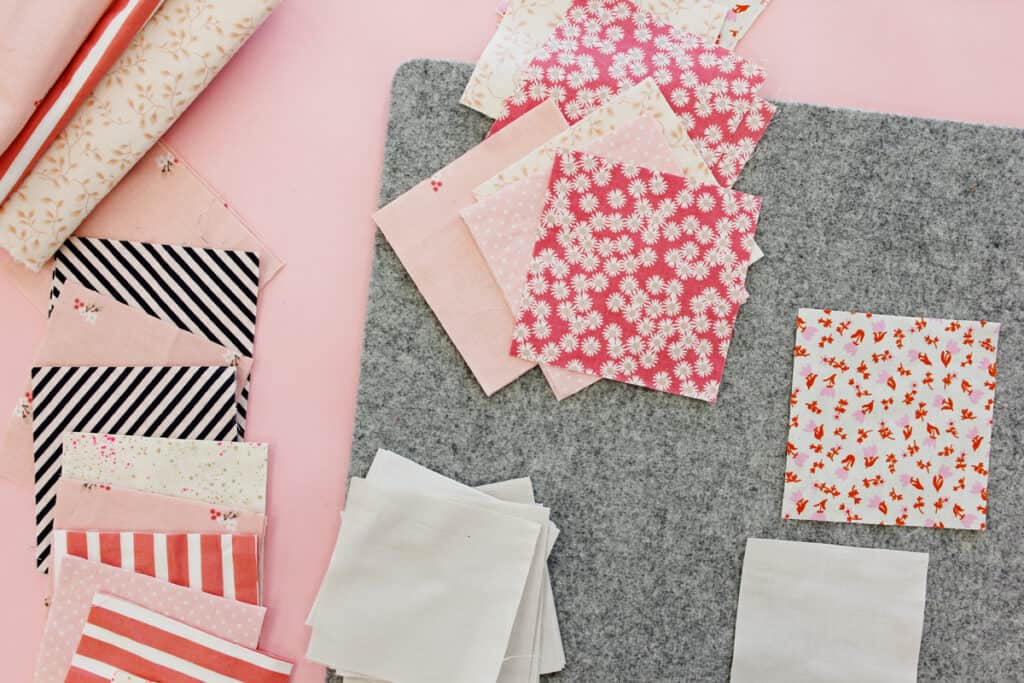
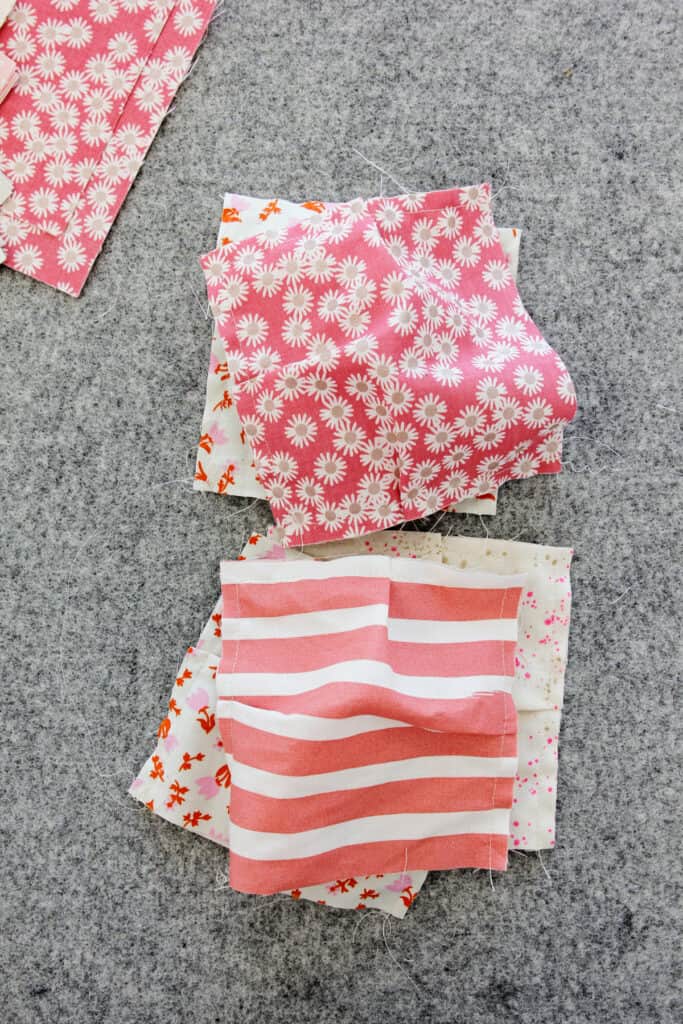
Grab all your fabric scraps for this project because you’ll need a bunch! A puffy quilt is an easy sewing project even though it looks difficult. This is a super easy project, great for a beginner. However it does take a while!
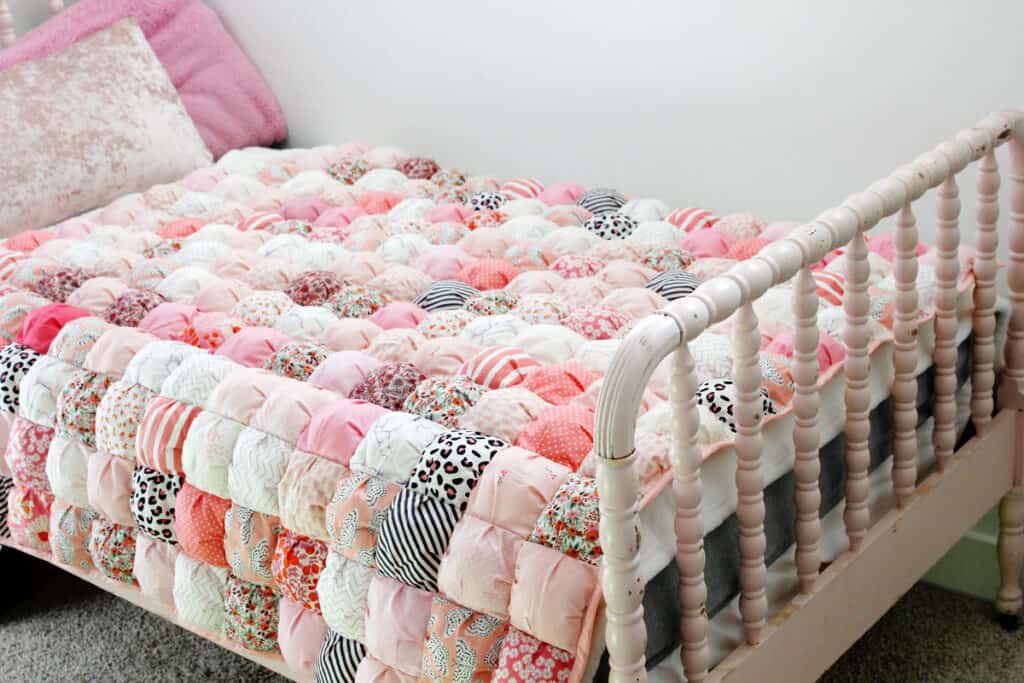
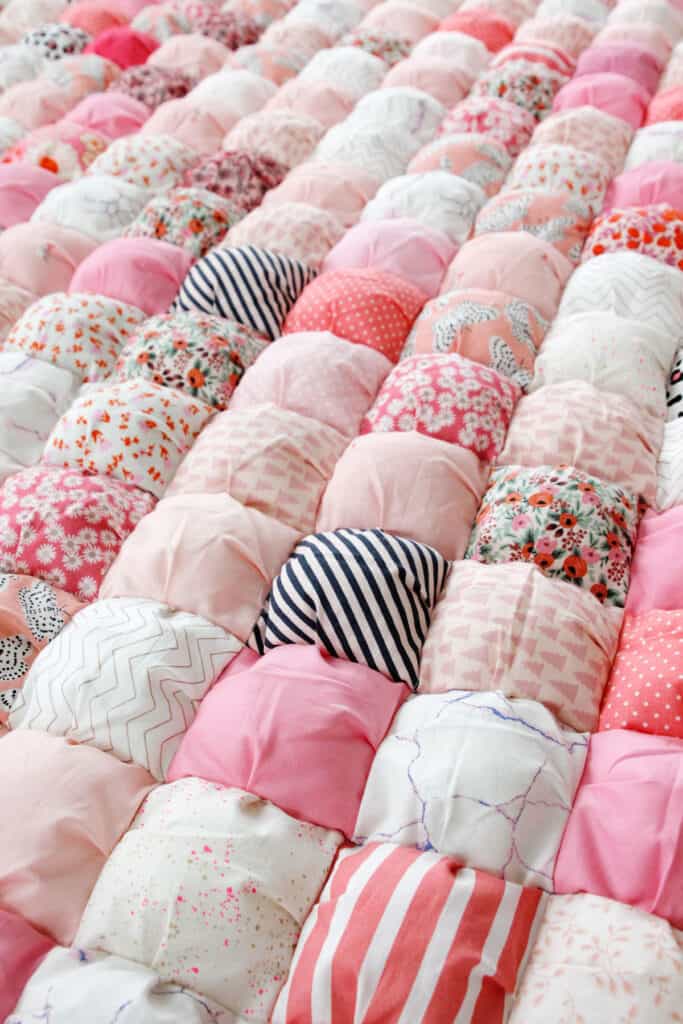
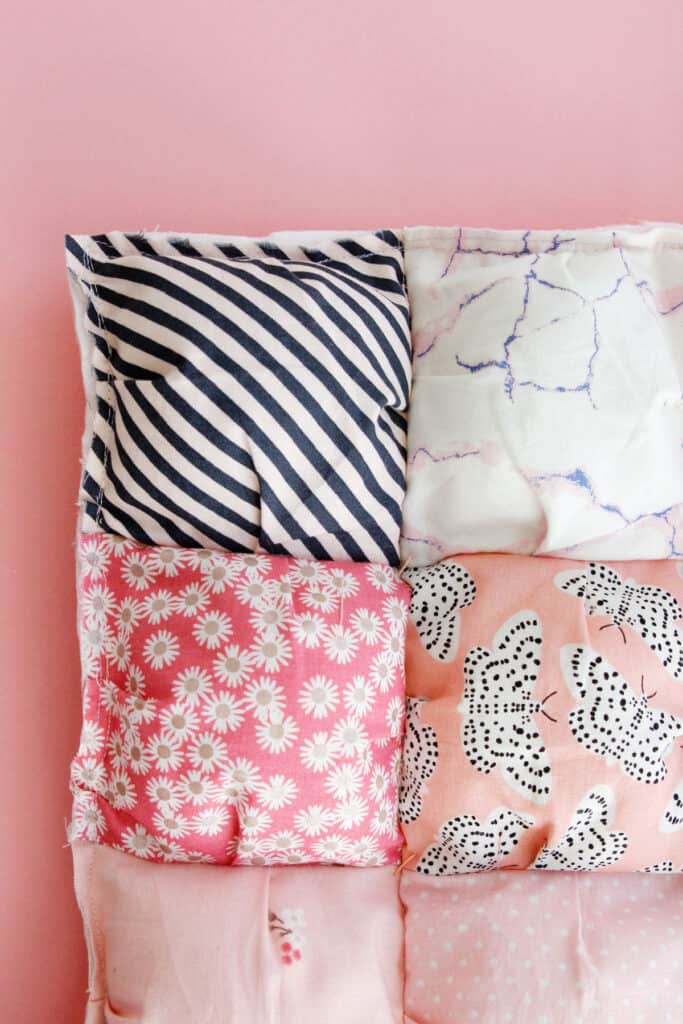
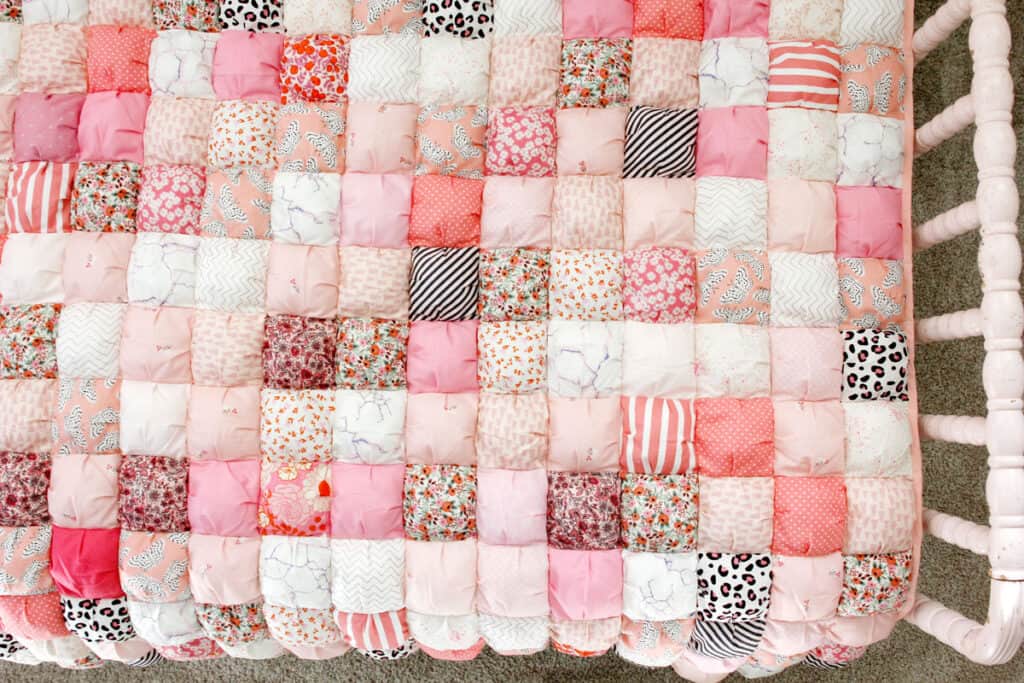
Puff quilts make great gifts! You can choose a color theme to match your decor, a baby room, or gather all of your scraps in one color variety like me!
I think I use the most pink fabrics so I grabbed as many pink scraps as I could find to make this quilt.
Grab some fabrics and read on for the puff quilt tutorial. Puff quilts can also be called biscuit quilts, how cute is that?
There is also a full video version of this puff quilt on YouTube or the video in this post if you get stuck at any of the instructions or want more tips and commentary!
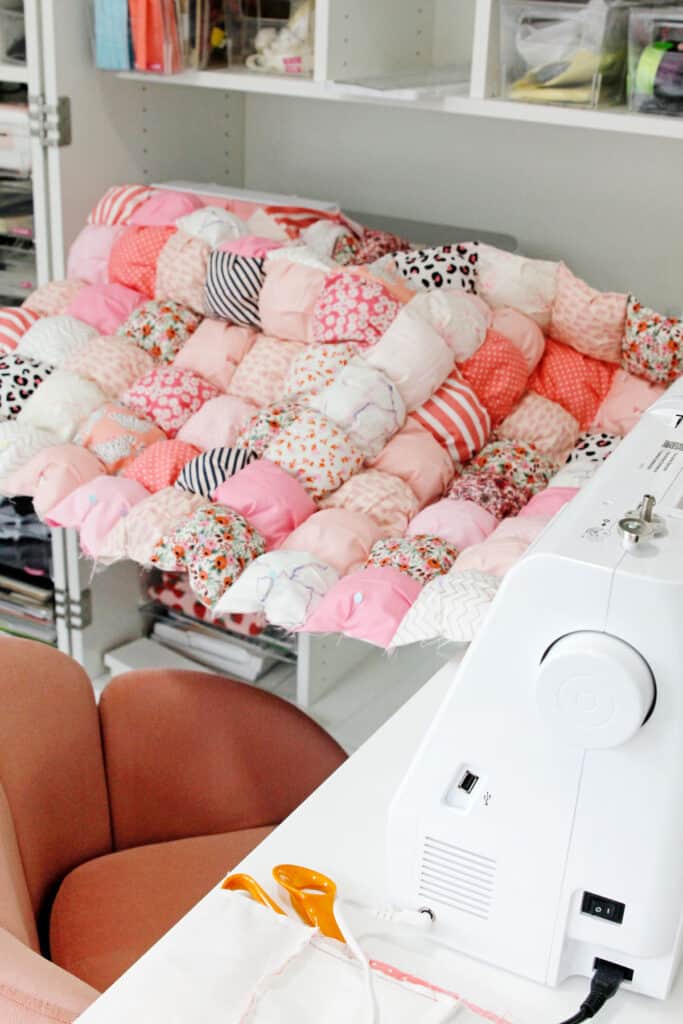
This was the first project I completed with my new DreamBox 2 setup. It was such a nice experience to have my machine surrounded by table space and supplies! Read more about the DreamBox 2 here.
Bubble Quilt Materials
- Quilting cotton fabric for squares – use scrap fabrics, yardage fat quarters or other precuts
- This puff quilt tutorial is a great project for precut fabrics, particularly 5-inch squares – these come stacks of precut squares, also called a charm pack (affiliate links) to save on cutting time
- 1/2 yard cotton for binding, or premade quilt binding (about 2 packs for baby or 3 packs for throw size)
- Additional cotton fabric for block bases
- Use white cotton, plain fabric or more woven scraps
- Backing fabric
- I recommend wide back fabric for the back of your quilt if you are making any size larger than baby, you can see options here
- You can also use standard size fabric sewn together to make up the size of your quilt
- 1 yard for baby size
- 3 yards for throw size
- Batting*, I prefer Warm & Natural Company needled batting
- Fiberfill stuffing, 2-3 – 32 oz bags depending on your size and how stuffed your bubbles will be
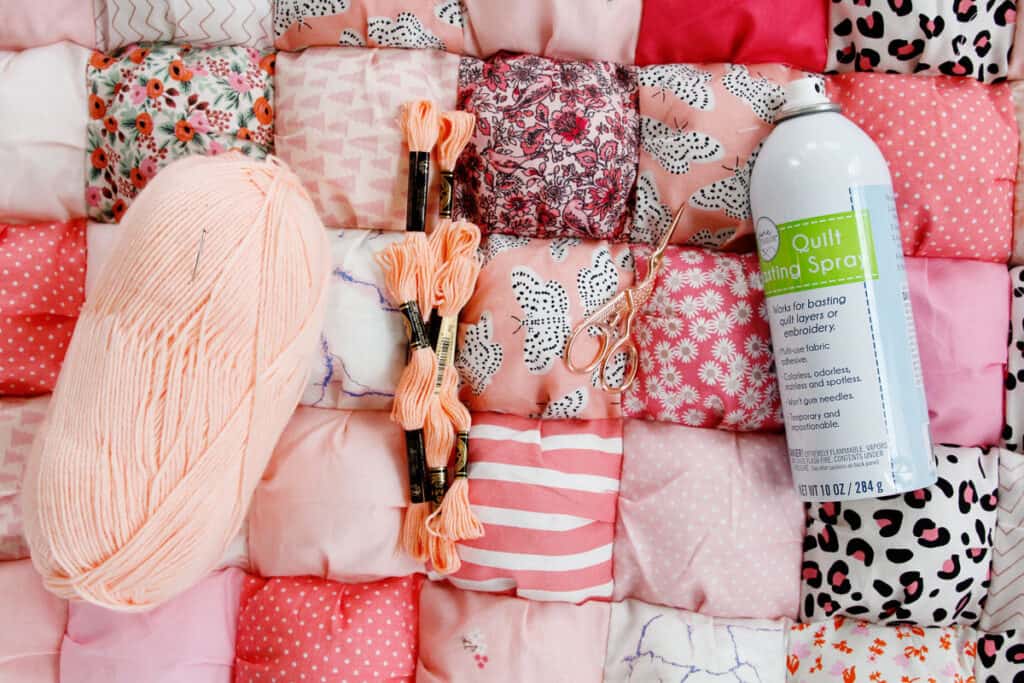
- Yarn or embroidery thread, needle and thimble for tying
- You won’t see much of this thread on the top of the quilt since it will be between the intersections of each puff block and will hide under the puffs a little bit. You will see it more on the back of the quilt so choose thread to match.
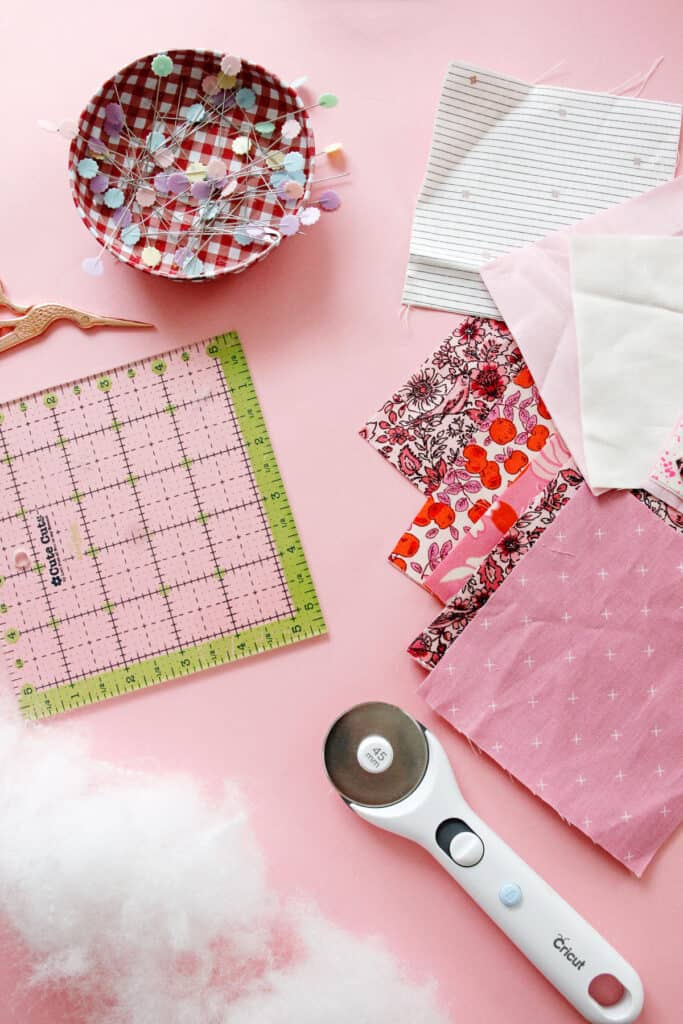
- Rotary cutter, acrylic ruler and cutting mat
- Lots of pins, scissors and a sewing machine
- Basting spray, I love the June Tailor brand for basting
- Optional: 5″ and 4.5″ square quilting rulers
- I love the 5.5″ Cute Cuts ruler by Lori Holt (the green one) for quilting projects
*Don’t have batting? Since there are so many layers in this quilt, you really won’t miss batting. However a layer of batting on the back of the puff quilt between the puff layer and the backing fabric will make a warmer blanket and will also smooth out the seam allowances on the back of the quilt.

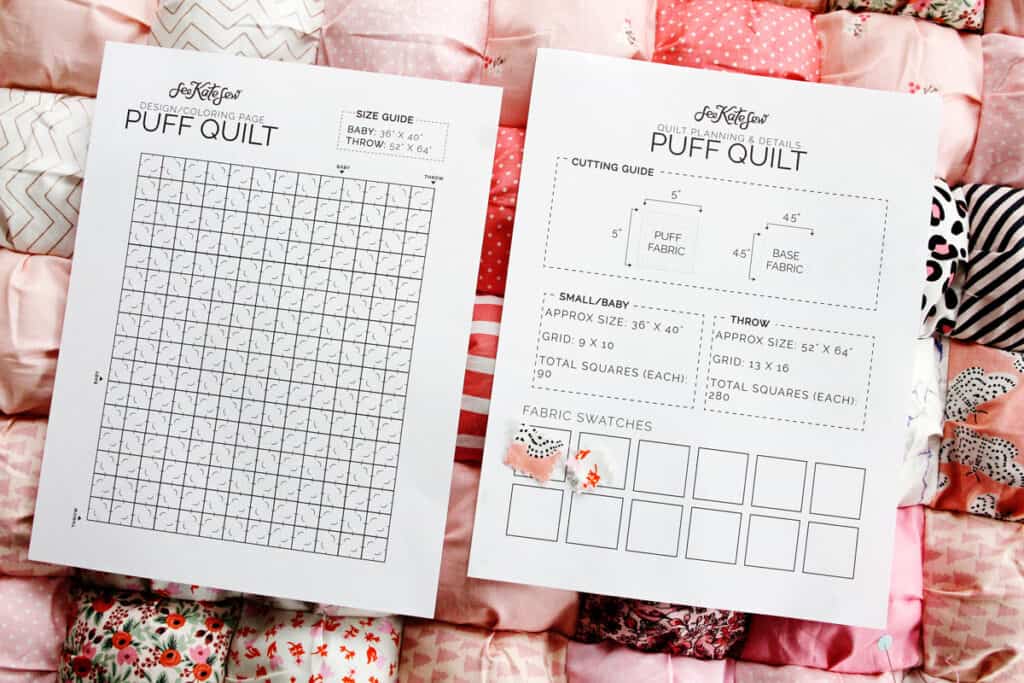
Puff Quilt Pattern Printable Design Coloring Page + Cutting Guide
Download the free design pages or purchase the easy-to-print pattern with instructions here!
There are two pages included. Page 1 is a blank coloring page that you can use to design your fabric placement before you start! Page 2 includes cutting size information as well as how many blocks you’ll need plus a spot for fabric swatches. These design sheets will help you stay organized as you make your puff quilt. For a full printable pattern including instructions, click here.
Click on the button below, enter your email and download this PDF pattern file.
Puff Quilt Finished Sizes
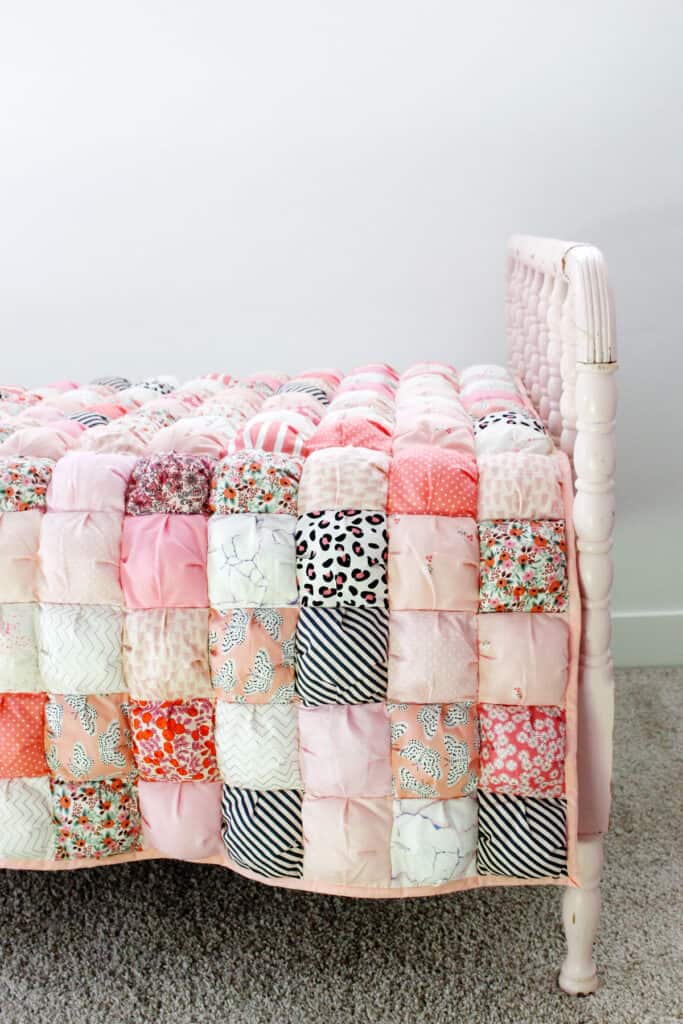
For this puff quilt tutorial, each finished puff or block will be 4-inch square at the base after it’s all sewn together.
The finished quilt size can be manipulated easily by adding more or less quilt squares. In this tutorial I am sharing two standard sizes – baby and throw. The baby size works for a toddler play mat which is a nice baby shower gift. The throw size can be a couch quilt, be draped over a bed or used as a reading mat. All the puffs make this quilt a little bit heavier than a normal quilt so keep that in mind – it’s not designed to be in the bed with babies for sure! It will have a bit of a comforter feel to it.
- Baby size: 36″ x 40″ (9 rows by 10 rows)
- Throw size: 52″ x 64″ (13 rows by 16 rows)
If you want a lap quilt, use measurements somewhere in between these two sizes. The stuffing will also contract the fabric squares up making the blanket seem a little smaller than the measurements. Keep that in mind when deciding how many rows to do.
how to make a puff quilt
Use 1/4″ seam allowances.
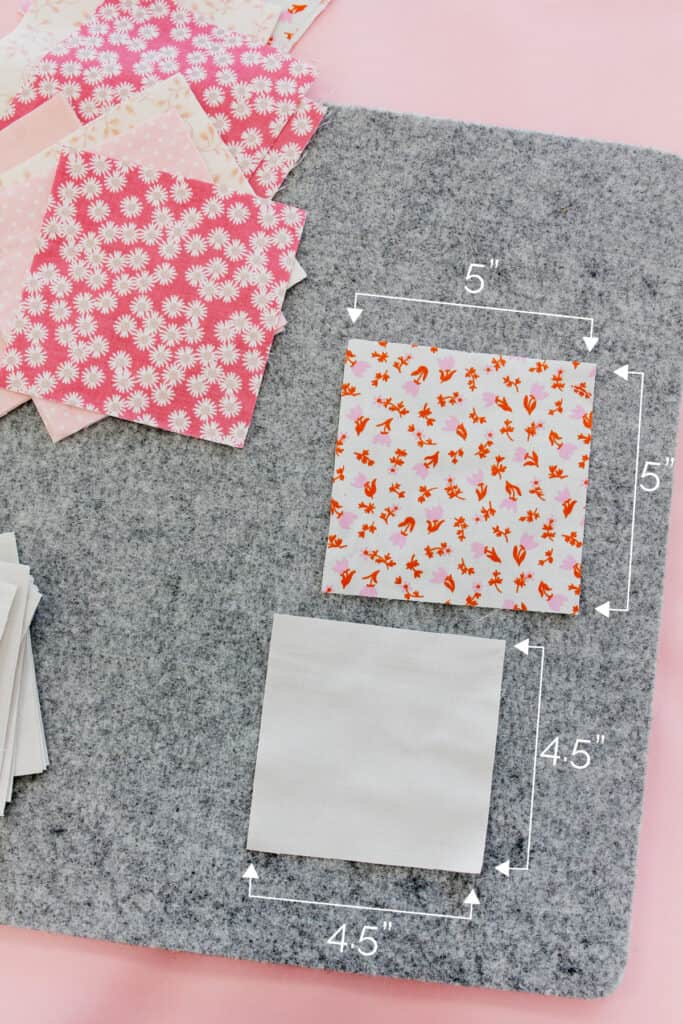
First cut out your squares. Cut the quilting fabrics into squares measuring 5″ by 5″.
Cut base squares measuring 4.5″ by 4.5″ with your muslin or extra fabric.
- Total Squares Baby Size: 90
- Total Squares Throw Size: 208
To cut faster, cut strips 5″ and 4.5″ wide from yardage, then cut down to squares. You’ll need the same amount of top/puff and base squares, for example 208 – 5″ squares and 208 – 4.5″ squares for the throw size.
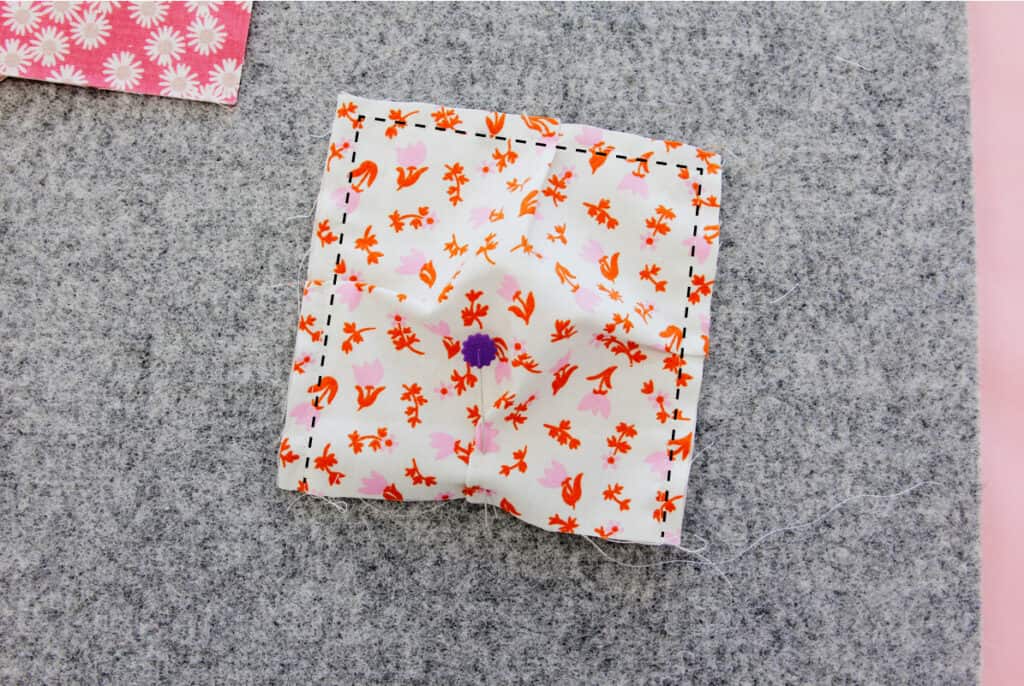
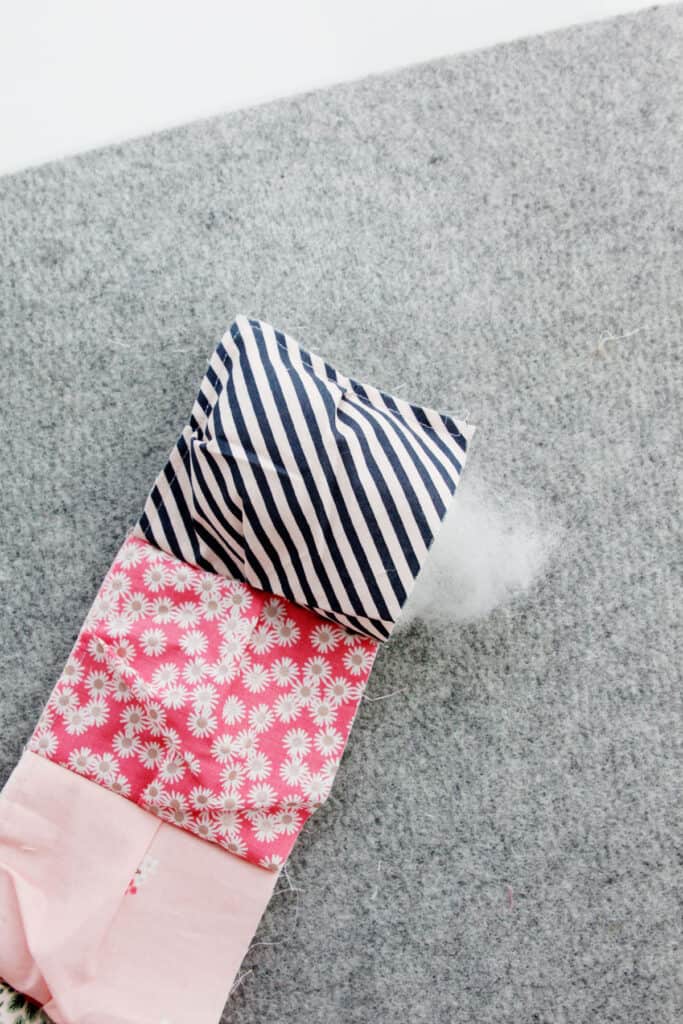
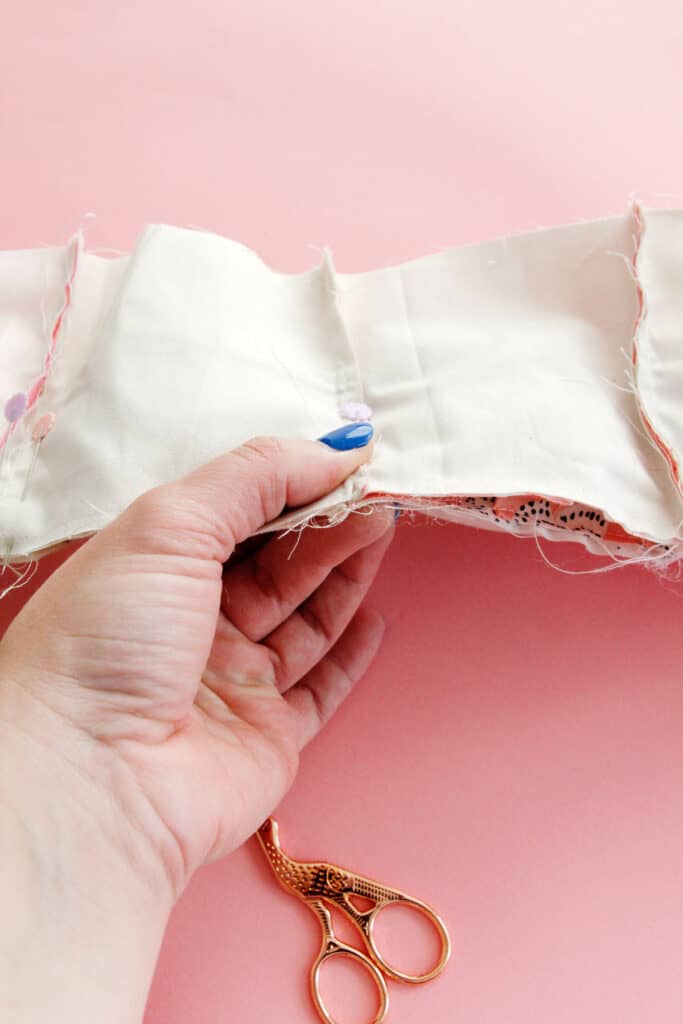
Once you have all your squares cut we will start the fun part! Grab one base square and one main square.

Match the corners of the large square with the corners of the small square underneath. You will have some billowing fabric along each side. Then create small pleats on the square sides with the excess fabric. Each pleat will be about 1/4″ and should be in the middle of the square’s side.
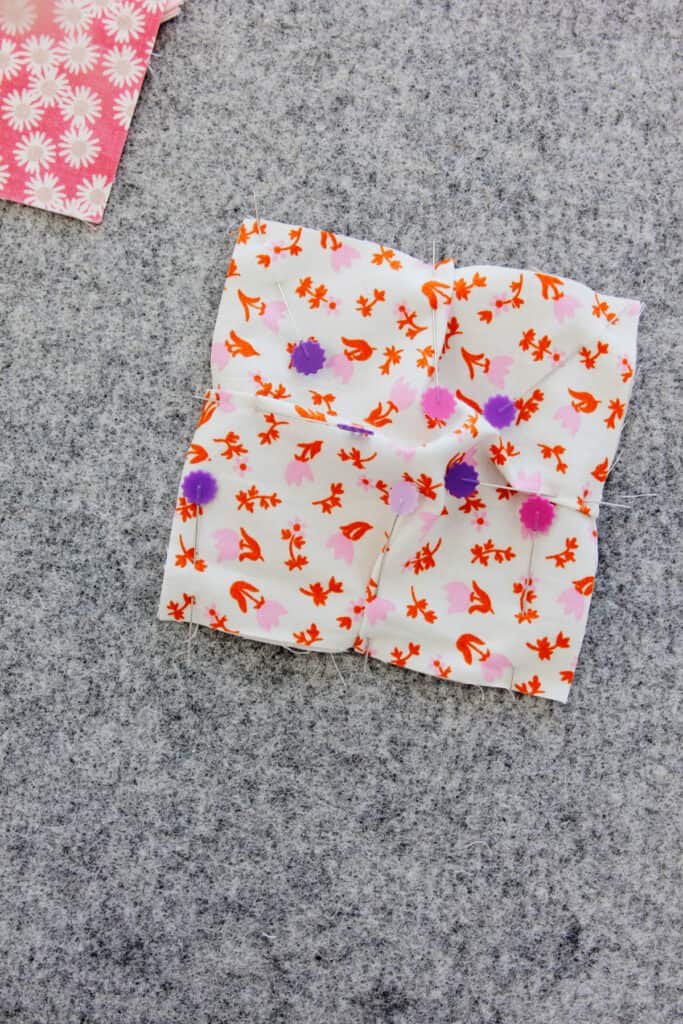
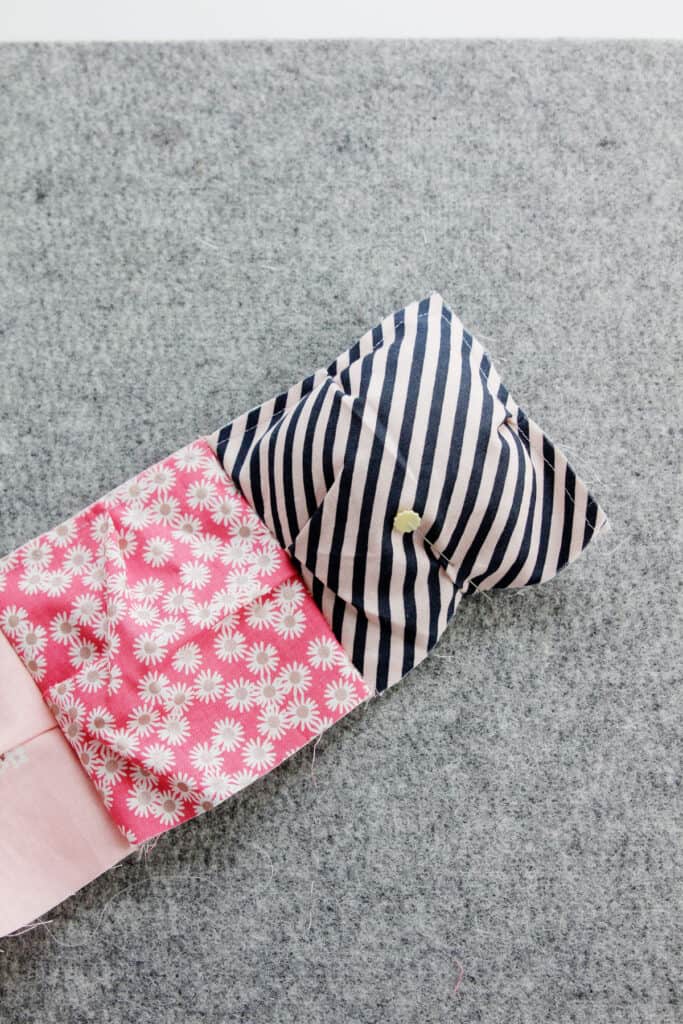
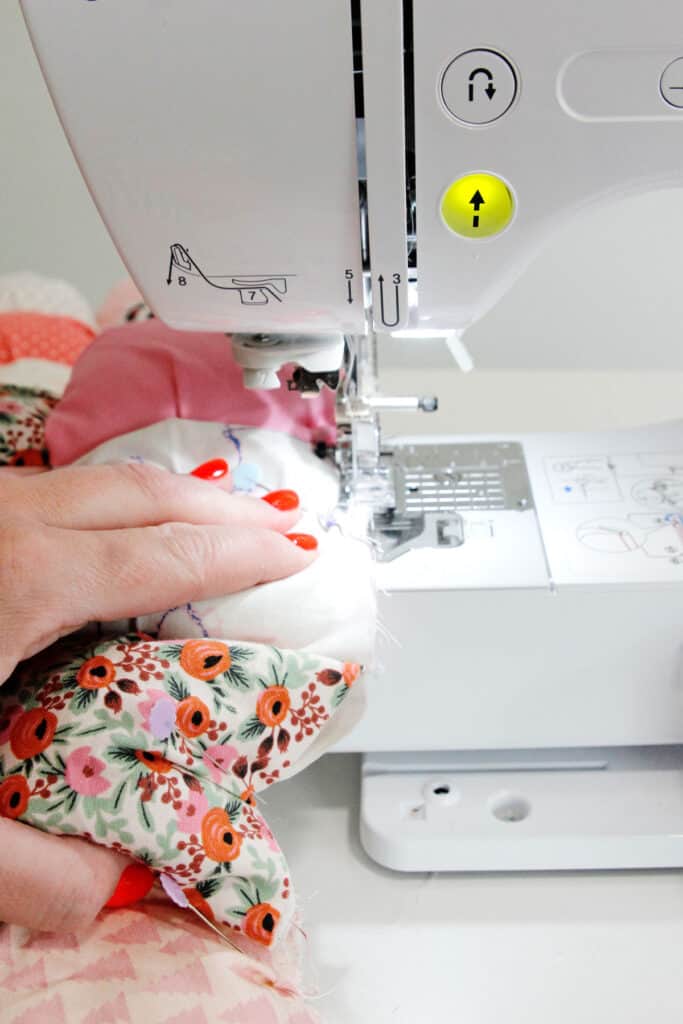
Sew three sides using a scant 1/4″ seam allowance. Leave the last side open. You will have stitches around 3 of the edges. *Backstitch at both ends of your stitching! This is important because we are going to be handling these blocks a lot throughout the process. Backstitching will help the blocks stay put together until we have sewn them into the quilt.
I like to batch sew these before moving on to the next step. You can choose to leave the pin in the 4th side or take it out for now. I took mine out for now.
Sew squares together
We’ll start by sewing the quilt blocks together in rows. We’ll sew one row at a time and stuff the squares in between.
Sew the squares together with the open sides on the right. Sew two squares together with a 1/4 inch seam allowance. The open sides will still be open.
- Baby Size: 9 x 10 squares
- Throw Size: 13 x 16 squares
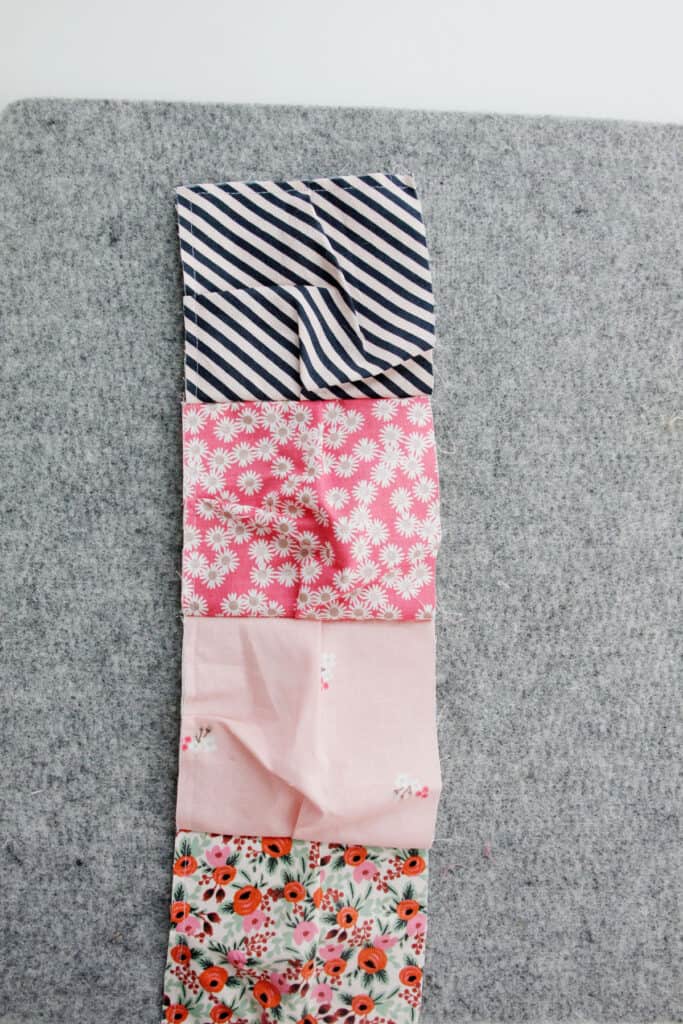
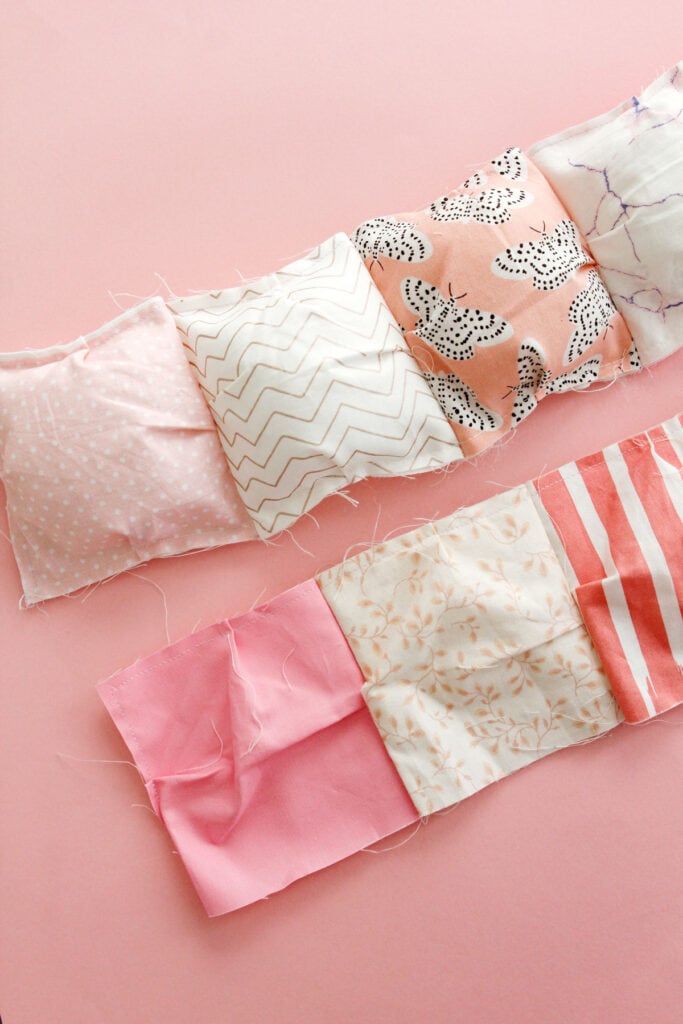
Sew squares together into a row of blocks, 9 for baby or 13 for throw.
Sew all the blocks into rows until you have used up all your blocks. If you are making the baby size, you should have 10 rows of 9 blocks. If you are making the throw size you’ll have 16 rows of 13 blocks.
Fill your puff squares
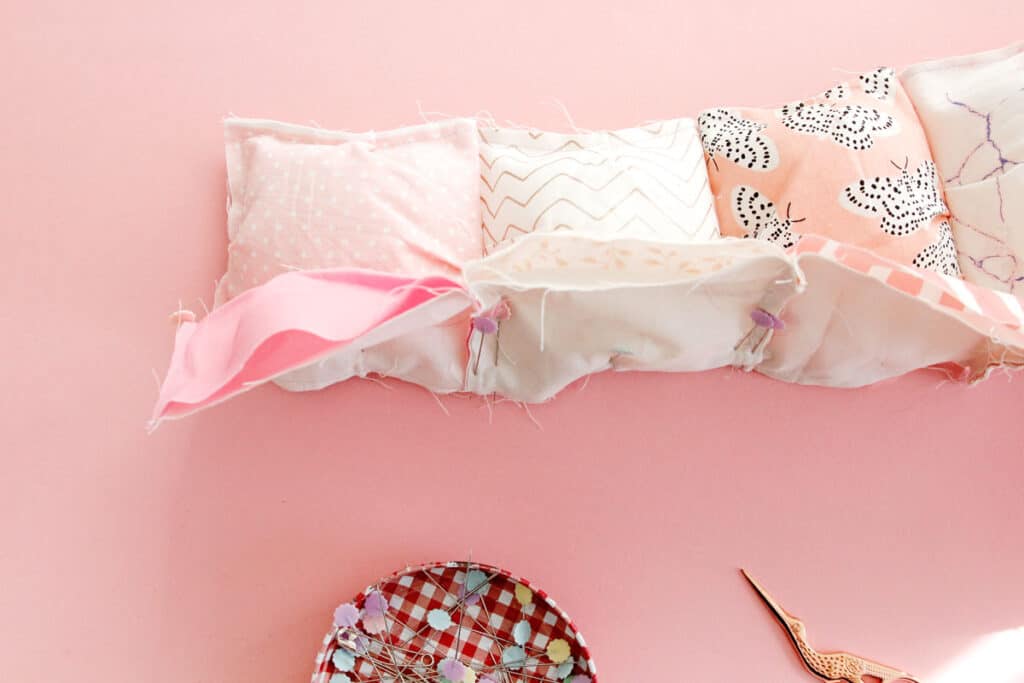
The next step in the puff quilt tutorial is to stuff your squares! Use fiberfill stuffing to stuff each square.
Pinch and pin the last side of each square after stuffing.
Continue stuffing and pinning all the way down your row of squares. I used a light handful of stuffing for each puff but you can decide how much or how little to stuff them.
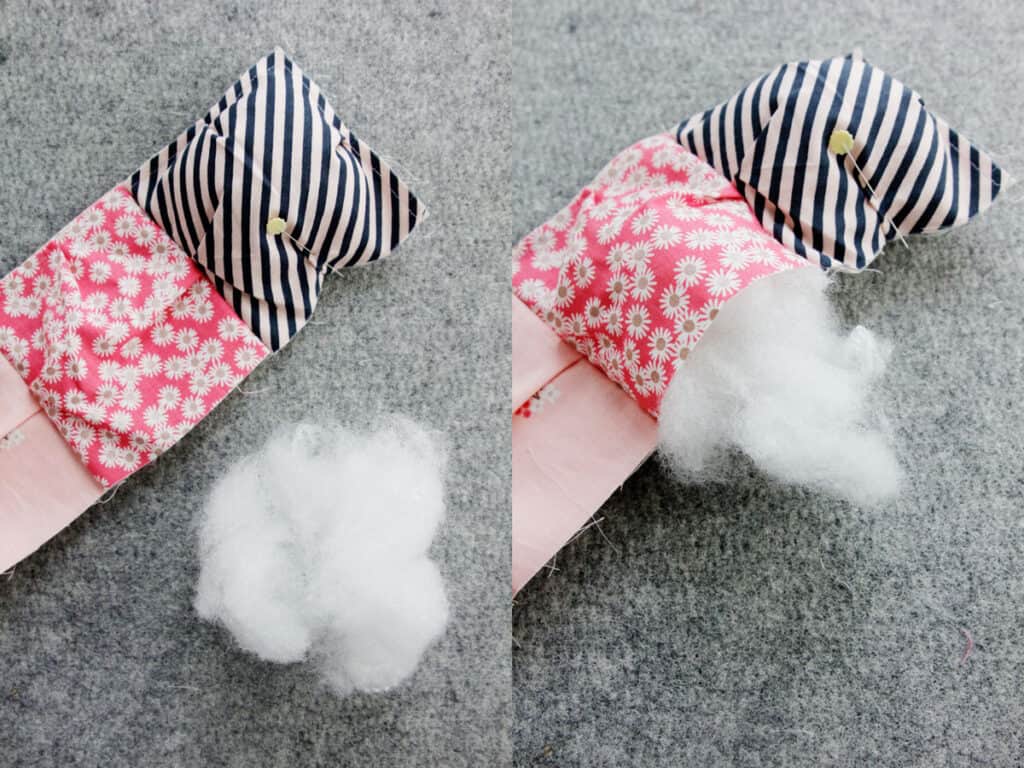
Once they are all stuffed and pinned, baste the openings closed so the pleats stay where they are. Don’t use too wide of a basting stitch because we want to secure the pleat. After basting, remove all the pins. Grab an unstuffed row from your pile and check to make sure the fabrics look good together.
Pin the stuffed row to the unstuffed row, matching up the seams between the blocks. The open side of the unstuffed row will be opposite this seam so we can stuff it after we sew it to the first row.

To help reduce seam bulk, nest the seam allowances as you match the rows together. To do this, pin one seam allowance to the left and the other to the right.
I recommend pinning the seam allowances between the blocks and another pin in the middle of the block. Since one of the rows is stuffed it will be a little bit tricky to get this seam straight, adding pins will make it easier.
Sew the second row unstuffed to the first stuffed row. Be sure the edges of your fabric don’t skew as you sew. Use a 1/4″ seam allowance. When you finish sewing these two rows together, remove all the pins.
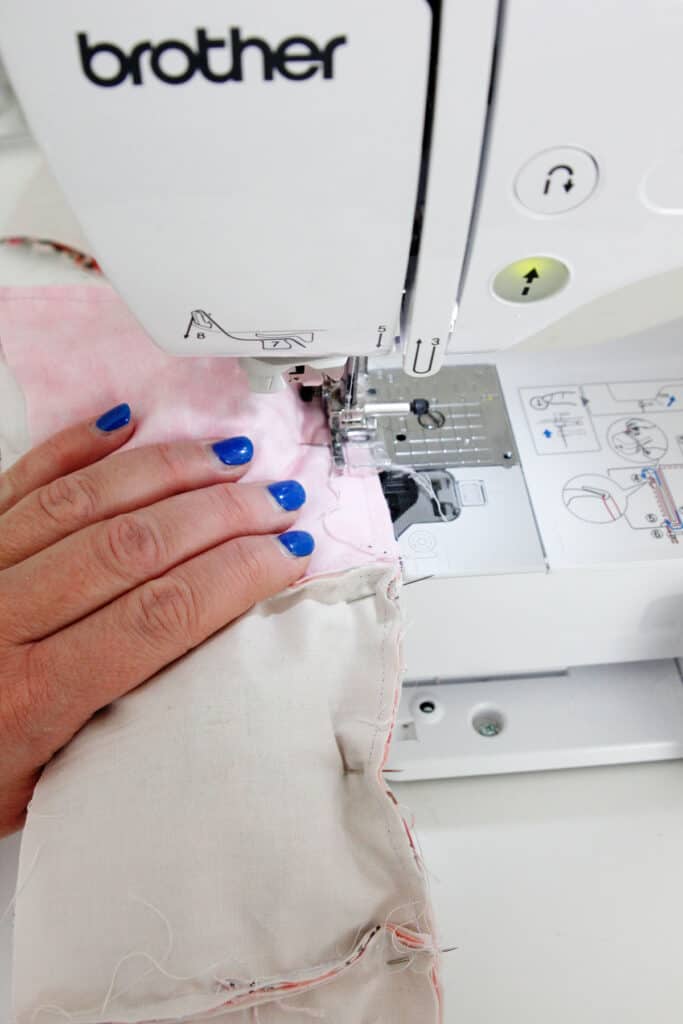
Then stuff the second row and repeat.
The stuffing can easily skew your stitching so use your left hand to hold the puff down as you sew. This will keep your edge straight as you sew.
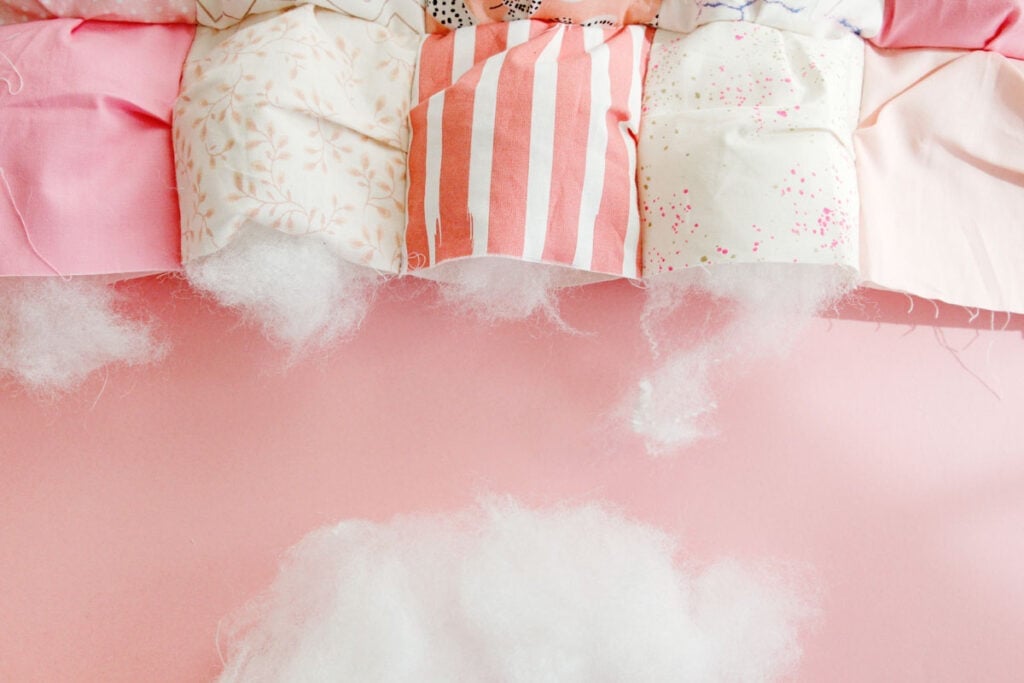
Add rows and stuff them until you have used all your rows.
How to finish your puff quilt
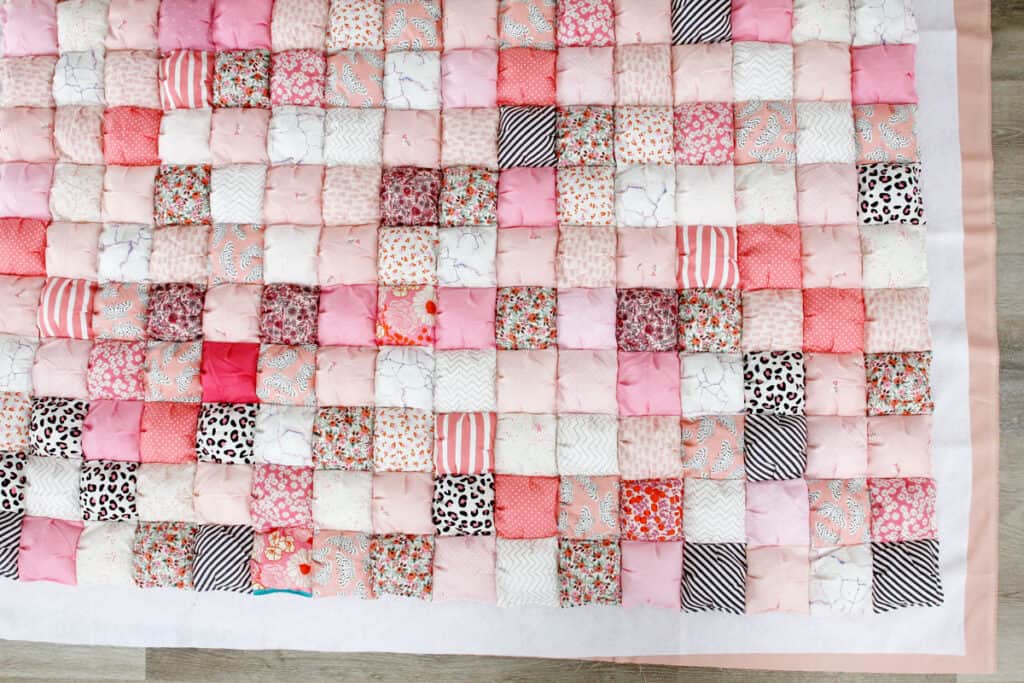
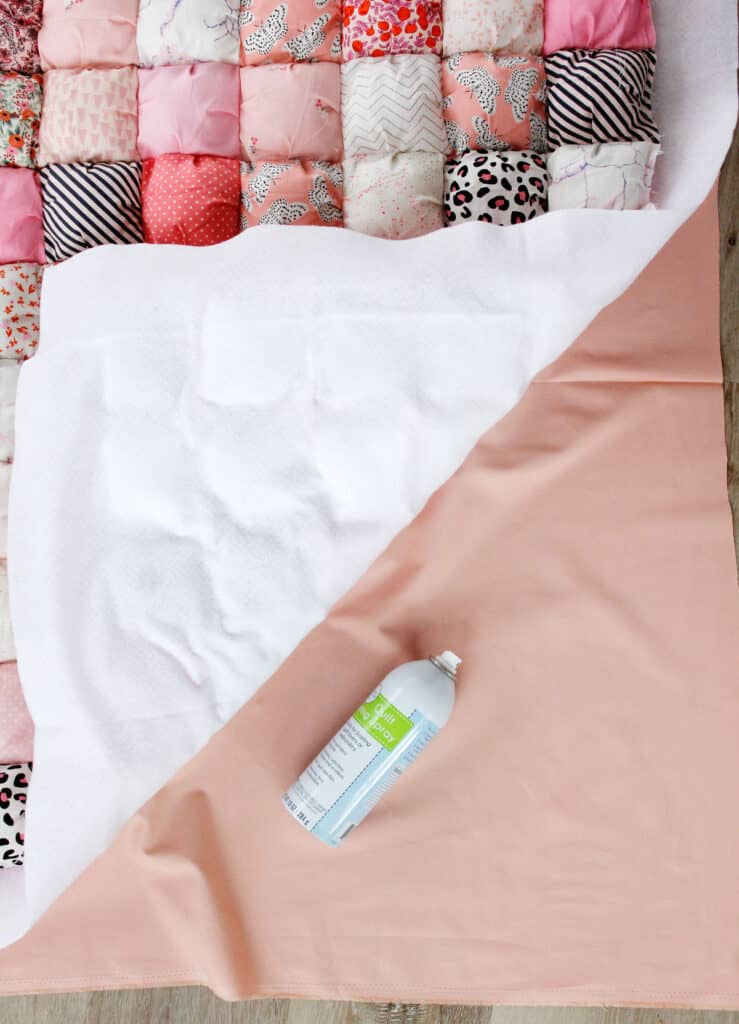
Once your puff quilt top is done, grab your batting and backing plus basting spray (or safety pins). You’ll also need embroidery thread or fine yarn with a needle and scissors for clipping.
Find some floor space if you can. Lay your backing fabric face down, then stack the batting on top. Finally, put the puff quilt face up on the stack. Trim your batting and backing if needed, I like to leave a few inches around the edges.
Then curl up the top two layers of the quilt and spray baste the backing to the batting. Work from the center out and repeat with the batting and puff layer. This is a temporary hold that will keep your layers together while you tie the bubble quilt together. After the basting spray is dry, if you need to move your quilt you can roll it up to keep the layers together.
Thread your needle and insert it from the back of the quilt coming up at one of the intersections, in the corner of one of the four blocks.
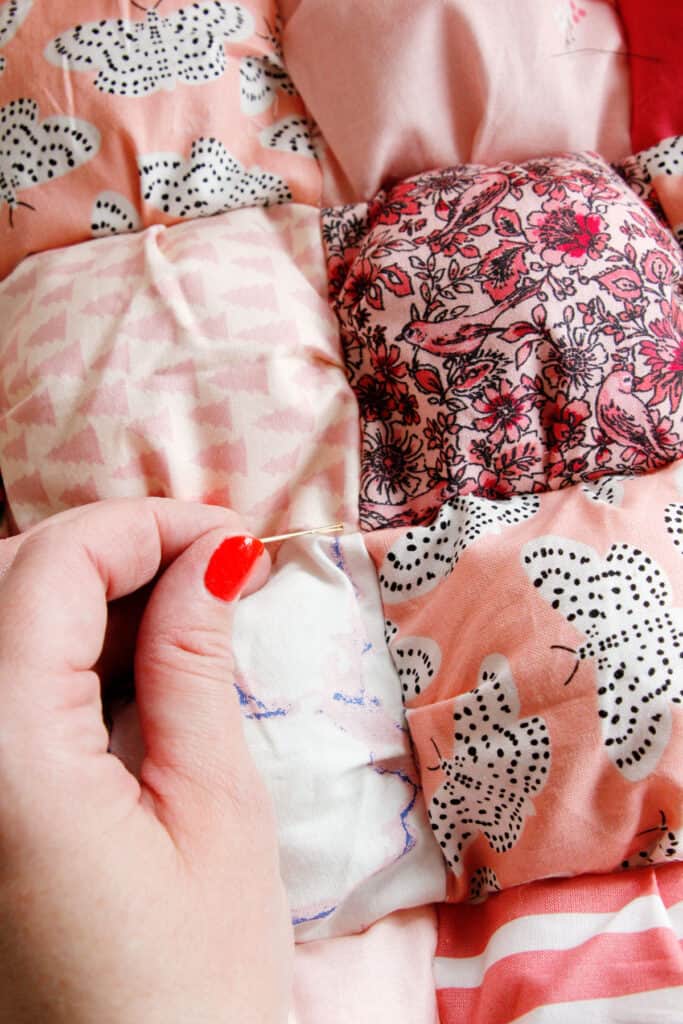
Thread back into the block diagonal from the insertion point.

Bring the threads to the back and tie with a tight triple knot. Then trim the threads, leaving about 3/8″ to 1/2″.

Continue tying the quilt at the intersections until you have done them all! Baste around the edges of the quilt then trim off the excess backing and binding to square up the quilt.
Last step: binding! Sew your bias tape to the front of the quilt (the puff side), then flip it to the back and finish it with a hand needle and thread.
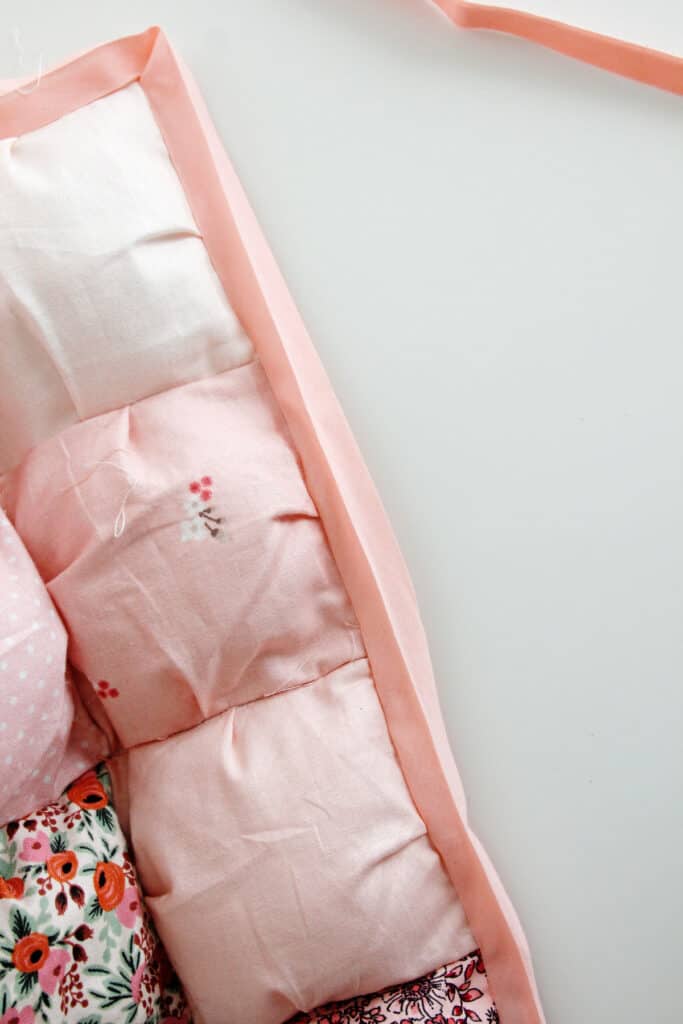
See this tutorial if you need binding instructions.


Wonderful directions, so clear. Thanks so much
Loved the quilt, process and finished product! Thank you so much for sharing!