Today’s guest is Rachel from Maybe Matilda! She had a super cute crochet booth at the queen bee market this weekend and I even saw her in real life! Rachel is even cuter in person. On her blog, she likes to refashion old clothes into cute accessories, try her headbands on her little boy, and make skirts. Today she has a cute ruffle project that anyone can do!
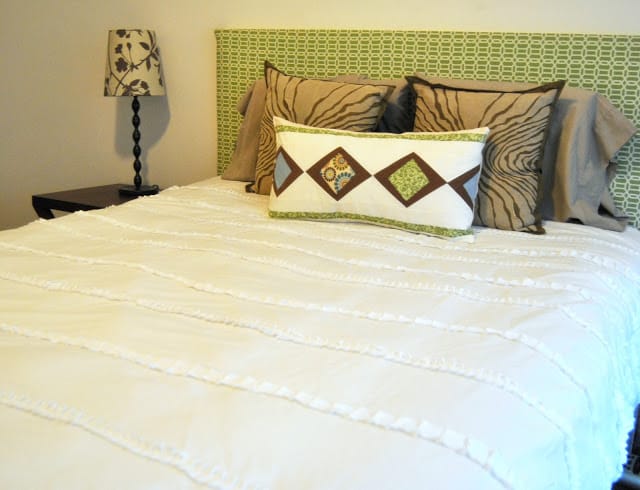
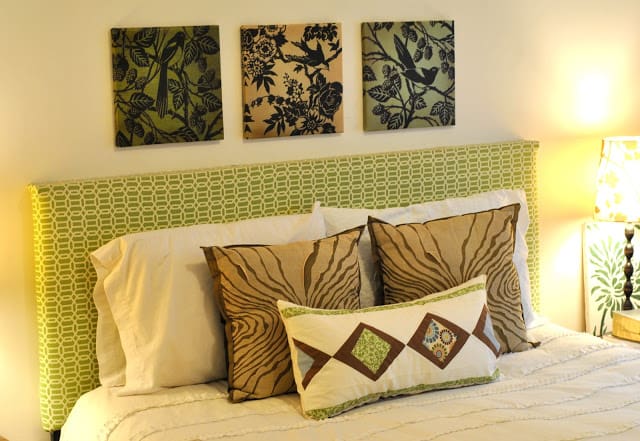
Hi there, ruffle-lovers! I’m Rachel from Maybe Matilda, and my contribution of ruffled fun comes in the form of a pretty little duvet cover for my bed. Our bed has undergone a bit of a makeover in the past few months . . . we started with a plain Jane, boring and ugly headboard that we (translation: I) upholstered. I borrowed some throw pillows from the living room and sewed up a little bolster pillow to dress up the new headboard. That was probably enough, honestly, but our old white bedspread was starting to look awfully dingy and I wanted to find a quick, inexpensive way to hide it and dress it up a bit. So I got to work copying the Tuxedo Ruffle Quilt from Urban Outfitters–I love the texture it adds to a bed, but keeping the ruffles in neat little rows prevents it from looking too girly. Here’s my cheapskate version:
I’ll admit it right now so no one is disappointed later on as they see all the shortcuts I took in making this project: I’m a bit lazy when I sew. My favorite projects are the quick, simple ones, so I took advantage of everything I could think of to make my duvet cover faster and easier to create. But I love the way my blanket came out, and the little imperfections don’t bother me . . . don’t they say something about the mistakes adding character? This blanket’s certainly not lacking in the character department.
I used 3 flat white sheets from Ikea for my ruffled duvet cover–I lucked out and found some sheets in the sale bin on my shopping trip, so I only spent $20 for the whole project! I used two queen-sized sheets (to use for the actual duvet cover itself) and one full-sized sheet (to cut up into ruffle strips).
I laid out the full sheet and cut long 1-2″ wide strips diagonally across the fabric. I cut the fabric on the bias because I wanted to minimize fraying without having to hem the sides of the ruffles or create a tube ruffle. It seemed to work out great! It would be wise to iron and mark the sheet before cutting to make sure you stay on track and end up with strips of the same width. But didn’t I mention that I’m lazy? I just eyeballed it and trimmed any wonky bits that looked too wide after I finished chopping that sheet up. It worked out just fine.
After the sheet had been sliced and diced into a huge pile of long, thin strips, I pulled out my handy ruffler foot to use on my sewing machine. If you don’t have a ruffler foot, you could still do this project by making ruffles the old-fashioned way–sew a loose stitch down the center of each strip and gather. But you’ll spend like 100 years working on this blanket. I would definitely recommend just investing in a ruffler foot–they don’t cost much and they do all the ruffling work for you!
I opened up one of the queen-sized sheets and sewed the strips horizontally across it, ruffling it automatically as I went (I guess they are technically pleats . . . close enough!). I took another shortcut here: it would have been smart and sensible to mark straight, even lines across the queen sheet before sewing to make sure the ruffles went on perfectly straight. But I’m not sure I can stress enough just how lazy and anxious to finish I am when I sew. Do you notice the crease lines from where the sheets were folded in the packaging? I just used those as a guide instead of measuring and marking . . . that’s a freebie too handy to pass up. I sewed one ruffle onto each horizontal crease line, then eyeballed the center point between each of those ruffle strips to place another in the middle. My rows of ruffles ended up being something like 6″ apart and are surprisingly straight and even for not being measured and marked first. Tally up another point for lazy seamstresses!
When I finished sewing all those pleated/ruffled strips onto the blanket, it sure did look pretty! What a nice expanse of crisp white ruffly goodness!
(I alternated ruffle sizes–one wider ruffle between each tighter ruffle. I thought it would add an extra dimension to the blanket, but to be completely honest, I think that was wasted effort. I’ve never since noticed or cared that the ruffles were different sizes. Just so you know.)
Since making this, I’ve thought it might have been more practical to leave the blanket as is without adding the second sheet to make it a true duvet cover–washing and drying and re-making the bed would sure be a lot simpler and faster if there wasn’t a blanket to pull out and stuff back in each time I want to wash it. It wouldn’t have the full, fluffy look that a duvet cover has, but it would have been easier. Something to consider if you decide to make one yourself.
To turn it into a duvet cover that you can stuff with a duvet or another blanket, lay the second queen-sized sheet on top of the ruffled sheet, keeping the ruffles facing up and the second sheet facing down, like so:
Line up and pin the two sides and the bottom edge of the two sheets, and stitch around. Turn it right-side out and it’s just about ready to go! You can sew ribbon ties or buttons and buttonholes to the top edge to keep the duvet tucked inside . . . my lazy way was to actually sew our blanket into the duvet cover by stuffing it inside, lining up the top edge of the blanket between the two sheets, and sewing it all together with a really loose, wide stitch. To wash it, I’ll just use a seam ripper to pop it open and re-sew it all together afterwards. This may not have been the wisest choice, but one of my biggest pet peeves in life is when the duvet bunches up and slides around inside the cover–don’t you hate that? You’re trying to be neat and cleanly by making the bed, but it looks sloppy and messy with a bunchy blanket inside the cover. Drives me nuts. So this unconventional and possibly stupid method will at least keep the blanket exactly where it’s meant to be inside the cover.
So there you have it! It was a relatively quick and simple project that I started and finished in one afternoon, and I think it adds a little extra texture and style to my bed:
Thanks for having me over, Kate, and I hope you all enjoyed my little bit of ruffles!
……….
Thanks Rachel! So cute! Also check out her pleated necktie refashion, ruffles and dots crochet blanket, and felt circle pillow. You can also follow her on facebook and twitter.






Thanks again for the posting invite, Kate! I’ve loved seeing everyone’s projects!
Very very cute. The little details definitely bing the duvet cover to life
this was a pretty big project…impressive
Love it! And I love your “laziness”. Looks darling.
I love the duvet cover! I’m thinking about sprucing my old one up. This just might be the thing for it.