• Skip to main content
  • Skip to primary sidebar
  • Skip to footer
  • Blog
  • About
  • Contact
  • FAQ
  • Sponsor

see kate sew

sewing, crafts, tutorials, DIY

  • Patterns
    • Free Patterns
    • Pattern of the Month
  • Tutorials
    • Accessories
    • Bags and Pouches
    • Clothing
    • Costumes
    • Crafts
    • Cricut Projects
    • Holiday
    • Household
    • Kids
    • Maternity
    • Quilting
  • Topics
    • Baby
    • Boy
    • Christmas
    • dog
    • Dolls
    • Easter
    • Girl
    • Halloween
    • Lookbook
    • Party
    • pet
    • Printables
    • Training
    • women
  • No Sew
  • Sewing 101
  • Sew4Good
  • Pet
  • Sewing Room
    • DreamBox
  • Reviews
Home
  • Patterns
    • Free Patterns
    • Pattern of the Month
  • Tutorials
    • Accessories
    • Bags and Pouches
    • Clothing
    • Costumes
    • Crafts
    • Cricut Projects
    • Holiday
    • Household
    • Kids
    • Maternity
    • Quilting
  • Topics
    • Baby
    • Boy
    • Christmas
    • dog
    • Dolls
    • Easter
    • Girl
    • Halloween
    • Lookbook
    • Party
    • pet
    • Printables
    • Training
    • women
  • No Sew
  • Sewing 101
  • Sew4Good
  • Pet
  • Sewing Room
    • DreamBox
  • Reviews

05.17

The Button Up Refashion Swap

Welcome to See Kate Sew! If you’re new here, sign up for my email newsletter for access to free patterns, tutorials and all the latest sewing news! Tour my sewing room HERE!

This tutorial is a men’s shirt to women’s jumper refashion and is part of a 10 Blogger Refashion Swap! We were all given the measurements of one blogger to sew for and handed our measurements to another blogger. I sewed a jumper for Melissa and Miranda made me a sweet dress! Next week we’ll all model our new clothes for you, but today, there are 10 refashion tutorials around blogland, including mine here! 
The other bloggers involved are:
Jennifer of Grainline Studio
Krista of Lazy Saturdays
Liz of Cotton & Curls
Megan of Megan Nielsen Designs 
Melissa of I Still Love You
Miranda of One Little Minute
Miriam of MadMim
Sunni of A Fashionable Stitch
Suzannah of Adventures in Dressmaking


I made a yellow striped jumper for the Men’s Refashion Swap for Melissa but totally didn’t take pictures of it! Silly me. I was on a deadline and in the middle of moving across the country if that justifies it. But I did have the pleasure of meeting Melissa in real life while I was in Salt Lake last month. She’s cooler than her blog makes her out to be, which is pretty cool!


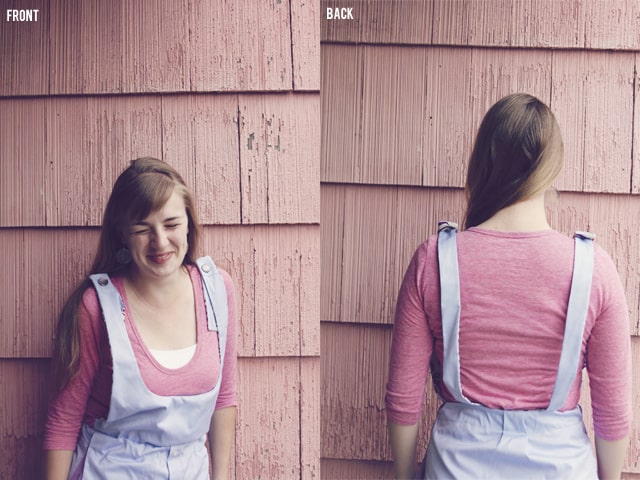
Anyways, I had a ton of fun making the jumper so I made another one the same way and had my friend Katie(isn’t she cute!) model it. Melissa of ISLY will model the jumper I made for her next week. I’m anxious to see it! 

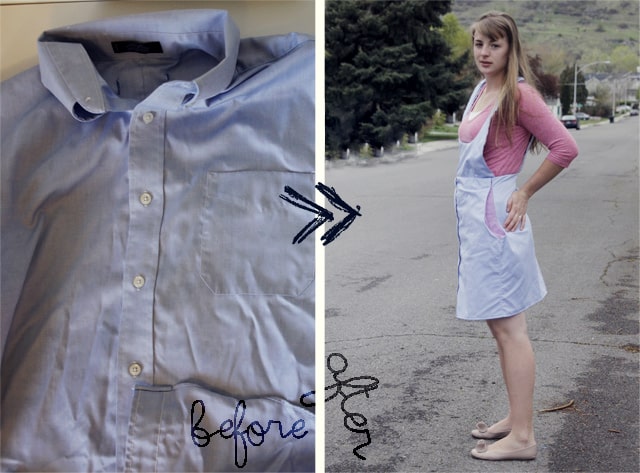
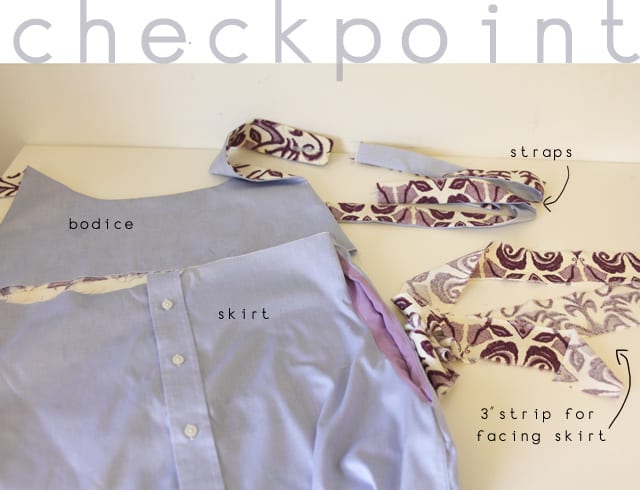
To make a jumper out of a men’s shirt, you need a large men’s shirt, about 1/2 yard of contrast fabric to line the bodice about 1/4 yard for pockets and little scraps for an optional collar. I made the tutorial with the collars but took them out for the final product. Melissa’s jumper has the collars though, so you’ll see them next week!


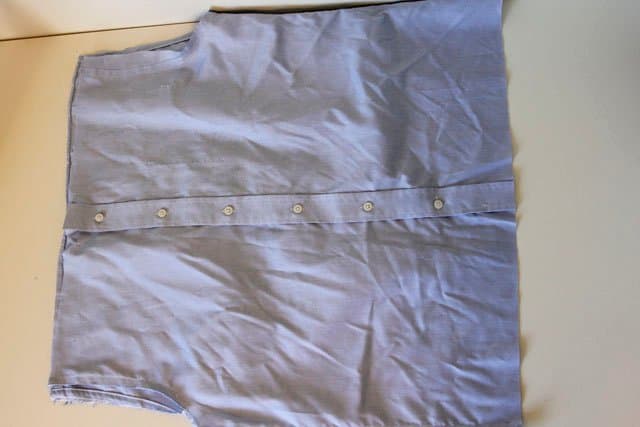
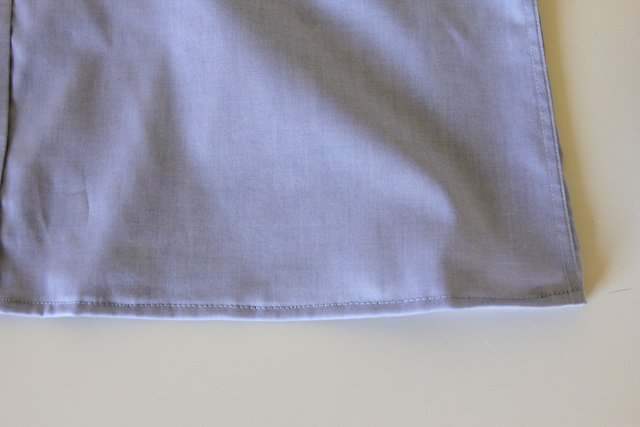
To make the skirt piece, cut off the sleeves and the top off your shirt, leaving most of the armhole. Then measure to your desired length and straighten up the bottom.

To add the pockets:
1. Cut out two big partial ovals using the armhole as a guide for the sides. 2. Pin the pocket pieces to the armholes, right sides together. 3. Sew at 1/4″ and press. 4. Stitch the seam allowance to the pocket at 1/8″. 5. Pin pocket pieces together 6. Sew around the edges. 7. Tuck the pocket in and tack together at the top. 8. Done! 

Finish the bottom edge with a clean hem. I folded my hem over twice, pressed and sewed it into place at 1/4″.

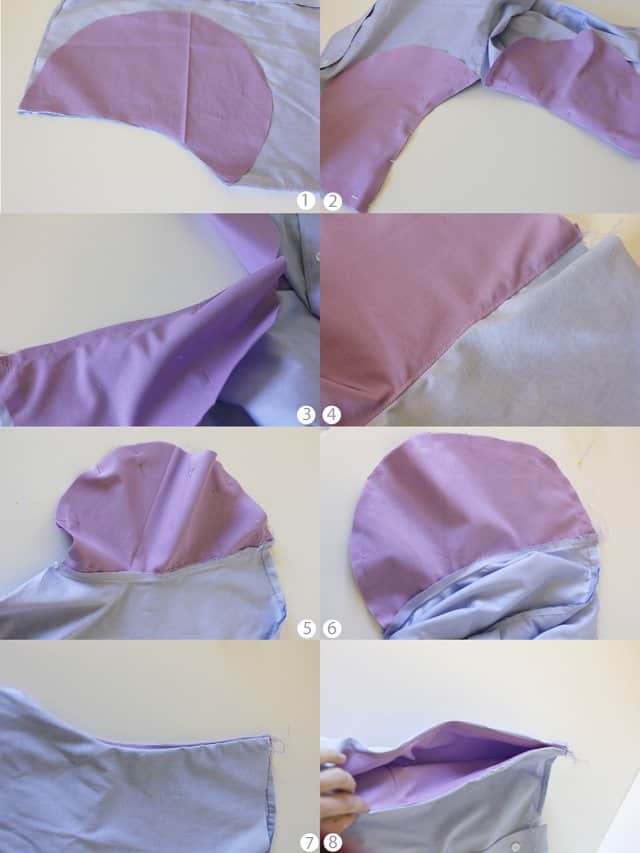
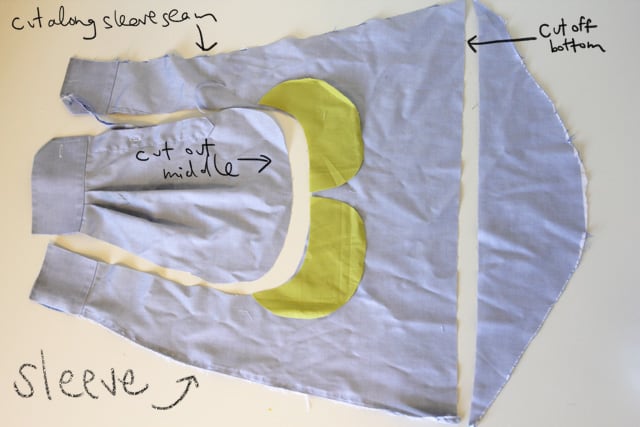
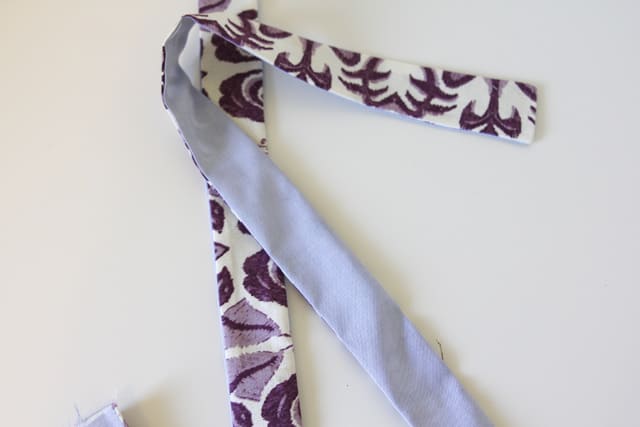
To make the front bodice piece, grab one of your sleeves and cut it open along the side seam. Then, straighten the bottom by cutting off the curved piece. Finally, cut out the middle in the shape you want to use. If you don’t want a front bodice piece, you can just makes straps with the sleeve.

If you want to add a little faux collar, here is how:

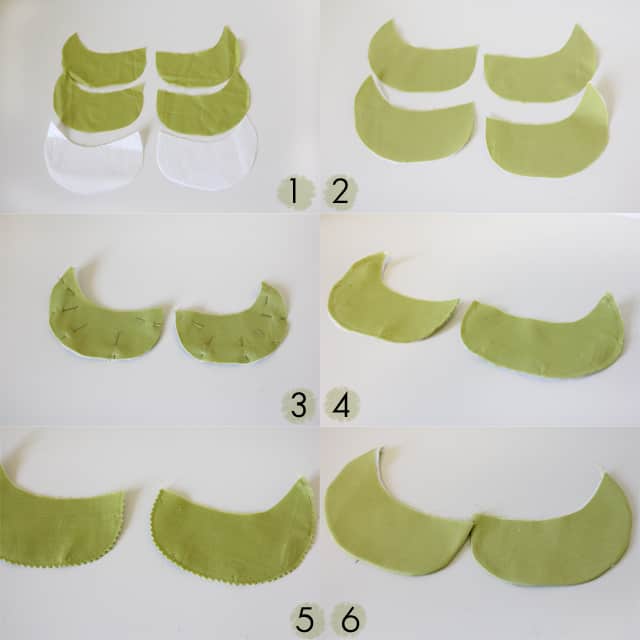
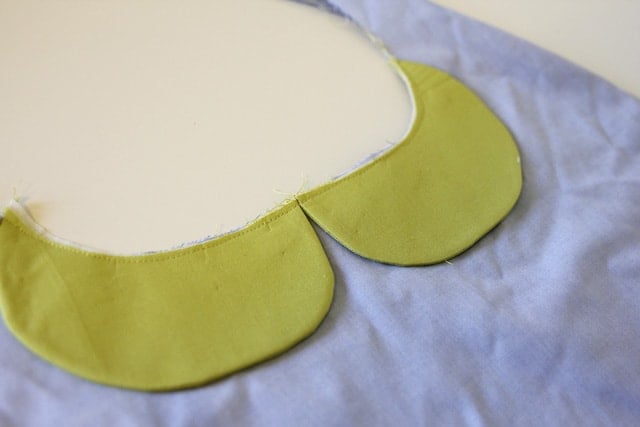
1. Cut out two layers of each collar and 1 layer of interfacing. 2. Fuse the interfacing to the collar pieces. 3. Pin collar pieces right sides together. 4. Stitch at 1/8″-1/4″. 5. Pink the edges 6. Turn and press.

 Sew on really close to the edge.

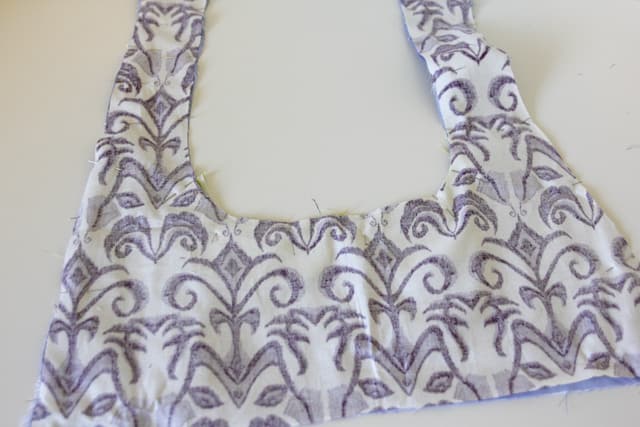
 Use your bodice piece to trace another layer in another fabric. Pin it on right sides together and stitch all the way around, leaving the bottom edge open. Turn.

Put a button hole at the top of each strap on the front bodice piece. 
Then make two more straps to extend from the front of your jumper to the top of the skirt on the back. Cut 2 1/2″ strips and line with your contrast fabric. Turn and press.
At this point, all of the elements of your jumper are finished! We just have to put them together. For the final step, you’ll need a 3″ wide strip to face the skirt with. 
To finish the jumper, serge one edge of the facing strip and then follow these steps:

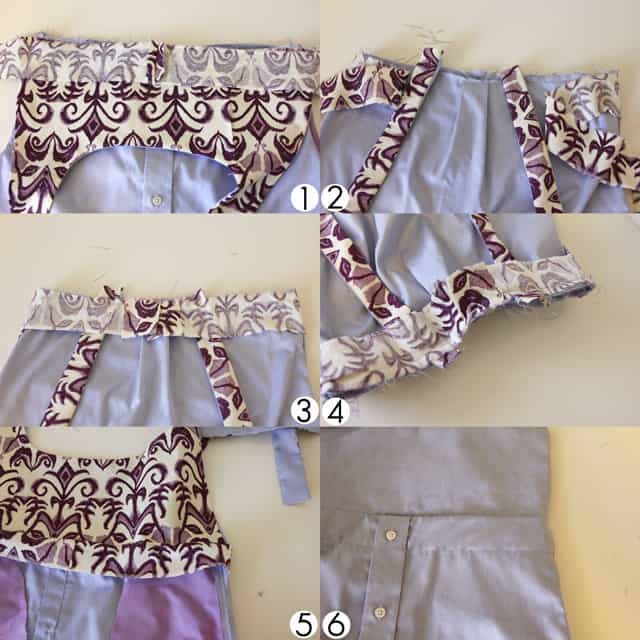
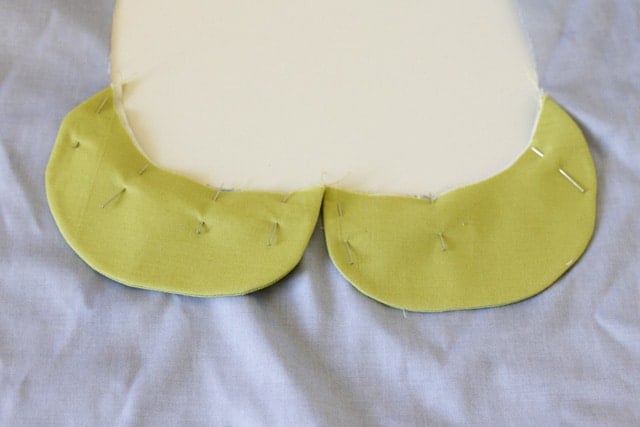
1. Lay the front bodice piece right side down at the top of the skirt piece. Pin the facing right side down on top of that. 2. Put the back straps where you want them and wrap the facing around to the back. 3. When the facing meets in the middle, fold it back the other way, making sure to overlap a little. 4. Stitch the facing on at 1/2″. 5. Flip the facing down. 6. Topstitch around the skirt, sewing a casing with the facing at about 1.5″. 


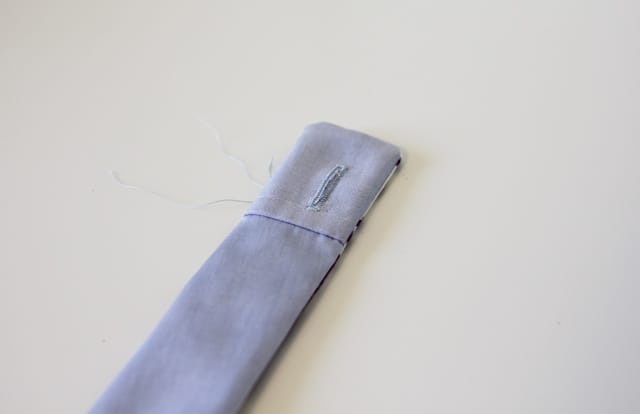
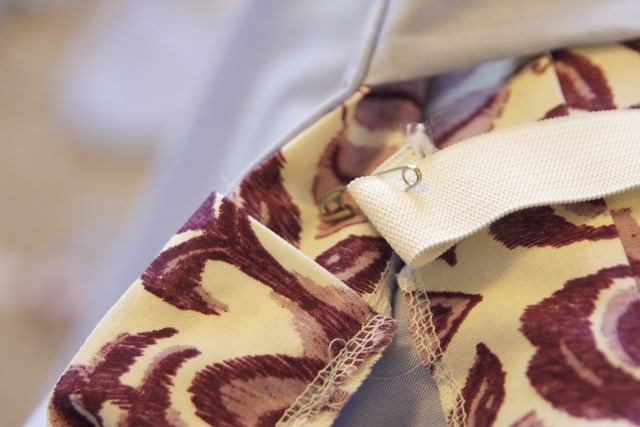
Feed elastic through the overlap in the casing and sew it together.

Sew buttons onto the back straps and you’re finished! 


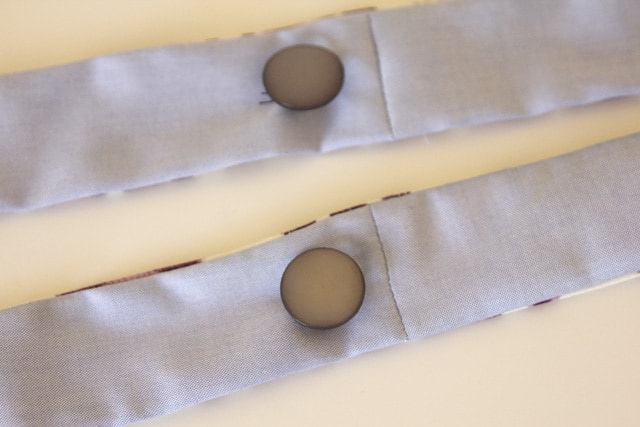
This is such a fun project and it uses most of the men’s shirt! The bigger the shirt you can find the better.


Thanks for checking out my refashion! Don’t forget to check all the others from Grainline Studio, Lazy Saturdays, Cotton & Curls, Megan Nielsen Designs, I Still Love You, One Little Minute, MadMim, A Fashionable Stitch, and Adventures in Dressmaking!

15 Comments | Reviews

Exclusive Free PatternRuffled Apron

Sign up for my email newsletter and receive my ruffled apron pattern totally FREE!

We take your privacy seriously. See our privacy policy here. Unsubscribe at any time.

You may also like these posts...

The BEST Sewing Machine Table – Sew Station ReviewDIY Printed Plush Toyssilk screen printing kit – DIY red panda plush toysbaby lock diana sergerHello, Diana! Baby Lock Diana Serger ReviewCricut EasyPress 2 FAQS

Reader Interactions

15 Comments

  1. Simple Simon & Co

    05/17 at 1:12 PM

    Hey—When did you change your header? Or did you change it awhile ago and I didn’t notice? I liked the old one but this one is really cute and clean looking!
    liZ

  2. Miranda

    05/17 at 1:28 PM

    Looks awesome! I love the pockets! I can’t wait to see the one you made for Melissa next week!!

  3. michael ann

    05/17 at 2:50 PM

    how fun!
    three things
    – that jumper is adorable.
    – i’m so excited to check out everyone else’s refashions today, what an awesome idea!
    – i was totally katie’s roommate for a year in college. it’s a small world after all ;]

  4. Adventures in Dressmaking

    05/17 at 3:08 PM

    Very creative!

  5. Melissa

    05/17 at 4:13 PM

    You didn’t get a pic? Bummer. This looks so cute on your model! I plan on pairing it with my floral peter pan top for a double collared effect.

    Thanks so much for my new jumper!

  6. Sylvia from Dare to DIY

    05/17 at 5:53 PM

    OMG! How is it possible! You’re a sewing genius :)

    http://www.daretodiy.com

  7. Miriam

    05/17 at 6:27 PM

    SEriously, this is so creative, and really so cute. I can’t wait to see it with a collar!

  8. grainline

    05/17 at 8:10 PM

    Ooh anything with pockets gets my vote! I love how you turned it into something completely unrelated to a men’s button down, super creative!! Can’t wait to see the original version on Melissa!

  9. Krista

    05/18 at 3:45 AM

    How adorable is your jumper!? Great work Kate! I can’t wait to see how Melissa styles it!

    Krista
    Lazy Saturdays

  10. Lizzie B.

    05/18 at 4:01 AM

    Seriously….can you be any more creative?! I can’t wait to hatch up some awesome summer tutorials with you…this just gets me excited!

  11. calinai

    05/18 at 8:31 PM

    this is so unfair ….and way to use katie as your model, she’s a natural

  12. Vanessa Barker

    05/19 at 12:01 AM

    This is so cute! I love it. I’d love if you’d come link it up to my Tutorial Tuesday Link Party! http://www.ourthriftyideas.com/2012/05/tutorial-tuesday-6.html

  13. Mindie Hilton

    05/19 at 12:17 AM

    This is super cute, and it seams like you can always find the xxl mens shirts on sale at Ross. I would love for you to share at the Bacon Time Friday linky if you have not already.

  14. Katy

    05/21 at 3:41 AM

    Katie looks so cute in that ADORABLE jumper! Man, I know SUCH AWESOME PEOPLE.

  15. Marcie

    05/23 at 7:08 AM

    I would love for you to share this on my linky party!
    http://www.igottatrythat.com/p/blog-hop-linky-colde.html
    Thanks, Marcie

Primary Sidebar

  • Facebook
  • Twitter
  • Instagram
  • Pinterest
  • Email

Exclusive Free PatternRuffled Apron

Sign up for my email newsletter and receive my ruffled apron pattern totally FREE!

We take your privacy seriously. See our privacy policy here. You can unsubscribe at any time.

Don’t miss these popular posts!

easy baby dress pattern for the summertime

easy baby dress pattern for the summertime

modern ombre + b/w triangle quilt tutorial + pattern

modern ombre + b/w triangle quilt tutorial + pattern

Fabric

Quilted Cosmetic Case Kiss Me KateKiss Me, Kate FabricOne Hour Granny Square Quilt Tutorial | See Kate SewModern Granny Square Quilt Whole Cloth

Pattern Hacks

Easy Baby Summer Dressthe EMMA pattern | See Kate SewThe EMMA Dress

Footer

Hello friends!

My name is Kate, a twenty something fashion lover and mother of two. When I’m not chasing kids you can find me at my sewing table or daydreaming up new designs. You can read more about me here. Thank you for visiting!

8a918f8da8e0e69102dc0f33a718de85a99c31a57283e0e3e2

FOLLOW ME HERE

  • Facebook
  • Twitter
  • Instagram
  • Pinterest
  • Email
  • Blog
  • About
  • Contact
  • FAQ
  • Sponsor

Copyright © 2023 See Kate Sew  •  All Rights Reserved  •  Privacy Policy  •  Site Design by Emily White Designs