• Skip to main content
  • Skip to primary sidebar
  • Skip to footer
  • Blog
  • About
  • Contact
  • FAQ
  • Sponsor

see kate sew

sewing, crafts, tutorials, DIY

  • Patterns
    • Free Patterns
    • Pattern of the Month
  • Tutorials
    • Accessories
    • Bags and Pouches
    • Clothing
    • Costumes
    • Crafts
    • Cricut Projects
    • Holiday
    • Household
    • Kids
    • Maternity
    • Quilting
  • Topics
    • Baby
    • Boy
    • Christmas
    • dog
    • Dolls
    • Easter
    • Girl
    • Halloween
    • Lookbook
    • Party
    • pet
    • Printables
    • Training
    • women
  • No Sew
  • Sewing 101
  • Sew4Good
  • Pet
  • Sewing Room
    • DreamBox
  • Reviews
Home
  • Patterns
    • Free Patterns
    • Pattern of the Month
  • Tutorials
    • Accessories
    • Bags and Pouches
    • Clothing
    • Costumes
    • Crafts
    • Cricut Projects
    • Holiday
    • Household
    • Kids
    • Maternity
    • Quilting
  • Topics
    • Baby
    • Boy
    • Christmas
    • dog
    • Dolls
    • Easter
    • Girl
    • Halloween
    • Lookbook
    • Party
    • pet
    • Printables
    • Training
    • women
  • No Sew
  • Sewing 101
  • Sew4Good
  • Pet
  • Sewing Room
    • DreamBox
  • Reviews

07.27

the seriously SO easy gathered skirt tutorial

Welcome to See Kate Sew! If you’re new here, sign up for my email newsletter for access to free patterns, tutorials and all the latest sewing news! Tour my sewing room HERE!

I’ve been trying to destash my fabric stash for like a year now. It’s not working. I decided to tackle it by making a few skirts for me with my bigger pieces of fabric. 

This is the easiest skirt tutorial ever! I just made it up as I went, but as you’ll see it’s very basic! Like the most basic. It is the perfect starting place if you’re interested in making your own clothes.

STEP 1: Cutting
We’re going to gather at a 1.5 to 1 ratio. So, measure your hips and multiply by 1.5. That’s how wide your fabric should be. If you’ll be adding pockets, add 1 inch and cut your length in half. Measure from your hip to your knee and add 3 inches for the length. 


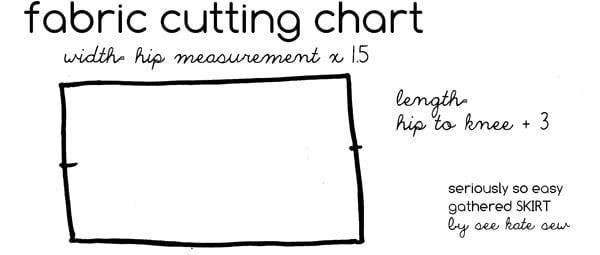
Oh look! I made a sketch for you. It’s a fancy rectangle. Make your sides straight though, unlike in the following sketch:


If you want your skirt to sit at the waist, use that measurement instead. You can also adjust the length however you want.

STEP 2: (optional) Pockets
If you want to add pockets to your skirt, now is the time! Go read this tutorial and print the free pocket pattern piece. Sew one seam together as outlined in the tutorial.(And then come back!) 

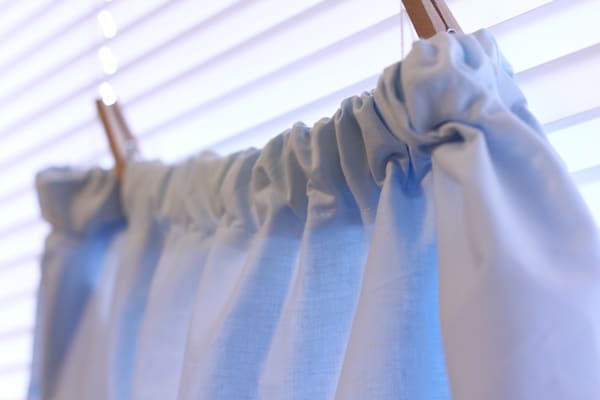
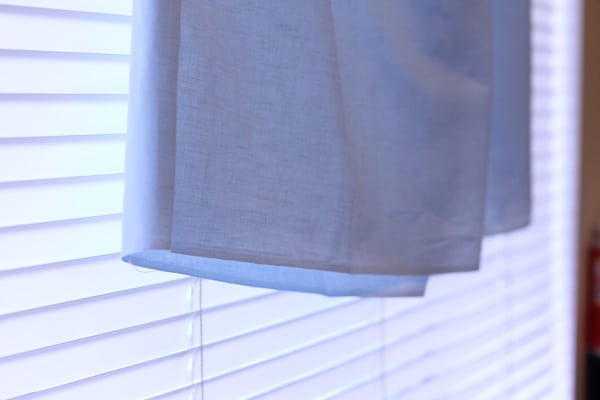
When you’re done with that, your skirt will look like this:

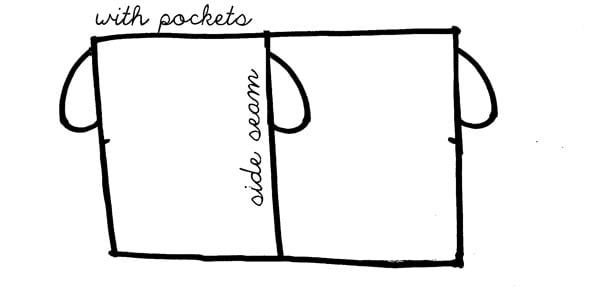
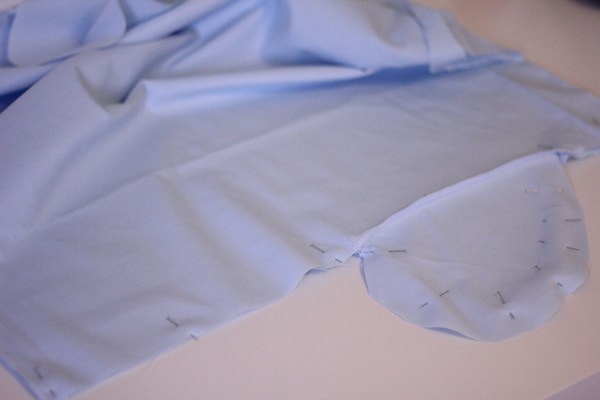
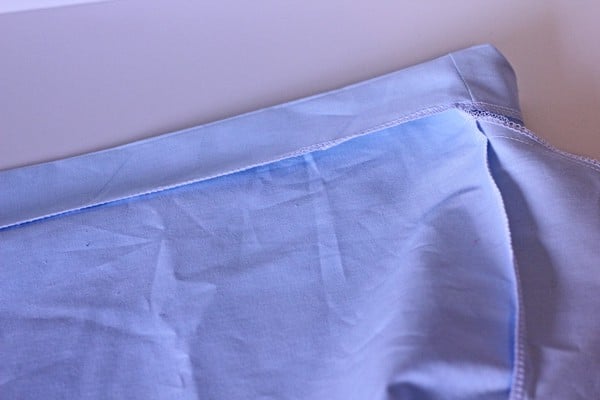
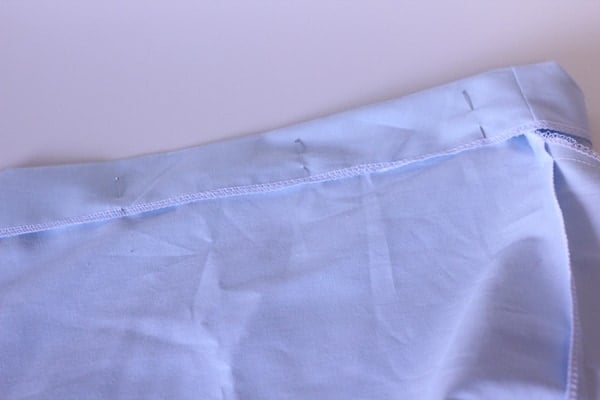
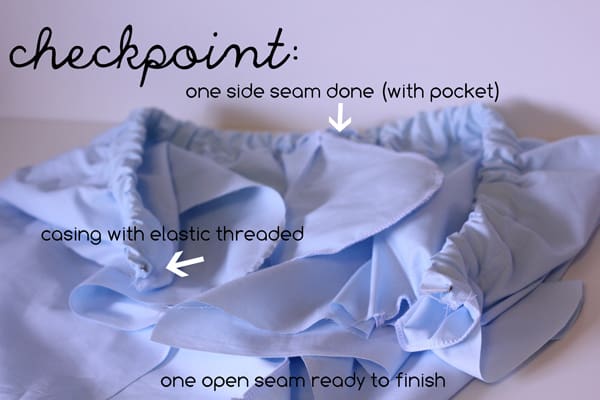
One pocket completed (in the middle) and one side seam finished. You’ll have one piece of fabric to work with, just as if you were making it without pockets and only one seam. 


The other pocket will be split in two on both sides of your length. 
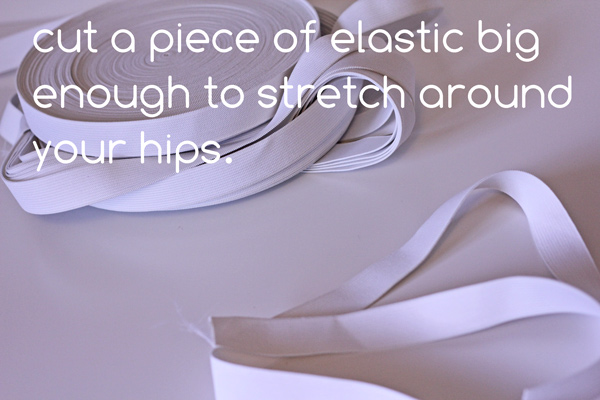
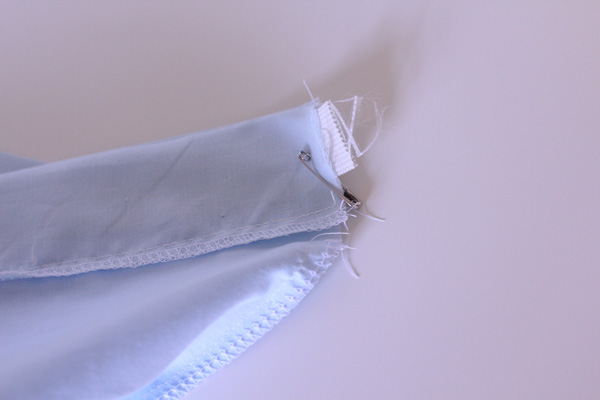
Step 3: Elastic Casing.
To make a place for your elastic to go, serge the top edge of your fabric. If you don’t have a serger, just fold over 1/2″ and press instead. Now, fold over 1.5″ on and press.

Pin and sew it up, 1.25 inches away from the top edge to make a casing.


Cut your elastic.

Now use a safety pin on one end of the elastic to help you guide it through the casing. 

Start threading. The safety pin will be your guide since threading a flat piece of elastic is difficult!

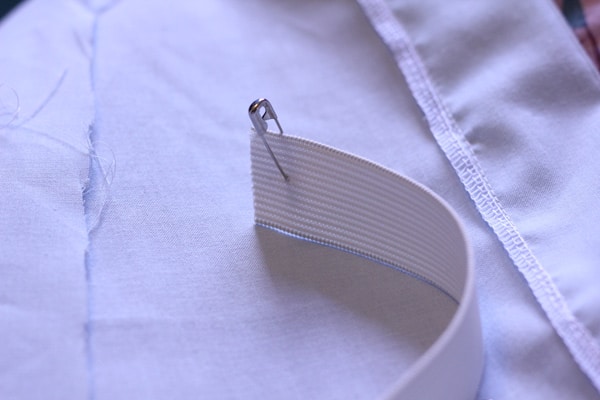
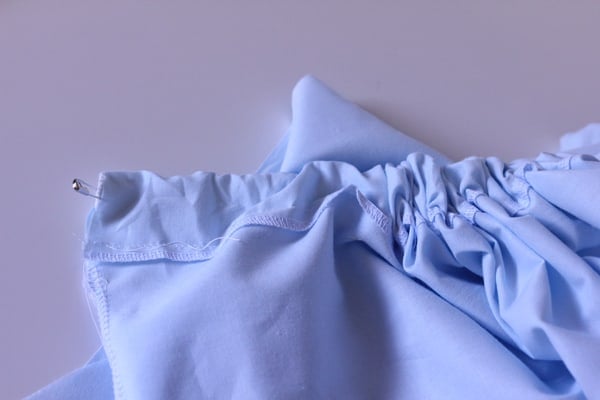
When the other end reaches the edge of the casing hole where you started, pin it to the skirt so it doesn’t get pulled in and lost in your casing. 

Once you get to the other side with the first end, pin it to the edge. Look, your skirt is starting to gather! So pretty!

This is what you should have:

Step 4: final seam
Pin the two sides together with right sides together. Pin the pockets together if you have them and sew it up! Make sure to catch both ends of the elastic in this seam. That is what will keep your skirt up! 

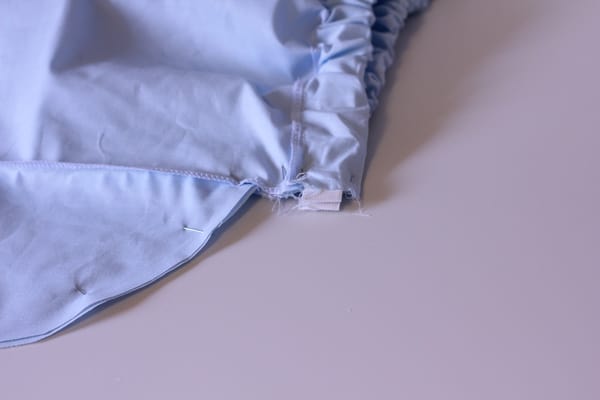
Finish the seam with a serger or other method.


Step 5: Hem
Hem your bottom edge by pressing over 1/2″ twice and sewing it up with a straight stitch. If you have a nice selvage, you can cheat and use that like I did. (Shh..don’t tell! Hemming is so boring!)

I told you it was easy! 


So, how do you destash your fabric?? (Or do you just leave it sitting like me?) 

14 Comments | Holiday

Exclusive Free PatternRuffled Apron

Sign up for my email newsletter and receive my ruffled apron pattern totally FREE!

We take your privacy seriously. See our privacy policy here. Unsubscribe at any time.

You may also like these posts...

Fabric Gift Bag Patternfabric gift bag patternElf on the Shelf Christmas Tree Outfit50+ Gifts to SewGifts to Sew – easy things to sew and givePinecone Christmas Trees Craft

Reader Interactions

14 Comments

  1. Amy

    07/27 at 12:12 PM

    Cute!

  2. Cherished Bliss

    07/27 at 12:38 PM

    This is adorable! Thanks for the tutorial : )

  3. Jaime

    07/27 at 12:51 PM

    Love your new header.

  4. Sandy

    07/27 at 1:39 PM

    I’m going to give this a try … it looks so easy, I think even I could do it! :)

  5. Natbeesfashion

    07/27 at 2:24 PM

    It seems so easy love!
    You are right we should try it.Thank you for that!

    x
    Anastasia

  6. Rachel

    07/27 at 2:40 PM

    How perfect! I love a simple skirt . . . especially one with pockets :-) And the new header is adorable! I love it!

  7. Melanie@Crafty Cupboard

    07/27 at 4:22 PM

    Um, that is one amazing roll of elastic you have going there. Wow!
    I’m going to do pockets one of these days, thanks for that tut earlier. :)

  8. Emily

    07/27 at 5:08 PM

    Looks great! I keep trying to reduce my fabric inventory… but it just seems to breed when I’m not looking.
    Emily
    domesticdeadline.blogspot.com

  9. hellomomo

    07/27 at 10:28 PM

    It really looks a piece of cake… I should give it a try and sew me something pretty! Thanks for the tutorial! :-D

  10. Madigan at madiganmade

    07/30 at 1:50 AM

    You make it look so easy! Easiest enough that I might be able to try it. Great tut! Thanks.

  11. Jen @ tatertotsandjello.com

    07/30 at 4:59 AM

    So so cute! I featured it on my TT&J facebook page :)

    oxoxo
    Jen

  12. Sew Frenzi

    07/30 at 7:15 PM

    Thanks for sharing…so easy and cute! Love it.

  13. sewista

    07/30 at 7:38 PM

    Hi Kate – I visit your blog everyday, and I’m excited to sew my very first skirt using this tutorial.

    One question. Under step one (Cutting) it states “If you’ll be adding pockets, add 1 inch and cut your length in half,” but won’t that turn my skirt into a mini?

    I’m a newbie so thanks in advance for your patience.

    Thanks!

  14. kate

    07/31 at 3:11 AM

    Hey Sewista!

    By “length” I meant “length of fabric” which is fancy for “piece of fabric” which is totally confusing! Sorry! I should change that :)

    So, if you’re adding pockets, make the piece 1 inch wider. Then cut it in half, so you’ll have two pieces half as wide, but the same length. The 1 extra inch will make up for the extra seam allowance.

    Hope that helps!
    Good luck!

Primary Sidebar

  • Facebook
  • Twitter
  • Instagram
  • Pinterest
  • Email

Exclusive Free PatternRuffled Apron

Sign up for my email newsletter and receive my ruffled apron pattern totally FREE!

We take your privacy seriously. See our privacy policy here. You can unsubscribe at any time.

Don’t miss these popular posts!

easy baby dress pattern for the summertime

easy baby dress pattern for the summertime

modern ombre + b/w triangle quilt tutorial + pattern

modern ombre + b/w triangle quilt tutorial + pattern

Fabric

Quilted Cosmetic Case Kiss Me KateKiss Me, Kate FabricOne Hour Granny Square Quilt Tutorial | See Kate SewModern Granny Square Quilt Whole Cloth

Pattern Hacks

Easy Baby Summer Dressthe EMMA pattern | See Kate SewThe EMMA Dress

Footer

Hello friends!

My name is Kate, a twenty something fashion lover and mother of two. When I’m not chasing kids you can find me at my sewing table or daydreaming up new designs. You can read more about me here. Thank you for visiting!

8a918f8da8e0e69102dc0f33a718de85a99c31a57283e0e3e2

FOLLOW ME HERE

  • Facebook
  • Twitter
  • Instagram
  • Pinterest
  • Email
  • Blog
  • About
  • Contact
  • FAQ
  • Sponsor

Copyright © 2023 See Kate Sew  •  All Rights Reserved  •  Privacy Policy  •  Site Design by Emily White Designs