• Skip to main content
  • Skip to primary sidebar
  • Skip to footer
  • Blog
  • About
  • Contact
  • FAQ
  • Sponsor

see kate sew

sewing, crafts, tutorials, DIY

  • Patterns
    • Free Patterns
    • Pattern of the Month
  • Tutorials
    • Accessories
    • Bags and Pouches
    • Clothing
    • Costumes
    • Crafts
    • Cricut Projects
    • Holiday
    • Household
    • Kids
    • Maternity
    • Quilting
  • Topics
    • Baby
    • Boy
    • Christmas
    • dog
    • Dolls
    • Easter
    • Girl
    • Halloween
    • Lookbook
    • Party
    • pet
    • Printables
    • Training
    • women
  • No Sew
  • Sewing 101
  • Sew4Good
  • Pet
  • Sewing Room
    • DreamBox
  • Reviews
Home
  • Patterns
    • Free Patterns
    • Pattern of the Month
  • Tutorials
    • Accessories
    • Bags and Pouches
    • Clothing
    • Costumes
    • Crafts
    • Cricut Projects
    • Holiday
    • Household
    • Kids
    • Maternity
    • Quilting
  • Topics
    • Baby
    • Boy
    • Christmas
    • dog
    • Dolls
    • Easter
    • Girl
    • Halloween
    • Lookbook
    • Party
    • pet
    • Printables
    • Training
    • women
  • No Sew
  • Sewing 101
  • Sew4Good
  • Pet
  • Sewing Room
    • DreamBox
  • Reviews

01.27

girly bandana bibs + a wooden ring teether tutorial

Welcome to See Kate Sew! If you’re new here, sign up for my email newsletter for access to free patterns, tutorials and all the latest sewing news! Tour my sewing room HERE!

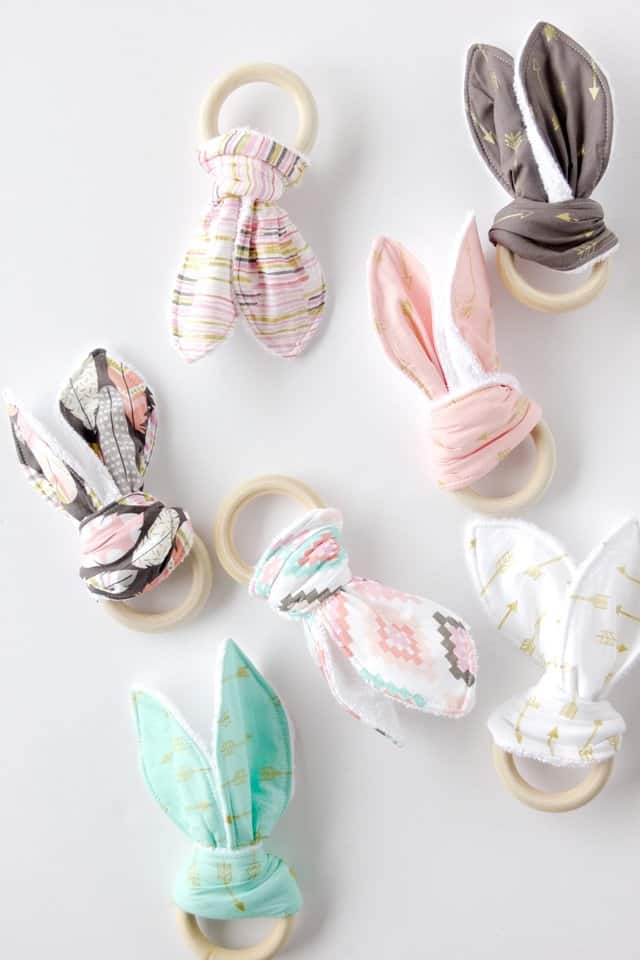
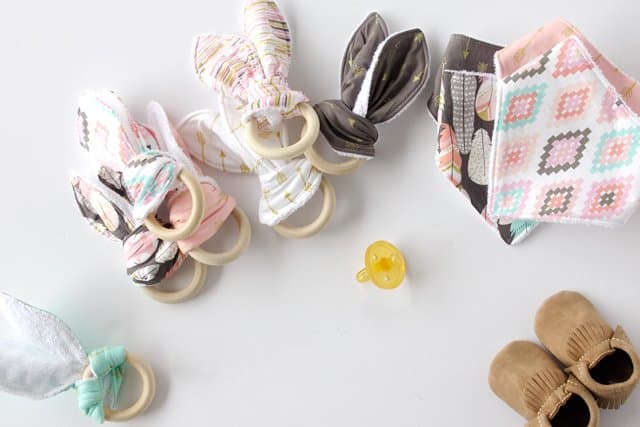
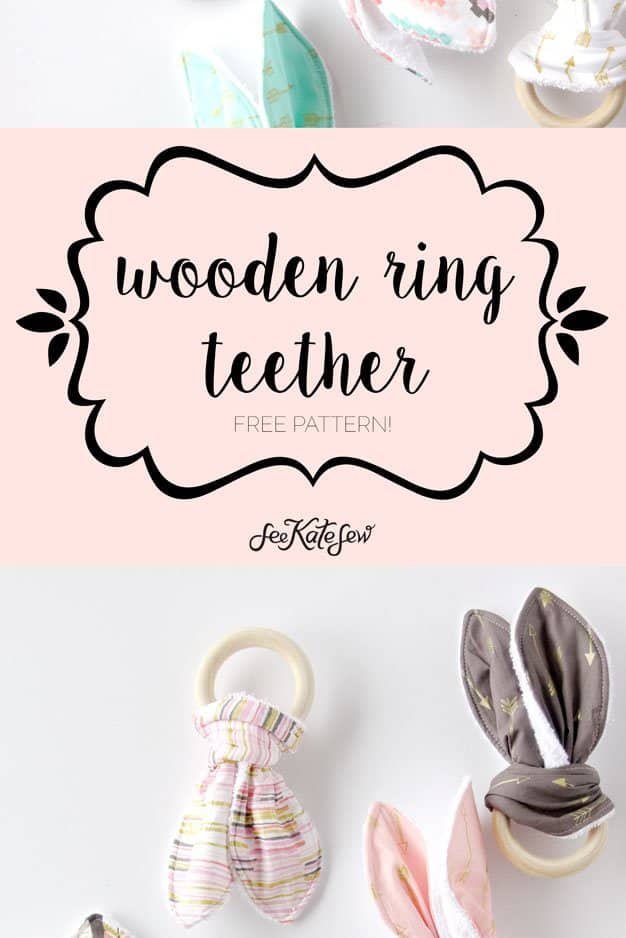
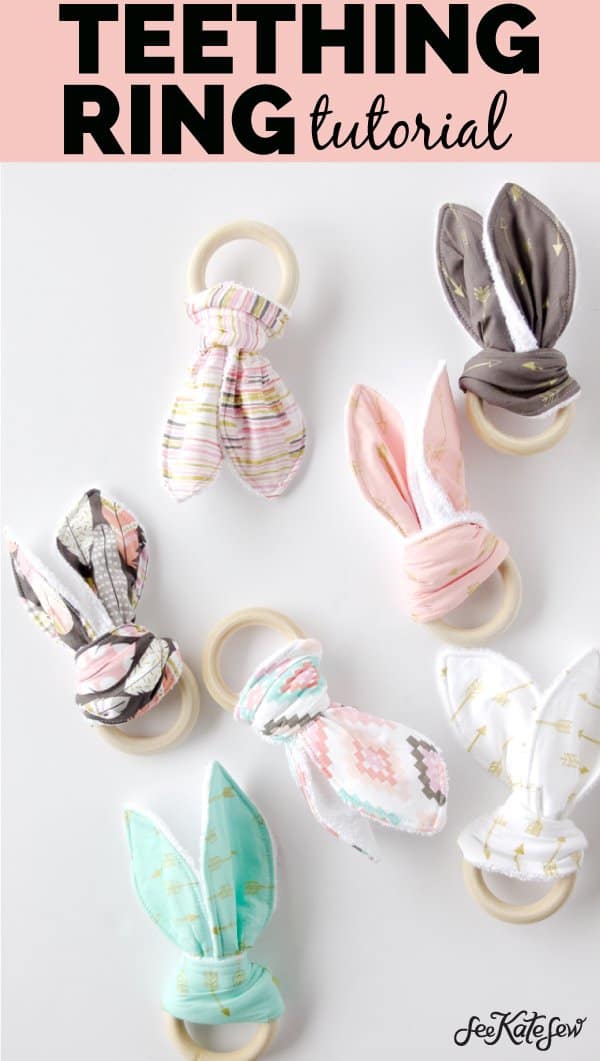
Baby sewing is in full swing! For my own baby and for others! This wooden ring teether tutorial is quick and fun to sew.

Wooden Ring Teething Toy Tutorial | diy teething ring | diy baby bandanas | diy baby toys | teething ring tutorial || See Kate Sew #teethingring #diybaby #diyteethingring

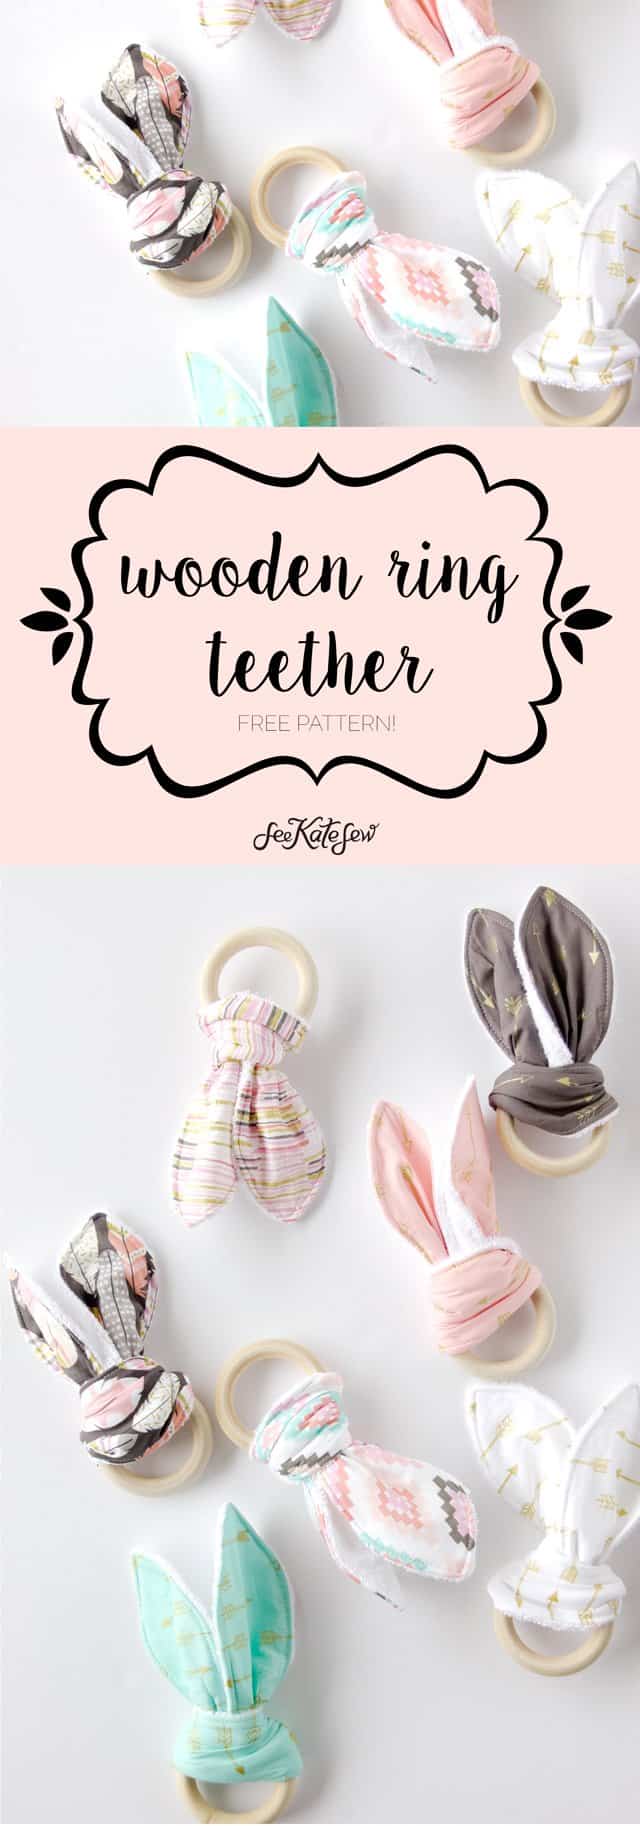
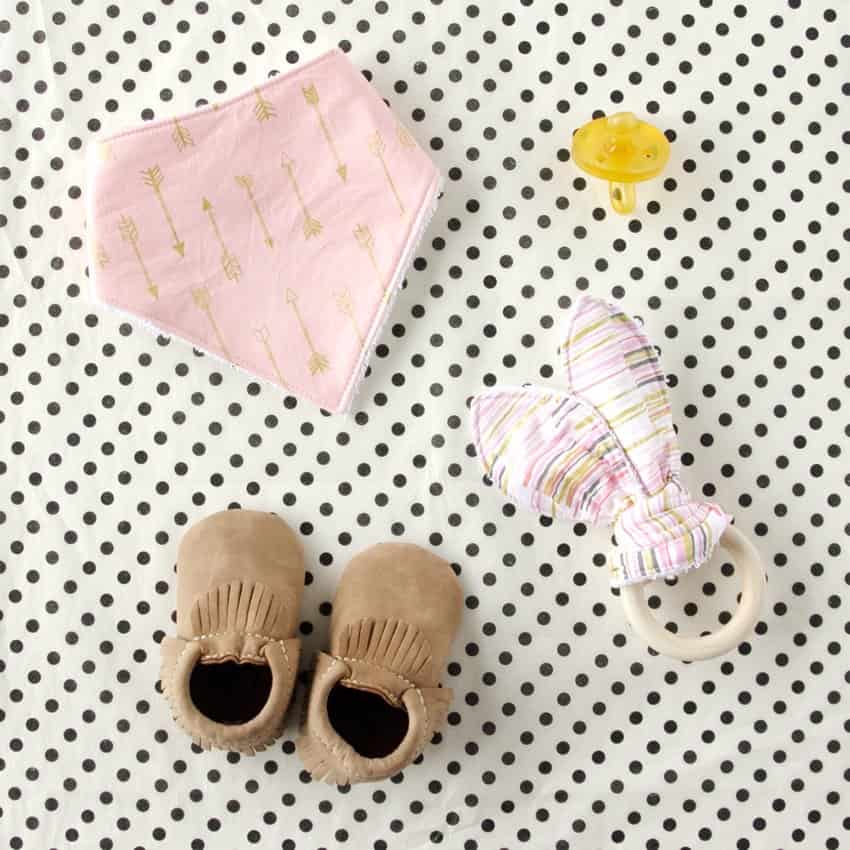
You know I love a good baby shower project and I submit that this little combo is perfect for baby gifts! It’s also perfect because it can be adapted for a baby boy, girl or a not-finding-out gift!

Wooden Ring Teething Toy Tutorial | diy teething ring | diy baby bandanas | diy baby toys | teething ring tutorial || See Kate Sew #teethingring #diybaby #diyteethingring

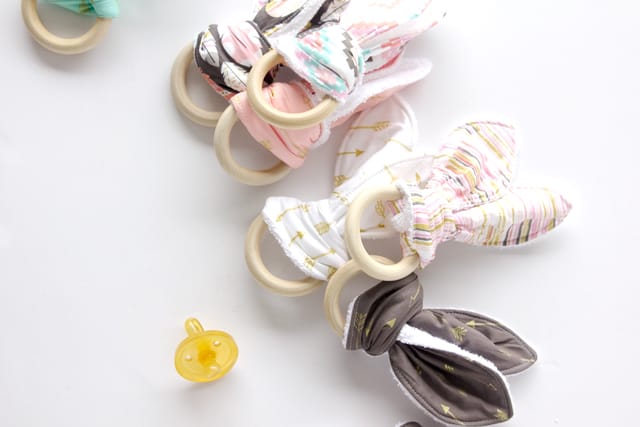
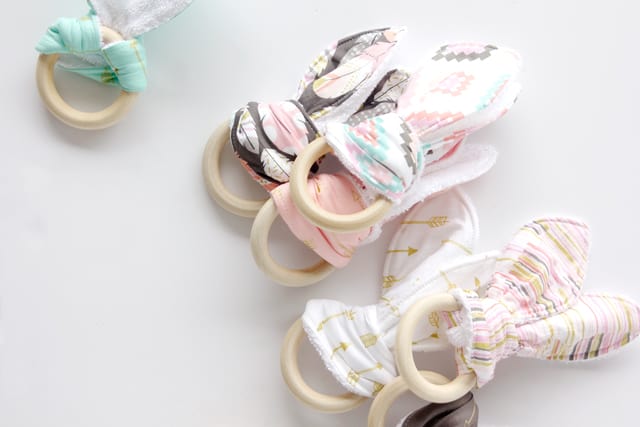
I used a Fat Quarter stack for all of these. They were just ALL so cute and go together so well. The FQ pack is called Pastel Arrow Flight by Michael Miller, available at Fat Quarter Shop.

Wooden Ring Teething Toy Tutorial | diy teething ring | diy baby bandana bib | diy baby toys | teething ring tutorial || See Kate Sew #teethingring #diybaby #diyteethingring

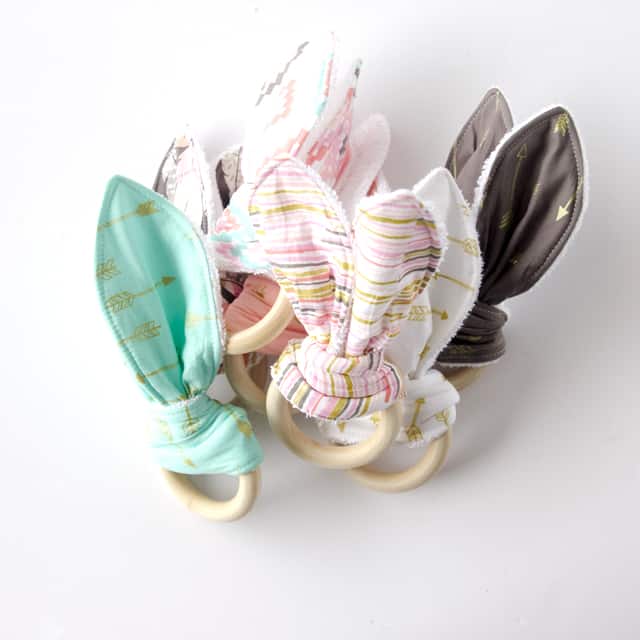
I really love that there are a few girly prints in here and also some great gender-neutral ones (the arrows!) so I have a nice little stash of baby gifts saved up now!

Wooden Ring Teething Toy Tutorial | diy teething ring | diy baby bandana bib | diy baby toys | teething ring tutorial || See Kate Sew #teethingring #diybaby #diyteethingring

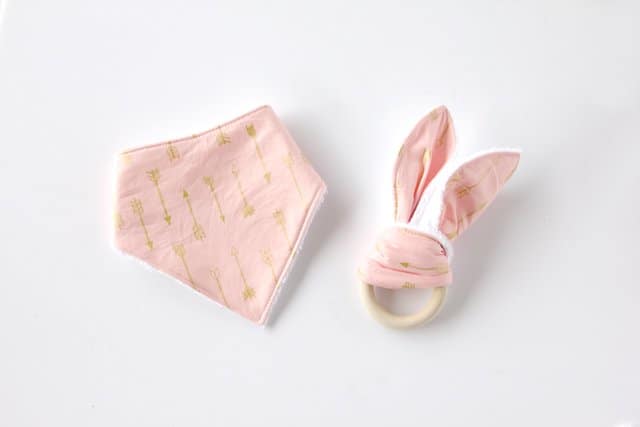
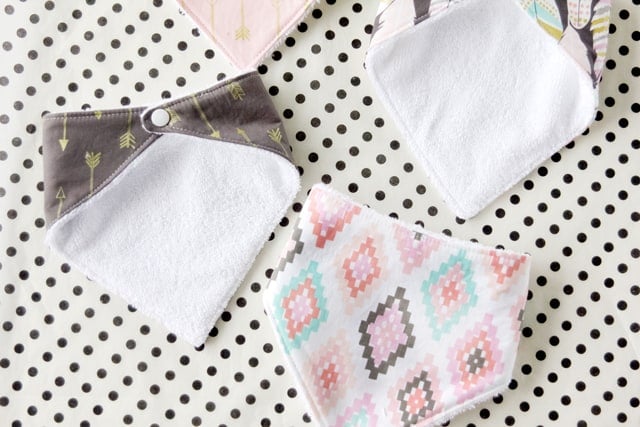
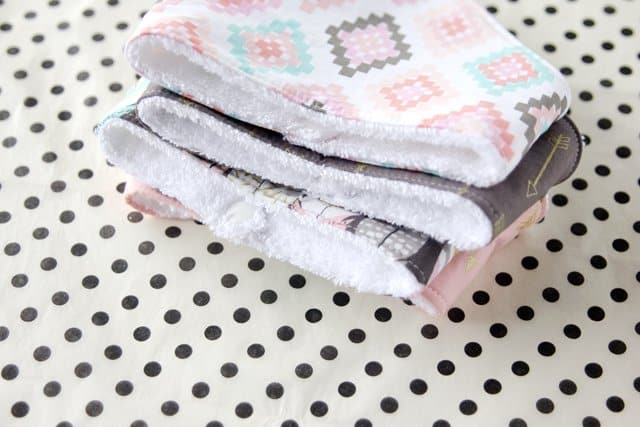
I used the Bandana Bib Pattern listed on my site (it’s FREE!) with one little twist: terry cloth backing. The backing makes for a nice absorbent bib for extra drooly babies, and as a bonus it’s nice and soft on the backside. Even if your baby isn’t super drooly, why not have a towel on the back?

Wooden Ring Teething Toy Tutorial | See Kate Sew

I put these snaps in with a KAM snap placer. I’ll tell you more about it later, but I love this thing!

Wooden Ring Teething Toy Tutorial | See Kate Sew

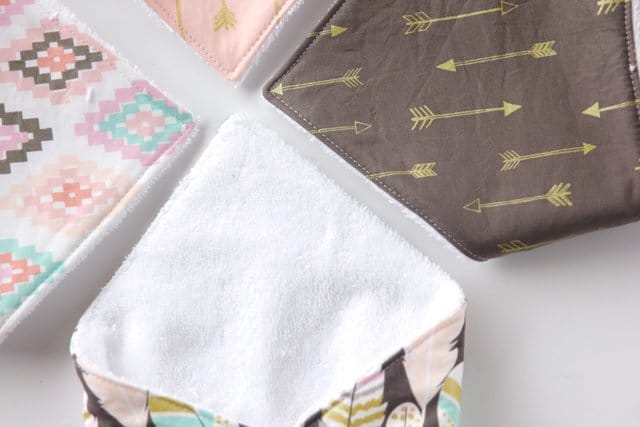
The backing is really just made from a white towel I got at Target. You can purchase terry cloth material, or just use a towel!

wood-ring-teether-pattern

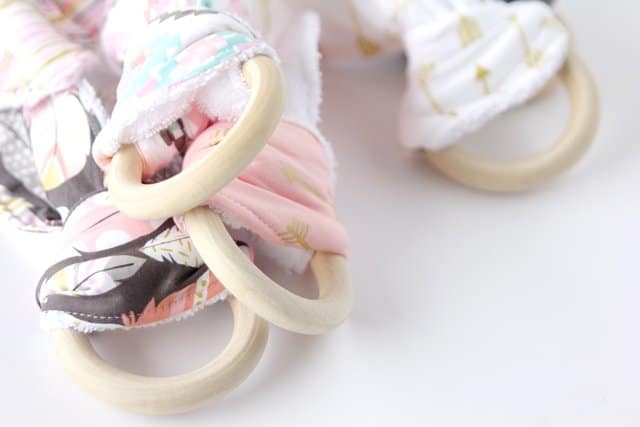
I made a little bib/teether set with these wooden ring teethers. There’s a FREE download for these, too!

Wooden Ring Teething Toy Tutorial | See Kate Sew

Wooden Ring Teether Materials

  • 3″ natural wooden ring, I got mine from this shop on etsy but Amazon has them cheaper!
  • 1/4 yard fabric (Fabric in this post was provided by Fat Quarter Shop!)
  • 1/4 yard terry cloth (or towel)
Wooden Ring Teething Toy Tutorial | diy teething ring | diy baby bandana bib | diy baby toys | teething ring tutorial || See Kate Sew #teethingring #diybaby #diyteethingring

Wooden Ring Teether Tutorial

Step 1: Cut 1 front and 1 back from pattern download. Make sure you put the arrow up against a fold.

Step 2: Sew front and back together with right sides together, leaving a 1/4″ seam allowance. Leave a 1-2″ opening on one side for turning. Trim seam allowance and clip points.

diy teething ring pattern | Wooden Ring Teething Toy Tutorial | diy teething ring | diy baby bandana bib | diy baby toys | teething ring tutorial || See Kate Sew #teethingring #diybaby #diyteethingring

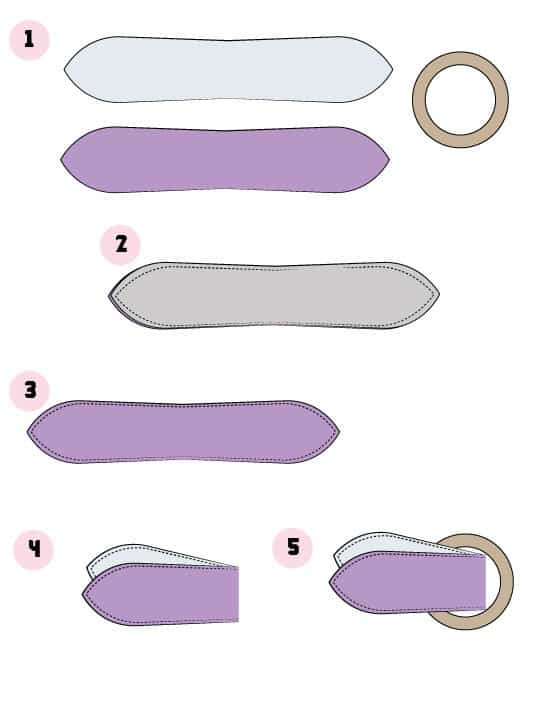
Step 3: Turn rightside out and press well. Then topstitch around teething toy, 1/8″ from edge. You’ll close up the hole you left when you topstitch so make sure those edges are pinned together neatly.

Step 4: Fold fabric in half.

Step 5: Slip into wooden ring.

teething-toy-tutorial-1

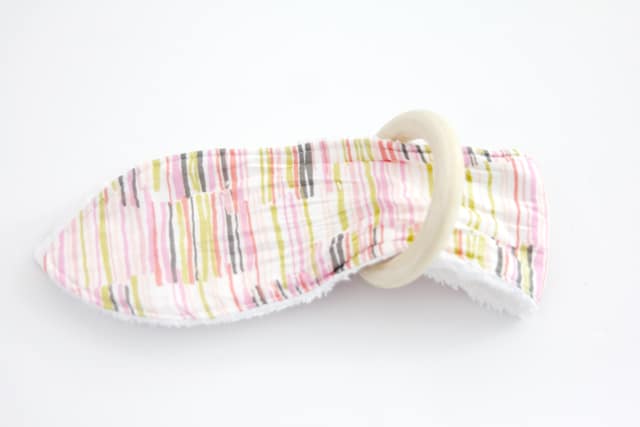
Step 6: Pull ends over loop and through the fold in the fabric.

teething-toy-tutorial-2

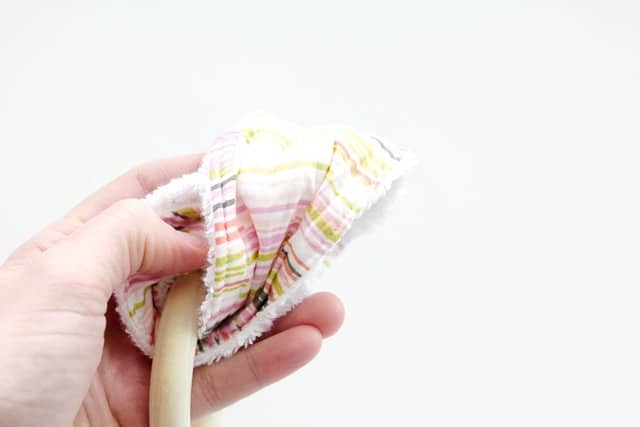
Step 7: Pull edges until the fabric is taut, adjust as necessary.
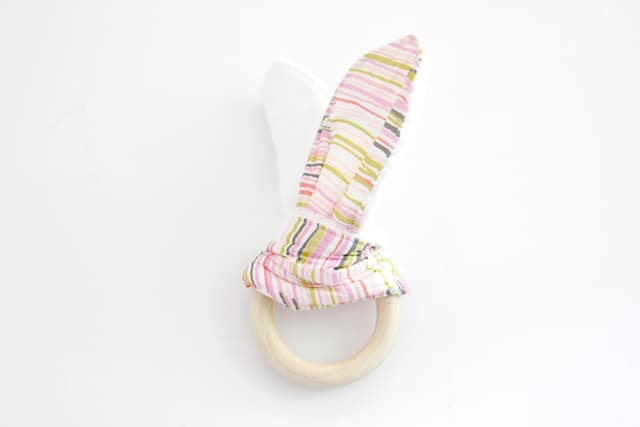
teething-toy-tutorial-4

And you’re done!

Bandana Bibs | See Kate Sew

Check out more baby tutorials here! 

SaveSave

See Kate Sew| Wooden Ring Teether

6 Comments | Free Patterns, Kids

Exclusive Free PatternRuffled Apron

Sign up for my email newsletter and receive my ruffled apron pattern totally FREE!

We take your privacy seriously. See our privacy policy here. Unsubscribe at any time.

You may also like these posts...

FREE baby bonnet brim patternburp cloth tutorialKnit Headbands for Baby + ToddlerDIY Halloween Costumes – 30 Easy Costume Tutorials!

Reader Interactions

6 Comments

  1. Ana Love Craft

    01/27 at 6:52 PM

    This is really gorgeous! I love your lovely project! Thanks for sharing great tutorial!
    Have a fabulous day!
    Hugs and love from Portugal,
    Ana Love Craft
    http://www.lovecraft2012.blogspot.com

  2. Hilde

    01/28 at 7:10 AM

    These are so cute! I am def. making some of these bibs for our little one who’s on the way. I’m actually on my way to the fabric store today after work to pick up some batting and backing for my one-hour seekatesew quilt that I got from spoonflower yesterday, so will pick up some fat quarters while I’m there as well! :)

  3. Shari

    01/28 at 9:21 AM

    I love your ideas and web site. You always seem to amaze me, like with the wooden teethers!!! As you suggested with the drool bib it is a very nice gift for baby! Thanks

  4. Erica

    01/28 at 12:13 PM

    Do you coat the wooden rings in anything? Is that something you have to worry about splintering?

  5. Hannah

    02/02 at 11:34 AM

    Did you finish the wooden rings? If so, what did you use? Thanks!

  6. Katie

    02/13 at 1:46 PM

    Those teething toys look like they would make cute little bunny ears! Perfect Easter baby gift!!

Primary Sidebar

  • Facebook
  • Twitter
  • Instagram
  • Pinterest
  • Email

Exclusive Free PatternRuffled Apron

Sign up for my email newsletter and receive my ruffled apron pattern totally FREE!

We take your privacy seriously. See our privacy policy here. You can unsubscribe at any time.

Don’t miss these popular posts!

easy baby dress pattern for the summertime

easy baby dress pattern for the summertime

modern ombre + b/w triangle quilt tutorial + pattern

modern ombre + b/w triangle quilt tutorial + pattern

Fabric

Quilted Cosmetic Case Kiss Me KateKiss Me, Kate FabricOne Hour Granny Square Quilt Tutorial | See Kate SewModern Granny Square Quilt Whole Cloth

Pattern Hacks

Easy Baby Summer Dressthe EMMA pattern | See Kate SewThe EMMA Dress

Footer

Hello friends!

My name is Kate, a twenty something fashion lover and mother of two. When I’m not chasing kids you can find me at my sewing table or daydreaming up new designs. You can read more about me here. Thank you for visiting!

8a918f8da8e0e69102dc0f33a718de85a99c31a57283e0e3e2

FOLLOW ME HERE

  • Facebook
  • Twitter
  • Instagram
  • Pinterest
  • Email
  • Blog
  • About
  • Contact
  • FAQ
  • Sponsor

Copyright © 2023 See Kate Sew  •  All Rights Reserved  •  Privacy Policy  •  Site Design by Emily White Designs