• Skip to main content
  • Skip to primary sidebar
  • Skip to footer
  • Blog
  • About
  • Contact
  • FAQ
  • Sponsor

see kate sew

sewing, crafts, tutorials, DIY

  • Patterns
    • Free Patterns
    • Pattern of the Month
  • Tutorials
    • Accessories
    • Bags and Pouches
    • Clothing
    • Costumes
    • Crafts
    • Cricut Projects
    • Holiday
    • Household
    • Kids
    • Maternity
    • Quilting
  • Topics
    • Baby
    • Boy
    • Christmas
    • dog
    • Dolls
    • Easter
    • Girl
    • Halloween
    • Lookbook
    • Party
    • pet
    • Printables
    • Training
    • women
  • No Sew
  • Sewing 101
  • Sew4Good
  • Pet
  • Sewing Room
    • DreamBox
  • Reviews
Home
  • Patterns
    • Free Patterns
    • Pattern of the Month
  • Tutorials
    • Accessories
    • Bags and Pouches
    • Clothing
    • Costumes
    • Crafts
    • Cricut Projects
    • Holiday
    • Household
    • Kids
    • Maternity
    • Quilting
  • Topics
    • Baby
    • Boy
    • Christmas
    • dog
    • Dolls
    • Easter
    • Girl
    • Halloween
    • Lookbook
    • Party
    • pet
    • Printables
    • Training
    • women
  • No Sew
  • Sewing 101
  • Sew4Good
  • Pet
  • Sewing Room
    • DreamBox
  • Reviews

03.21

your questions about the clothing labels

Welcome to See Kate Sew! If you’re new here, sign up for my email newsletter for access to free patterns, tutorials and all the latest sewing news! Tour my sewing room HERE!

Thank you so much for your sweet responses to the clothing label post!


I had lots of questions about the labels so I thought I would answer them all in a post so everyone can see the responses.


How long does it take to cut and iron 300 labels?
I just cut and iron them in small batches when I need more. I actually got over 320 labels in a 1 yard print. I don’t have the patience to do it all at once! (So the answer to this question is probably a long time!)


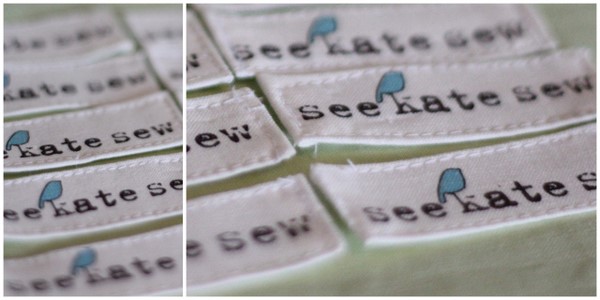
Why do you sew them before you sew them onto a product?
I have sewn these labels on things in all different ways. When I iron the edges down and pin it directly to the garment or project, the edges of the label always skew. It’s easier to get a good looking label when you sew around the edges first. The double stitching all the way around looks really professional and sturdy. It can be done without sewing first, but it looks better when you do.

Couldn’t you do this without the ironing part?
Yep, I’ve done that too. I have used heat-n-bond to apply the logo to a project and then sewn over the edges. The edges will eventually fray a little. If I am going for a deconstructed or natural look, or if I just don’t care, I do this and just let the edges fray.

A tight zig zag stitch around the raw edges will also give you a professional look, although I find this takes more time.
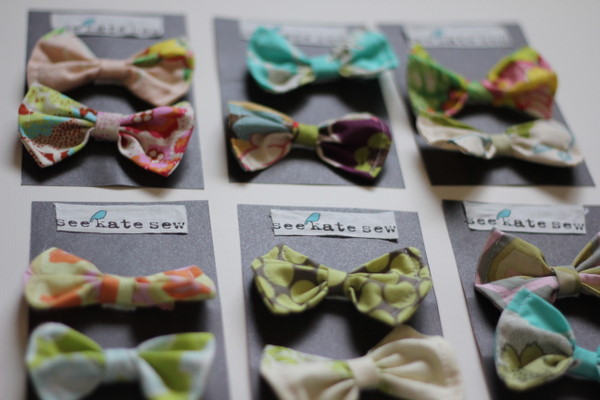
I have also glued and sewn the labels onto paper for product presentation. It just adds a little something to have your logo plastered everywhere.

What about printing it on a different fabric, like canvas or twill?
I made my labels a long time ago before Spoonflower had more than just basic cotton. When I run out of these labels, I am going to spend a little more for a cotton twill. Twill doesn’t fray easily and the label will be thicker. Thus, eliminating ironing altogether.


Let me know if you have any more questions! I am happy to help!


2 Comments | Crafts

Exclusive Free PatternRuffled Apron

Sign up for my email newsletter and receive my ruffled apron pattern totally FREE!

We take your privacy seriously. See our privacy policy here. Unsubscribe at any time.

You may also like these posts...

mouse pun valentines - you're a gouda oneanimal pun valentineshow to print with contact paperRainbow Rope Wall Hanging Tutorialtriangle chandelier baby mobile

Reader Interactions

2 Comments

  1. Lillian Pearl Designs

    03/23 at 3:47 AM

    Great questions (and answers!) Thanks for sharing!

  2. Max and Otis Designs

    05/09 at 4:00 AM

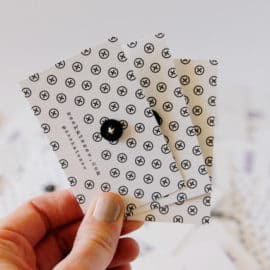
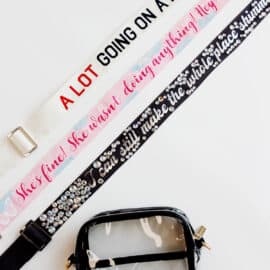
    Thanks for the post! I just got my fabric in the mail and my logo was really small so I cut it into strips to make ribbons instead which turned out pretty cool too. I also read the fine print on Spoonflower and figured out what I was doing wrong and placed a new order. My teeny labels work too, I just glue them on other productand since I have thousands of them now I’ll be able to label everything!

Primary Sidebar

  • Facebook
  • Twitter
  • Instagram
  • Pinterest
  • Email

Exclusive Free PatternRuffled Apron

Sign up for my email newsletter and receive my ruffled apron pattern totally FREE!

We take your privacy seriously. See our privacy policy here. You can unsubscribe at any time.

Don’t miss these popular posts!

easy baby dress pattern for the summertime

easy baby dress pattern for the summertime

modern ombre + b/w triangle quilt tutorial + pattern

modern ombre + b/w triangle quilt tutorial + pattern

Fabric

Quilted Cosmetic Case Kiss Me KateKiss Me, Kate FabricOne Hour Granny Square Quilt Tutorial | See Kate SewModern Granny Square Quilt Whole Cloth

Pattern Hacks

Easy Baby Summer Dressthe EMMA pattern | See Kate SewThe EMMA Dress

Footer

Hello friends!

My name is Kate, a twenty something fashion lover and mother of two. When I’m not chasing kids you can find me at my sewing table or daydreaming up new designs. You can read more about me here. Thank you for visiting!

8a918f8da8e0e69102dc0f33a718de85a99c31a57283e0e3e2

FOLLOW ME HERE

  • Facebook
  • Twitter
  • Instagram
  • Pinterest
  • Email
  • Blog
  • About
  • Contact
  • FAQ
  • Sponsor

Copyright © 2023 See Kate Sew  •  All Rights Reserved  •  Privacy Policy  •  Site Design by Emily White Designs