• Skip to main content
  • Skip to primary sidebar
  • Skip to footer
  • Blog
  • About
  • Contact
  • FAQ
  • Sponsor

see kate sew

sewing, crafts, tutorials, DIY

  • Patterns
    • Free Patterns
    • Pattern of the Month
  • Tutorials
    • Accessories
    • Bags and Pouches
    • Clothing
    • Costumes
    • Crafts
    • Cricut Projects
    • Holiday
    • Household
    • Kids
    • Maternity
    • Quilting
  • Topics
    • Baby
    • Boy
    • Christmas
    • dog
    • Dolls
    • Easter
    • Girl
    • Halloween
    • Lookbook
    • Party
    • pet
    • Printables
    • Training
    • women
  • No Sew
  • Sewing 101
  • Sew4Good
  • Pet
  • Sewing Room
    • DreamBox
  • Reviews
Home
  • Patterns
    • Free Patterns
    • Pattern of the Month
  • Tutorials
    • Accessories
    • Bags and Pouches
    • Clothing
    • Costumes
    • Crafts
    • Cricut Projects
    • Holiday
    • Household
    • Kids
    • Maternity
    • Quilting
  • Topics
    • Baby
    • Boy
    • Christmas
    • dog
    • Dolls
    • Easter
    • Girl
    • Halloween
    • Lookbook
    • Party
    • pet
    • Printables
    • Training
    • women
  • No Sew
  • Sewing 101
  • Sew4Good
  • Pet
  • Sewing Room
    • DreamBox
  • Reviews

11.20

bagged lining tutorial

Welcome to See Kate Sew! If you’re new here, sign up for my email newsletter for access to free patterns, tutorials and all the latest sewing news! Tour my sewing room HERE!

bagged lining tutorial

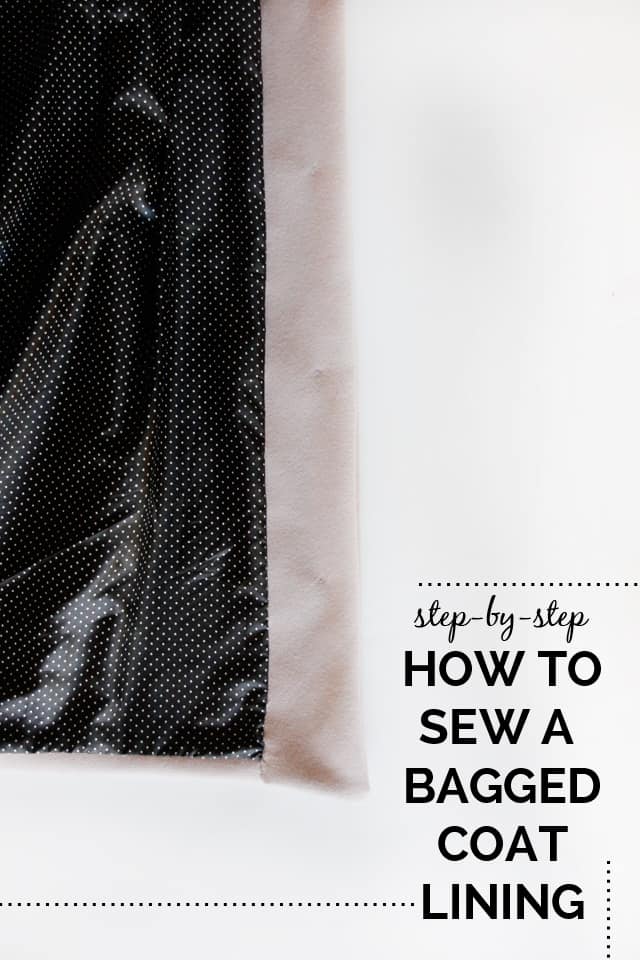
Bagged lining are so nice! You will love this professional hem finish. This is also one of those techniques that might give you a headache at first but will be totally worth the satisfaction and boost in your sewing confidence afterwards. I simplified this tutorial a tiny bit and took tons of photos, so I’m hoping walking you through this process will make it easy and fun.

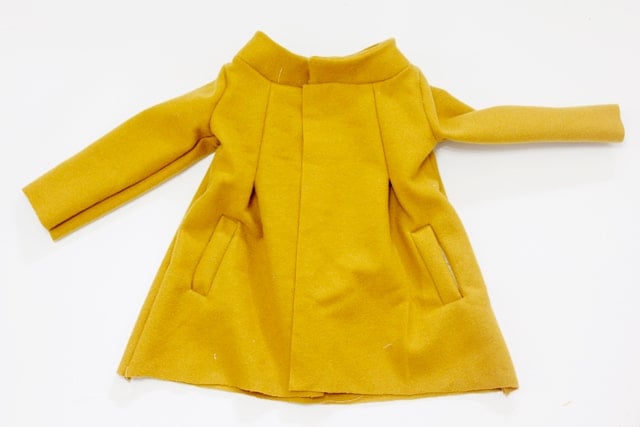
Let’s get started! I’m demonstrating this technique on the Kennedy coat just because it was easier to show you with a smaller garment. The pieces are the same as the Icon, but the proportions vary. The Kennedy pattern actually doesn’t called for a bagged lining (I wanted to give you a break) but you can add a bagged lining to any coat/jacket pattern that has a lining and I will talk more about that tomorrow. Tomorrow I will also show you the Kennedy hem method which is super easy and not bagged. (And one of these days I will actually release the Kennedy pattern! I’m sorry it is taking so long, I’m just doing finishing touches!)

Okay, let’s get started!

Bagged Lining Tutorial//

To prep your coat for a bagged lining, the outer coat should be finished with the collar basted on.

Simplified bagged lining tutorial

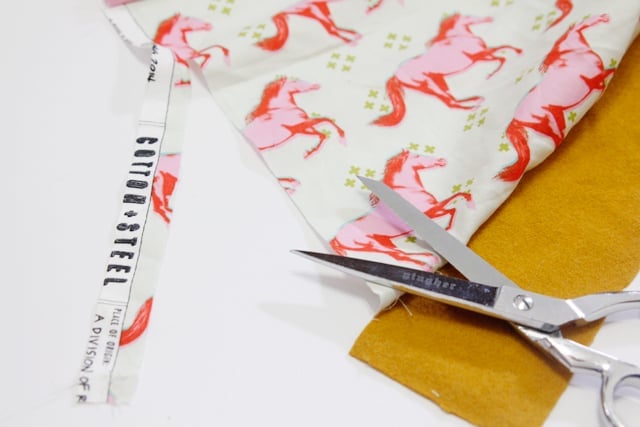
You lining should be assembled as well, including front facings and sleeves. I scrounged for my lining, using little piece I had laying around, so the sleeves are rayon and the body is cotton. I didn’t have enough to make the horses run the same way so they are just running all over the place ;).

Simplified bagged lining tutorial

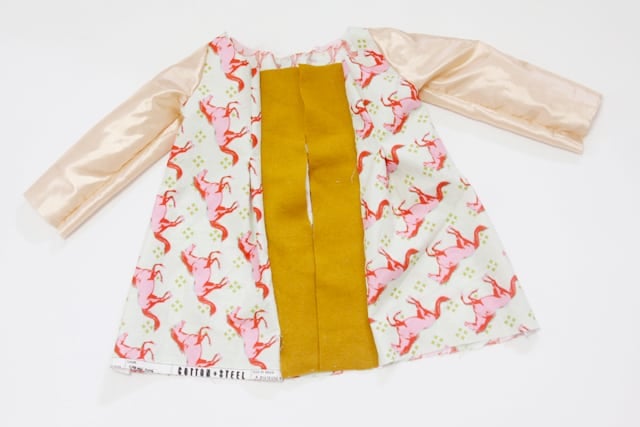
Your lining will have 3 openings. 2 of those are at the bottom of the lining/front facing seam. Leave about 3″ open at the bottom of this seam.

The other opening will be in the lining side seam. Leave 6″ open for turning later.

Simplified bagged lining tutorial

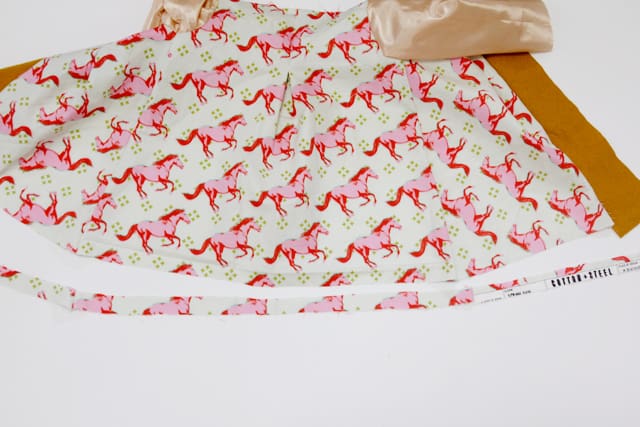
Clip off 1″ from the bottom of the lining. Leave the facing for now.

Simplified bagged lining tutorial Simplified bagged lining tutorial

To sew the outer coat to the lining turn both inside out and place right sides together. Flip the collar DOWN so it becomes encased in the seam. Now pin the fronts and necklines together, matching the shoulder seams at the neckline. Pin well and stitch around these three edges.

Simplified bagged lining tutorial

Start and stop 1″ from the bottom of where the facing meets the front coat.

Simplified bagged lining tutorial

Now we are going to baste the hem of the outer coat. Fold up 1″ and pin.

Simplified bagged lining tutorial

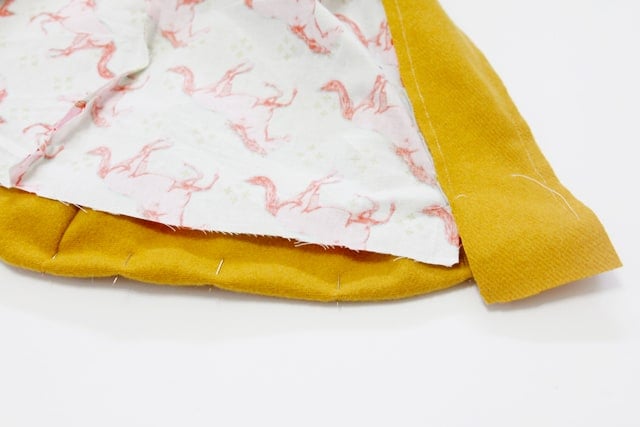
Here is a view of the other side. The coat hem is flipped up 1″ and pinned all the way across the hem. Leave the facing and lining alone for now.

Simplified bagged lining tutorial

Beginning 3″ from the front, stitch hem in place at 1/4″ from fold with a baste stitch.

Simplified bagged lining tutorial

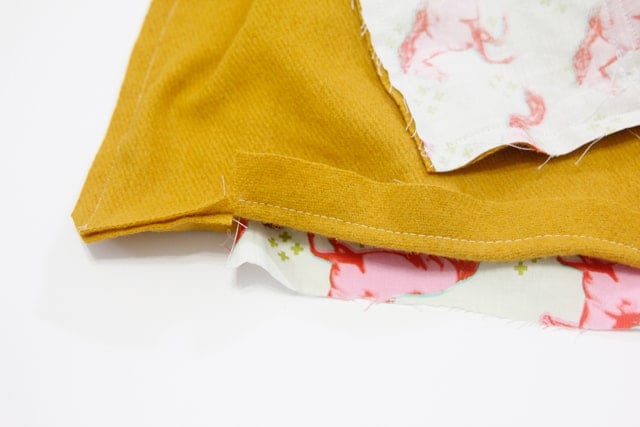
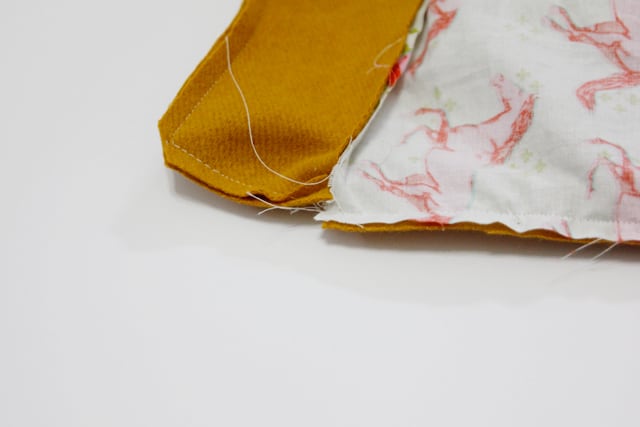
Here is a view of the outer hem (folded and basted, the facing (still long) and the lining (trimmed 1″). I think the most confusing part of this process is keeping track of all the different pieces and lengths, so hopefully this photo will give you a good checkpoint.

Simplified bagged lining tutorial

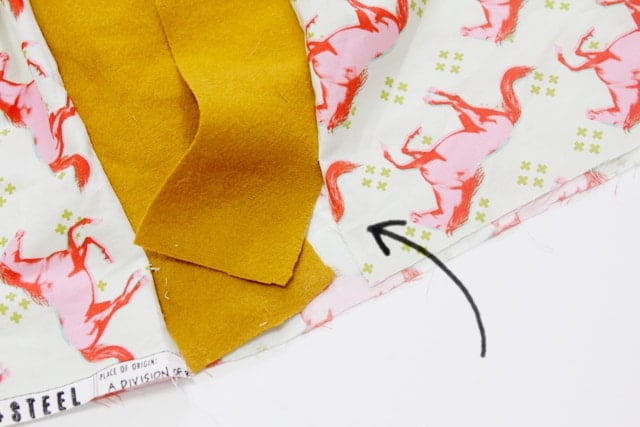
Now lay coat flat. We are focusing on the facing and outer hem right now. Clip the outer hem right where it lines up with the facing.


Simplified bagged lining tutorial

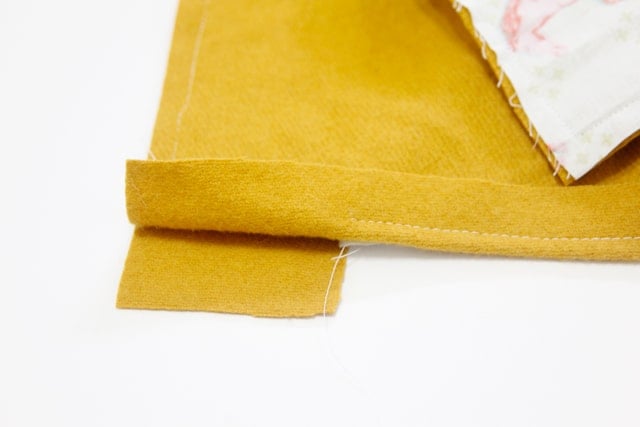
The clip should go 7/8″ and butt up against the stitching you just made at the hem fold.

Simplified bagged lining tutorial

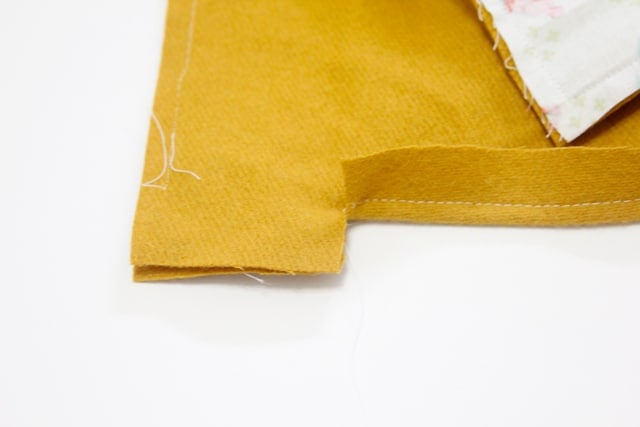
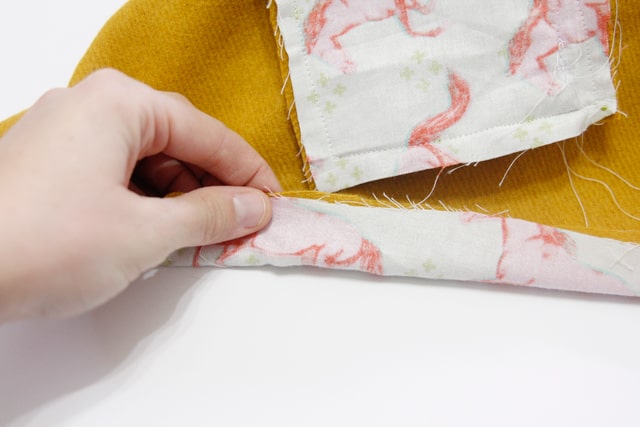
Now stitch from the corner to the edge of the hem.

Simplified bagged lining tutorial


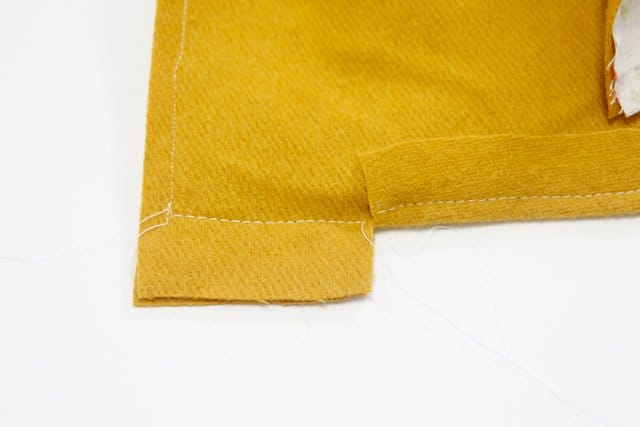
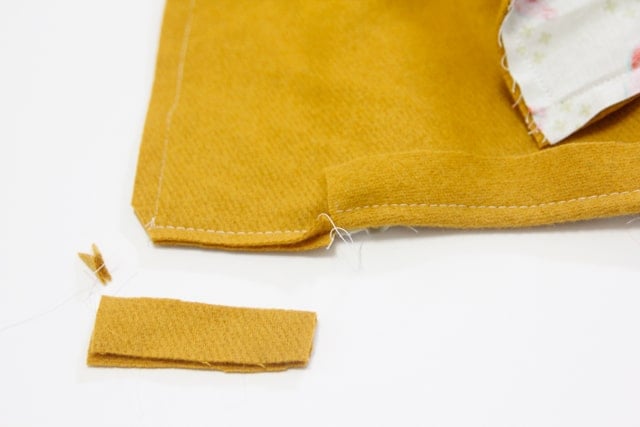
Clip the excess fabric.

Simplified bagged lining tutorial


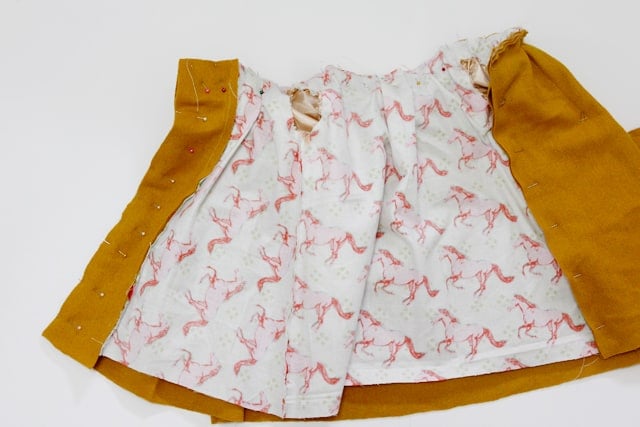
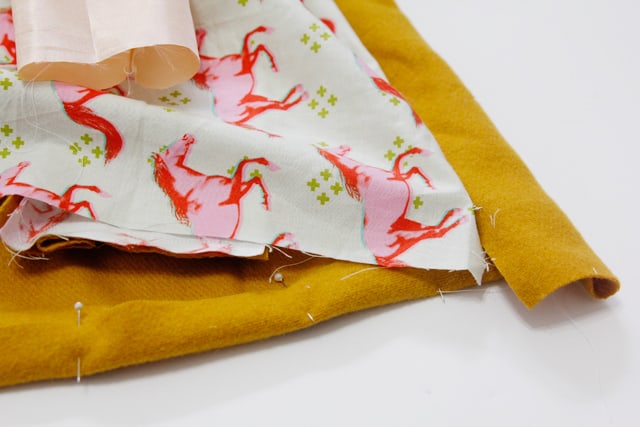
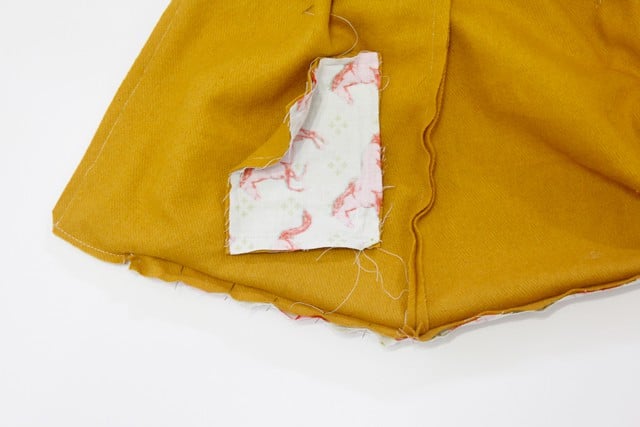
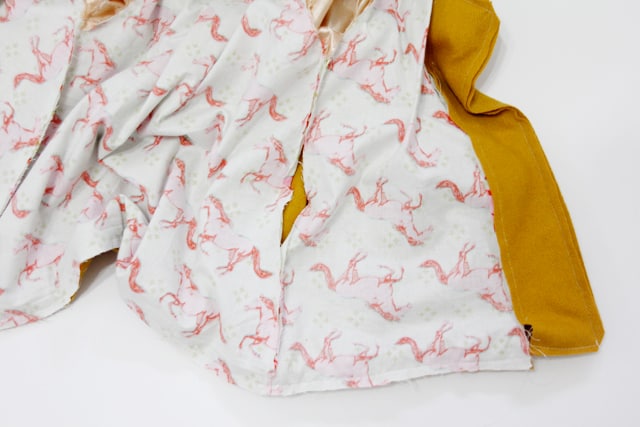
Pull the lining out from under the coat like so:

Simplified bagged lining tutorial


Now match lining with hem with right sides together.

Simplified bagged lining tutorial

Pin all the way across.

Simplified bagged lining tutorial

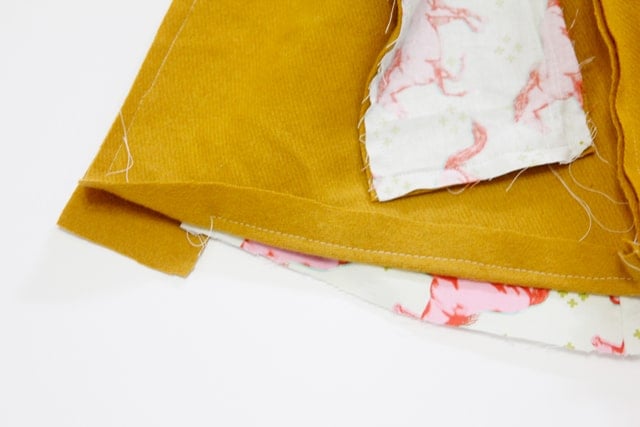
View from the other side:

Simplified bagged lining tutorial Simplified bagged lining tutorial


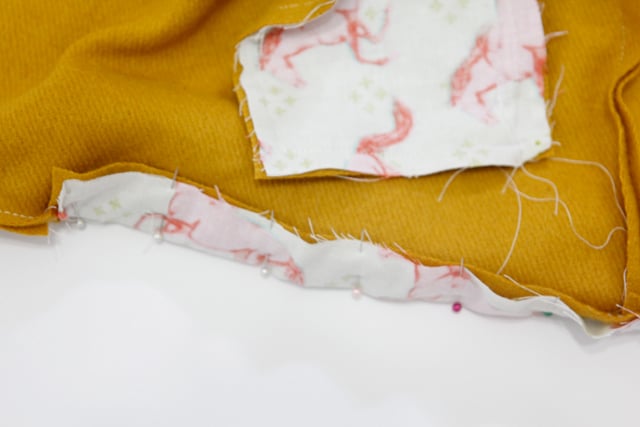
Now stitch all the way across them hem at 3/8″.

Simplified bagged lining tutorial Simplified bagged lining tutorial

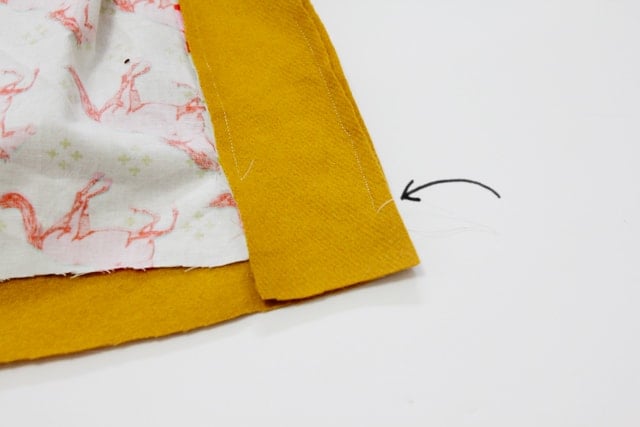
Trim all the corners of your coat and flip it rightside out through the hole in your lining.

Simplified bagged lining tutorial

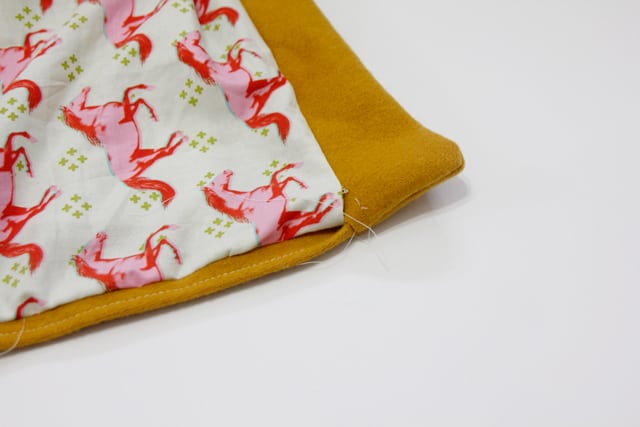
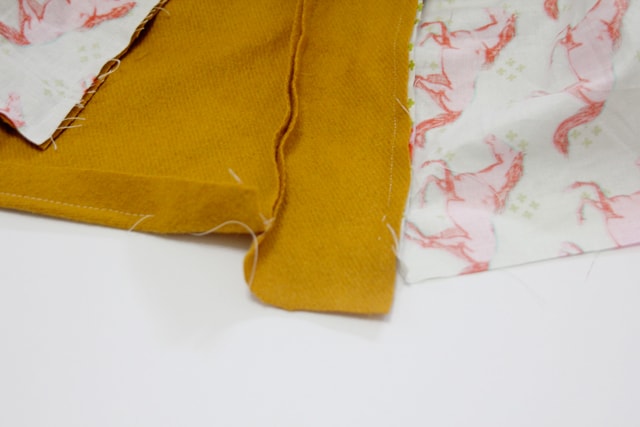
Remove baste stitches at hem. Give your hem a good press, focusing on this corner.

Simplified bagged lining tutorial

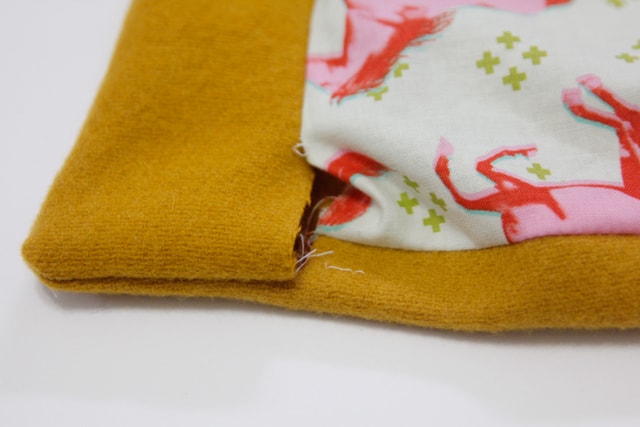
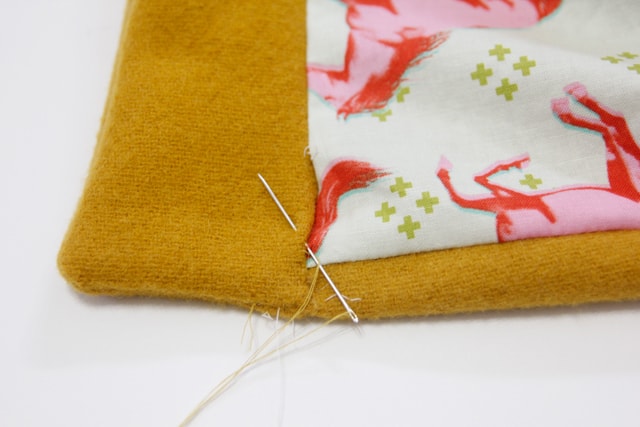
Now you’ll need a needle and thread for finishing. Fold under the facing, catching the little bit of lining underneath.

Simplified bagged lining tutorial

Slip stitch this section closed.

Simplified bagged lining tutorial

Once you’ve done that you have three options to finalize the hem.

1) Press really well

2) Topstitch bottom edge of coat with matching thread.

3) Finish hem with hand stitching.

Your choice may depend on the type of fabric you are using and how you like the way the hem looks. I prefer to have the hem pressed well without topstitching or using a hand stitch to keep the hem flat. It is up to you though!

And you’re done! Not that bad, huh? Now you can admire your bagged lining!

bagged lining tutorial

3 Comments | Sewing 101, Tutorials

Exclusive Free PatternRuffled Apron

Sign up for my email newsletter and receive my ruffled apron pattern totally FREE!

We take your privacy seriously. See our privacy policy here. Unsubscribe at any time.

You may also like these posts...

Dog Collar DIYhow to make a dog collar free sewing pattern!5 Things I Love about my Cricut Explore Air 2 for sewinghow to print pdf patternsPenelope Peplum Sew-a-long Day 2: Printing PDF Patternshow to shorten a zipper

Reader Interactions

3 Comments

  1. Claire

    11/20 at 4:51 PM

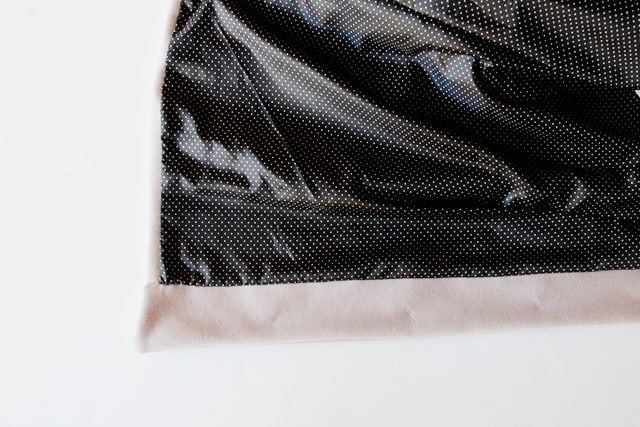
    This is great, but what about the sleeves?

    • kate

      12/09 at 11:18 AM

      I did a simple foldover hem on the sleeves. I figured after the bagged lining we all needed a break. It still looks nice and the lining is just tucked into the main fabric inside :)

  2. Kerrie

    11/21 at 10:03 AM

    Excellent. I have never done a lining…thank you for the tutorial. Now I won’t have to wing it :)

Primary Sidebar

  • Facebook
  • Twitter
  • Instagram
  • Pinterest
  • Email

Exclusive Free PatternRuffled Apron

Sign up for my email newsletter and receive my ruffled apron pattern totally FREE!

We take your privacy seriously. See our privacy policy here. You can unsubscribe at any time.

Don’t miss these popular posts!

easy baby dress pattern for the summertime

easy baby dress pattern for the summertime

modern ombre + b/w triangle quilt tutorial + pattern

modern ombre + b/w triangle quilt tutorial + pattern

Fabric

Quilted Cosmetic Case Kiss Me KateKiss Me, Kate FabricOne Hour Granny Square Quilt Tutorial | See Kate SewModern Granny Square Quilt Whole Cloth

Pattern Hacks

Easy Baby Summer Dressthe EMMA pattern | See Kate SewThe EMMA Dress

Footer

Hello friends!

My name is Kate, a twenty something fashion lover and mother of two. When I’m not chasing kids you can find me at my sewing table or daydreaming up new designs. You can read more about me here. Thank you for visiting!

8a918f8da8e0e69102dc0f33a718de85a99c31a57283e0e3e2

FOLLOW ME HERE

  • Facebook
  • Twitter
  • Instagram
  • Pinterest
  • Email
  • Blog
  • About
  • Contact
  • FAQ
  • Sponsor

Copyright © 2023 See Kate Sew  •  All Rights Reserved  •  Privacy Policy  •  Site Design by Emily White Designs