• Skip to main content
  • Skip to primary sidebar
  • Skip to footer
  • Blog
  • About
  • Contact
  • FAQ
  • Sponsor

see kate sew

sewing, crafts, tutorials, DIY

  • Patterns
    • Free Patterns
    • Pattern of the Month
  • Tutorials
    • Accessories
    • Bags and Pouches
    • Clothing
    • Costumes
    • Crafts
    • Cricut Projects
    • Holiday
    • Household
    • Kids
    • Maternity
    • Quilting
  • Topics
    • Baby
    • Boy
    • Christmas
    • dog
    • Dolls
    • Easter
    • Girl
    • Halloween
    • Lookbook
    • Party
    • pet
    • Printables
    • Training
    • women
  • No Sew
  • Sewing 101
  • Sew4Good
  • Pet
  • Sewing Room
    • DreamBox
  • Reviews
Home
  • Patterns
    • Free Patterns
    • Pattern of the Month
  • Tutorials
    • Accessories
    • Bags and Pouches
    • Clothing
    • Costumes
    • Crafts
    • Cricut Projects
    • Holiday
    • Household
    • Kids
    • Maternity
    • Quilting
  • Topics
    • Baby
    • Boy
    • Christmas
    • dog
    • Dolls
    • Easter
    • Girl
    • Halloween
    • Lookbook
    • Party
    • pet
    • Printables
    • Training
    • women
  • No Sew
  • Sewing 101
  • Sew4Good
  • Pet
  • Sewing Room
    • DreamBox
  • Reviews

09.19

Boat Shoe Embellishment Tutorial

Welcome to See Kate Sew! If you’re new here, sign up for my email newsletter for access to free patterns, tutorials and all the latest sewing news! Tour my sewing room HERE!

Written by Jessica of The Ladyette.

boat shoes 16boat shoes 17  boat shoes 15 boat shoes 13


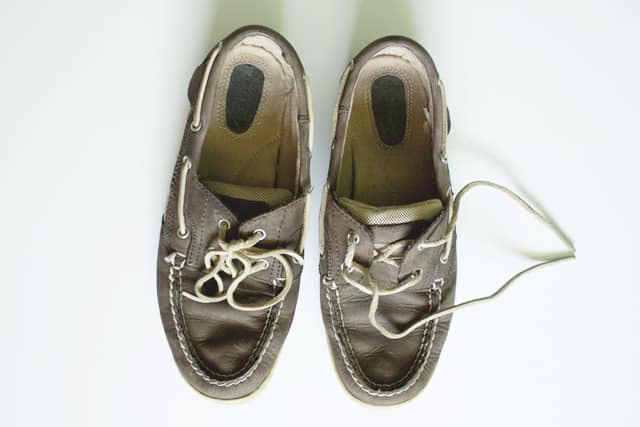
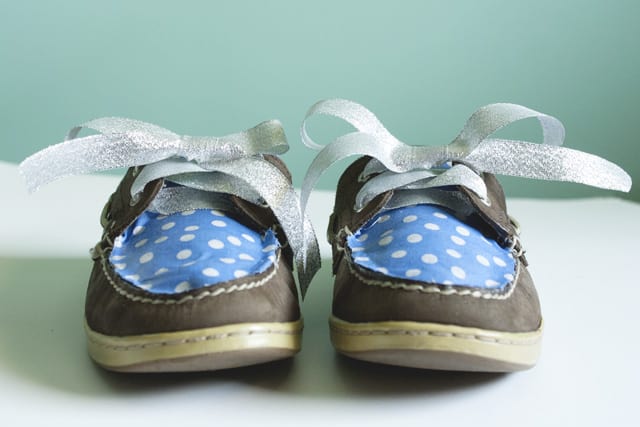
I’ve had a pair of boat shoes for several years.  I wore them out in college and then even when they looked like they were on their last life line, I just couldn’t bear to throw them out.  So naturally, that means they need some sprucing up.  A little embellishment.  Some polka dot fabric, metallic ribbon, and an afternoon later these boat shoes had a second life.

boat shoes 01

boat shoes 02

Boat Shoe Embellishment Tutorial

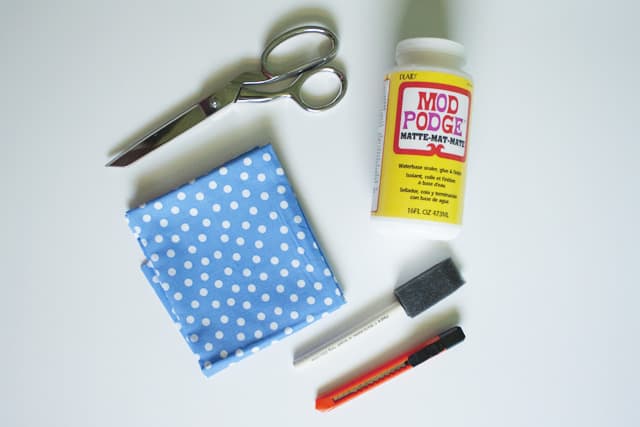
Supplies Needed: a pair of boat shoes, scrap fabric, Mod Podge, a sponge brush, scissors, a utility (or exacto) knife, and approximately 30-35″ of metallic ribbonboat shoes 03

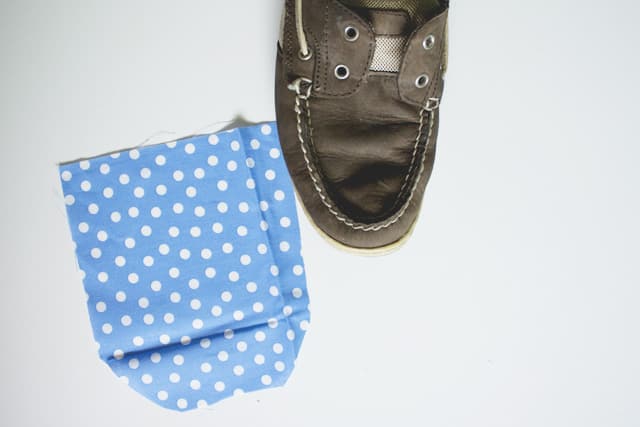
Step 1: Using the scissors, cut your pieces of scrap fabric into a size and shape similar to the area of the boat shoe being covered.  This is as simple as laying the fabric over top of the shoe and cutting out a shape.  It doesn’t have to be perfect because it will be trimmed later.

boat shoes 04

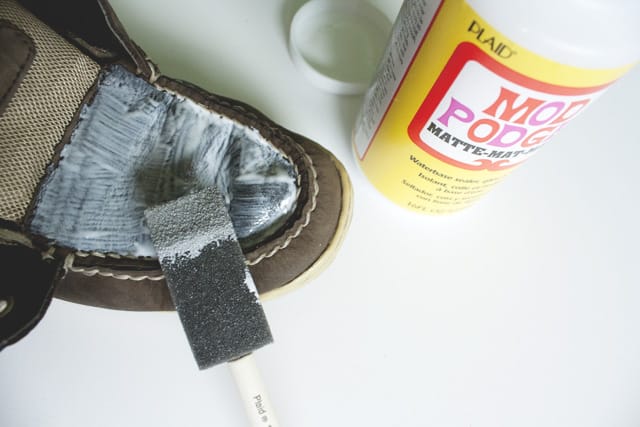
Step 2: Make sure the surface area of the shoe is clean and remove the laces.  Using the sponge brush, apply a thick layer of Mod Podge to the area of the shoe that will be covered in fabric.  For hard to reach areas like the tongue of the shoe, it can be easier to work in sections.  In this case, I covered the toe area in glue, moved on to step 3, then came back and started at step 2 again with the tongue.

boat shoes 05

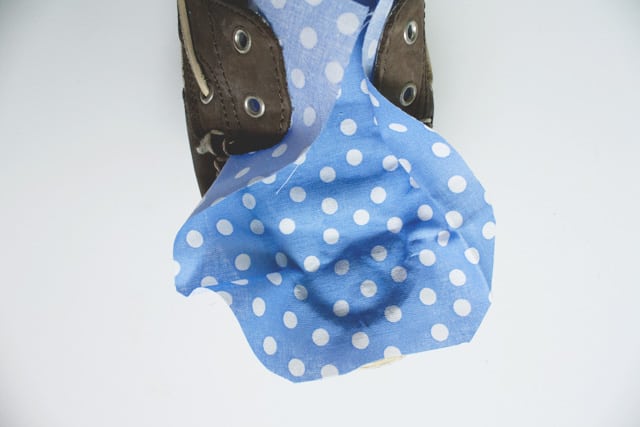
Step 3: Place the fabric over the area covered in glue.  Make sure to rub it down firmly and smooth out any bumps or bubbles.  Stick your hand into the shoe and apply pressure from both the top and bottom to be sure it the glue will hold.  It will need about ten minutes to dry enough to move on, so repeat step 2 in other areas at this time.

boat shoes 06

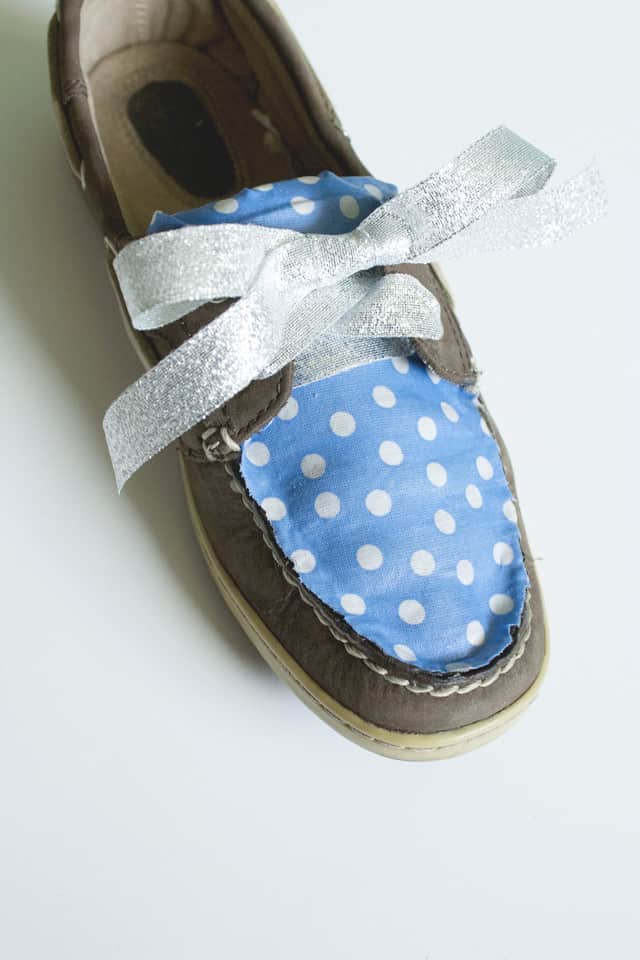
Step 4: Trim the excess fabric around the glued area.  This can be done with the utility knife or the scissors, whichever you are more comfortable with.  If you notice edges not being fully glued down, go back and add more glue and hold them in place until it has begun to dry.

boat shoes 07 boat shoes 08

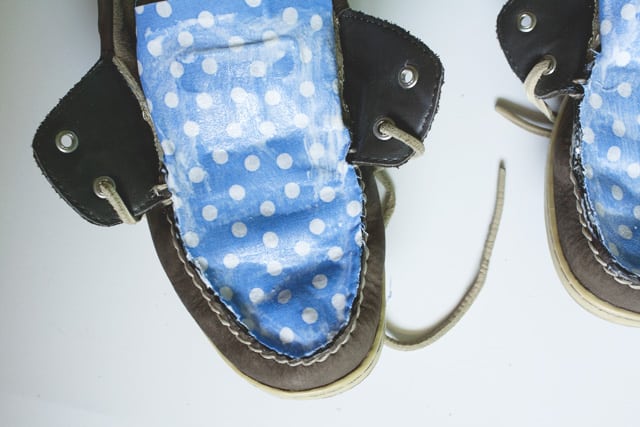
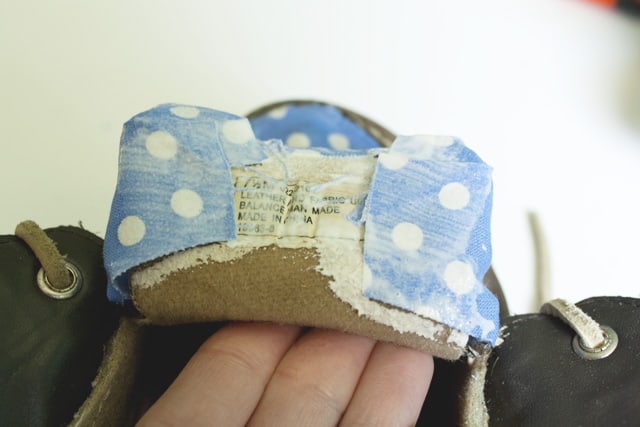
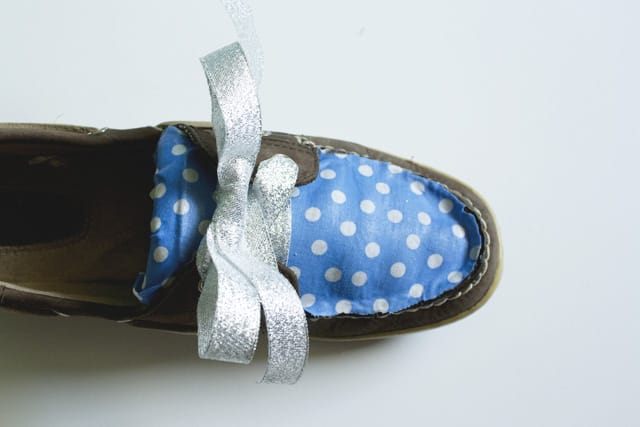
Step 5: Using the sponge brush again, apply a moderate coat of Mod Podge to the top of the fabric.  Cover all the edges to prevent fraying.  The Mod Podge will dry clear and will act as a sealer for the fabric.  To work with the tongue area, I used the old laces to hold the flaps back by running the laces through the holes and tying them underneath the shoe.  Apply the Mod Podge to the back edges of the tongue so the fabric can be wrapped around behind for a finished look.  Apply some Mod Podge over top of all the fabric behind the tongue as well.boat shoes 09 boat shoes 10

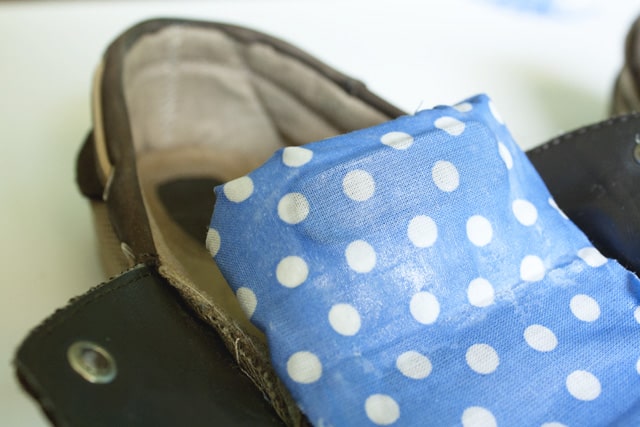
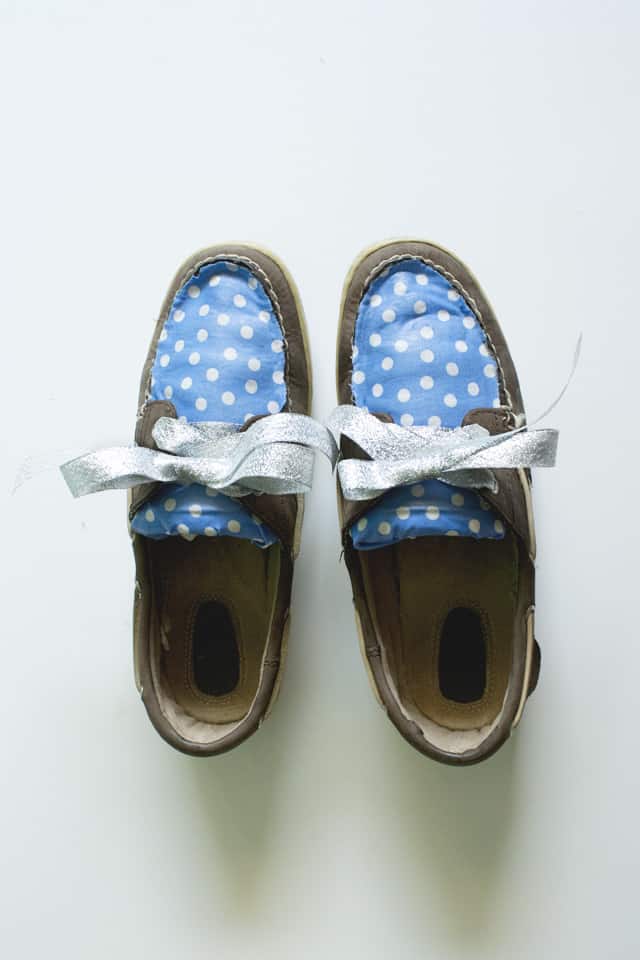
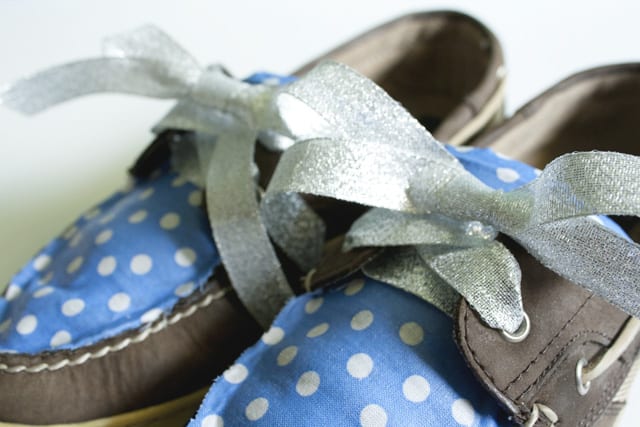
Step 6: Allow about one hour for all of the Mod Podge to fully dry.  Once dry, remove the old laces holding the flaps back.  Cut the ribbon into two equal pieces and lace the shoes to your liking.

boat shoes 11 boat shoes 12 boat shoes 14 boat shoes 13

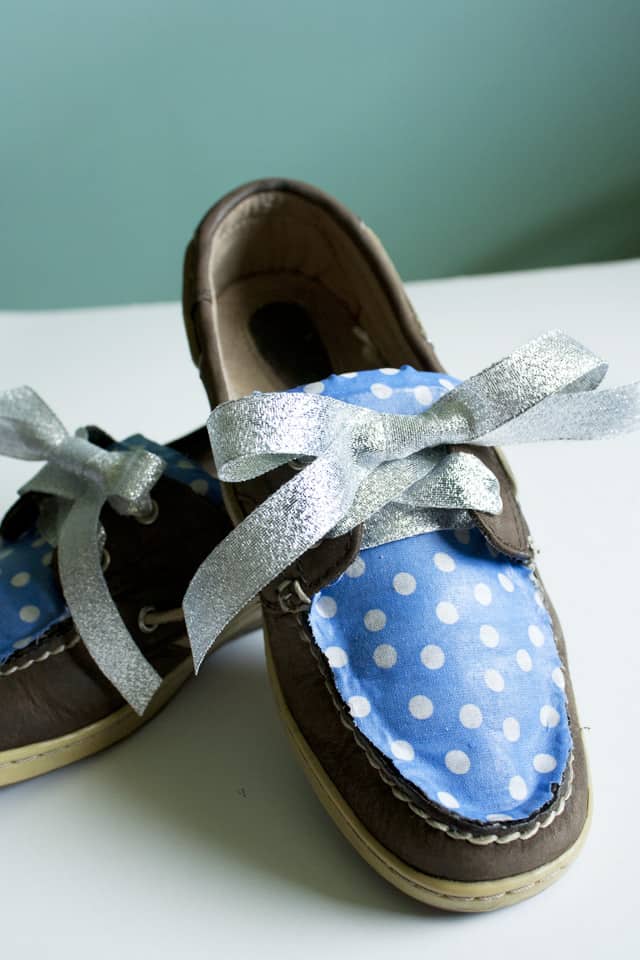
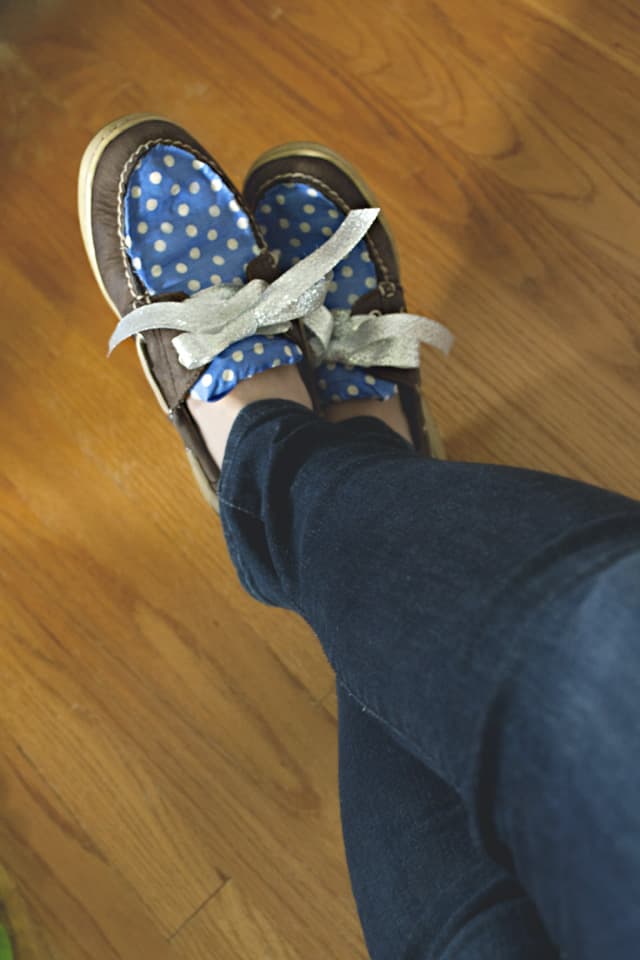
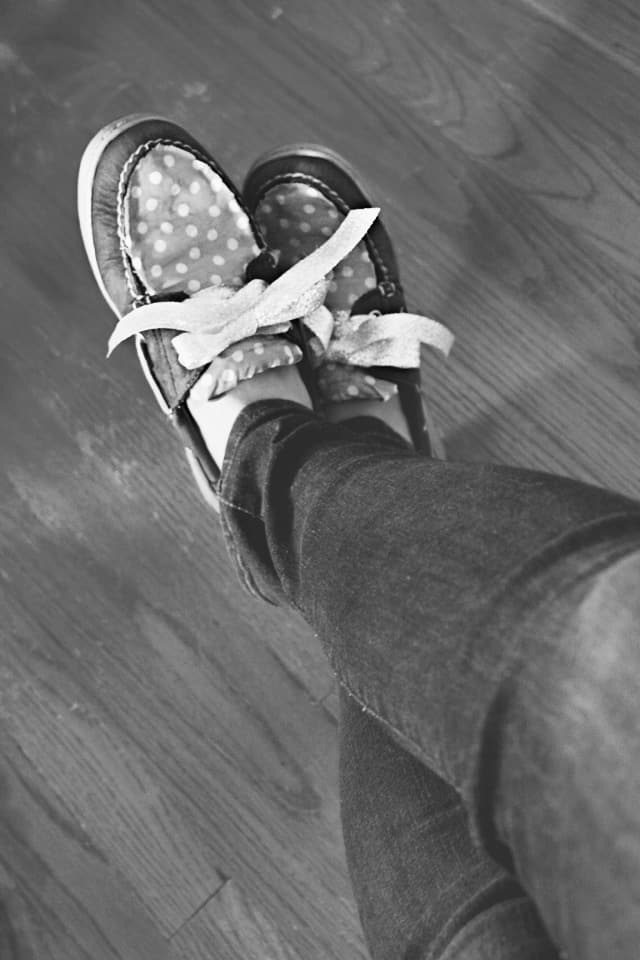
Done!  Now these much loved boat shoes can take one last spin at life, and look quite a bit fancier!

boat shoes 18

2 Comments | Tutorials

Exclusive Free PatternRuffled Apron

Sign up for my email newsletter and receive my ruffled apron pattern totally FREE!

We take your privacy seriously. See our privacy policy here. Unsubscribe at any time.

You may also like these posts...

ruffles 2012 guest: the southern institutehair bow with metallic threadstriped metallic hair bowmad for plaid: gingham style wrap-upmad for plaid: gingham style wrap-uppleat week guest! – delia from delia creates

Reader Interactions

2 Comments

  1. Trend-mixblog

    09/20 at 1:10 PM

    I love how these came out! It looks really easy to pull off too! Thanks for the tutorial! :)

  2. hannah

    10/09 at 8:11 AM

    These are awesome, I really should get some modge-podge – everyone seems to be using it but me!

    https://www.etsy.com/shop/WhyDidIMakeThat

    http://whydidimakethat.blogspot.co.uk/

Primary Sidebar

  • Facebook
  • Twitter
  • Instagram
  • Pinterest
  • Email

Exclusive Free PatternRuffled Apron

Sign up for my email newsletter and receive my ruffled apron pattern totally FREE!

We take your privacy seriously. See our privacy policy here. You can unsubscribe at any time.

Don’t miss these popular posts!

easy baby dress pattern for the summertime

easy baby dress pattern for the summertime

modern ombre + b/w triangle quilt tutorial + pattern

modern ombre + b/w triangle quilt tutorial + pattern

Fabric

Quilted Cosmetic Case Kiss Me KateKiss Me, Kate FabricOne Hour Granny Square Quilt Tutorial | See Kate SewModern Granny Square Quilt Whole Cloth

Pattern Hacks

Easy Baby Summer Dressthe EMMA pattern | See Kate SewThe EMMA Dress

Footer

Hello friends!

My name is Kate, a twenty something fashion lover and mother of two. When I’m not chasing kids you can find me at my sewing table or daydreaming up new designs. You can read more about me here. Thank you for visiting!

8a918f8da8e0e69102dc0f33a718de85a99c31a57283e0e3e2

FOLLOW ME HERE

  • Facebook
  • Twitter
  • Instagram
  • Pinterest
  • Email
  • Blog
  • About
  • Contact
  • FAQ
  • Sponsor

Copyright © 2025 See Kate Sew  •  All Rights Reserved  •  Privacy Policy  •  Site Design by Emily White Designs