This post is sponsored by Cricut! I’m excited to introduce you to the new EasyPress, which is a heat press specifically designed for iron-ons!
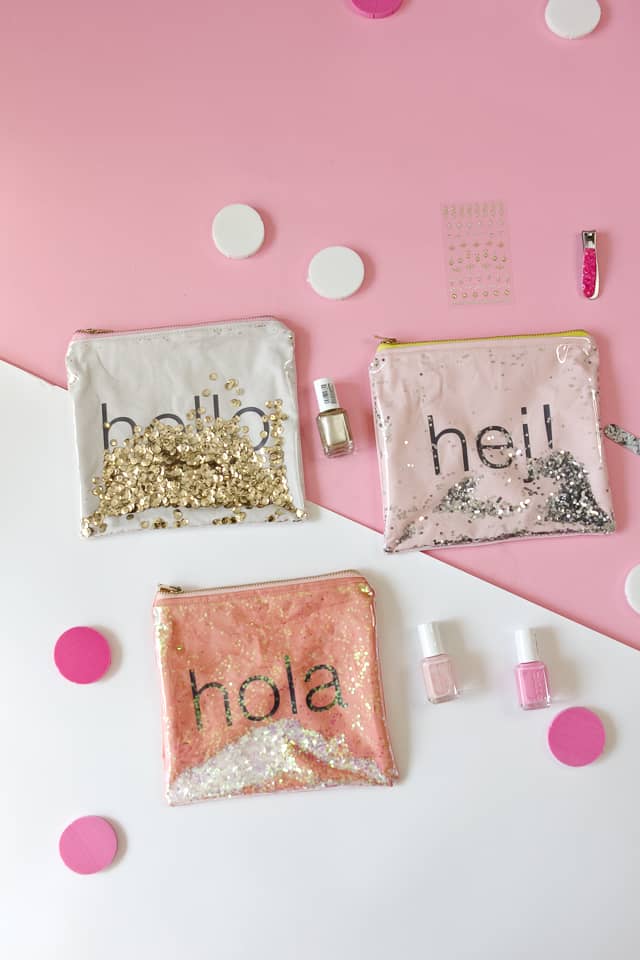
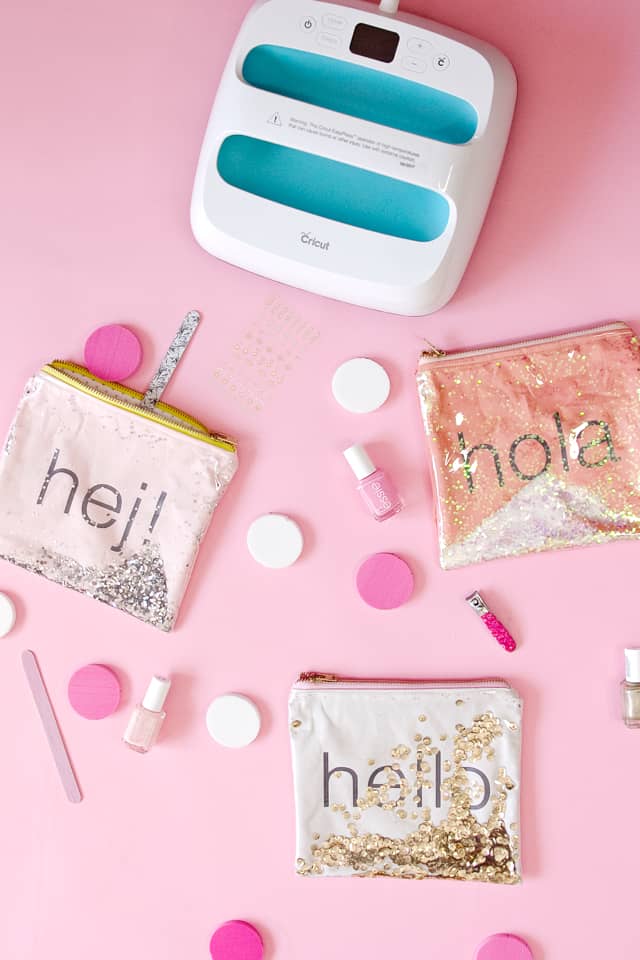
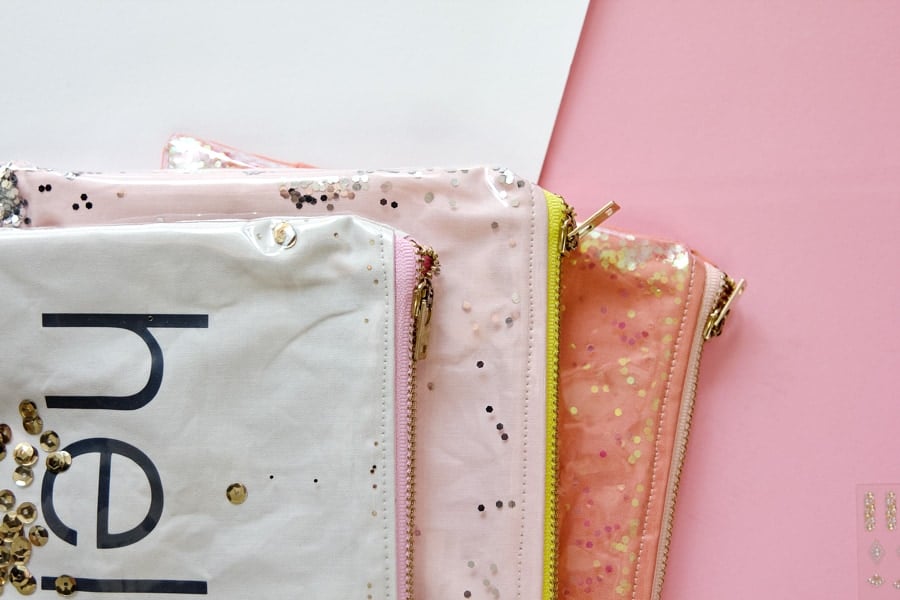
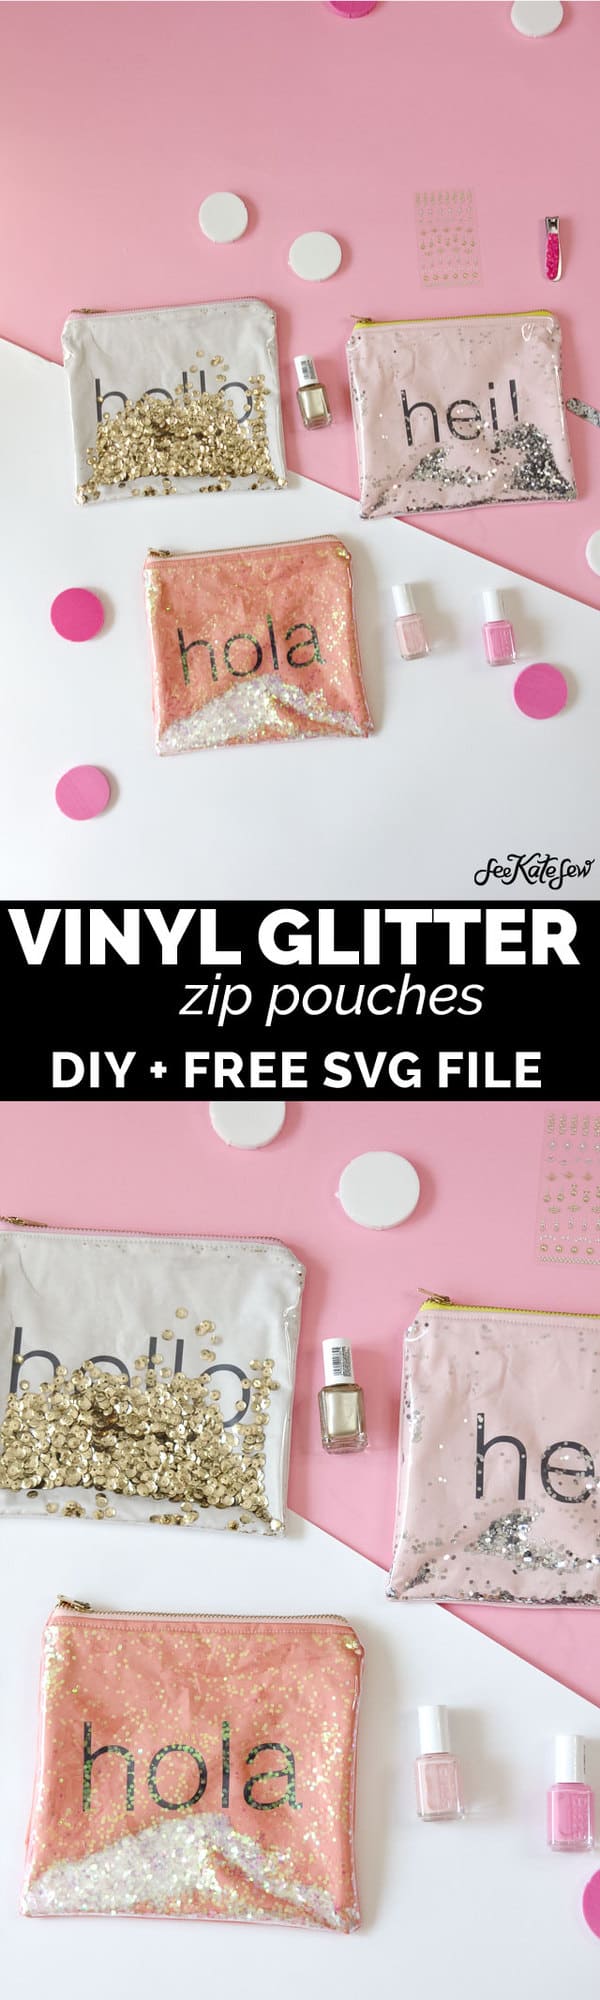
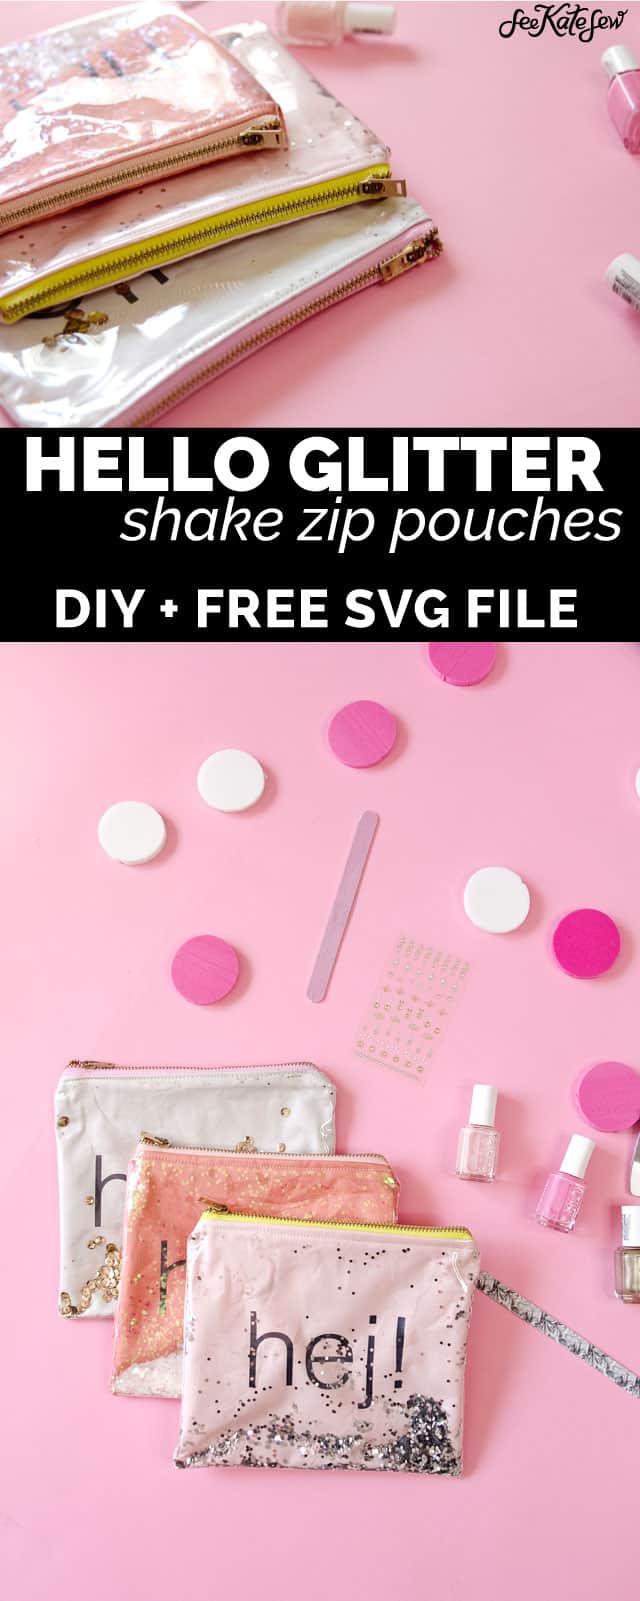
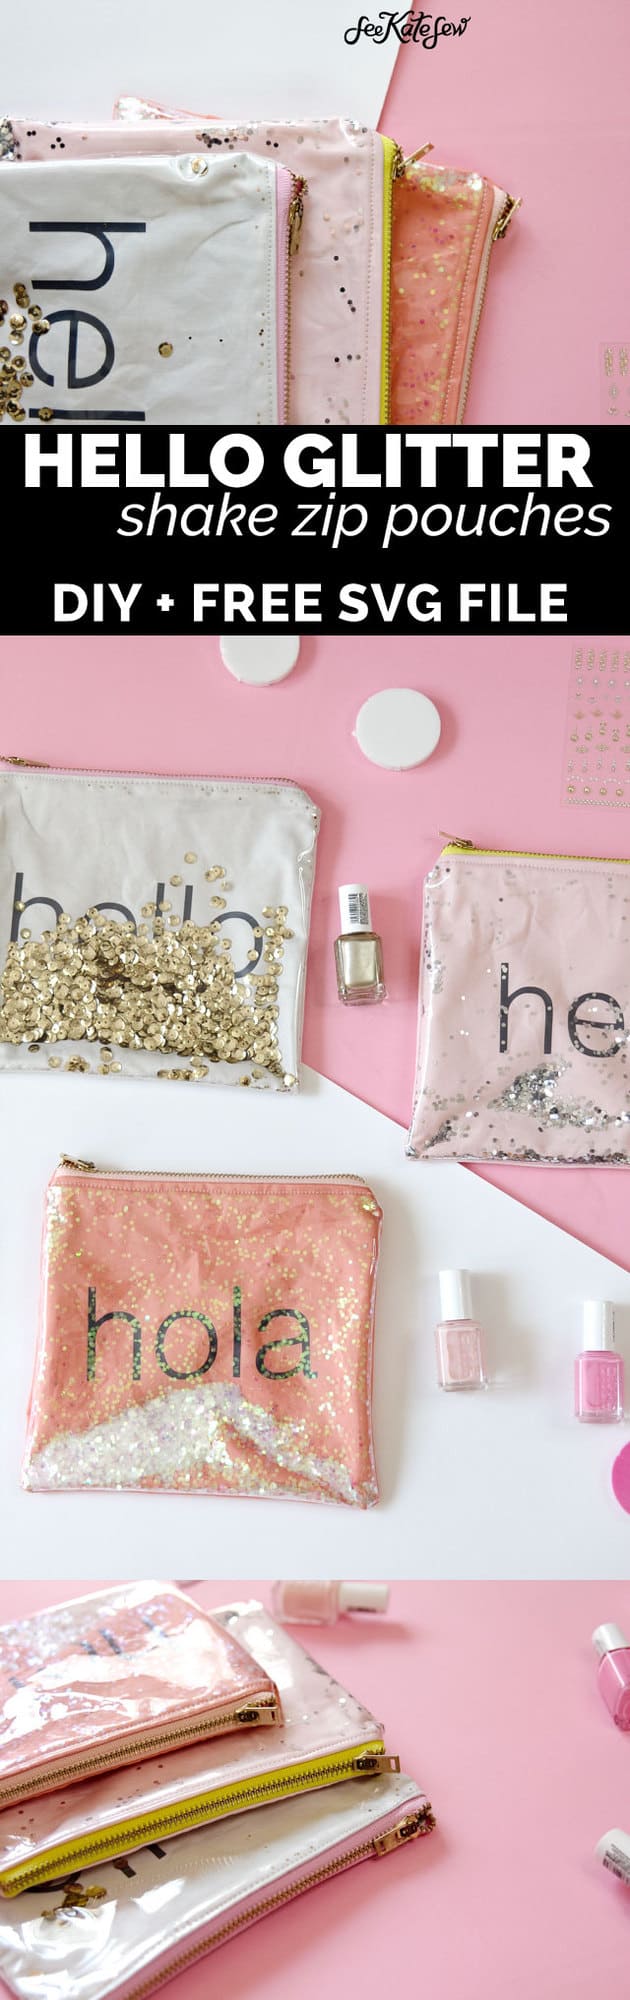
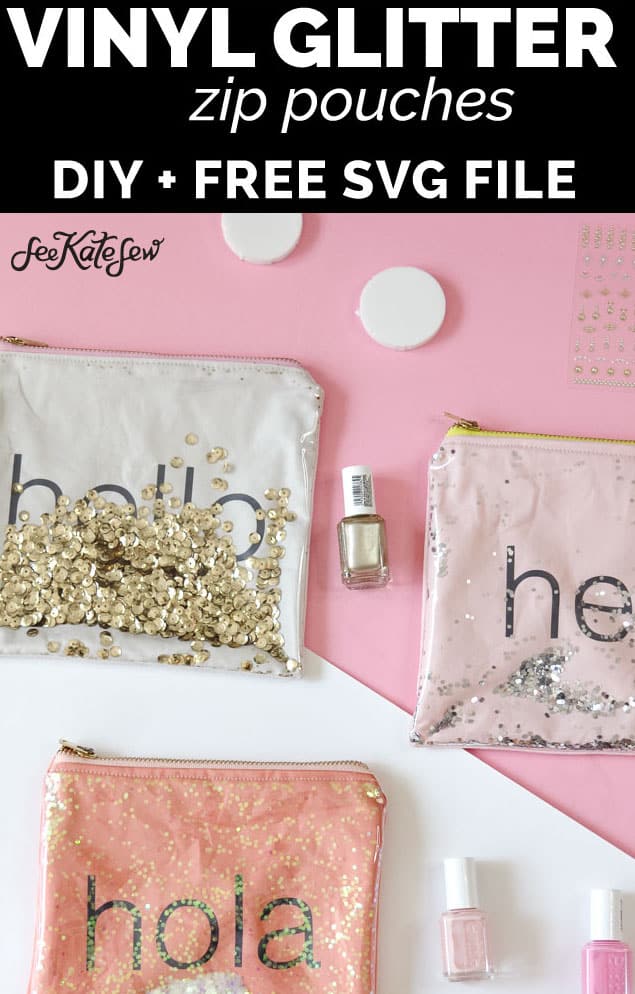
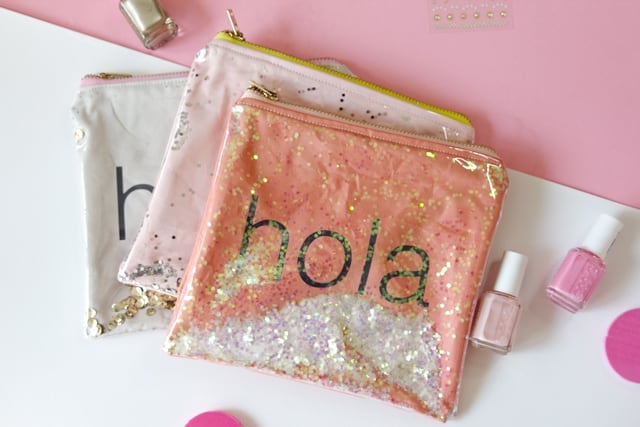
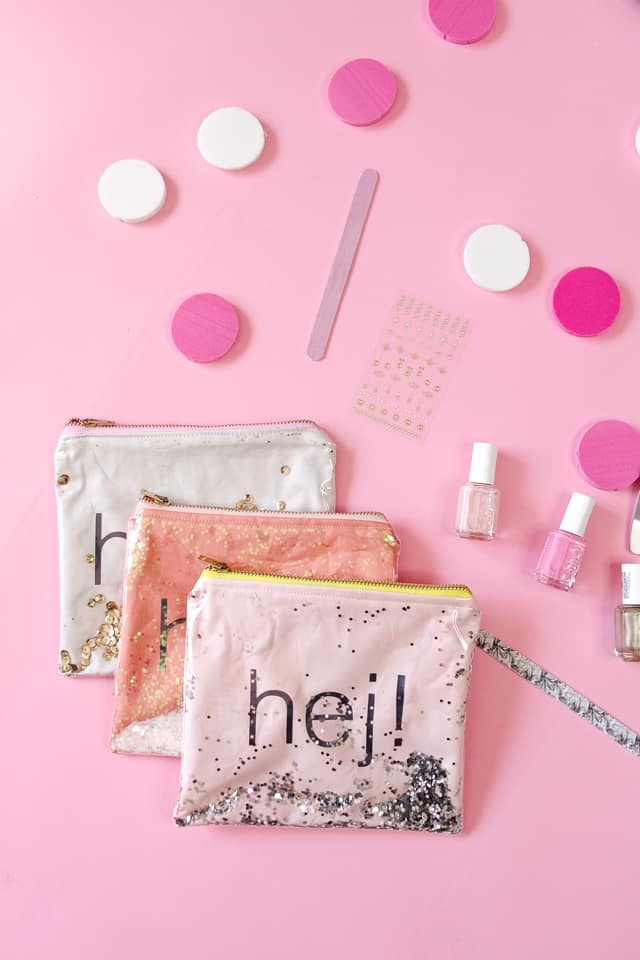
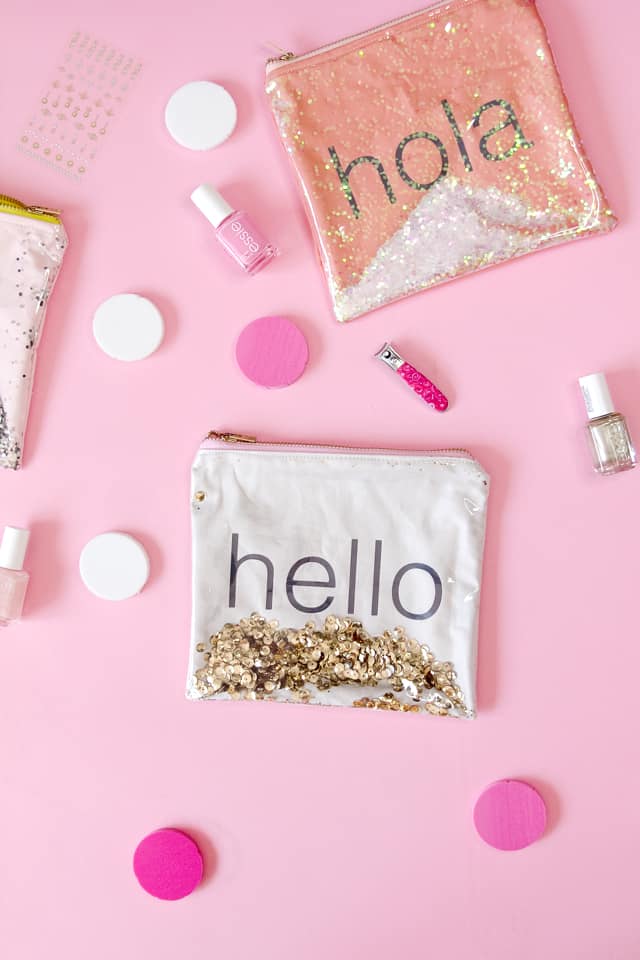
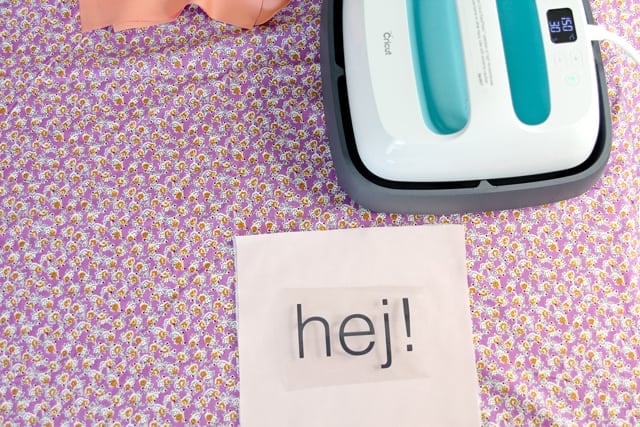
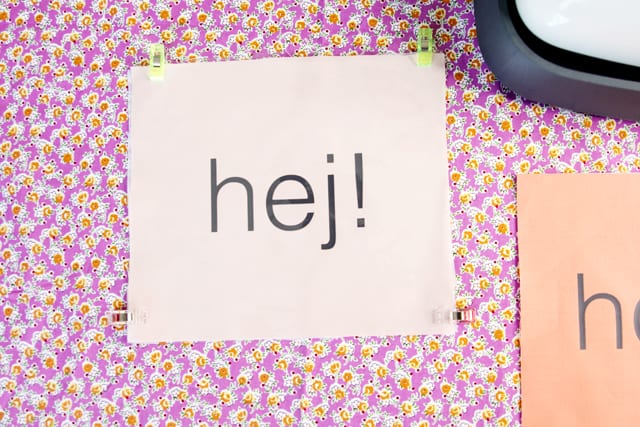
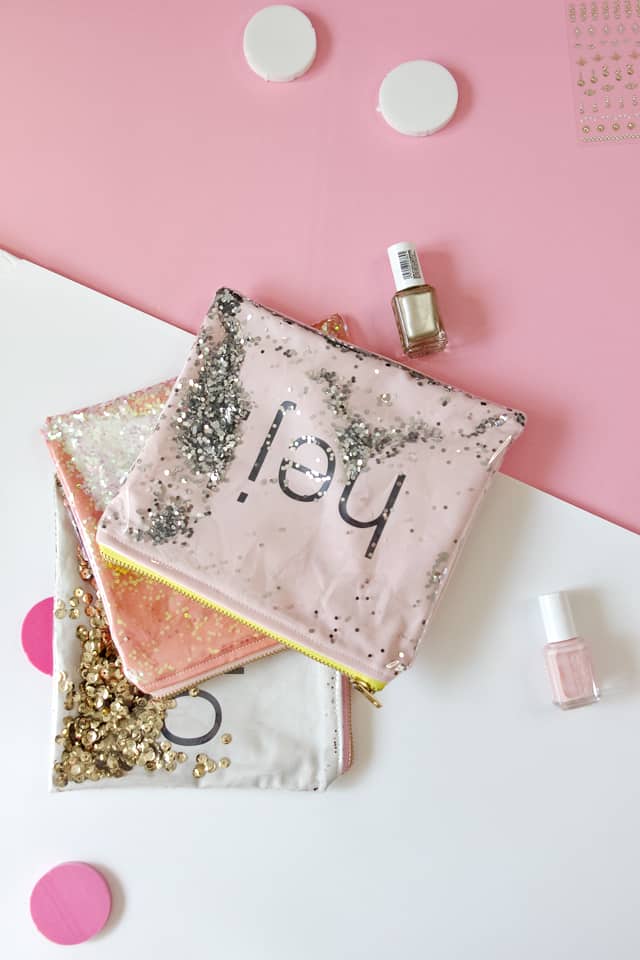
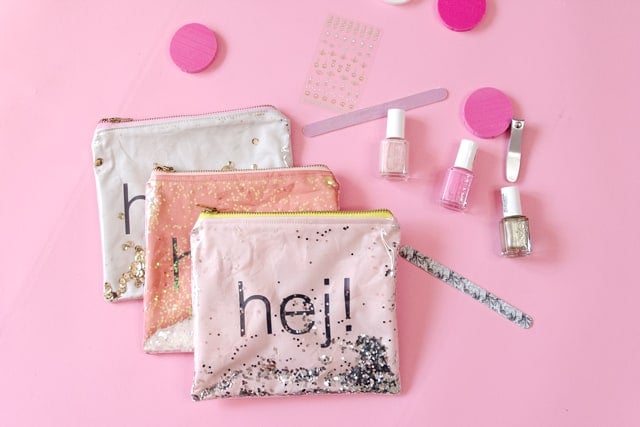
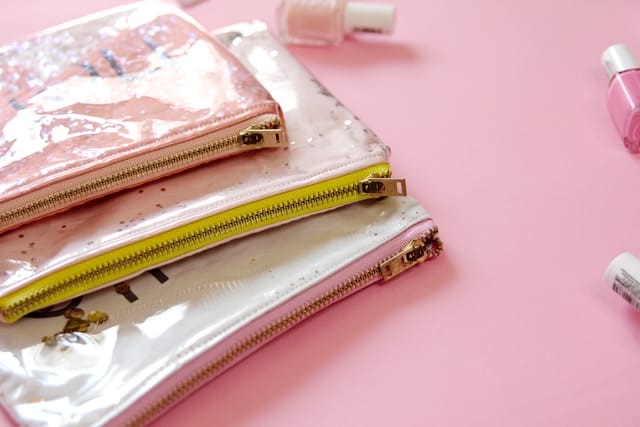
Hello, hola, hej! I’m pretty excited about these glittery zipper pouches! They have a lot going for them: cute typographic iron-on letters, clear vinyl, sequins/glitter, zippers and bright pops of color! As you may know, I love zipper pouches and can never have enough! I also love to have them around for fun just-because gifts! These pouches can be made without the words, but I love the idea of customizing your project and simple vinyl iron-on is what I used for these! Lots to chat about in this post!

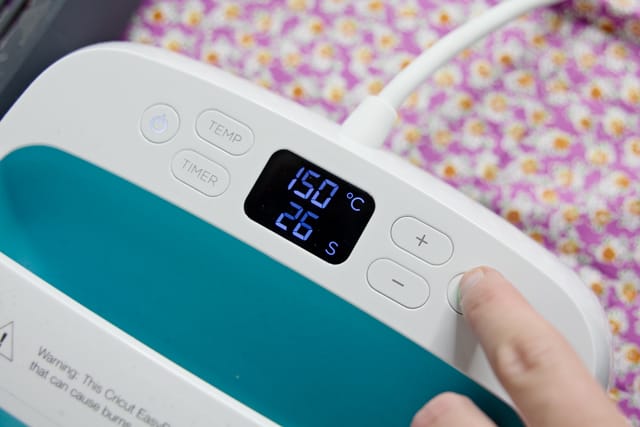
We’ll start with the EasyPress! This new machine was launched right along with the new Cricut Maker. This is ESSENTIAL if you do iron-ons, or if you want to! With a regular iron, I always had issues with iron-ons, mostly with the specialty vinyls. The EasyPress has a chart based on the 1) fabrics and 2) iron-on type you are using and tells you exactly how to set it. It lets you set TIME and TEMP and will tell you the exact settings for the perfect press that will make the vinyl last wash after wash.
Iron-on lite is my most-used type of iron-on vinyl. I also love the foil and holographic iron-on vinyls. So much fun! It was fun to chat with the product team at the Cricut Maker Launch event, they get so excited about the products they are developing, their faces light up when they talk about them. Crafty passion is pretty contagious!
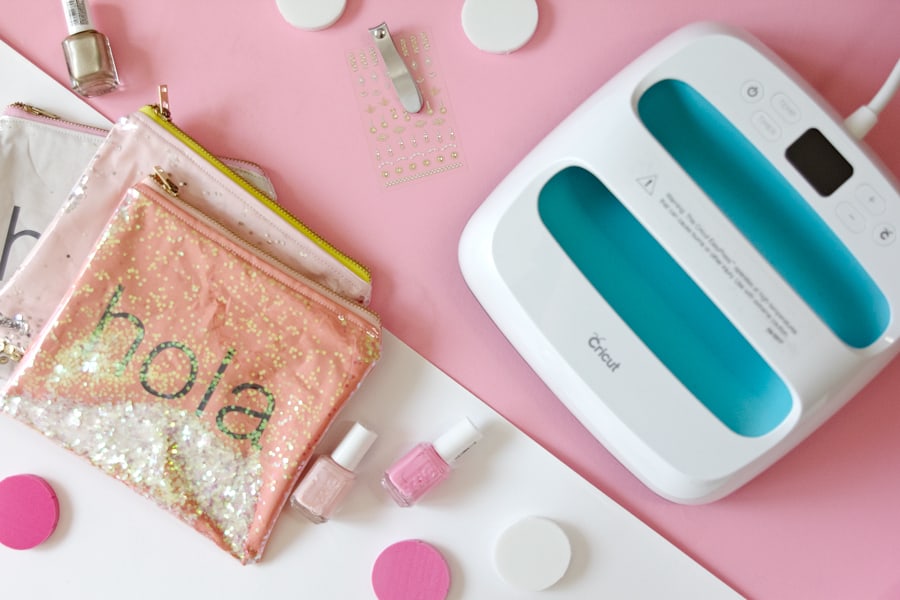
The plate of the EasyPress is just about 9″ by 9″, a nice flat square for you to get your whole design under. The heat is distributed evenly for the perfect press. My favorite iron-on is the foil, but I was never able to get a really good press with a regular iron, so my letters didn’t stay on very long. The EasyPress solves all your problems! The EasyPress works with any vinyl and any machine! (It’s been selling out quickly – if you don’t see it in stock check back frequently to get your hands on one!)
You’ll never go back! It’s also nice and cute and comes with a holder.
Materials:
-solid cotton
-clear vinyl
–colorful zipper
-iron-on vinyl, I’m using the color Charcoal
–fusible interfacing
–Cricut EasyPress
–sequins or glitter
–HELLO HOLA HEJ! svg
–shake glitter pouch pattern
Instructions //
Cut 4 layers of colored cotton using the pattern piece, or the measurements 8″ tall by 9″ wide.
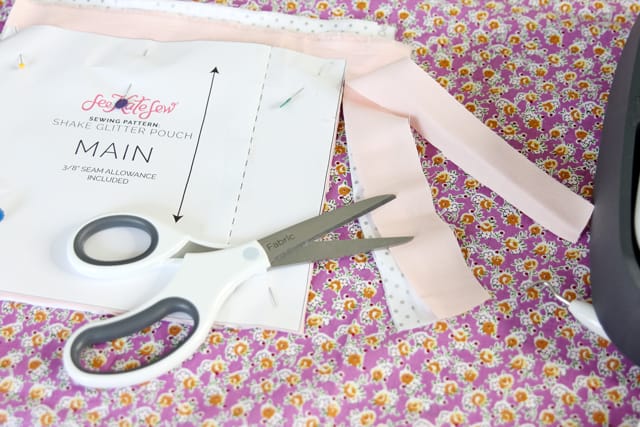
Cut 2 layers of fusible interfacing
Cut 1 layer of clear vinyl in the same dimensions.
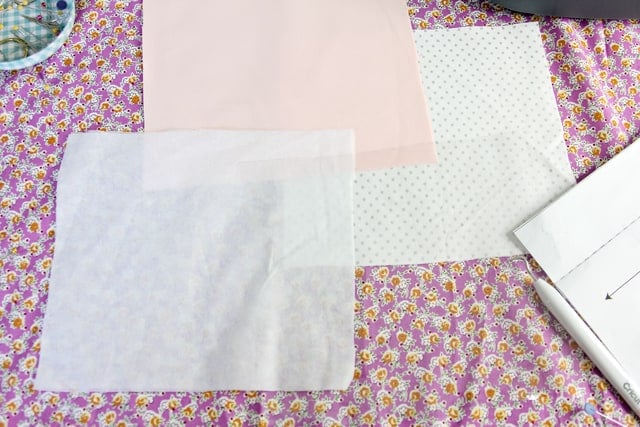
Prep fabric:
fuse fusible interfacing to the backs of 2 pieces of colored cotton. These will be your front and back. The other two cotton pieces will be your lining.
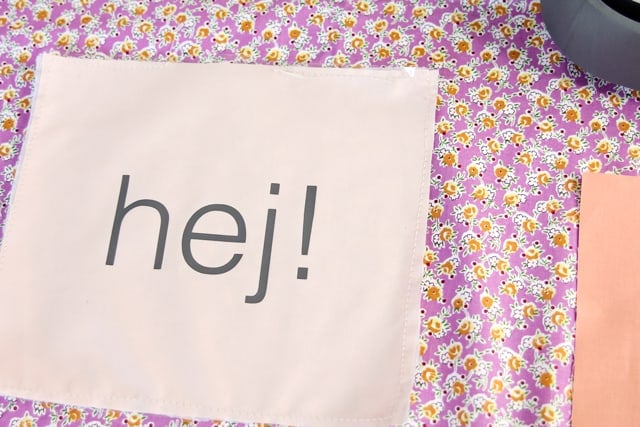
Cut the vinyl letters from the SVG file in Design Space. “Attach” the letters to the canvas so they don’t move and then hit MAKE. MAKE SURE YOU CUT ON MIRROR IMAGE!
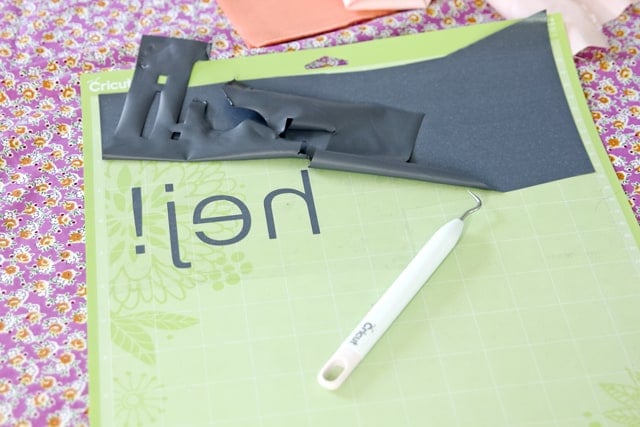
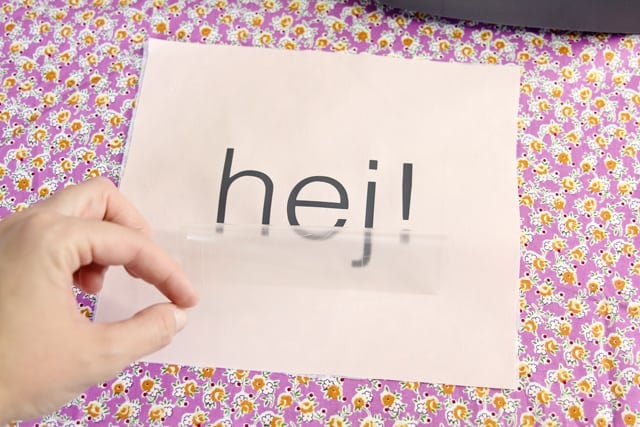
Weed the letters and align the design on your front piece of cotton.
Now reference the chart that came in your EasyPress.
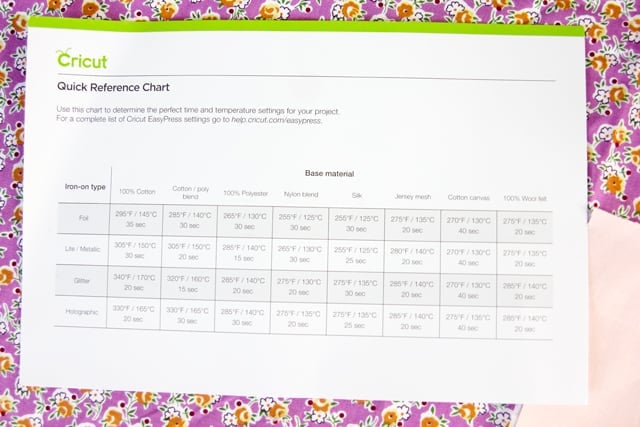
Since we are using iron-on vinyl and basic cotton, set the EasyPress to 30 seconds at 285 F/145 c
Let it cool, peel off the clear sheet and we’re ready to get sewing!
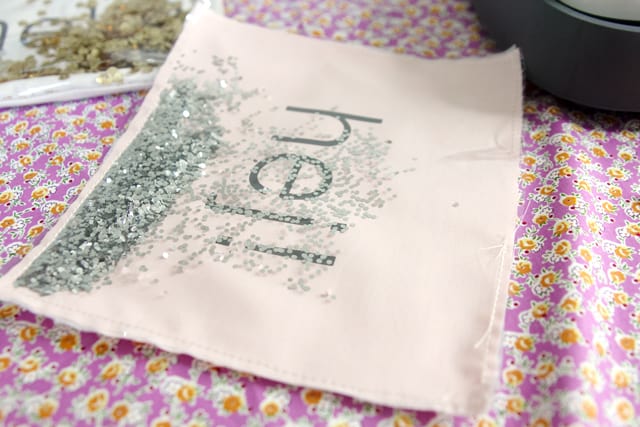
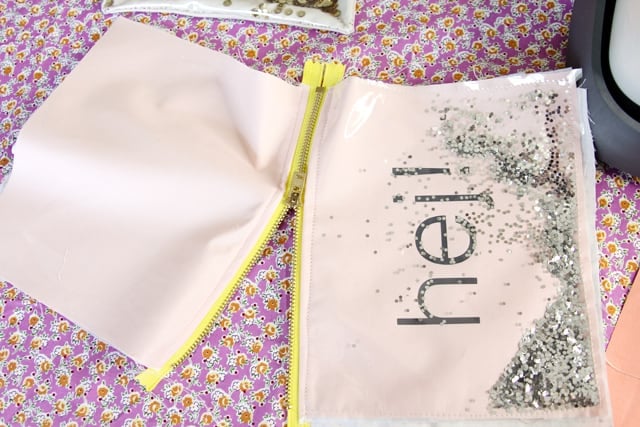
Lay the clear vinyl piece over the top of the cotton with iron-on and clip together with wonder clips, or binder clips if you have those handy. Sew all the way around leaving a 2-3″ opening at the top.
Use a funnel or a rolled up piece of paper to insert the sequins into the pouch. Use as many or as few as you want. Sew the opening closed, making sure there aren’t any sequins in your path.
Now you will sew the zipper to the top of the pouch, and complete it using these basic zipper pouch instructions.
Once you’ve sewn the clear vinyl on top of the cotton, DO NOT IRON. I made this mistake with my first go around (it’s habit!) and the sequins melted to the vinyl, whoops! So you can press the pouch between books or use other non-heat methods to get it flat when you are finished, but be sure to press your pieces well before assembling, too!
And you’re done! We turned these pouches into nail kits but this is also a good baby distractor toy, shaking it up is so much fun! See my instagram to see this pouch in action!

This is a sponsored conversation written by me on behalf of Cricut. The opinions and text are all mine.
This post contains affiliate links.
Read more about the Cricut Maker!
Which Cricut machine is best for you?