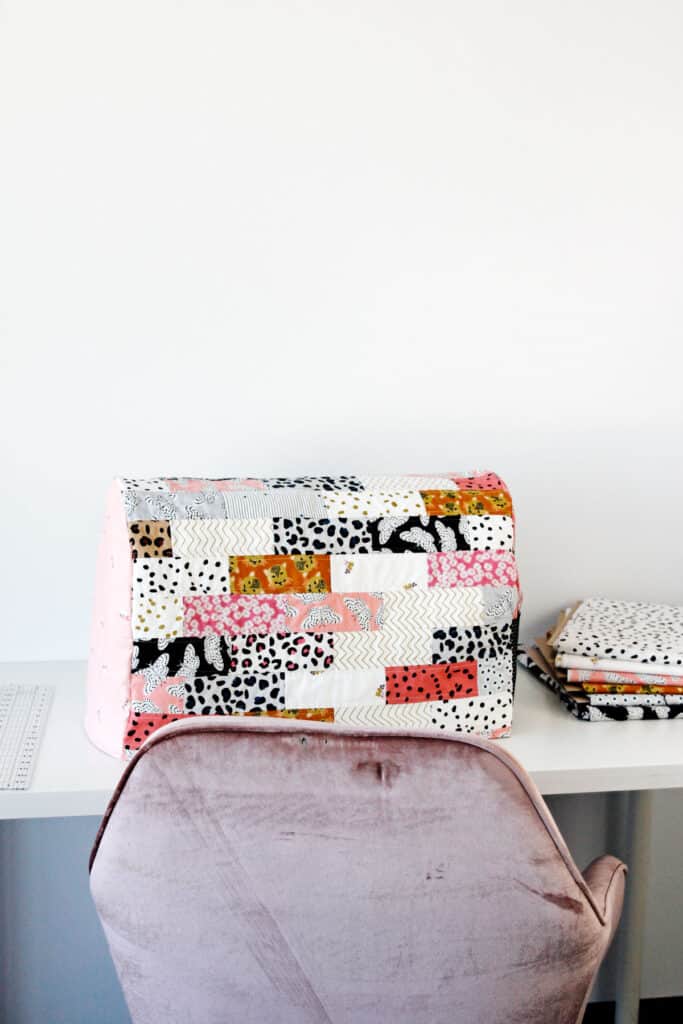
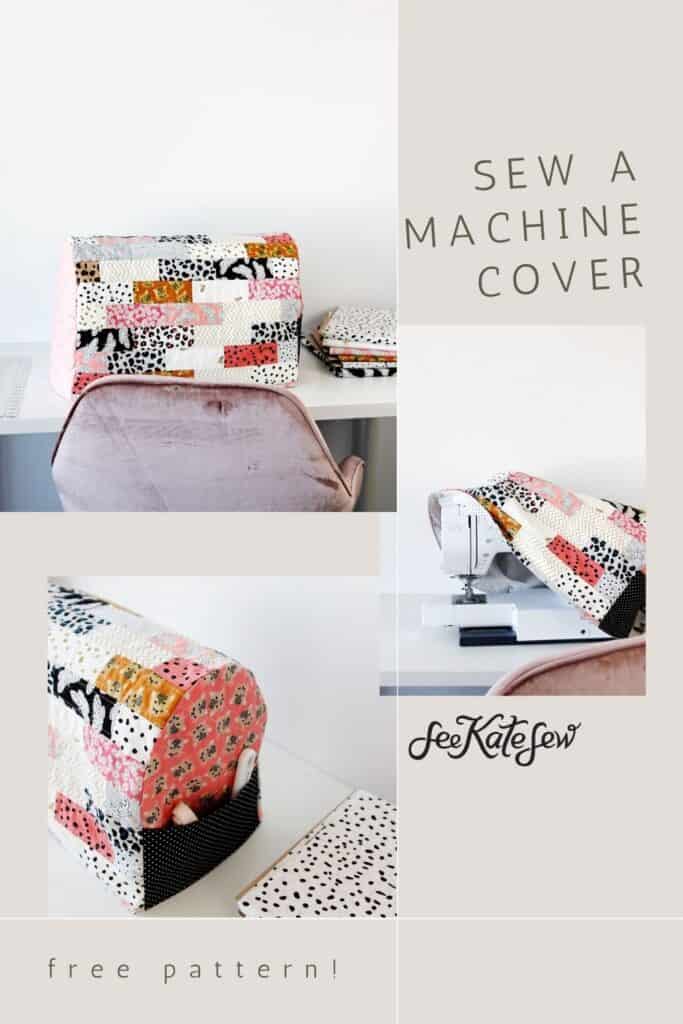
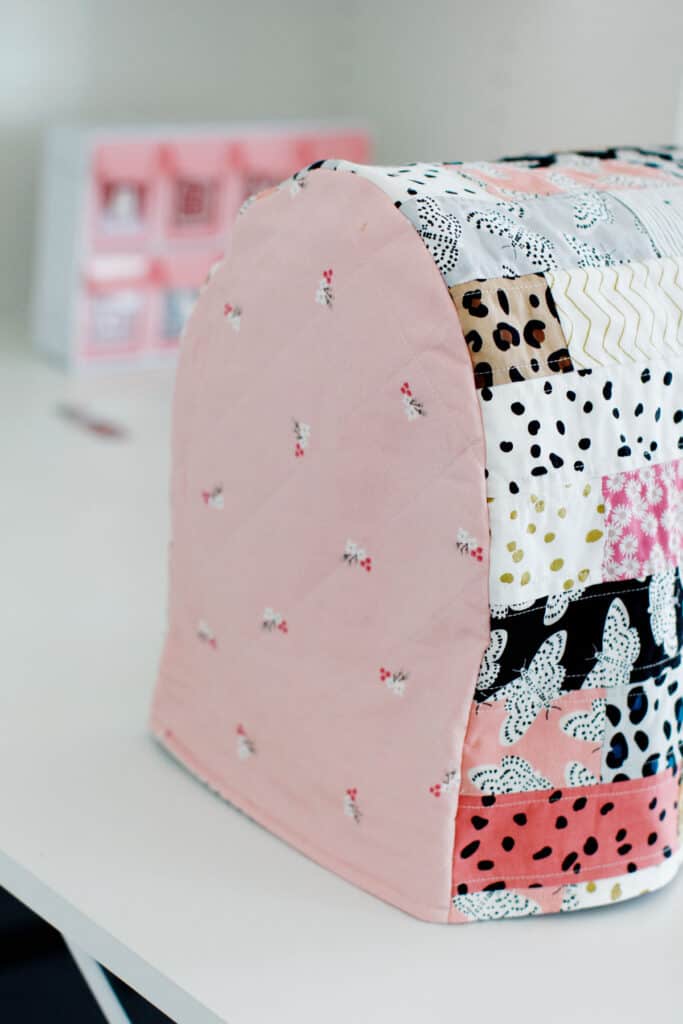
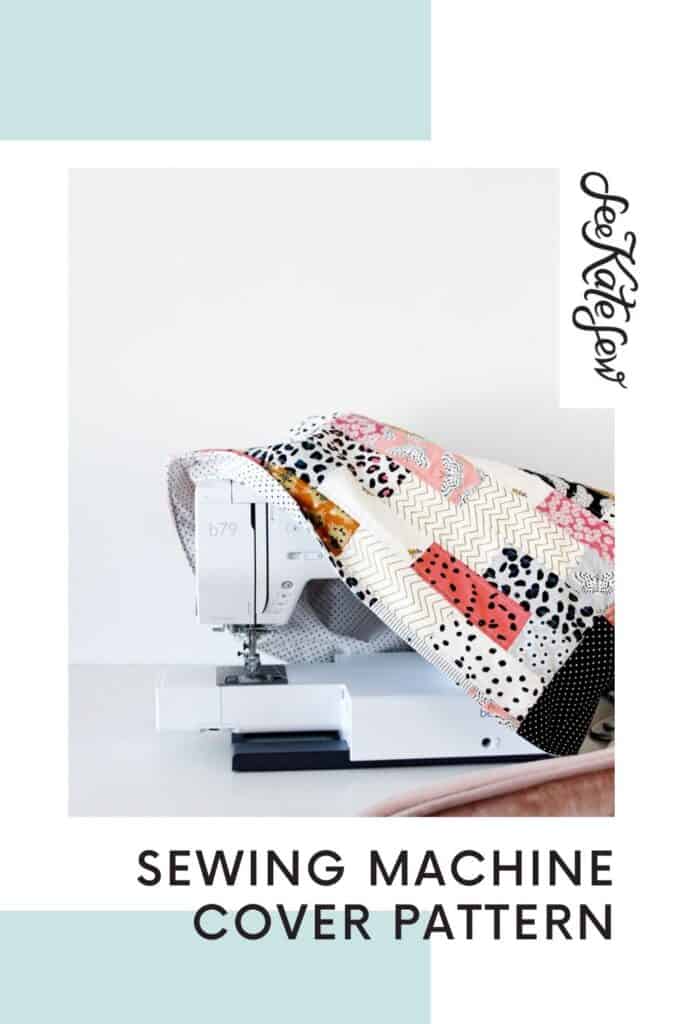
A sewing machine dust cover is a sewing room essential! This free sewing machine cover pattern will show you how to make your own! It’s adorable but also protects your machine from excess wear, dust and scratches.
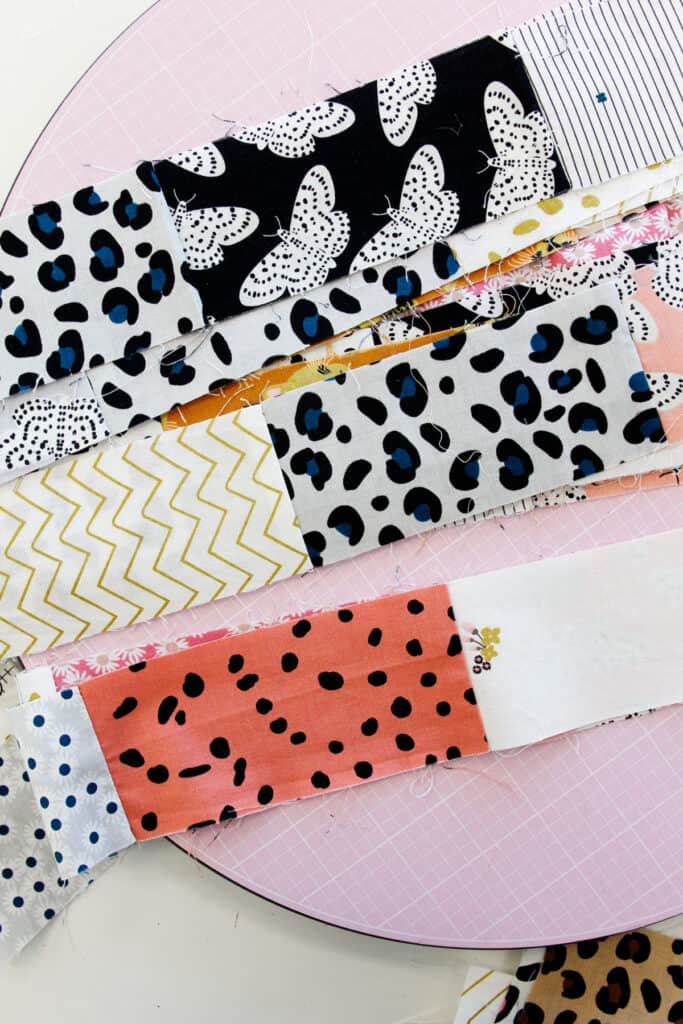
This project starts with a jelly roll! A jelly roll is a precut package of fabric with strips 2.5″ wide. If you don’t have a jelly roll you can cut your own strips – that’s what I did!
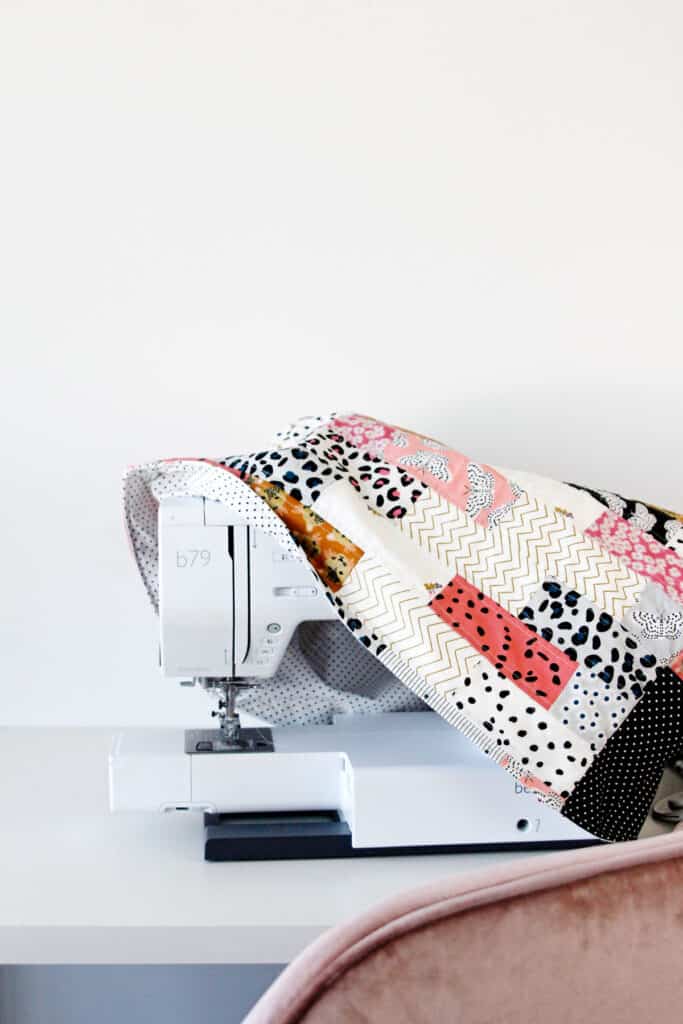
This protective cover fits over the top of the machine to keep it clean. This size will fit most standard machines include Bernina, Brother, Singer and Janome. If your machine is extra large, feel free to adjust the measurements.

This blog post will show you how to make your own sewing machine cover with a gorgeous quilted exterior! Download the pattern below and read on for the free tutorial.

Materials for Sewing Machine Dust Cover
- 1 Jelly Roll or Rolie Polie this will be your main fabric (you will have lots left over for more fun projects!) (affiliate links)
- 1 yard quilting cotton fabric for lining, I used Riley Blake Swiss and Dots BW
- 1/2 yard fabric for the side of the cover (or just use your jelly roll fabric)
- 1/3 yard fabric for optional side pocket
- Fusible interfacing for stabilizer, I’m using Shape-Flex
- Needle felted batting
- Thread for topstitching
- Scissors, rotary cutter, sewing machine and iron
- Optional Clover Hera Marker
The finished measurements of this cover are approximately 10″ deep by 22″ wide by 13.5″ tall. Use a measuring tape to measure your machine to make sure the cover will fit. You can easily adjust the width by adding more little strips of fabric to the main piece.
Sewing machine cover free pattern
Click the link below to sign up for the newsletter and gain access to the DIY sewing machine cover pattern. Download and print it out from your home computer at 100% or DO NOT SCALE.
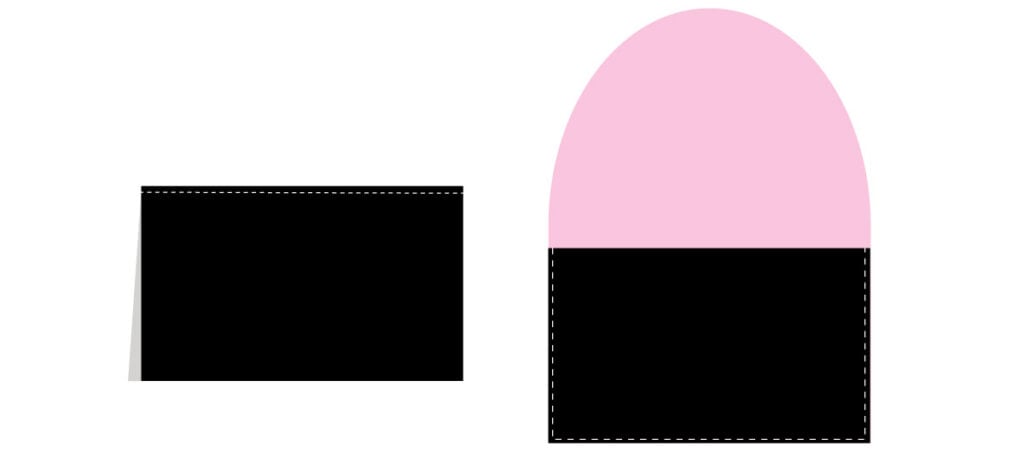
Trim the edges of the paper and tape them together along the dashed lines. Use the layout shown below:
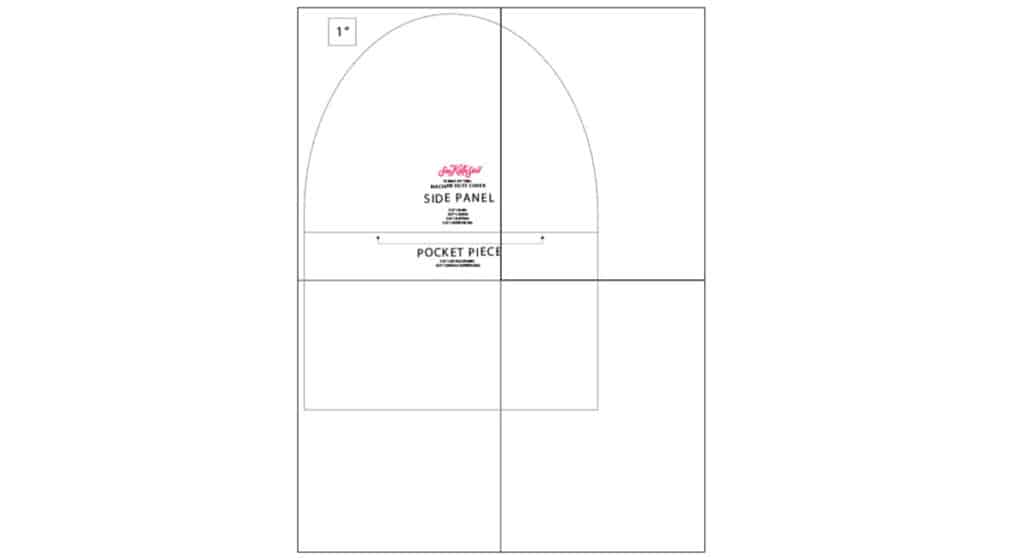
how to make a Cover for sewing machine
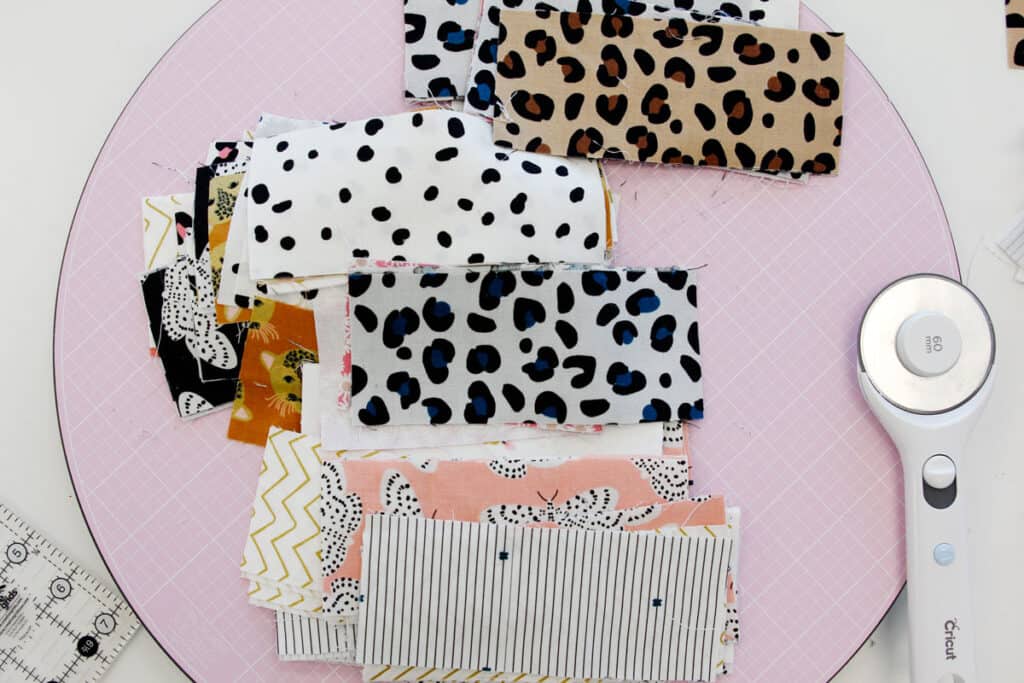
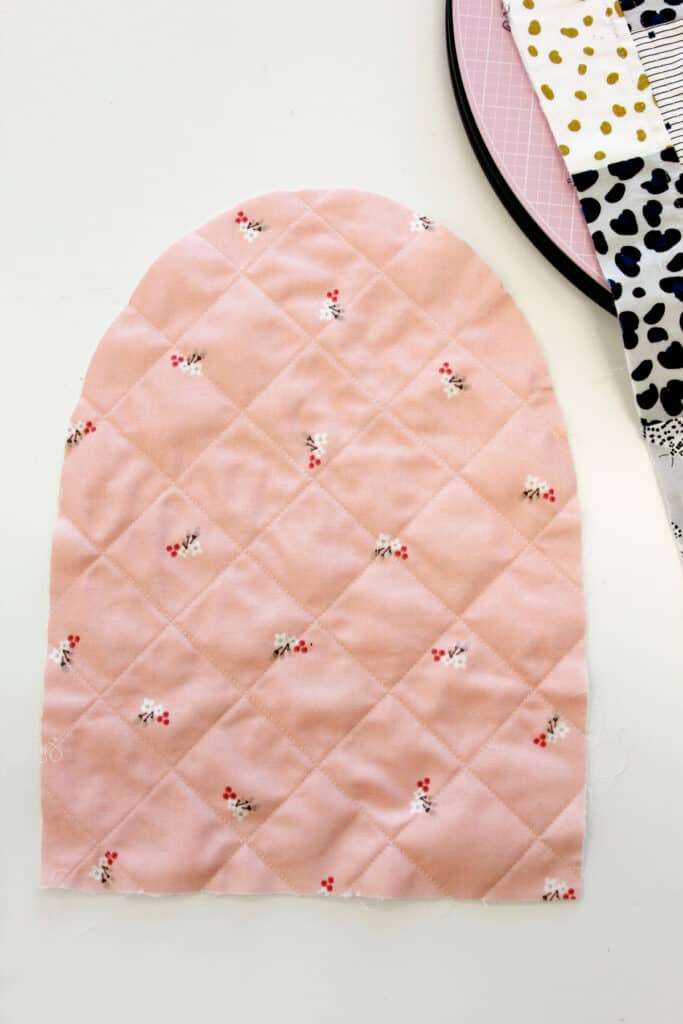
The middle of the cover is made up of a big rectangle. We’ll piece this together with lots of little strips of fabric. Start by stacking 2-4 strips from your jelly roll and then cutting them down to 6″ strips. Straighten up the short edge first then cut away!
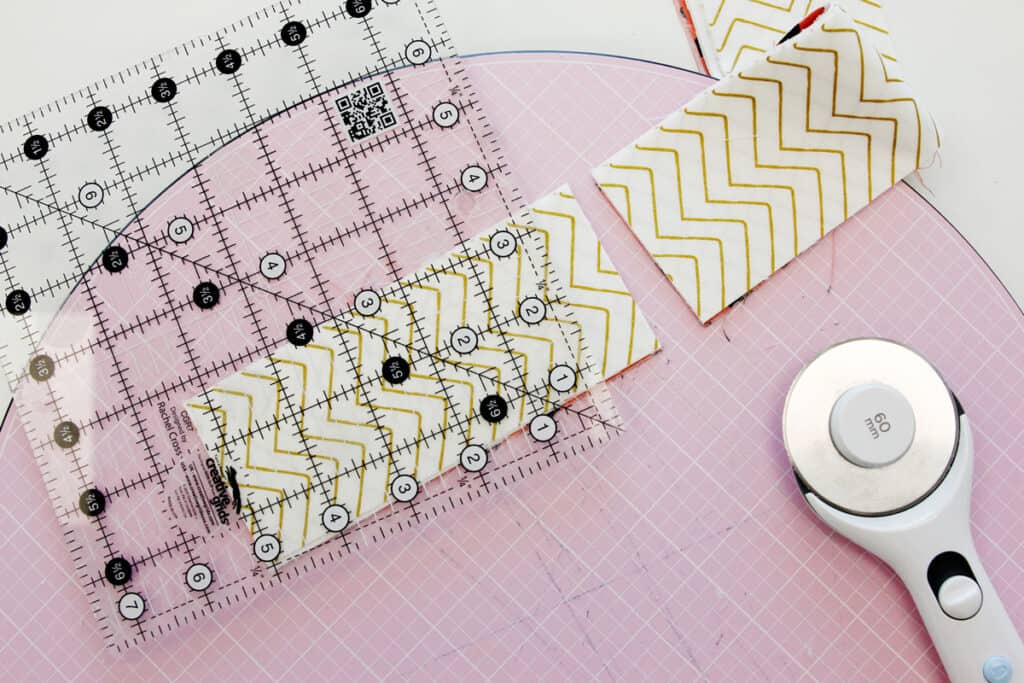
Keep cutting until you have at least 76 fabric pieces. I like to cut a few extra to have on hand.
Now we’ll sew the strips together. Sew 9 strips with 4 of the strips together. Then sew 8 with 5 strips sewn together. You’ll have a total of 17 strips.
Sew the strips together alternating a 4-piece strip then a 5-piece strip. Center the blocks of the second row in a half-brick pattern. Trim the edges as you go so they line up with the 4-piece strips.

When you’ve sewn all your strips together and trimmed the edges, press all the seam allowances down. Then spray baste the wrong side of the fabric to a layer of batting.
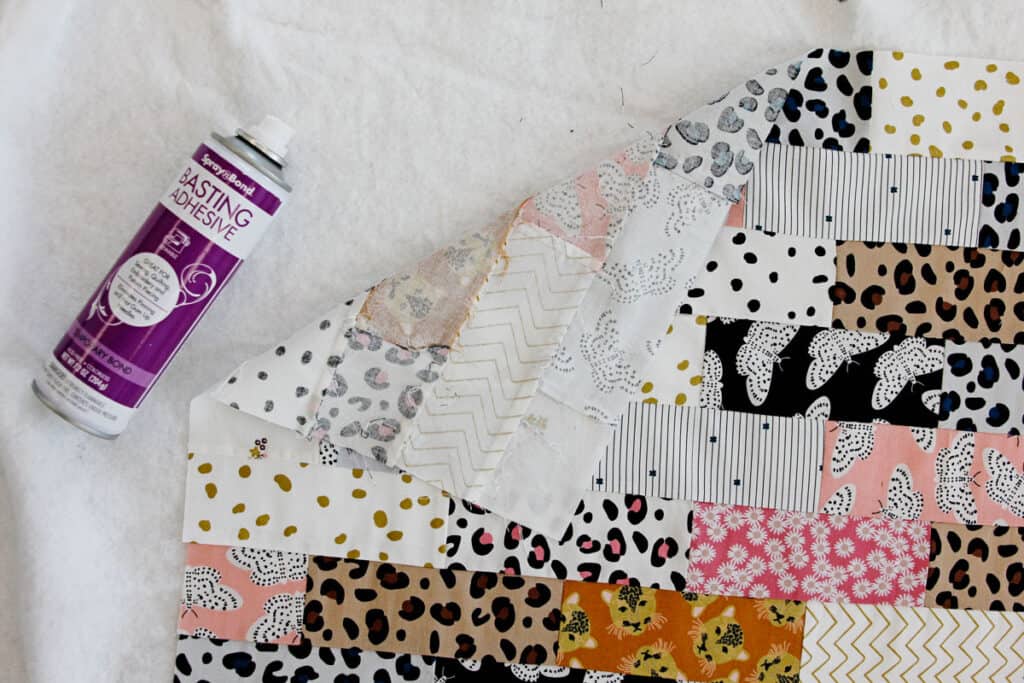
Press down so it is all smooth. Let the spray baste sit for a minute to dry and then quilt the layers together.
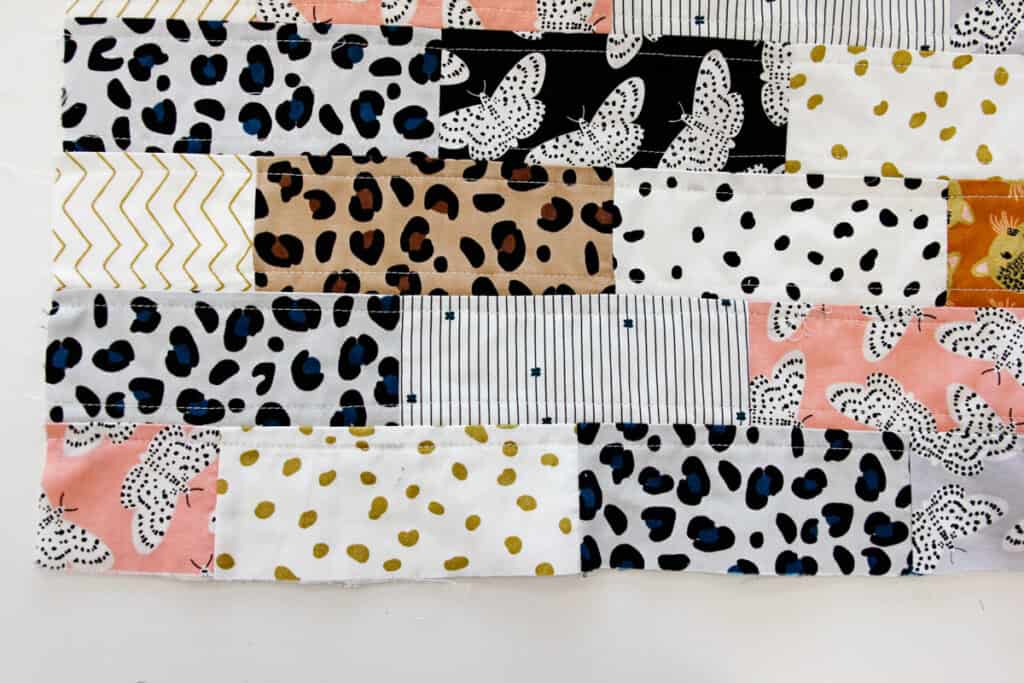
You can choose any quilting pattern for this project. I topstitched 1/4″ on both sides of the seams holding the rows together. I like to do a little bit wider stitches, about 3mm versus the standard 2.5mm. Alternatively, you can do straight lines, a grid or any other pattern you want!
Side Panels
Baste the side panels to batting and quilt. I chose to do a 2″ grid for this one. To make the grid you can use a fabric marker or chalk to mark lines.
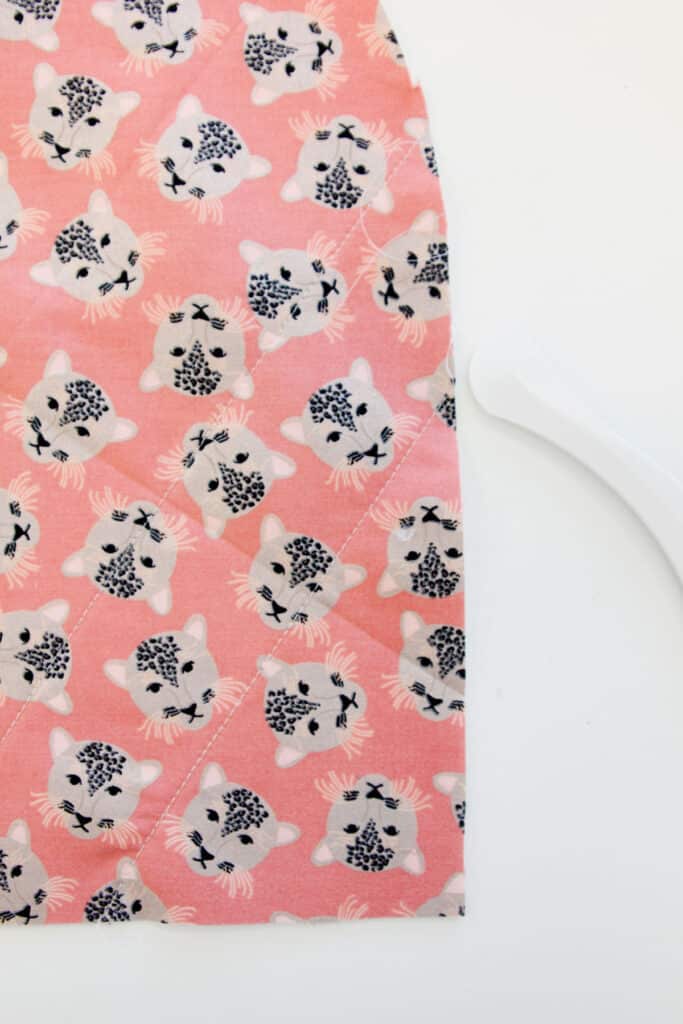
I used the Clover Hera Marker, which is great for making a quick crease on your fabric.
Side Pocket Tutorial
Fuse interfacing to the back of the side pocket piece.
Fold side pocket in half and topstitch along the folded edge. Pin to the the bottom of the quilted side piece and baste around the sides and bottom.
Assemble Machine Cover
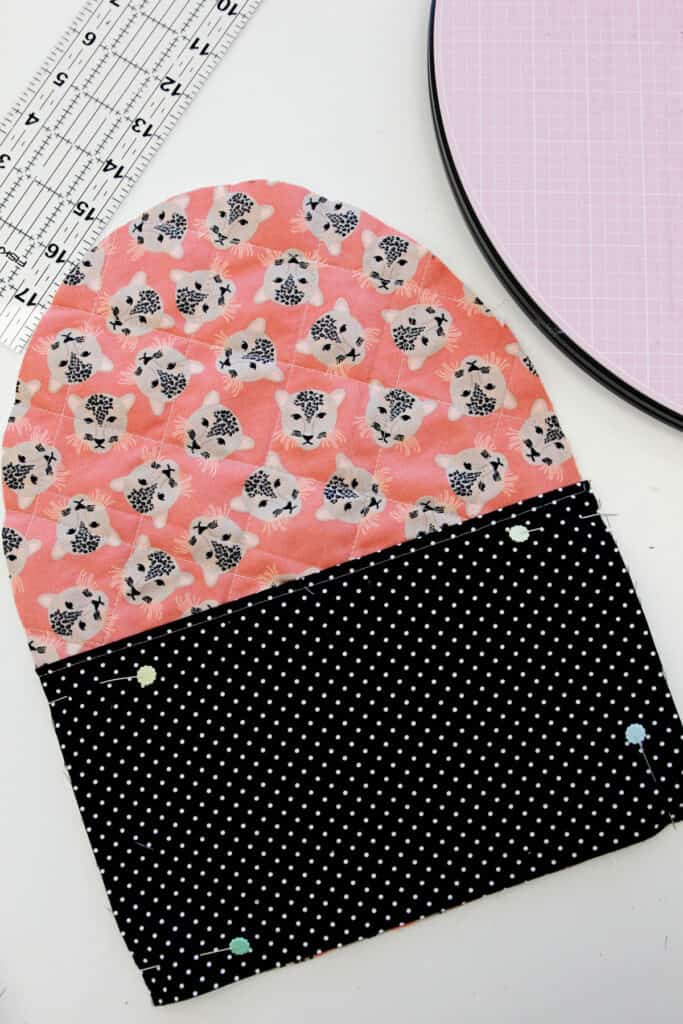
Sew quilted side pieces to the main cover piece. Contour the main cover piece around the side piece. The main cover piece is longer than the side piece so you should have extra after you’ve pinned to the side piece. Sew with a 3/8″ seam allowance. Repeat with the second side, starting at the same side of main cover piece as you started with on the first side.
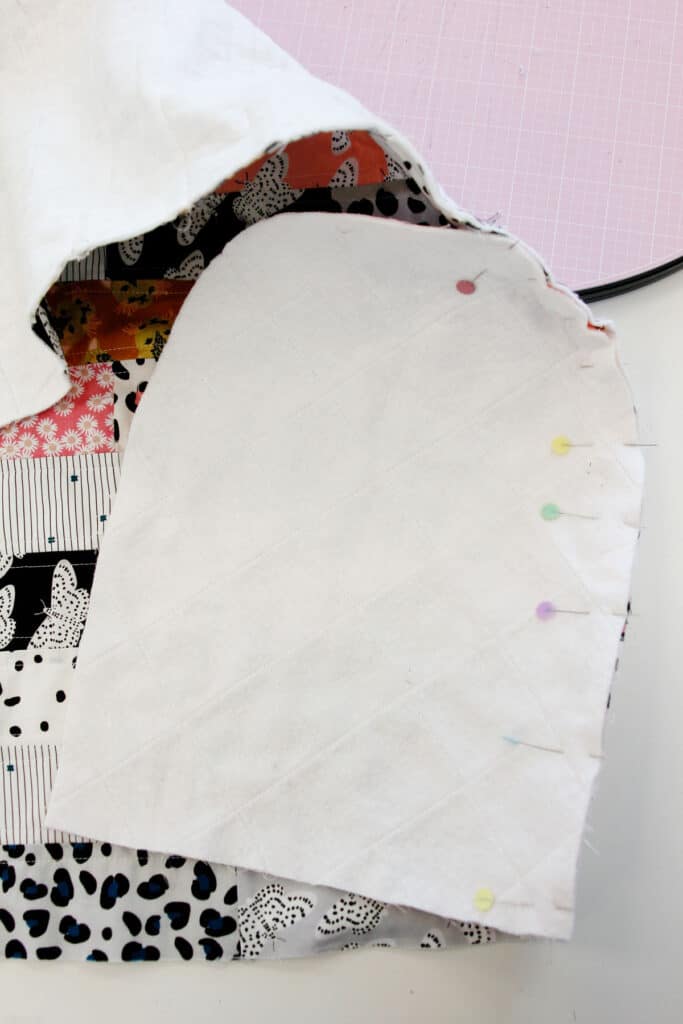
Trim excess of the main cover piece. You’ll end up trimming off about 1-1/5″. Trim the seam allowance and clip the curved edges well. Turn and press right side out.
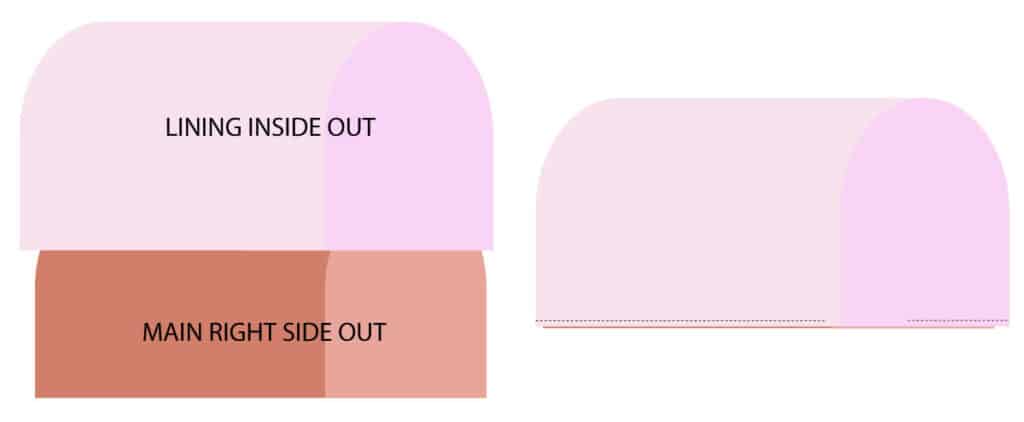
Lining Instructions
Cut 2 lining side pieces from pattern piece. Cut 1 piece of fabric measuring 23.25″ by 33.25″ for the middle. Fuse interfacing to the back of the lining pieces.
Sew pieces together as you did with the outer fabric. Trim seam allowances and clip curves.
Turn the lining inside out and place it right side down on the main cover. Pin bottom edges, matching up the seams. Sew all the way around using a 3/8″ seam allowance. Leave about 3″ open along the bottom edge for turning. Trim the bottom seam allowance to reduce bulk.
Turn right sides out and press. Then topstitch all the way around the bottom edge 1/4″ from the bottom. Smooth out the lining on the interior of the dust cover and pin the layers together at the top. Sew the layers together at the top, about 3″ of stitching on top of an existing stitching line. This will tack the layers together so they don’t get wonky!

If you prefer, you can sew the main and lining together with wrong sides together along the raw edges at the bottom. Then use a binding or bias tape along the bottom edge. For an extra unique cover, use piping sandwiched between the side panels and the main piece or make your own bias tape to use at the bottom edge.
If you love jelly roll projects, try the Chloe Clutch or the Jelly Roll Strip Quilt!