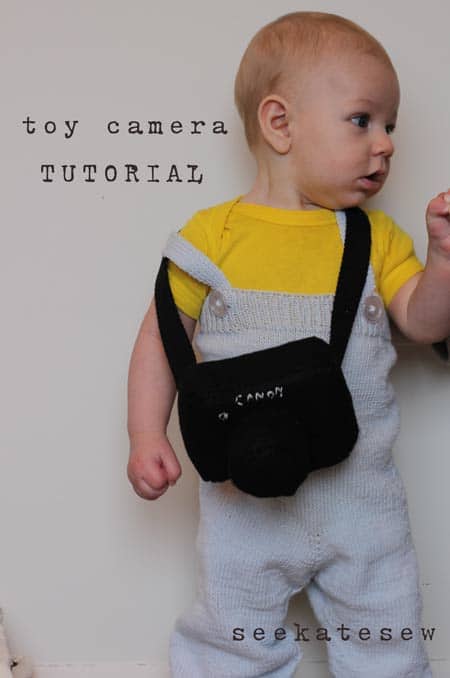
This year’s new year’s resolution is to take up photography. It’s not a traditional resolution, more of a long-term project. I saw a cute toy camera somewhere and had to make one for baby. Had to. So cute. Since he stares at my camera most of the day (what else do you take photos of??), I thought I should get him excited about our resolution.
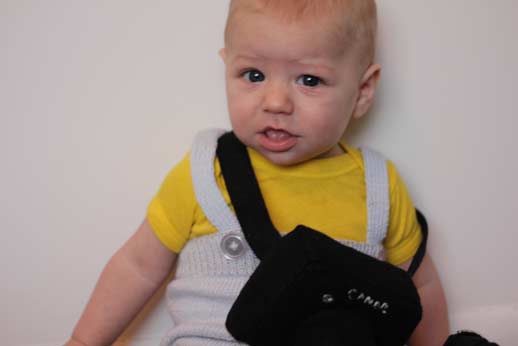
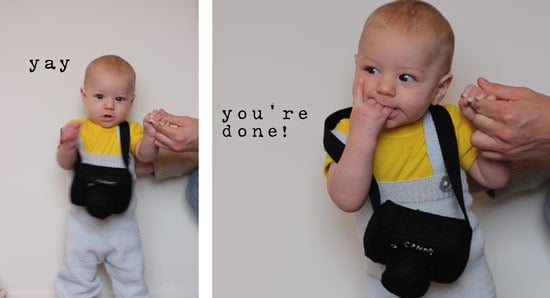
He wasn’t too sure about this idea at first.
He wasn’t too sure about this idea at first.
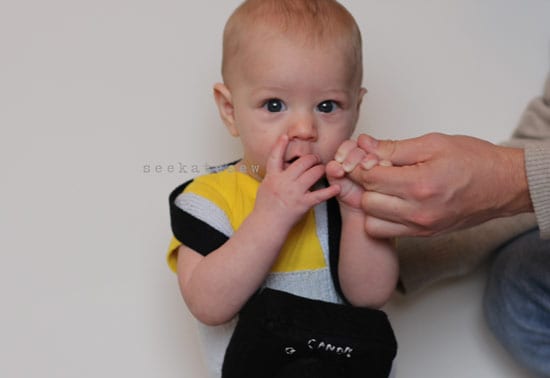
But I think he changed his mind. Or he got hungry.
Want one??? Here’s a tutorial. You need about 1/4 yard of black felt, a little bit of vinyl and some embroidery thread.
Pattern pieces:
Front and back: 4” by 5”
Top and bottom: 5” by 2”
Sides: 4” by 2″
Lens: 2.5” by 8.5”
Lens top: 1 circles 2.5” diameter
Controls: 1 circle 1” diameter, 1 circle 3/4” diameter
Strap: 3/4 yard belt like something for strap
Strap: 1” velcro
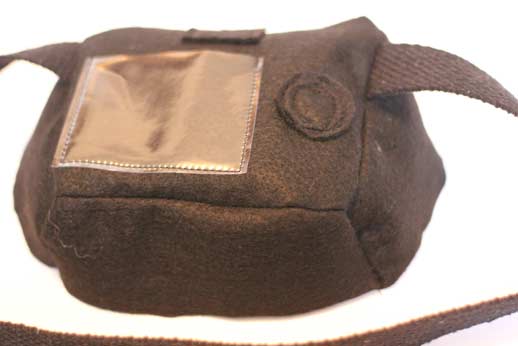
LCD: 3″ by 2.25″ vinyl
embroidery floss for accents
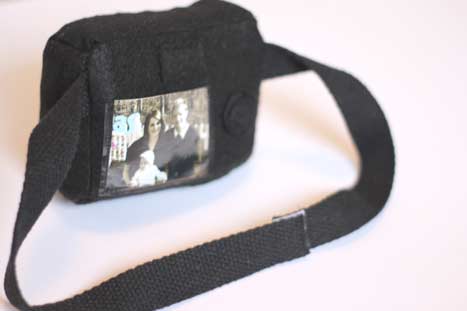
photograph cut down to 2.75” by 2”
I used 1/4 yard of felt and had plenty left over.
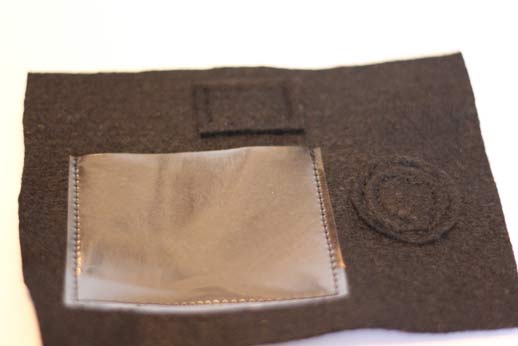
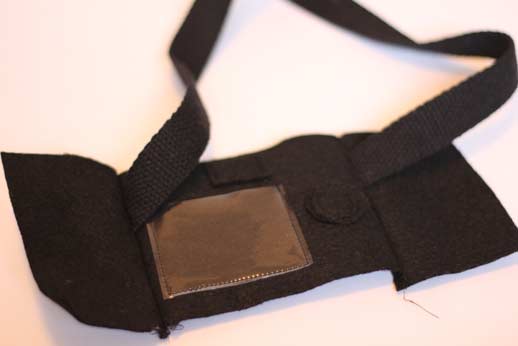
Step 1: Sew the “viewfinder,” “navigation circles,” and “LCD screen” to the camera like so. Make sure you only sew 3 sides of the LCD screen down, leaving the top open so you can slip a photograph in it. Backstitch ends of stitch on the vinyl.
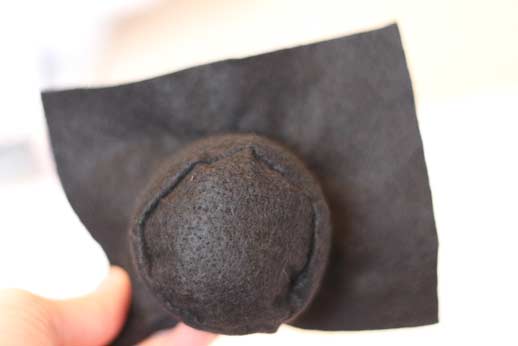
Step 2: Sew the long strip into a circle to make the lens.
Step 3: Pin the 2.5″ circle to the lens with wrong sides facing out. Using lots of pins will make it easier to sew.

Step 4: Turn lens inside out and stuff with fiberfill. Stuff it halfway full. Then fold over and pin the open edge.
Step 5: Sew the lens to the front piece of the camera using a needle and thread. (If you want to add little things like buttons or logos with embroidery thread or regular thread, do it now. I didn’t do it until later and it was harder that way!)
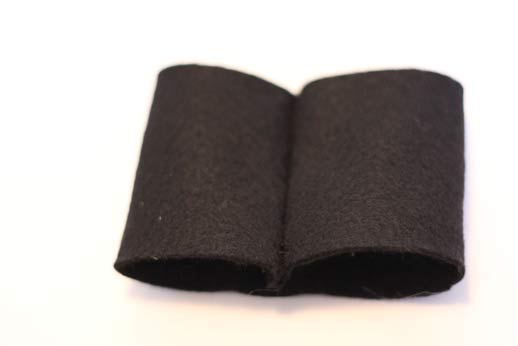
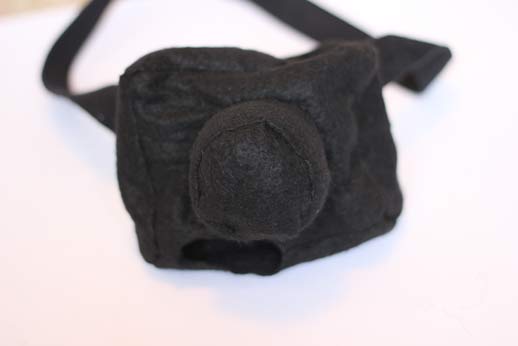
Step 6: Sew sides of camera to back, inserting ribbon or belt material to make the camera strap.
Step 7: Sew the top and bottom onto the back and then onto the sides.
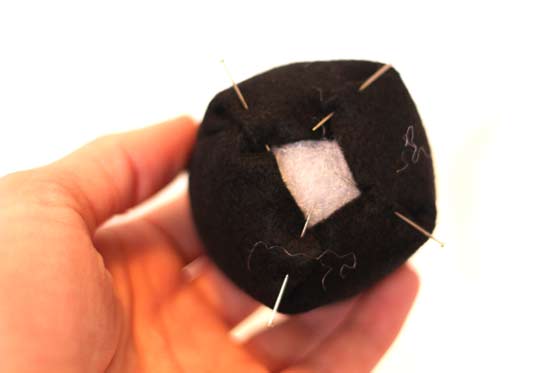
Step 8: Next, pin the front(complete with lens) onto the rest of the camera. Everything you want on the outside of the camera(LCD screen, strap, etc) needs to be on the INSIDE of this little sandwich:
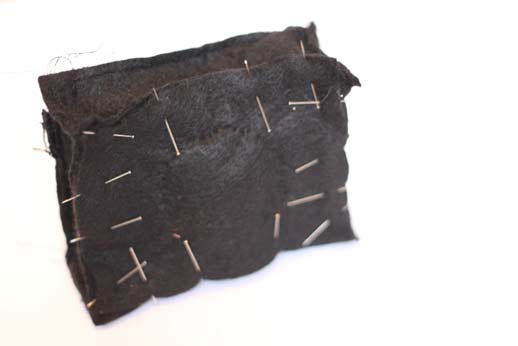
Step 9: Sew around the edges, leaving a 3″ hole. Backstitch where you stop sewing and turn the whole thing inside out.
Step 10: Stuff it with foam and/or fiberfill.
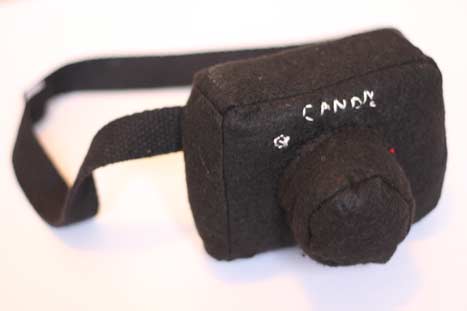
Step 11: Cut a photo down to size and slide it under the vinyl. Cut the ribbon or belting in half and sew on velcro.
Good work!


so super cute…as always. :)
happy new year!
This is adorable! I love the idea for the LCD screen. :)
What a cute idea!
Oh my goodness, how cute! I love this. But the number of pins makes me nervous. Don’t think I’d ever be able to try it.
I see a project in my future!!! I love your ideas.
omg I saw this on the Crafting with the Stars linky thing and had to come over and check it out [can you believe there are 83 entries now! yikes!] Such a cute, original idea! I love it!
And I love your little bubba! Now i’m excited to check out the rest of your blog! ★
That is so cute! Thanks for linking up to Mad Skills Monday!
That model is just adorable and so is the toy camera! Thanks for linking up!
So precious! love that idea!
This is SUCH a cute idea!! Thanks for doing a tute for it! On. My. list.
I’d love for you to come link this up to my linky party! http://www.littleEme.blogspot.com
He looks so cute with it!
Oh for the love of Pete, could that be any more adorable?!? Oh, and the camera is cute too! ;)
Cute idea! And what a cutie pie :) I was just thinking about what to make for my nephew’s first birthday, and I think I might have found it! Thanks for sharing!! Happy Fabric Tuesday to you :)
what a cute little project! and your little photographer is simply adorable! what a cutie!
Oh, now that’s cute!
what a cute idea!!
Now I’ve found my match. That you made this is stupendous but to put a tutorial on for the rest of us is more than wonderful. Thanks so much. I am putting your blog on my favorites list so that I know whenever you put on a new post. Best wishes for a happy healthy New Year. Linda
That is so cute. Wish I had a little bitty one to make it for. My grands have their own cameras.
Super cute! Love it!
Super cute!
How adorable Thanks so much for sharing the tutorial
this is so cute!! I am actually going to feature it so head on over to get a button if you want :) and thanks so much for coming by and linking up to handmade tuesdays @ ladybug blessings and make sure to come by next week! http://www.ladybug-blessings.com
THIS IS SO COOL!!! I’m a new follower!! found you at ladybug-blessings!!
Oh my goodness….this is AWESOME!!!! I do photography on the side, so this is perfect for me to sew for my daughters. My 3 year old is named Kate :) Thanks for such a fun tutorial!
Um so ridiculously cute!! I love that, thanks so much for sharing and the tutorial!
I love it!!!
Featured this on my blog:
simplyjenna.blogspot.com
This is just too cute. My 2 1/2 year old nephew got a camera for Christmas, but his 1 year old sister keeps trying to take it away. She could have her own.
http://jandjhome.blogspot.com/
love. you are fabulous!
You have been featured at SSB! Check it out here:
http://superstinkyboys.blogspot.com/2011/01/mad-skills-monday-link-party-40.html
Please snag my I was Featured button for your blog and stop by again soon!
xoxo
Ginger
SSB
Such a great idea!! Your project has been featured today at Craftastic Monday. Stop by & grab a Featured On button – thanks for linking!
I love your addition on the picture on the screen!
Thank you so much for linking up last week! I hope you’ll stop by again today. I’ll be doing a featured post very soon…
LittleEme.blogspot.com
This is sew genius, and the picture screen is to cute! Thank you for linking up last week to Sew Woodsy. I featured your toy camera!
http://sewwoodsy.blogspot.com/2011/01/whats-up-wednesdays-link-party-features.html
Hi Kate, This is the cutest project ever! You have done a fabulous job and your little model is adorable. The lcd screen is genius! Thanks so much for linking up to The Sunday showcase party – I have featured this today. Stop by and grab a featured button if you like. Hope you have a wonderful week ~ Stephanie Lynn
I sure wish I would have seen this a while back – one of my grand-daughters loves cameras- so we ended up giving her a broken camera and that lasted for awhile and finally for Christmas she got her camera and when I am there we take pictures – she always has to see my pictures and then looks for her camera – she is only 2 1/2 but has always loved cameras. – Loe your camera.
Hello! I’ve been reading your blog for some time now and finally got the courage to go ahead and give you a shout out from Porter Texas! Just wanted to mention keep up the good work!