• Skip to main content
  • Skip to primary sidebar
  • Skip to footer
  • Blog
  • About
  • Contact
  • FAQ
  • Sponsor

see kate sew

sewing, crafts, tutorials, DIY

  • Patterns
    • Free Patterns
    • Pattern of the Month
  • Tutorials
    • Accessories
    • Bags and Pouches
    • Clothing
    • Costumes
    • Crafts
    • Cricut Projects
    • Holiday
    • Household
    • Kids
    • Maternity
    • Quilting
  • Topics
    • Baby
    • Boy
    • Christmas
    • dog
    • Dolls
    • Easter
    • Girl
    • Halloween
    • Lookbook
    • Party
    • pet
    • Printables
    • Training
    • women
  • No Sew
  • Sewing 101
  • Sew4Good
  • Pet
  • Sewing Room
    • DreamBox
  • Reviews
Home
  • Patterns
    • Free Patterns
    • Pattern of the Month
  • Tutorials
    • Accessories
    • Bags and Pouches
    • Clothing
    • Costumes
    • Crafts
    • Cricut Projects
    • Holiday
    • Household
    • Kids
    • Maternity
    • Quilting
  • Topics
    • Baby
    • Boy
    • Christmas
    • dog
    • Dolls
    • Easter
    • Girl
    • Halloween
    • Lookbook
    • Party
    • pet
    • Printables
    • Training
    • women
  • No Sew
  • Sewing 101
  • Sew4Good
  • Pet
  • Sewing Room
    • DreamBox
  • Reviews

06.11

vintage inspired headwraps

Welcome to See Kate Sew! If you’re new here, sign up for my email newsletter for access to free patterns, tutorials and all the latest sewing news! Tour my sewing room HERE!

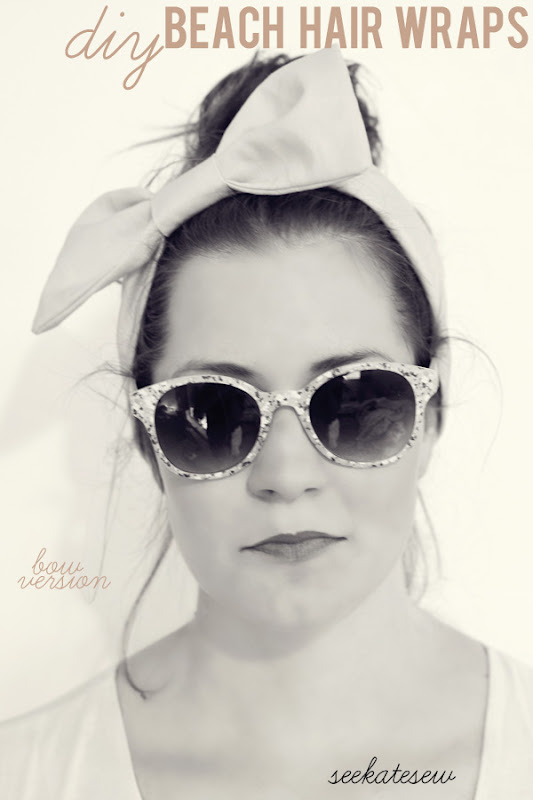
My go-to summer hair-do is a sloppy top knot. Yours, too? It’s just too hot for blow dryers and straighteners. Plus top knots are great for pools and beaches. I made three versions of a vintage inspired hair wrap to give my hair a little direction this summer, even if they will adorn a sloppy top knot. 

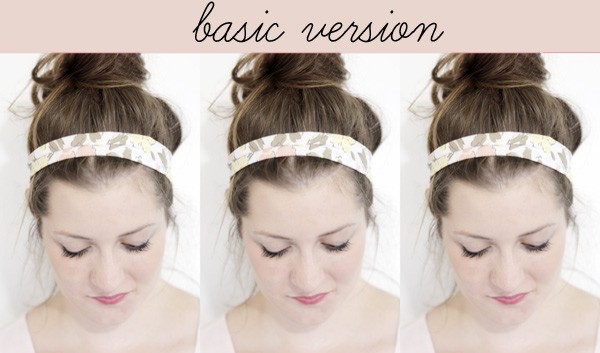
Each of these hair wraps is a variation of a simple headband. Here’s how to make the basic version:

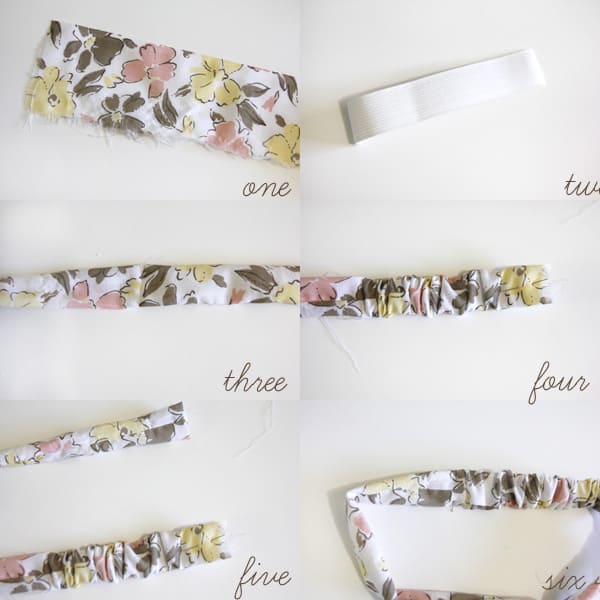
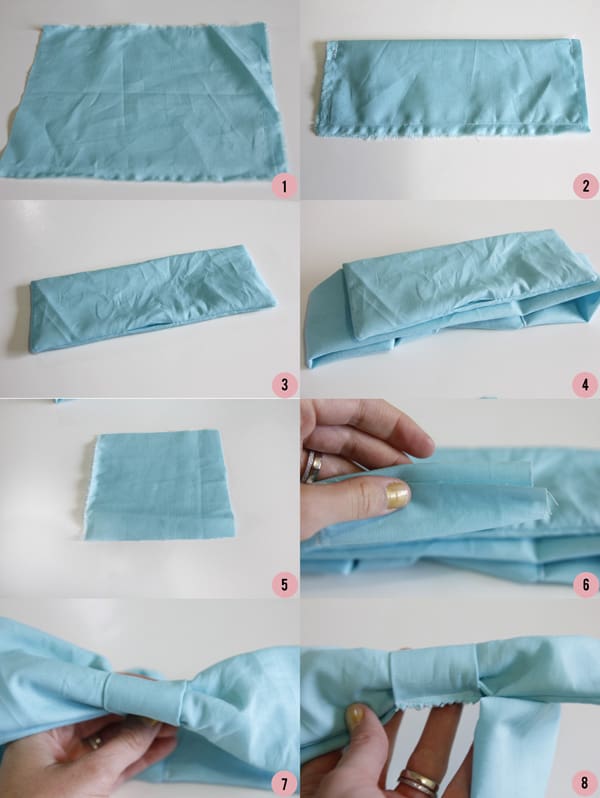
basic headband/hairwrap
1. For the basic head wrap, you’ll need a strip of fabric that is 3″ wide and 27″ long. 
2. You’ll also need a piece of 1″ elastic, about 5″ long. 
3. Fold over the strip and sew it at 1/4″. Turn and press. Then insert the elastic about 7″ into the band. Stitch it in place. 
4. Scrunch up the rest of the fabric until the elastic meets the end of the tube.
5. Stitch the other end of the elastic to the band.
6. Then, turn under the edge of the other side of the headband, insert the elastic edge into it and sew it up. 


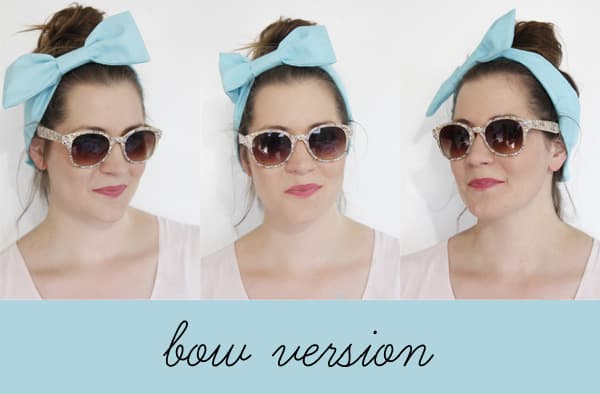
For the bow version, adjust the measurements of your strip to 7″ by 27″. Follow these instructions to add the bow:

Bow version
1. Cut a triangle 9″ by 7″. 
2. Fold in half and sew up the three edges, leaving a 2″ hole in the middle of the long edge.
3. Turn the bow right side out and tuck in the opening.
4. Stack on top of your headband.
5. Cut a 4″ by 4″ square for the middle of the bow.
6. Fold it in thirds.
7. Wrap around both the bow and the headband to keep them together.
8. Sew the middle piece together at the back and trim.


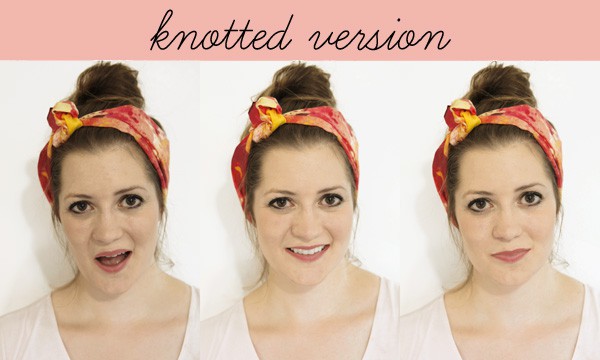
For the knotted version, adjust the dimensions to 10″ by 35″. Knot it twice in the middle and insert elastic.


Which one do you want to try? The bow is my favorite to wear!


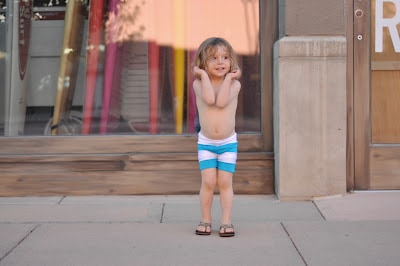
Check out these cute swim shorts Liz is sharing over at C&C today!


11 Comments | Accessories

Exclusive Free PatternRuffled Apron

Sign up for my email newsletter and receive my ruffled apron pattern totally FREE!

We take your privacy seriously. See our privacy policy here. Unsubscribe at any time.

You may also like these posts...

BUY + DIY // birthday bath bomb bag tutorialruffles 2012 guest: taylor madeCharm Square Tote Bag TutorialCWTS reveal – the book clutch + how-to

Reader Interactions

11 Comments

  1. Britty

    06/11 at 3:38 PM

    Oh, this is fab! Totally making one. Thanks!

  2. Madalynne

    06/11 at 4:44 PM

    As my hair is getting longer, I’ve been wearing more and more headbands. I’ll definitely bookmark this for a fun Sunday afternoon project!

  3. Deborah

    06/11 at 6:03 PM

    Like it! You make very lovely things and your DIY’s are so cool!

  4. kristin

    06/11 at 8:18 PM

    Love the big bows on you – you’re just too cute, Kate! :)

  5. BFree

    06/11 at 8:42 PM

    Cute!

  6. Aubrey

    06/11 at 10:41 PM

    you are so cute!

  7. BFree

    06/12 at 1:49 AM

    Cute

  8. Rachel

    06/15 at 3:19 AM

    Kate, I really don’t want to be a pain but I tried making this today several times and the first time it was as small as a bracelet, so I moved the elastic so it was 7 inches in from the end of the elastic rather than the front and it still can out too small for my toddler. Is the elastic supposed to be 15 inches not 5? I am completely confused as to why it won’t work for me.
    Thanks!

    • kate

      06/15 at 3:27 AM

      Hey Rachel! I think maybe I didn’t explain it that well! So your tube is about 27″ long and you’re going to use 5″ of elastic to scrunch up the last 7″ of the tube. So you should have 20″ that is not scrunched at all. I didn’t write that in the tutorial, are you trying to scrunch up 20″ of fabric with the elastic? Maybe scrunch it the other way? I hope that fixes it!

  9. Jay

    06/18 at 6:40 PM

    These are so cute!

  10. Kącik Madzi

    06/19 at 6:10 PM

    Hey! Lovely tutorial – I must do this first headband – is so cute! :)

Primary Sidebar

  • Facebook
  • Twitter
  • Instagram
  • Pinterest
  • Email

Exclusive Free PatternRuffled Apron

Sign up for my email newsletter and receive my ruffled apron pattern totally FREE!

We take your privacy seriously. See our privacy policy here. You can unsubscribe at any time.

Don’t miss these popular posts!

easy baby dress pattern for the summertime

easy baby dress pattern for the summertime

modern ombre + b/w triangle quilt tutorial + pattern

modern ombre + b/w triangle quilt tutorial + pattern

Fabric

Quilted Cosmetic Case Kiss Me KateKiss Me, Kate FabricOne Hour Granny Square Quilt Tutorial | See Kate SewModern Granny Square Quilt Whole Cloth

Pattern Hacks

Easy Baby Summer Dressthe EMMA pattern | See Kate SewThe EMMA Dress

Footer

Hello friends!

My name is Kate, a twenty something fashion lover and mother of two. When I’m not chasing kids you can find me at my sewing table or daydreaming up new designs. You can read more about me here. Thank you for visiting!

8a918f8da8e0e69102dc0f33a718de85a99c31a57283e0e3e2

FOLLOW ME HERE

  • Facebook
  • Twitter
  • Instagram
  • Pinterest
  • Email
  • Blog
  • About
  • Contact
  • FAQ
  • Sponsor

Copyright © 2025 See Kate Sew  •  All Rights Reserved  •  Privacy Policy  •  Site Design by Emily White Designs