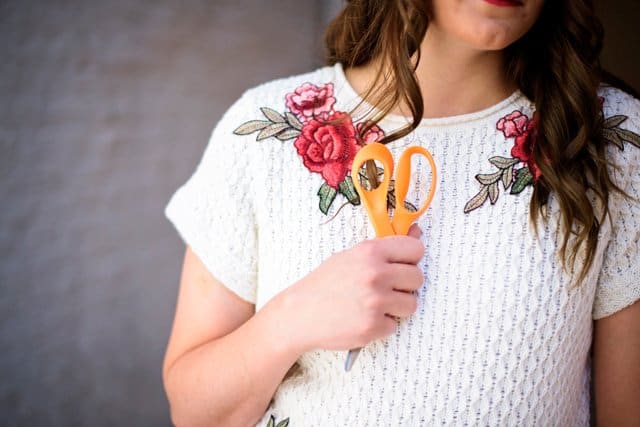
This post is sponsored by Fiskars in celebration of 50 years of Orange-Handled Scissors!
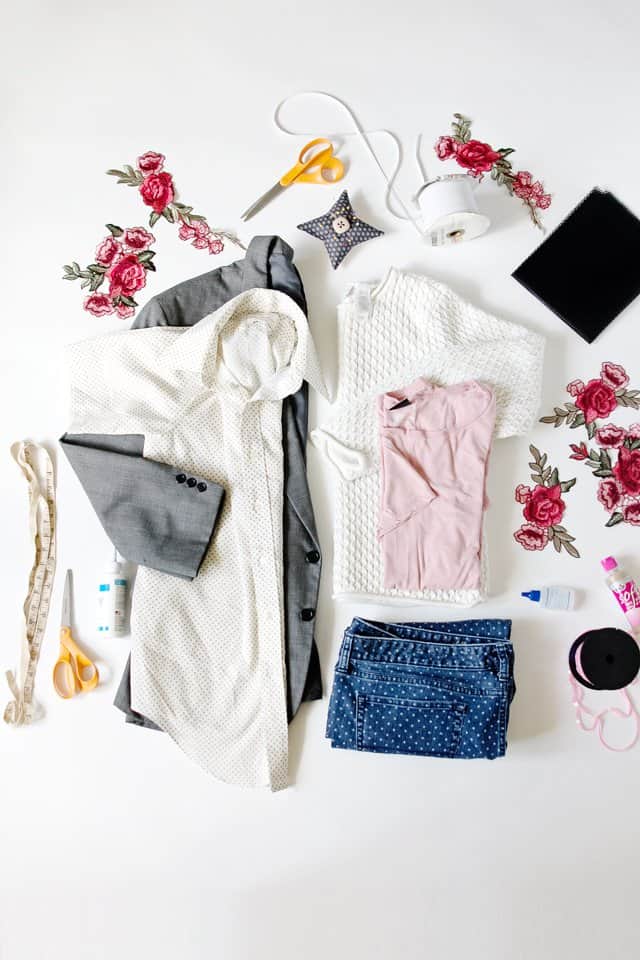
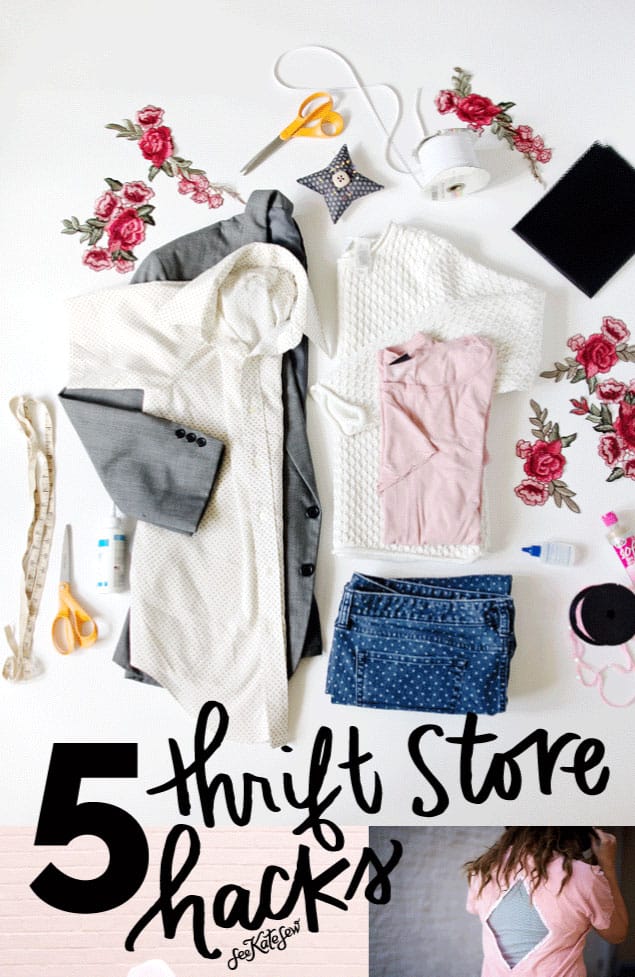
This pile of materials….
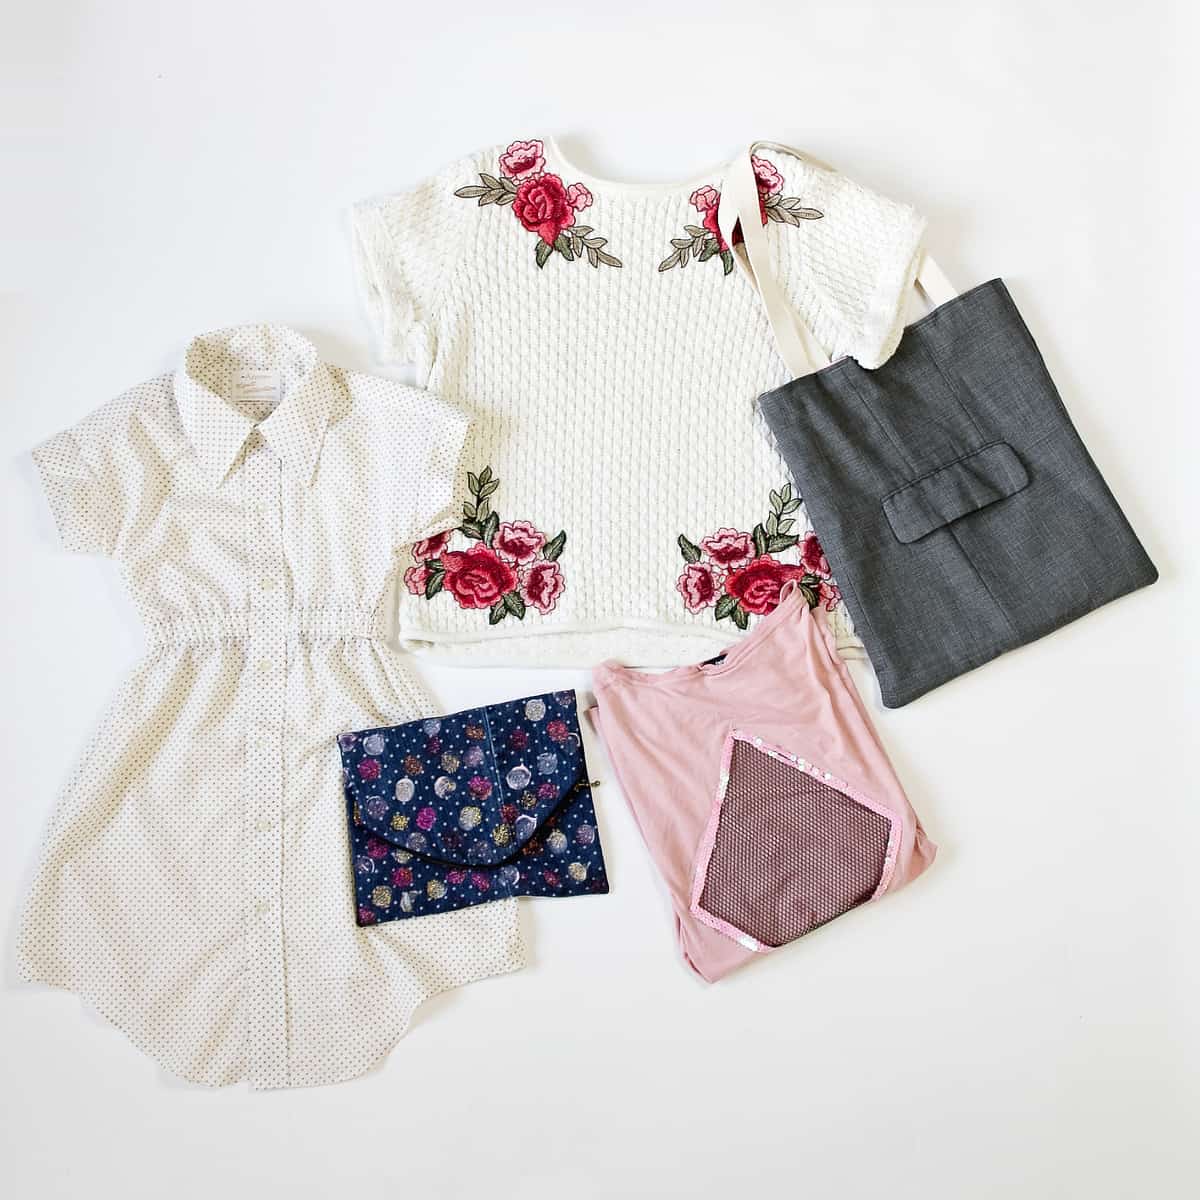
…to this pile of finished goods!
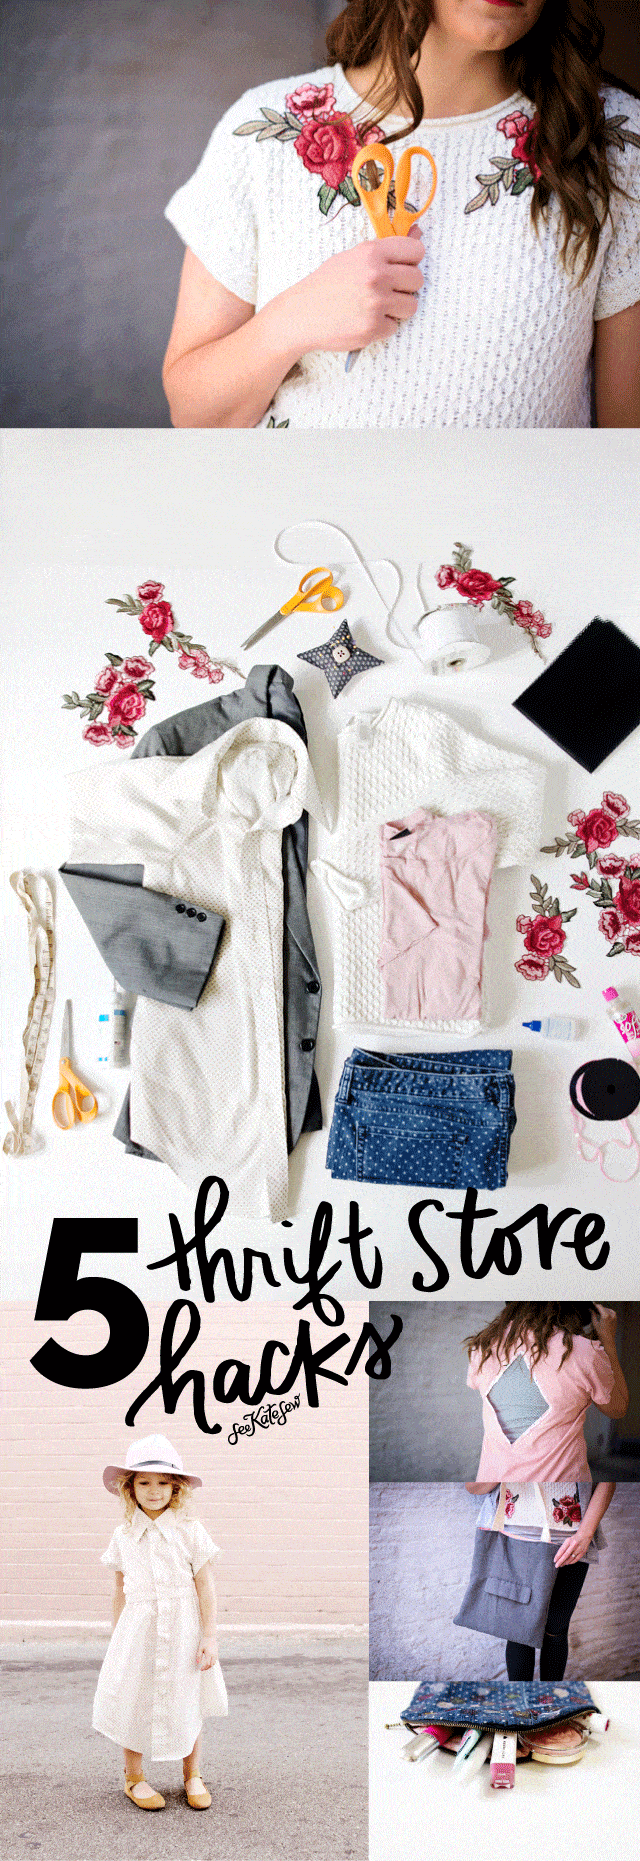
I excited to be helping Fiskars celebrate the 50th anniversary of their Orange-handled scissors with 5 thrift store hacks! 50 years of Orange-handled scissors with over 1 BILLION pairs sold! I can’t even imagine all the projects and people and creativity that has blossomed from all those scissors! It’s a thrill to be a part of that legacy. I have orange-handled scissors all over my sewing room (legit, like 8 pairs). They are the sharpest, the lightest and the easiest to use!
You know I get a little scissor happy and have no fear chopping into anything fabric! Today I’m sharing 5 ways to hack 5 common thrift store finds! These 5 items you can find at ANY thrift store, so anyone can make these projects! They just involve a little bit of scissor action and a few add-ons! Learn to sew with these simple beginner projects!
-
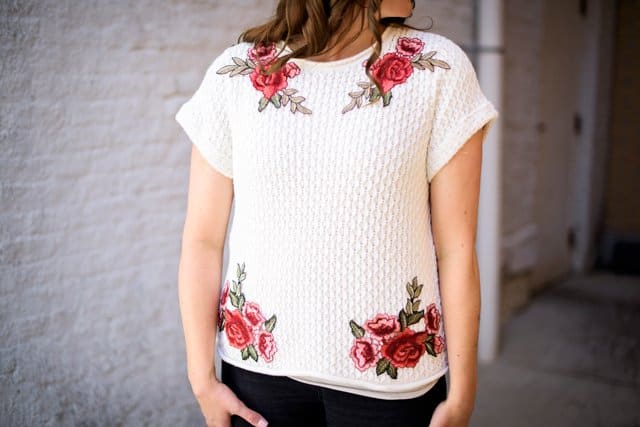
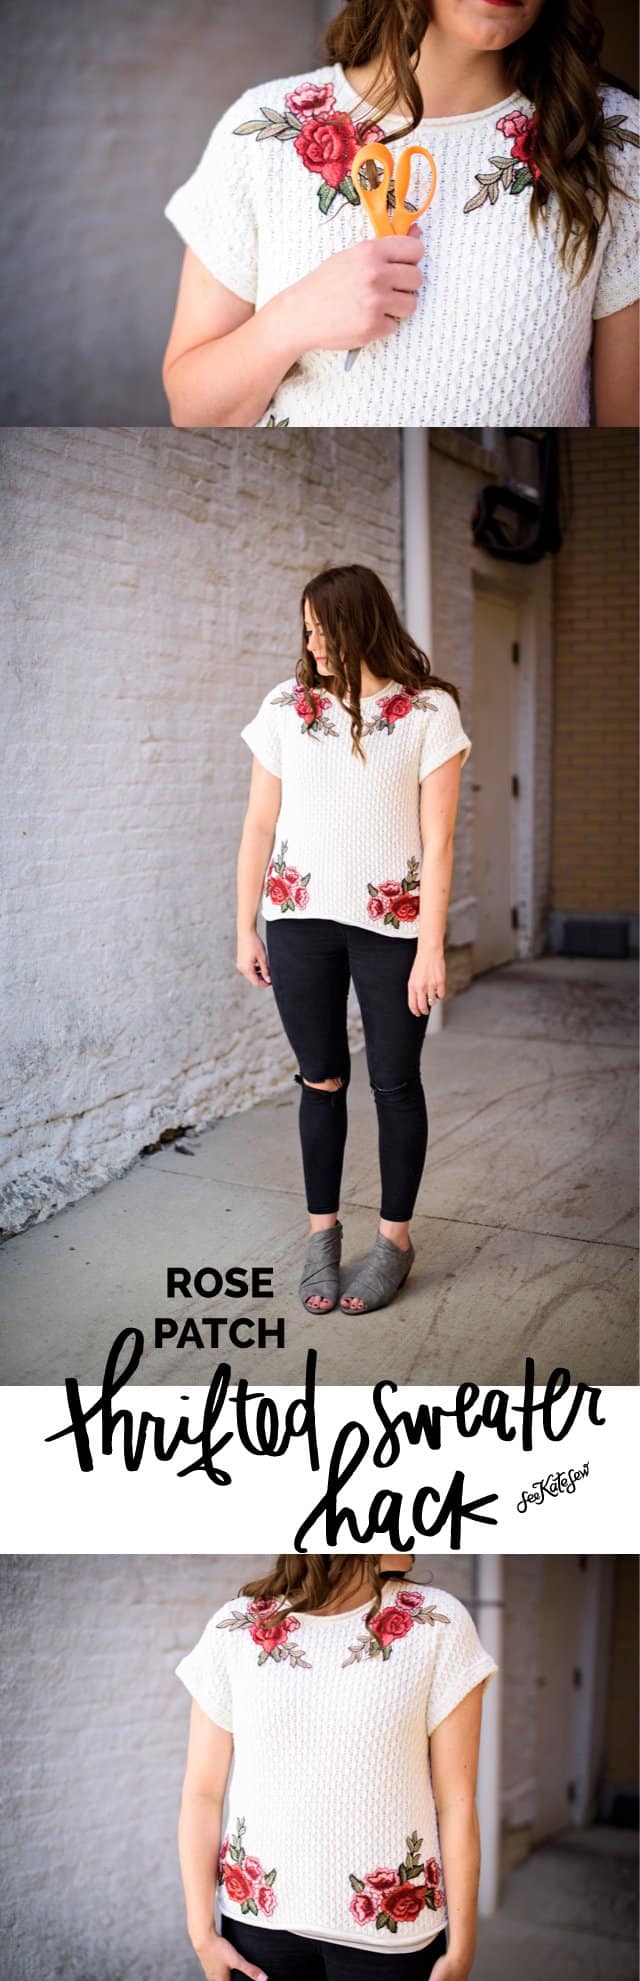
Rose embroidered sweater
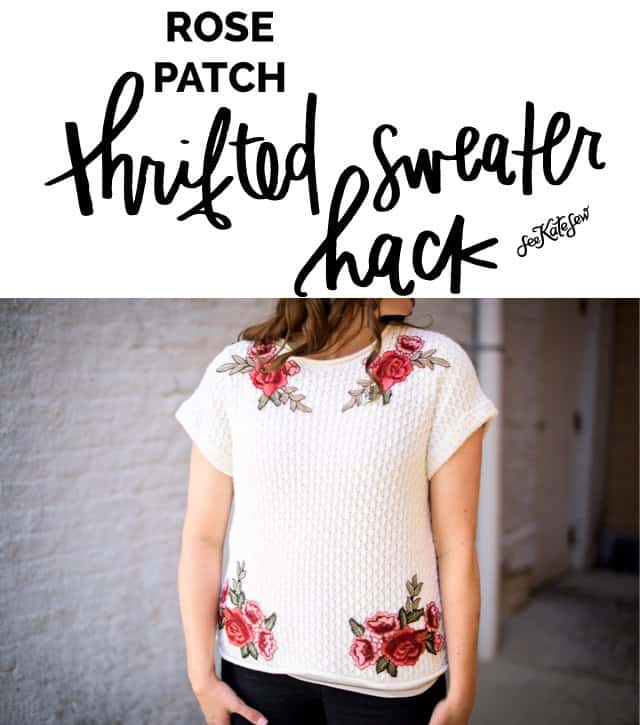
Give me all the roses please! I’m so digging classic red roses, especially embroidered ones, on clothing. These little patches are super simple to adhere to any sweater to really jazz it up. Find a thick sweater at the thrift store and then follow these instructions to make it short sleeved and rosey!
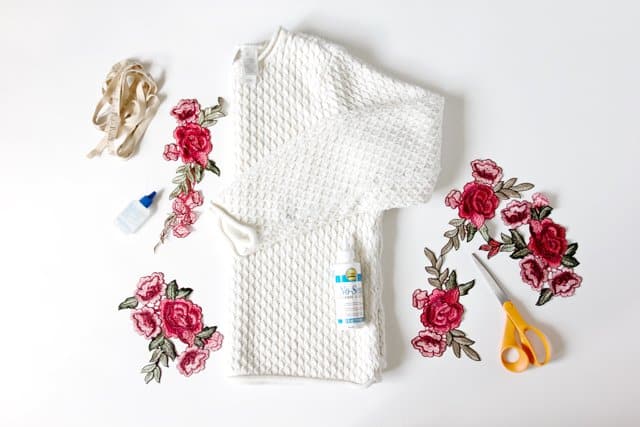
Materials //
- a thrifted sweater that fits
- rose embroidered patches
- fabric glue, pictured is no-sew temporary fabric glue which is perfect if you plan to stitch over the roses, by hand or by machine.
If you just want to glue them on, use Aleene’s Fabric Fusion, which is permanent!
Yes way rose’!
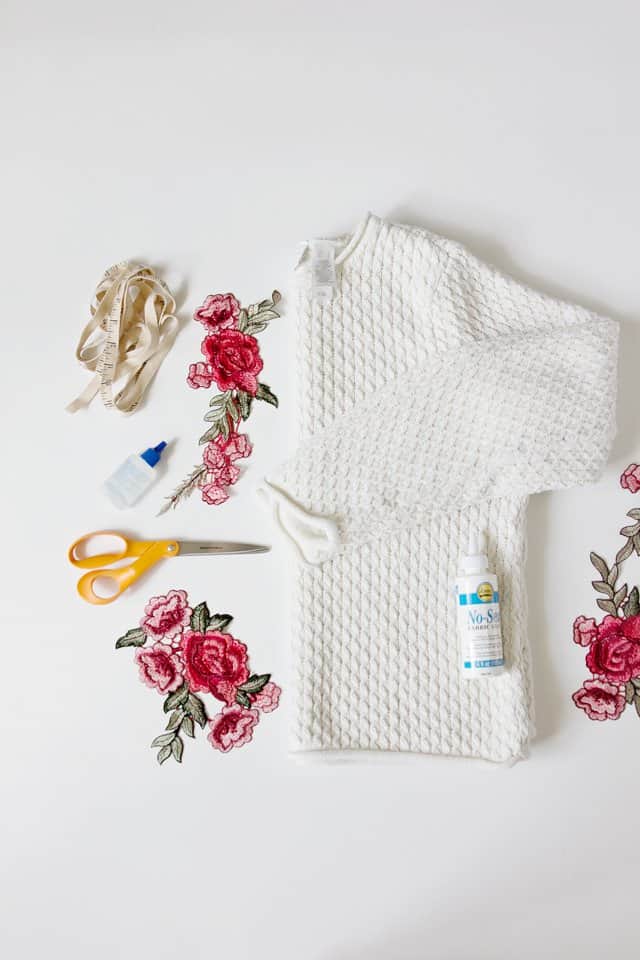
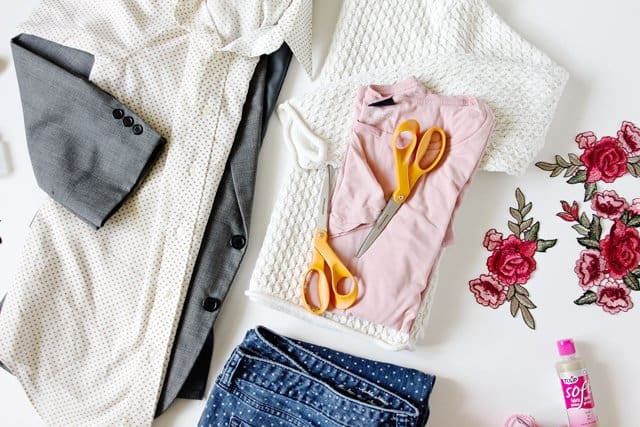
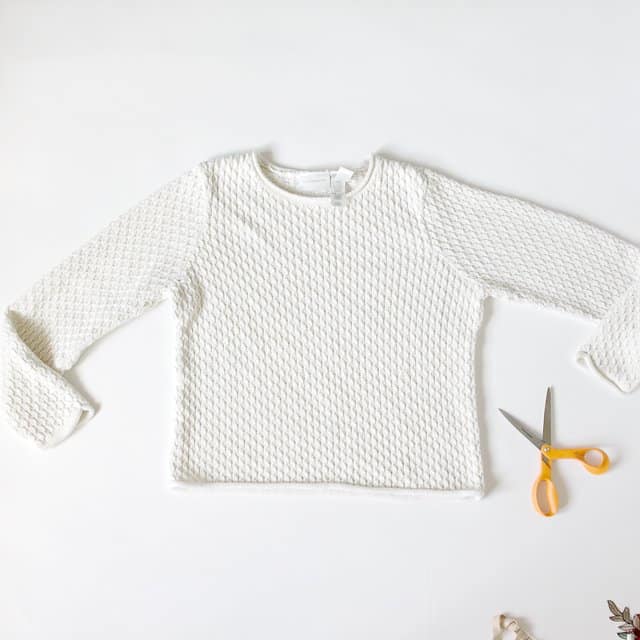
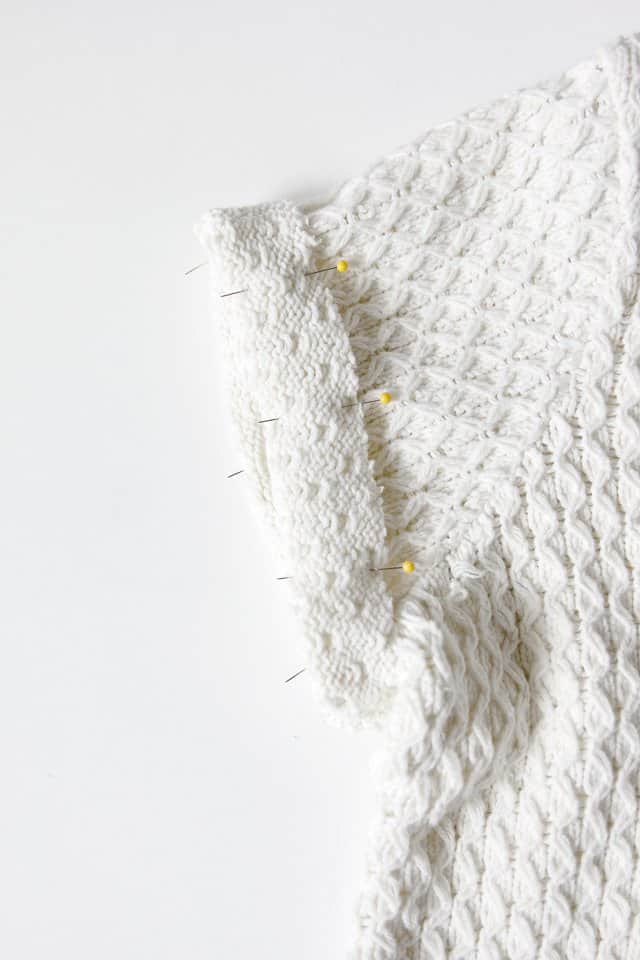
Collect all your materials and get ready to chop!
Cut the sleeves off about 3 inches from the inseam, right up to the top of the sleeve.

Discard the extra and fold the sleeve hem over the top 1″.
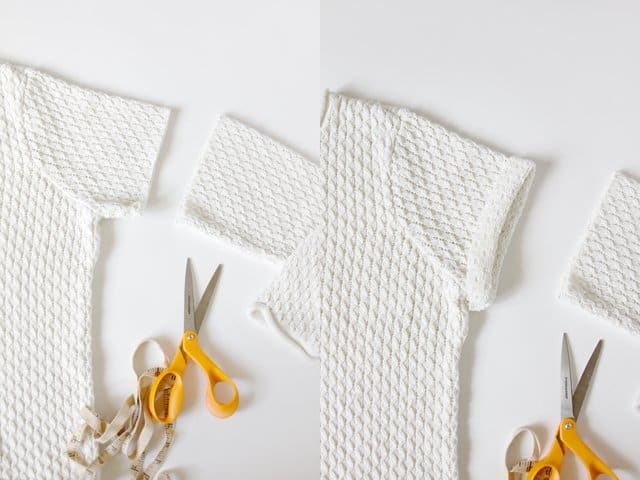
If your sweater knit is a pretty loose weave, use Fray check before sewing, this is a clear glue that will hold the fibers together.

Pin and zig zag stitch using a matching thread all the way around.
Now for the fun part! Decide where you want your roses to go.
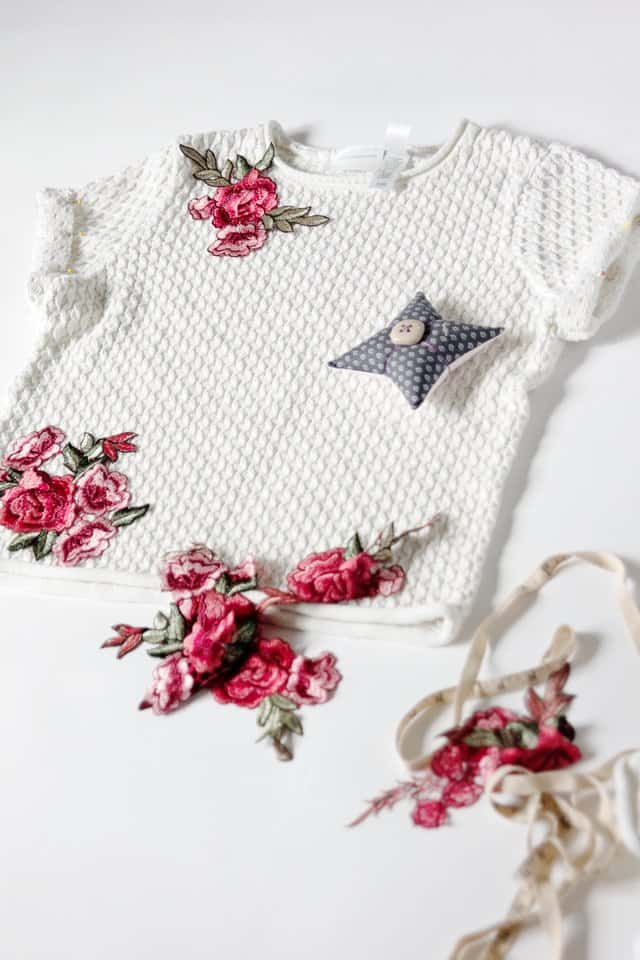
Glue them on and press down well. You may want to put a buffer inside the shirt if your fabric isn’t very thick. Use parchment or wax paper.
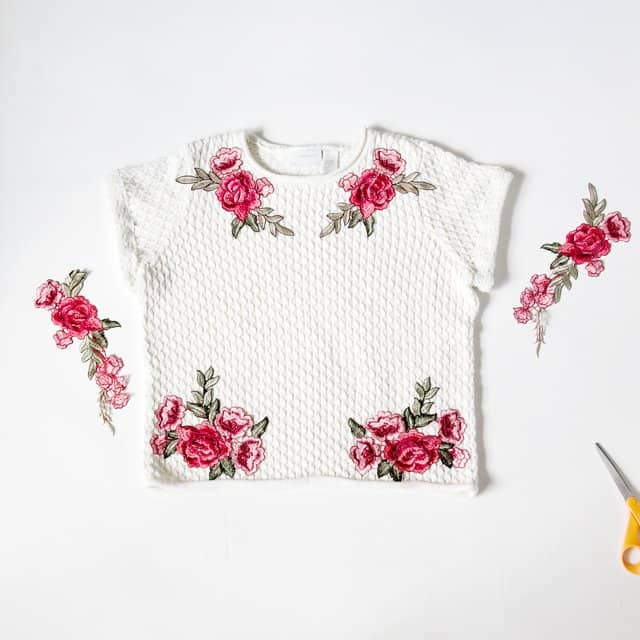
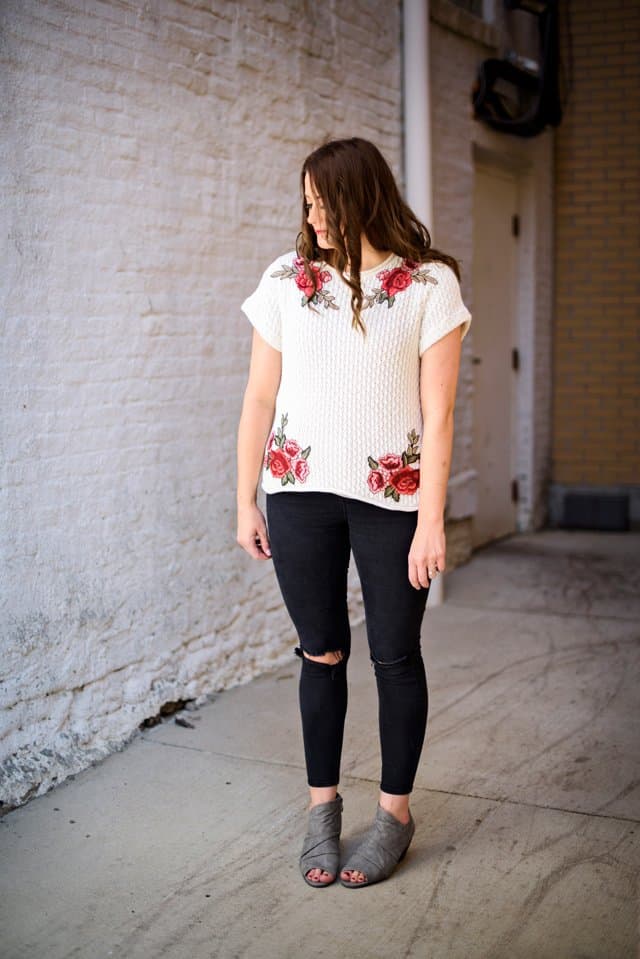
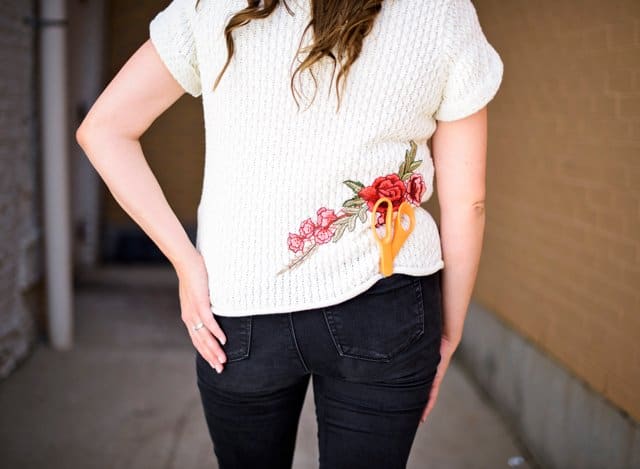
I did a symmetrical pattern on the front with one of the extra rose patches across the back!

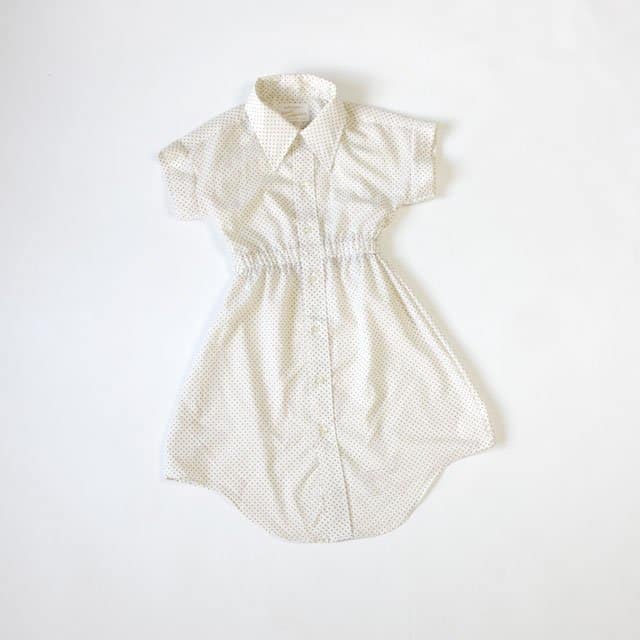
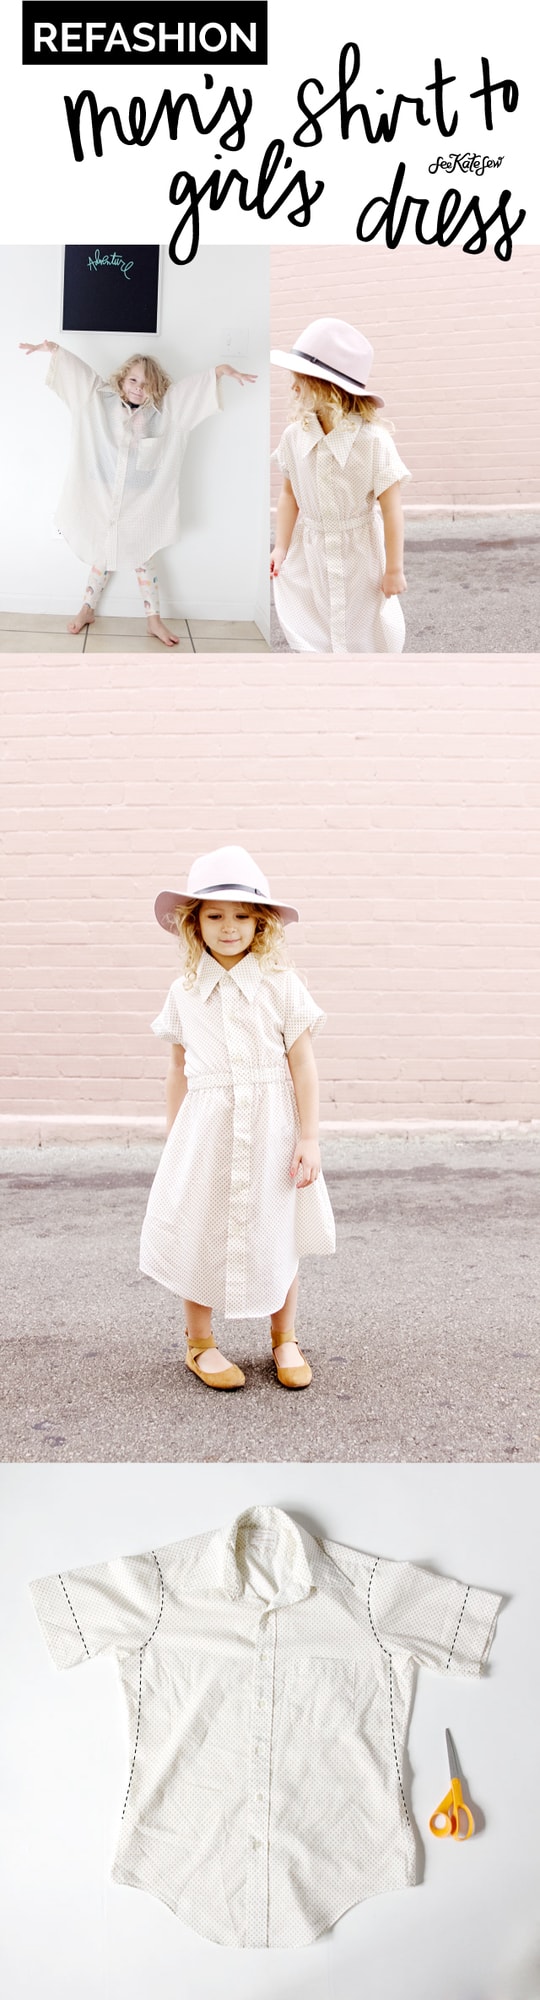
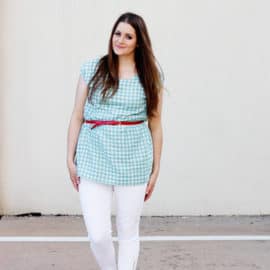
2. Men’s shirt —-> girl’s dress
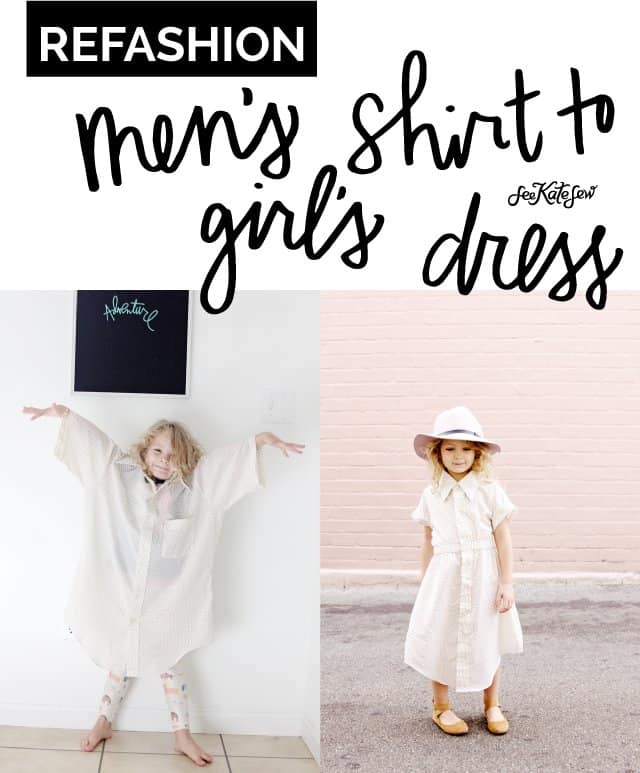
If there’s one thing you can count on finding at the thrift store, it’s a men’s button-down! I can usually sift through them and find a few patterns that I love! So much great fabric just sitting in the racks!
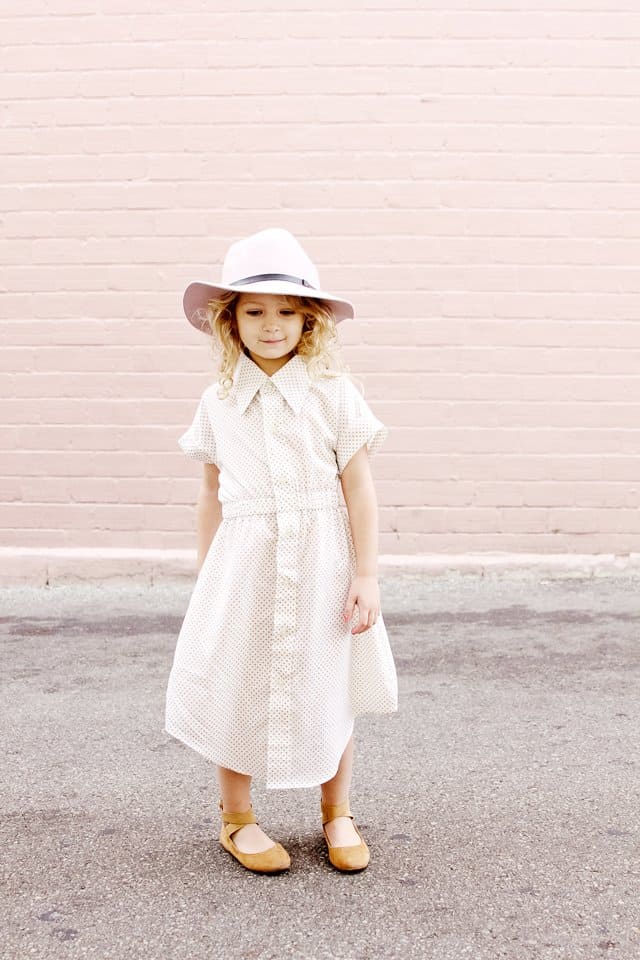
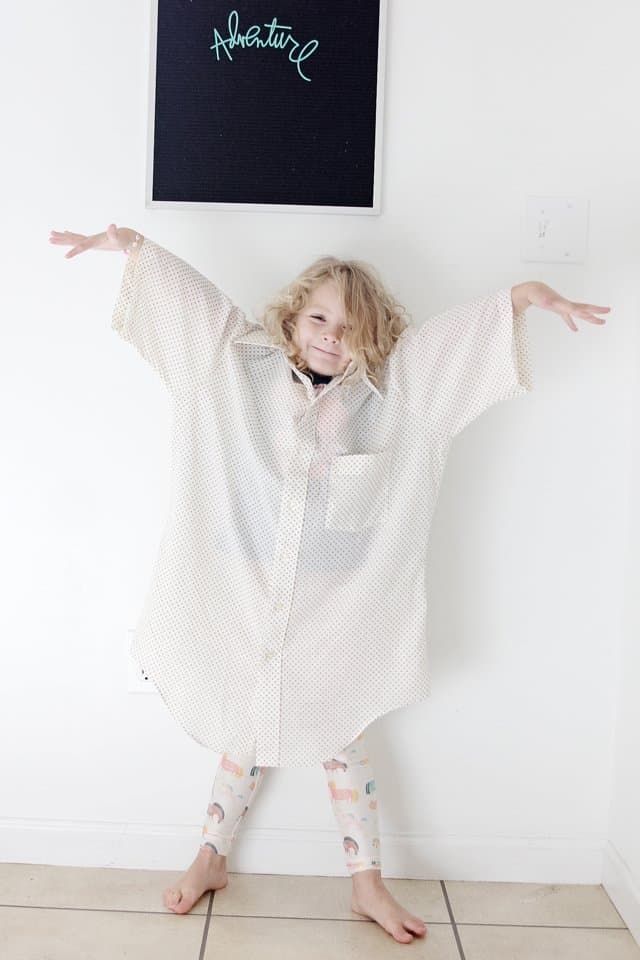
I found this polka dot one and was (predictably) drawn to it! So cute! I wanted to keep the main features of the dress such as the collar and the buttons, but turn it into a cinched girl’s dress for my 5 year old. You can do this same thing for lots of girl’s sizes, including tweens. Find a bigger men’s shirt size for taller girls!
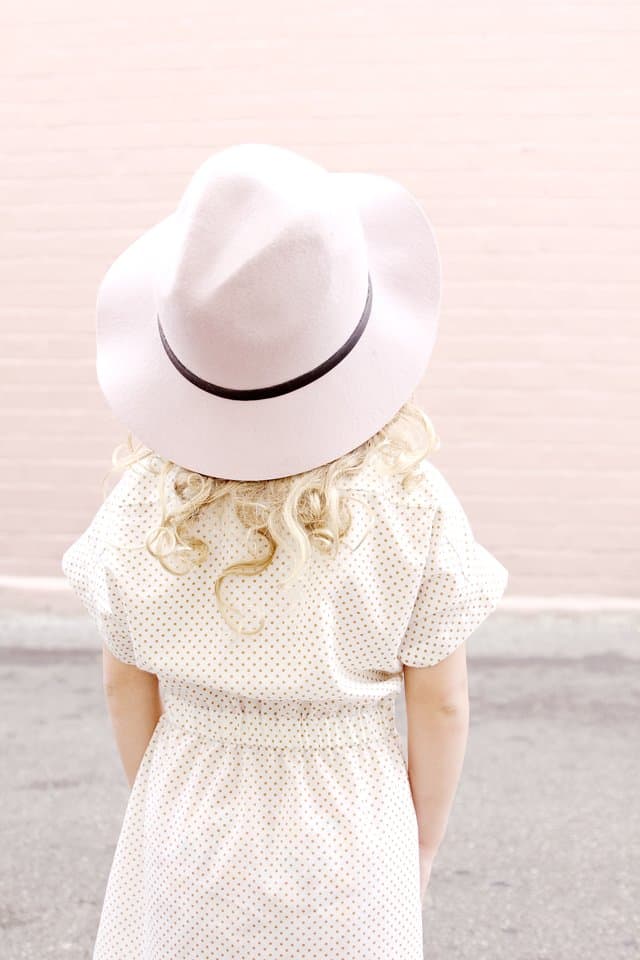
I really love my rose sweater, but when trying to decide which project is my favorite, this picture makes it hard to choose anything else!
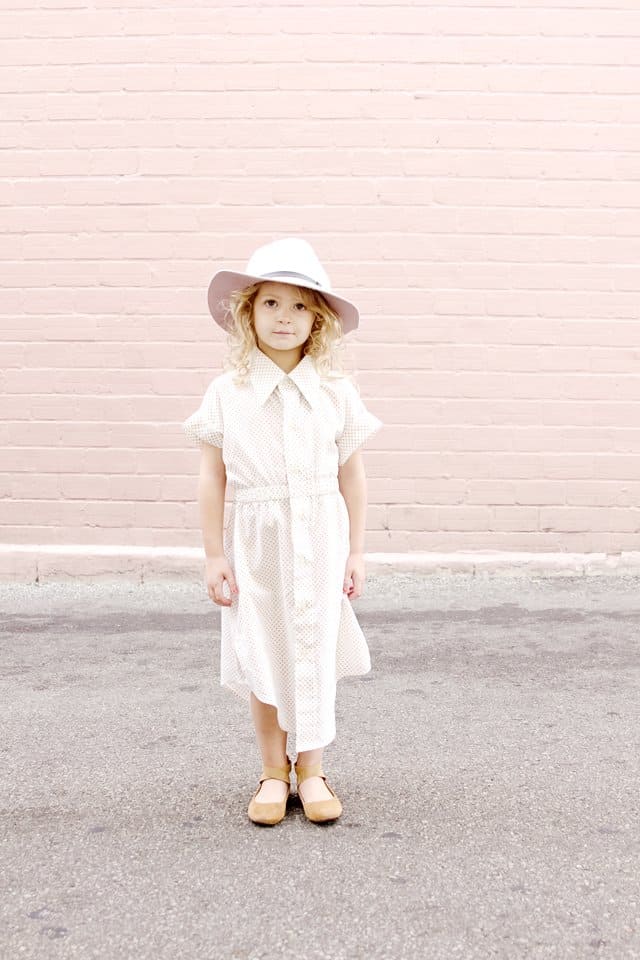
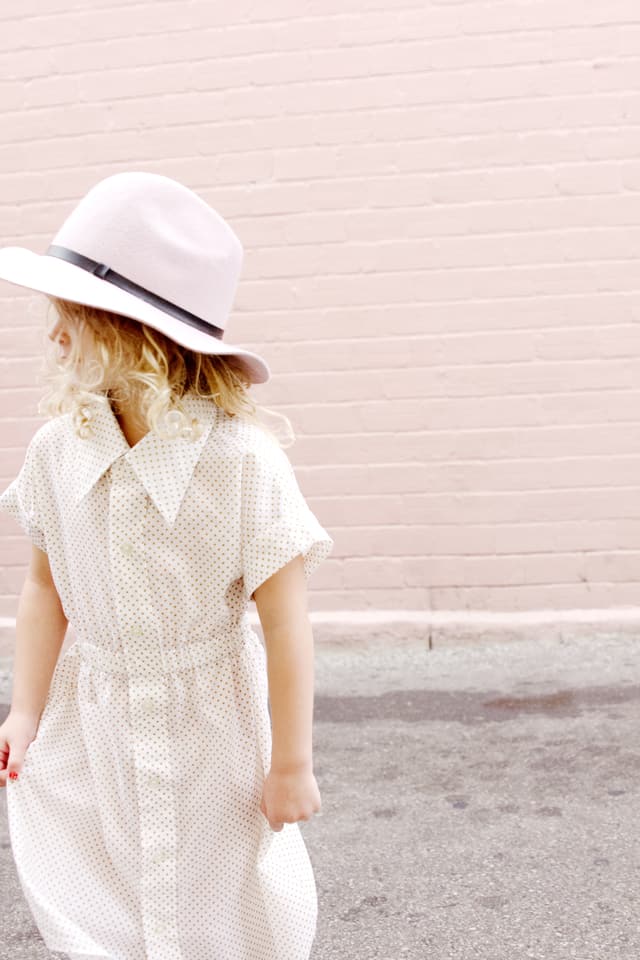
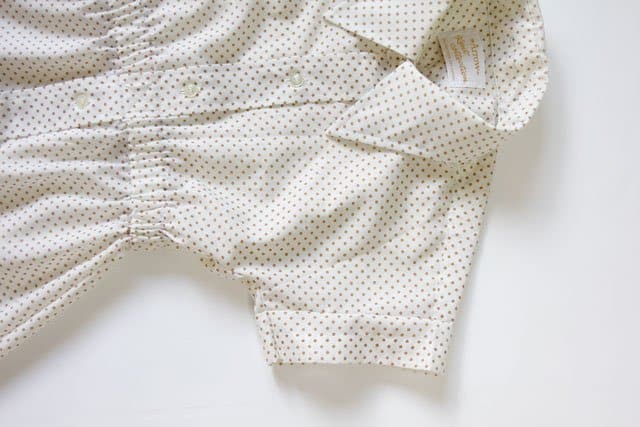
I keep the original hem, I love the shirttail hem, it’s so preppy and quintessential. Keeping the original hem (also collars, button placket and sleeve hem) also makes the project faster! More sewing!
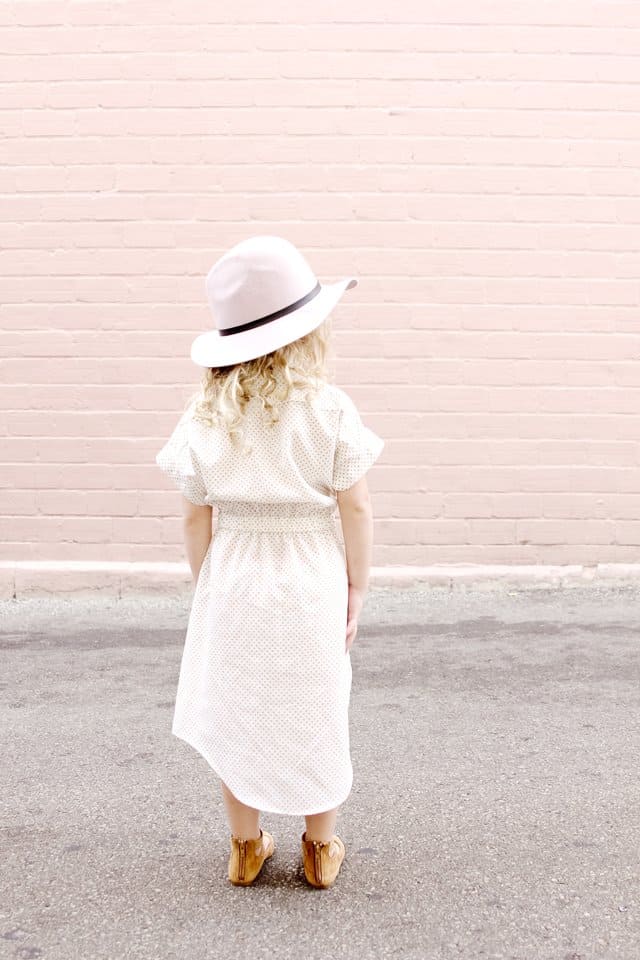

This is my new favorite quick sew! Ah, I love it so much! So fast, so easy and you use pretty much the whole shirt, so you don’t feel super wasteful!
Materials //
- a thrifted men’s shirt
- 1″ elastic
- measuring tape
- extra cotton fabric
Instructions //
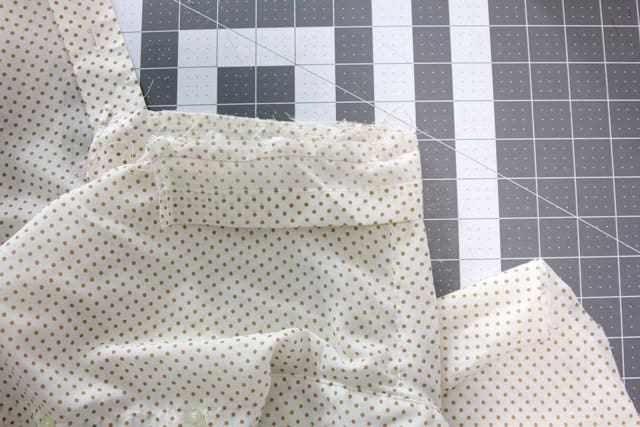
Lay your shirt out and cut the sleeves off at the armscye. Cut down from the sleeve to the side seam, tapering into it. You will decide how far over on the sleeve to cut based on the size of your child and the size of your men’s shirt.
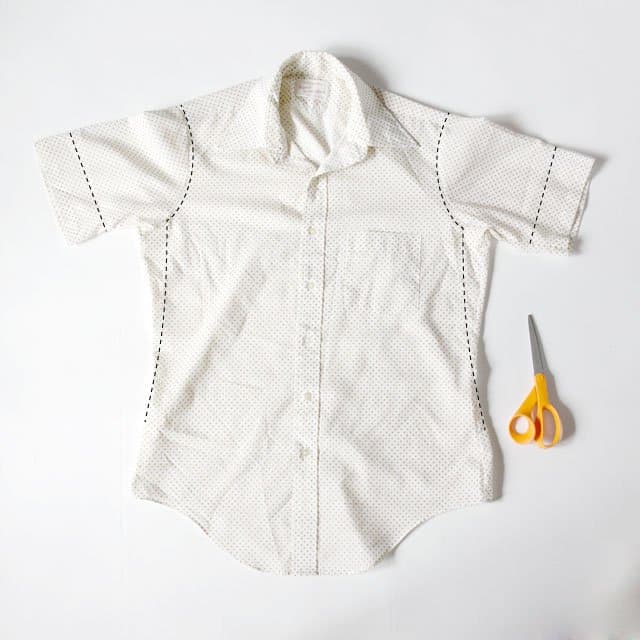
We tried it on to get it right, pinching and measuring under the arms.
Cut off 2″ of your sleeve hem, keeping the finished hem. Cut the seam so it is one long strip.
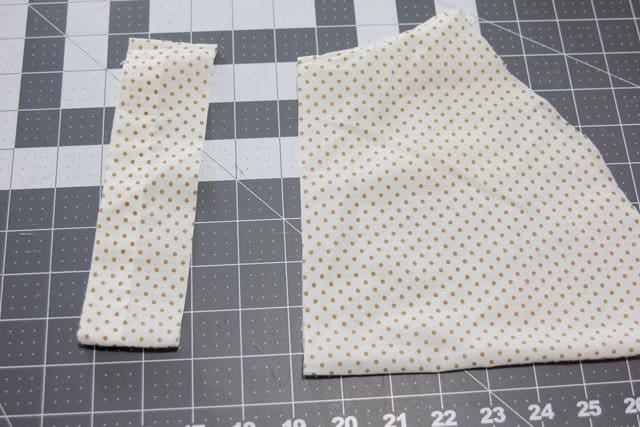
Place right side facing right side on the new sleeve hole of the mens shirt. Sew and finish seam allowance. Trim any excess from the strip.
Press and sew side seam.
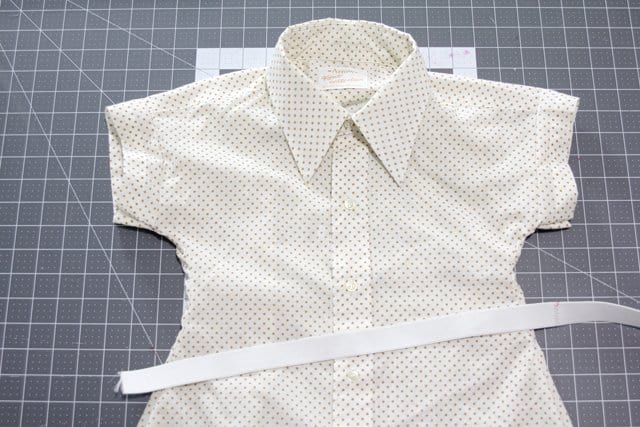
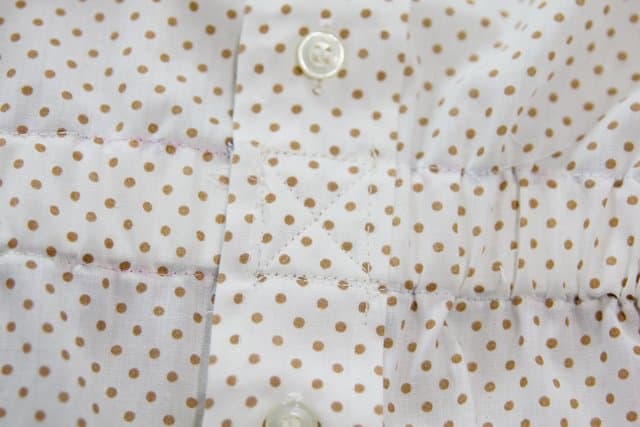
Cut out a really long strip of fabric 1.5″ wide by as long as the waist on the men’s shirt. Press under a scant 1/4″ on each of the long sides.
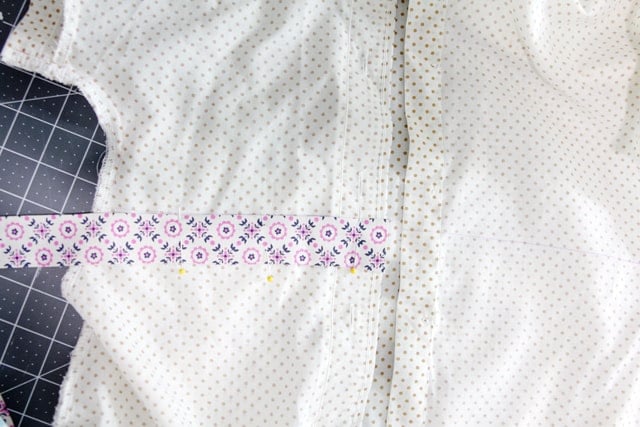
Sew it on around the waistline of the men’s shirt, creating a casing. Sew right at the top and right at the bottom of the fabric so you create a casing big enough for 1″ elastic.
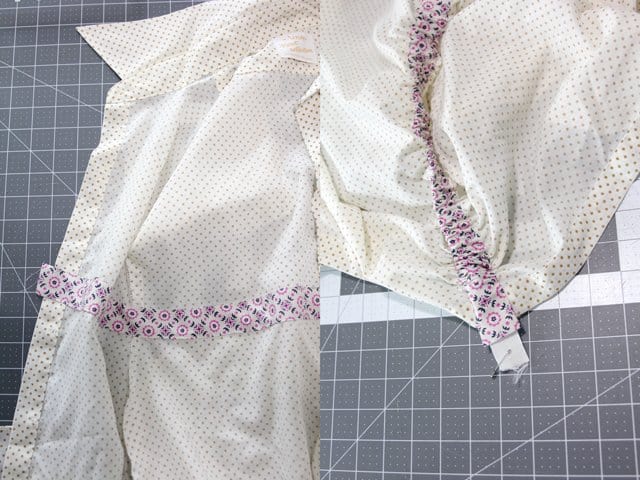
Thread elastic through, measuring about 1″ less than the waist of your child. Sew at both ends.
Create an “X” over the top of the button placket right where the elastic meets. And you’re done!
Recommended to wear with these cognac shoes and lavender hats!
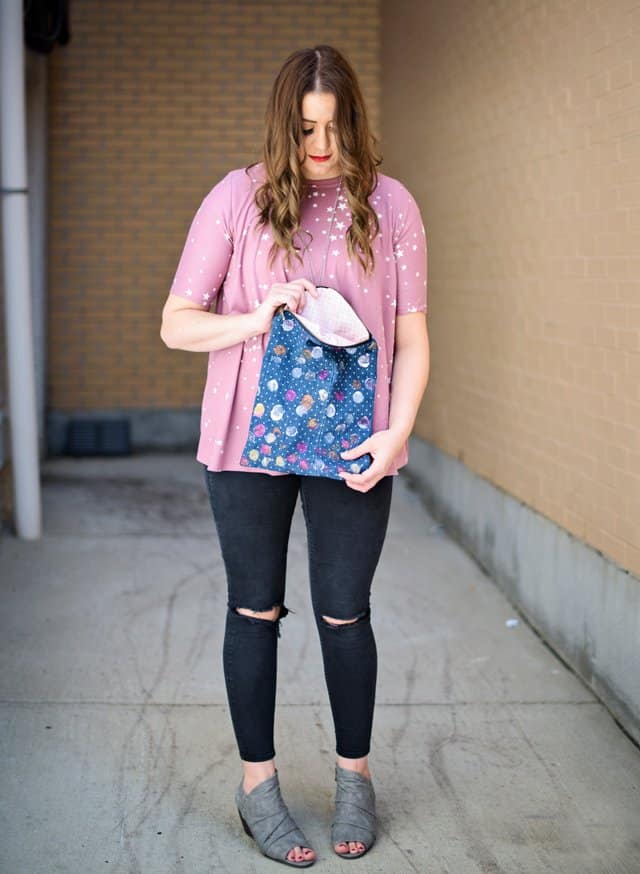
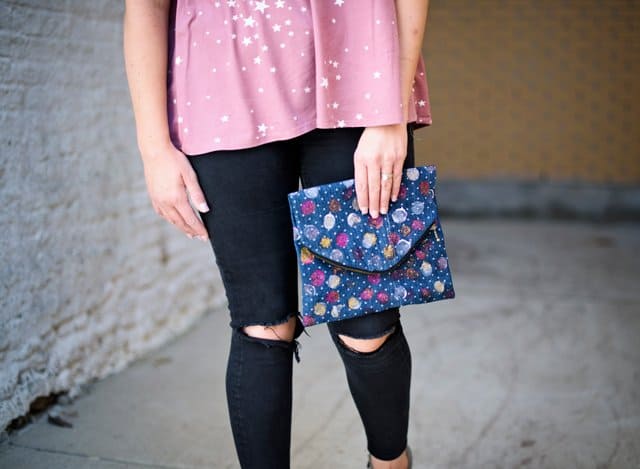
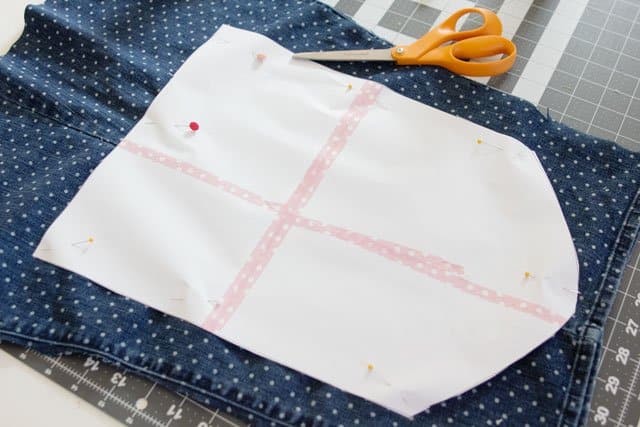
3. jeans —-> painted foldover clutch
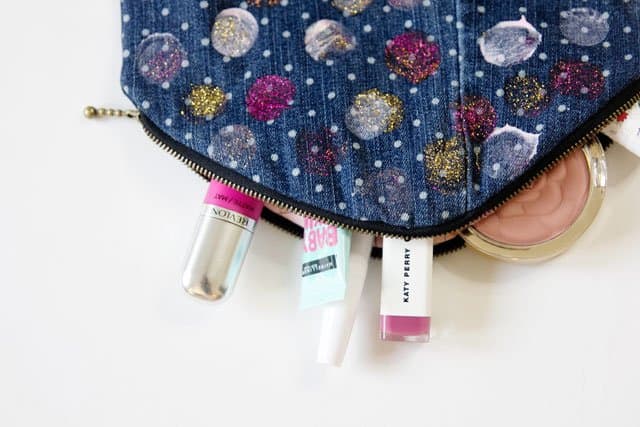
I couldn’t write this post without making myself a new clutch! I used a basic pair of blue jeans for this one. You may not even have to make a trip to the thrift store for this one! But I did find a cute pair of polka dot denim. You can really use any wash, even other colors of denim for a unique project.
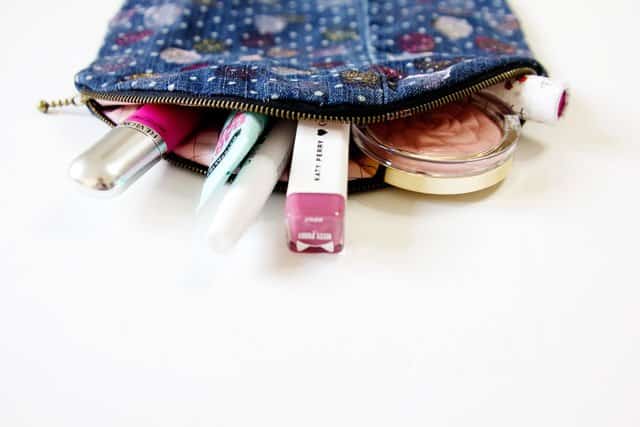
Materials//
- thrifted jeans
- cotton for lining
- puffy paint
- paint dabbers
- zipper, I used this cute one
- foldover clutch pattern
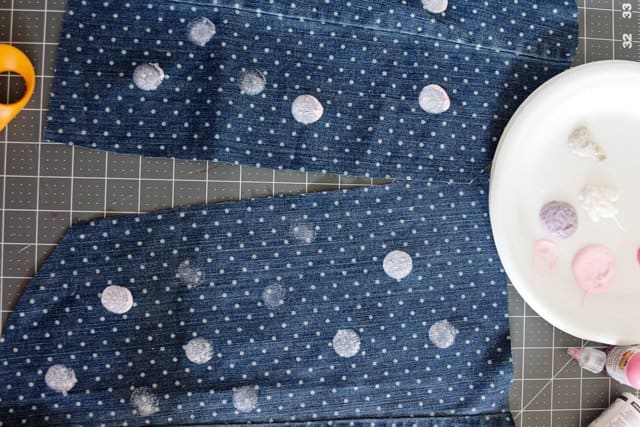
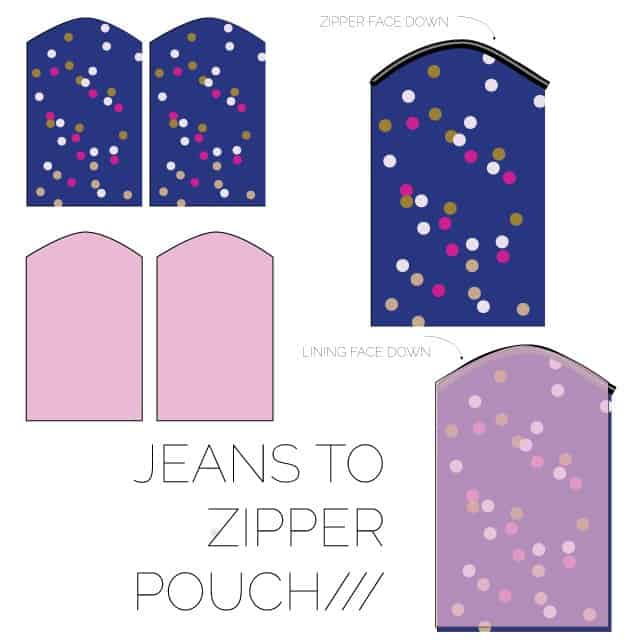
Use the pattern piece above to cut 2 layers from denim and 2 from cotton.
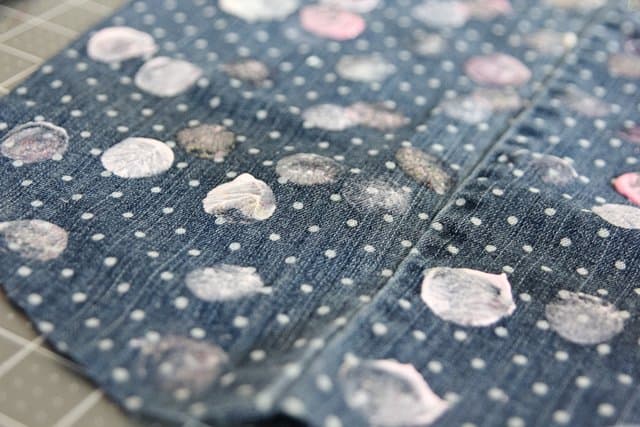
Create circles with the paint dabbers and paint. Cover the denim as much or as little as you want and let dry overnight.
Now that your fabric is customized to your liking, let’s sew it up! This is just a basic zipper pouch construction but the shape of the top makes it look like a little envelope when it is folded over. The curve is a bit tricky to insert a zipper on so I recommend basting one of the fabrics to the zipper before adding the lining piece. Here is a great basic zipper pouch tutorial if you need additional guidance.
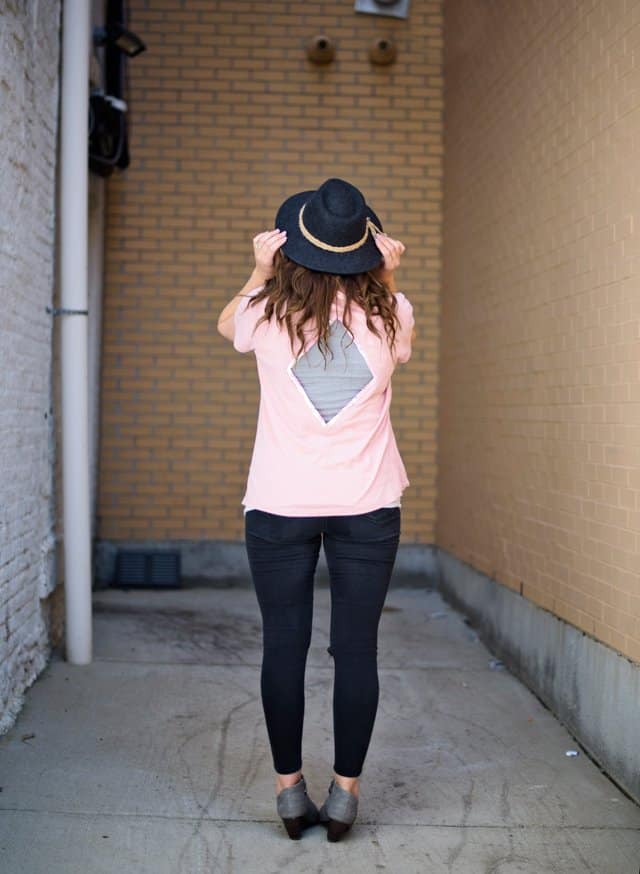
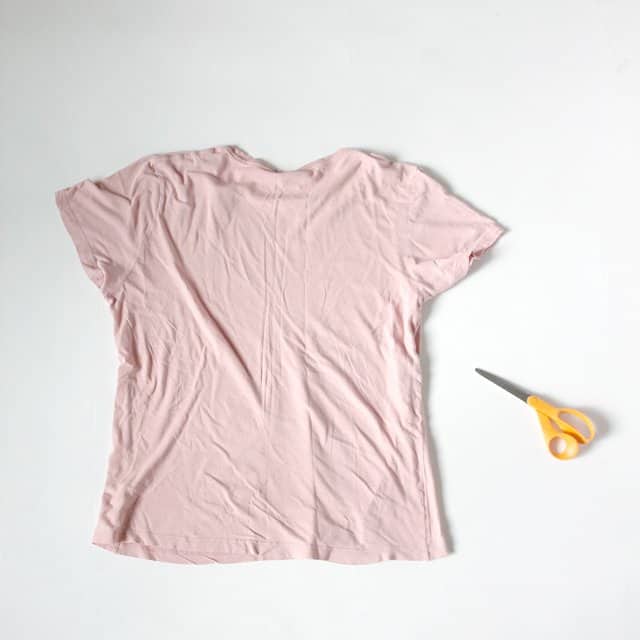
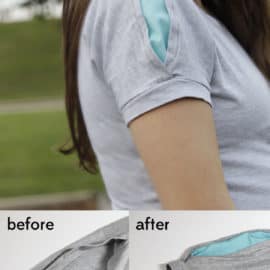
4. t-shirt —-> diamond mesh back
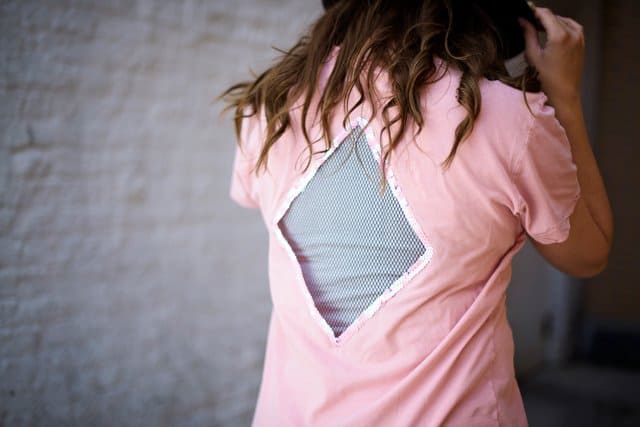
T-shirts get such a bad rap, but I thinks sometimes they just need a little TLC! A basic tee is such a great starting point for so much inspiration! See my last post with Fiskars where I showed you TEN ways to refashion a basic tee! I’m adding one more way today – with mesh and sequins!
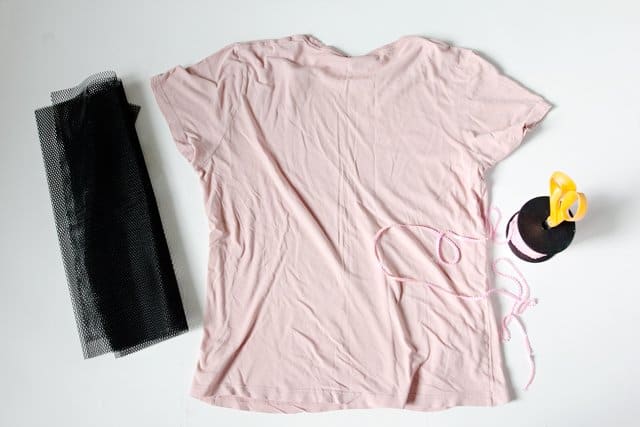
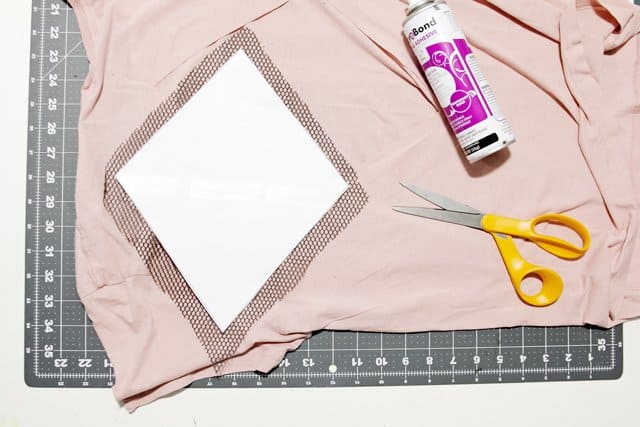
Materials:
–craft mesh
–basting spray
–fabric glue
–sequin ribbon
–diamond template
Spray the diamond template with heat n bond basting spray and lay on the shirt where you want the cut-out. The baste spray will keep the diamond in place better than pins would. Cut around the diamond and then use the template to cut out a piece of mesh. Be sure to add 1/2-1″ around the diamond so we can glue it to the tee!
Place the mesh beneath the t-shirt cut-out and glue to the top around the edges. Try to keep the shirt fabric as straight as possible to get a good diamond shape.
Be sure to put something inside the shirt so it doesn’t get glued together. I used a silicone mat, but anything that you can pull the glue from easily will work.
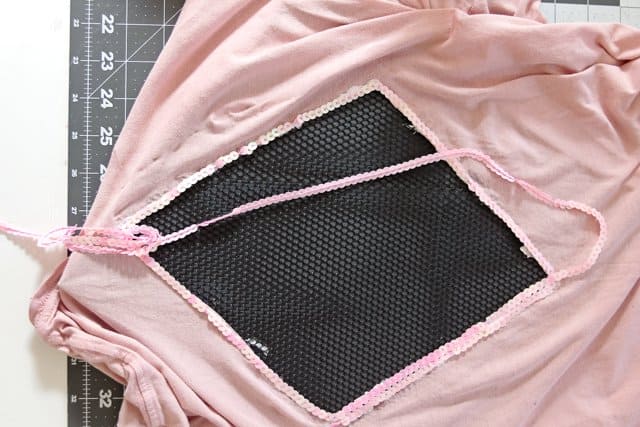
Once it’s dry, sew sequins around the diamond. Sew two layers and let dry!

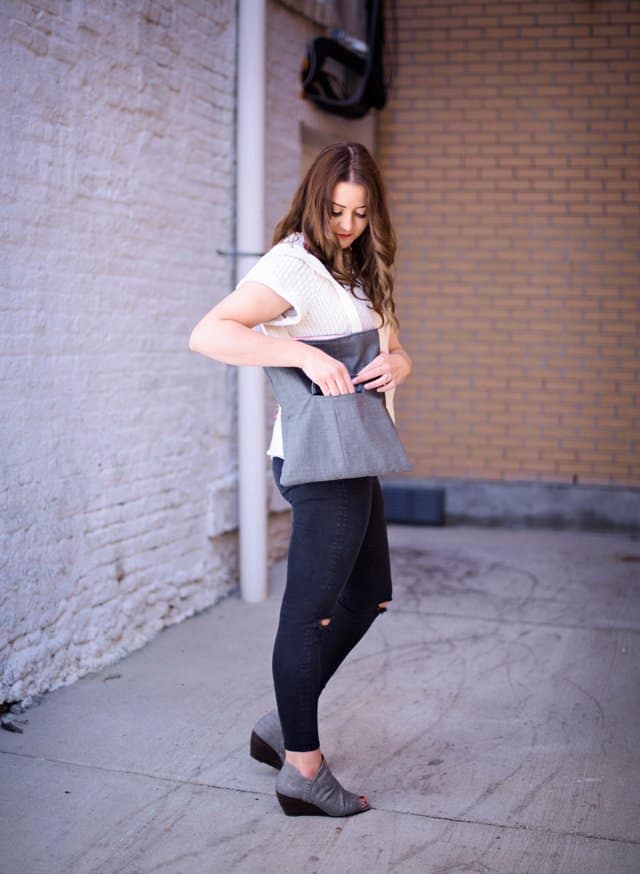
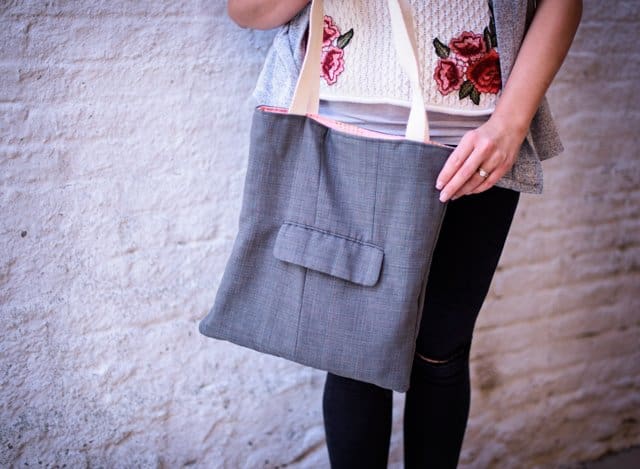
5. suit —–> tote bag!
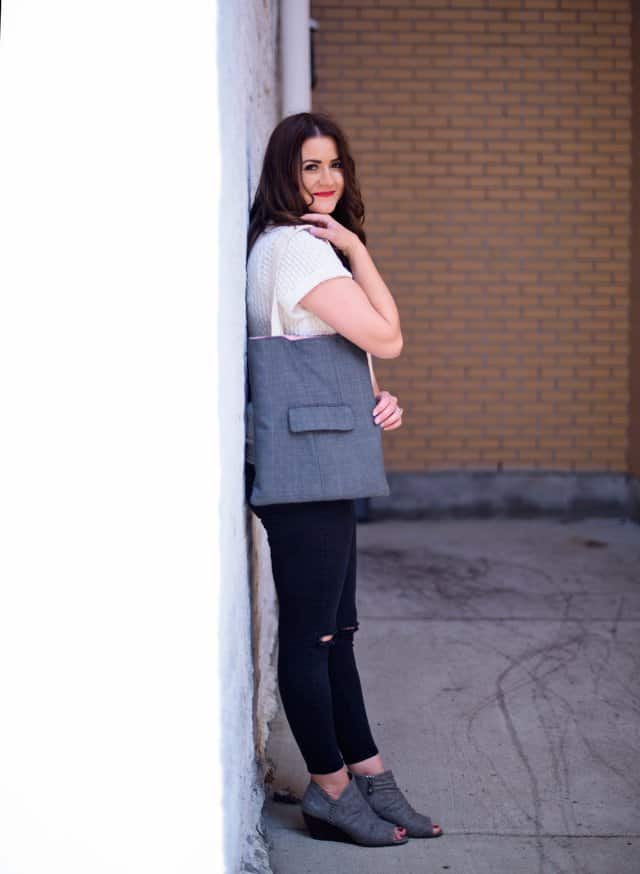
Grey suit fabric is one of my favorite materials to use! It’s so “menswear” which is always popping in and out of women’s fashion. And a whole suit is usually less than $8 bucks at the thrift store which gives you lots of fabric, a few buttons and design features to utilize in your sewing.
Materials//
- a men’s suit
- 1″ canvas strap material
- basic cotton for lining
The best part about this project is you can customize the size! I just made the biggest tote my suit would allow and kept one pocket for the front. It’s the perfect size for a cell phone!
My tote is about 15″ by 12″ so I’ll use those dimensions for the tutorial, but don’t be afraid of creating your own variation!
Cut two layers from the suit and 2 from lining.
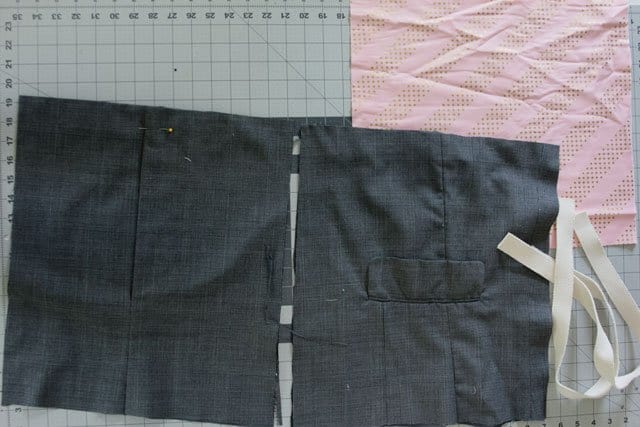
My back piece had a vent in it, so stitch that up with a straight stitch if yours does too. Backstitch at each end. 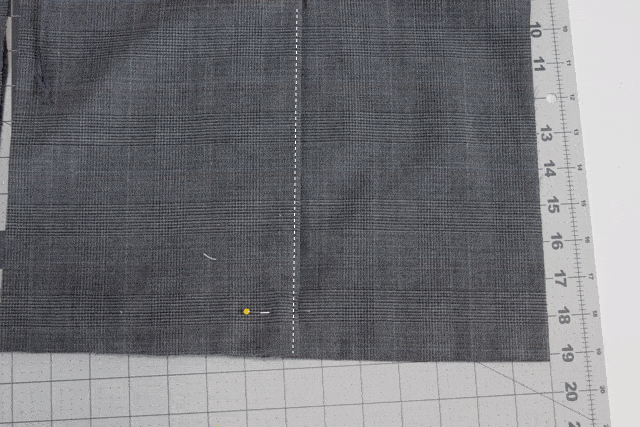
Sew the two layers of lining together with right sides together. Leave a 2-3″ opening at the bottom.
Repeat with suit pieces without the space at the bottom. Clip corners and trim seam allowance.
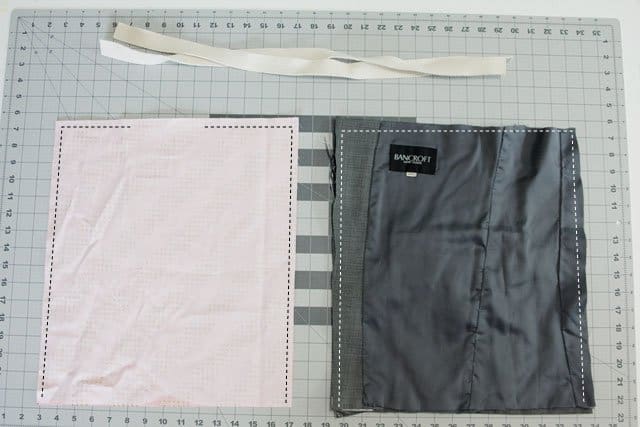
Turn the suiting right side out. Leave the lining inside out.
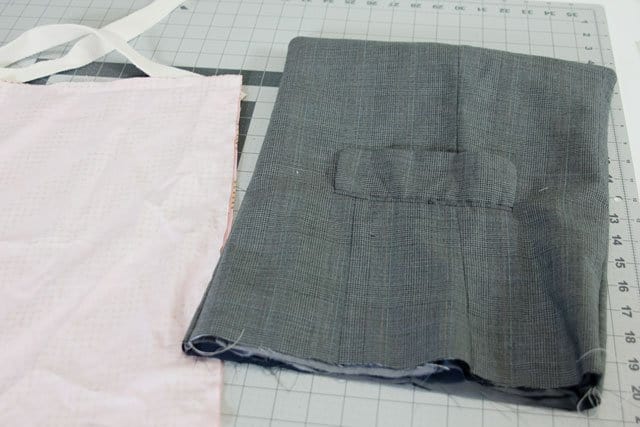
Put the suiting fabric into the lining, tuck straps inside. Match raw edges and strap edges at the top of the tote and sew all the way around. Turn through the opening in the lining, press and stitch opening closed. Topstitch around the top of the tote.

Cute!
Tips for shopping for “fabric” at the thrift store:
- Look past imperfections in the fabric. Since you’ll be cutting it up anyways, you’ll be able to avoid those spots.
- If you have a few options for the same type of fabric, buy the biggest size possible. They are always the same price, but you get more fabric.
- Buy backups! I always end up re-donating a few things that didn’t quite work out, were too small, or just look different in better light.
- If the fabric won’t be affected by a wash in your machine, wash that baby up! Sewing with clean fabric always feels better. ;)
- Shop your closet first! My closet is always need a good purge…or two!


Happy birthday Orange-Handled Scissors!!


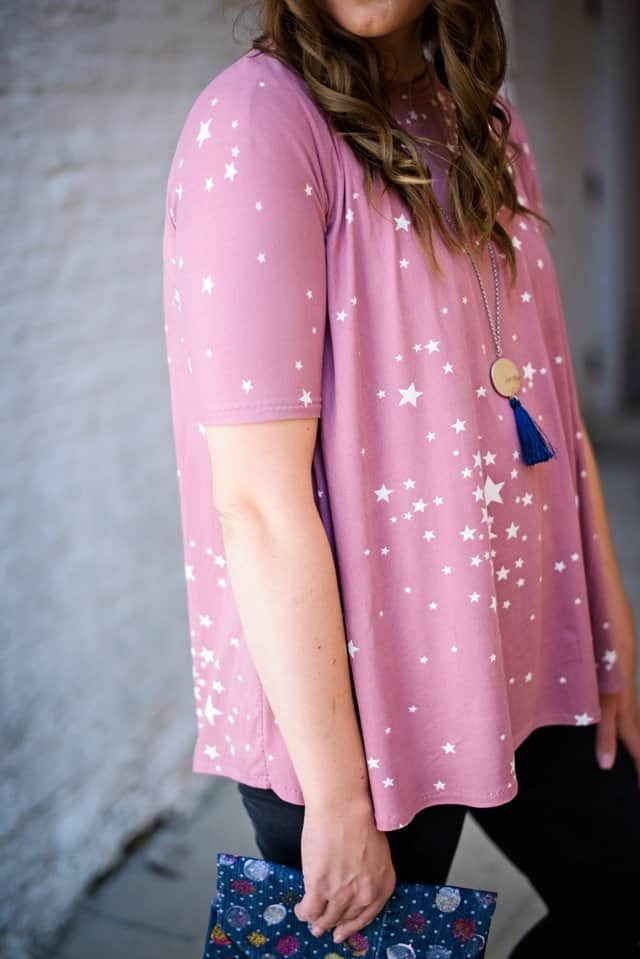
Love these! Is the top you’re wearing in the Denim Foldover shots one of your patterns?
Love your ideas! It’s fun to see people think outside the box.
I got a pair of Fiskars from my grandmother in 1977 when I graduated from 8th grade. She taught me to sew. I still have those scissors!
Great ideas! I took a 25 year old denim pullover top that had spots on it and converted it into something amazing. I superimposed a piece of heavy lace on the front in its natural shape (cut off of something else) Sewed it on and removed
the denim from behind it. Something old is new again!
Love thrift store finds! I make and sell a lot of purses & bags and always check out belts and placemats for materials. Their handbags are terrific sources for hardware and patterns for new bags. Found a linen shirk one time with 8″ embroidery circles on it. Those circles turned in to what I called my quesadilla wristlets! Oh! And let’s not forget men’s silk ties – mix them up for beautiful one of a kind linings, wish I could share some photos!