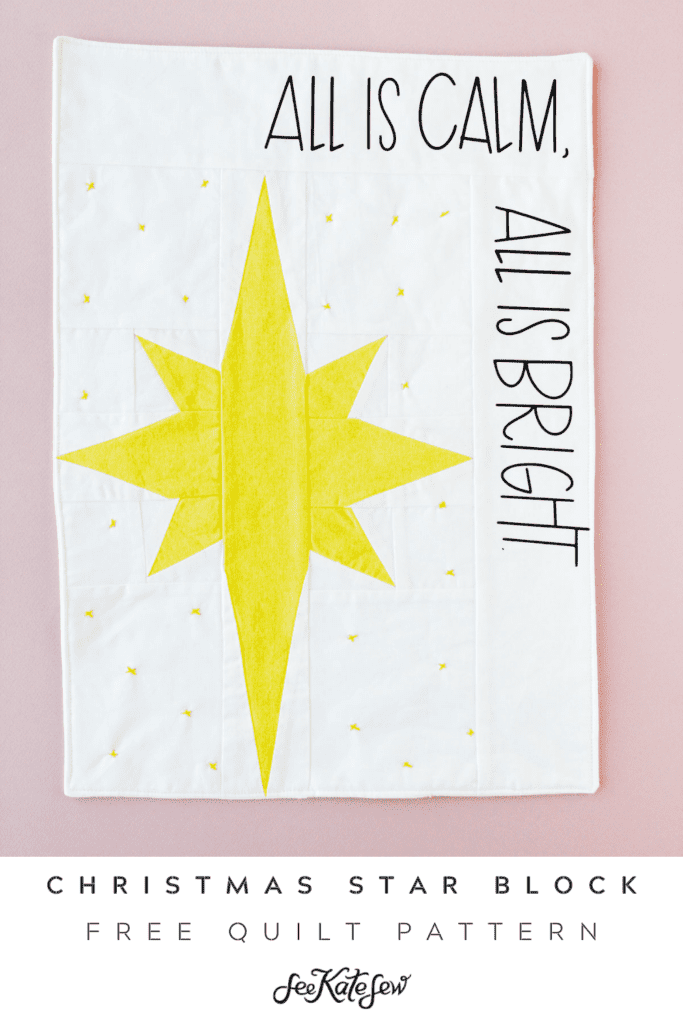
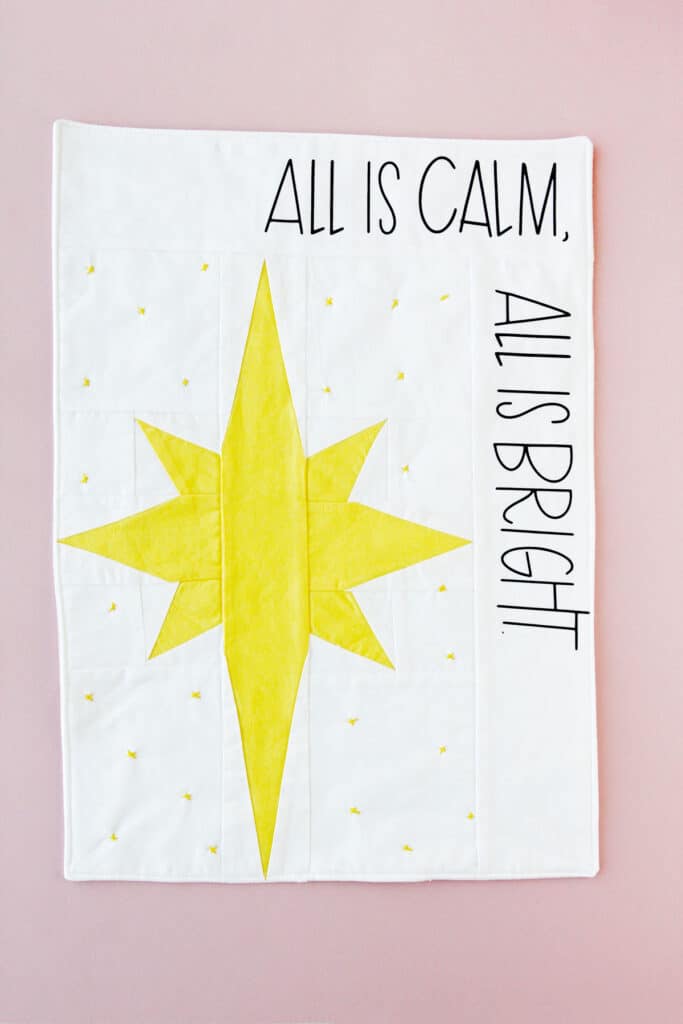
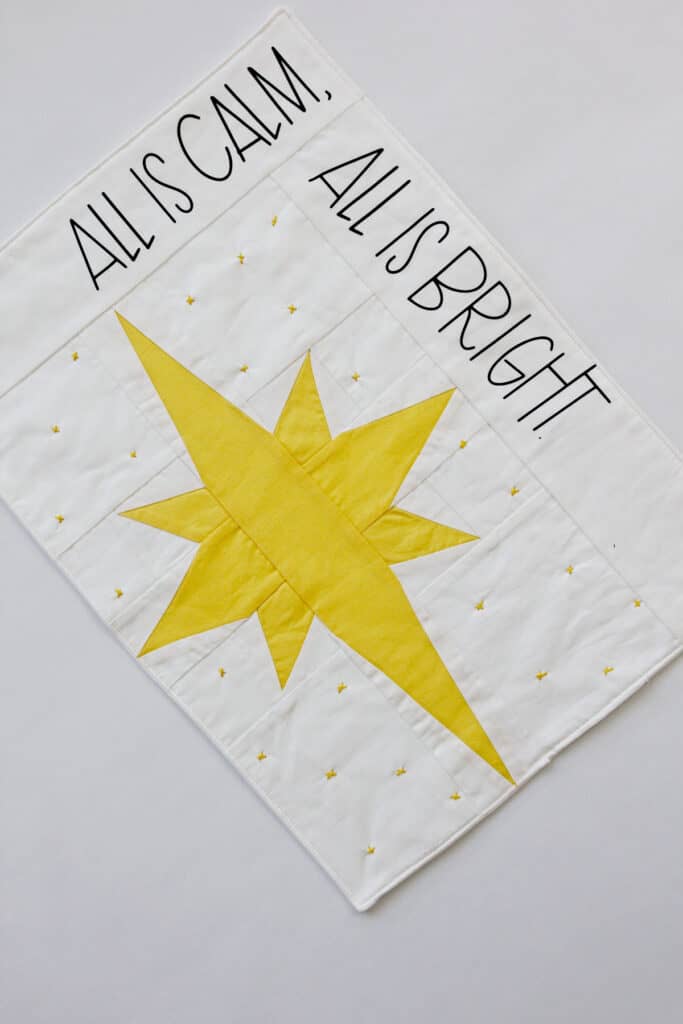
Here is another quilt project to add to your wall – the Christmas Star Quilt Block! This star of Bethlehem block is simple to sew and packs a punch for your holiday decor!
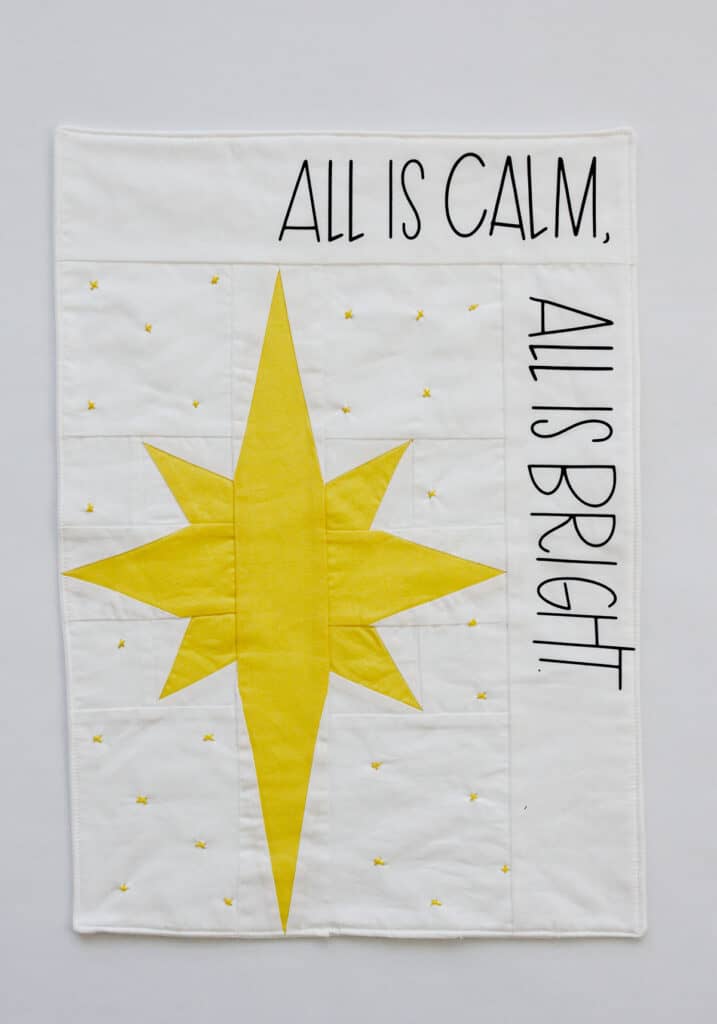
Sew this block on it’s own and add some iron-on vinyl to make a wall hanging, or sew up a few for a festive table runner. The first star is one of my favorite elements of the Nativity!
You can even use this block to make a full quilt! This block is sewn with templates that are available to download in this post.
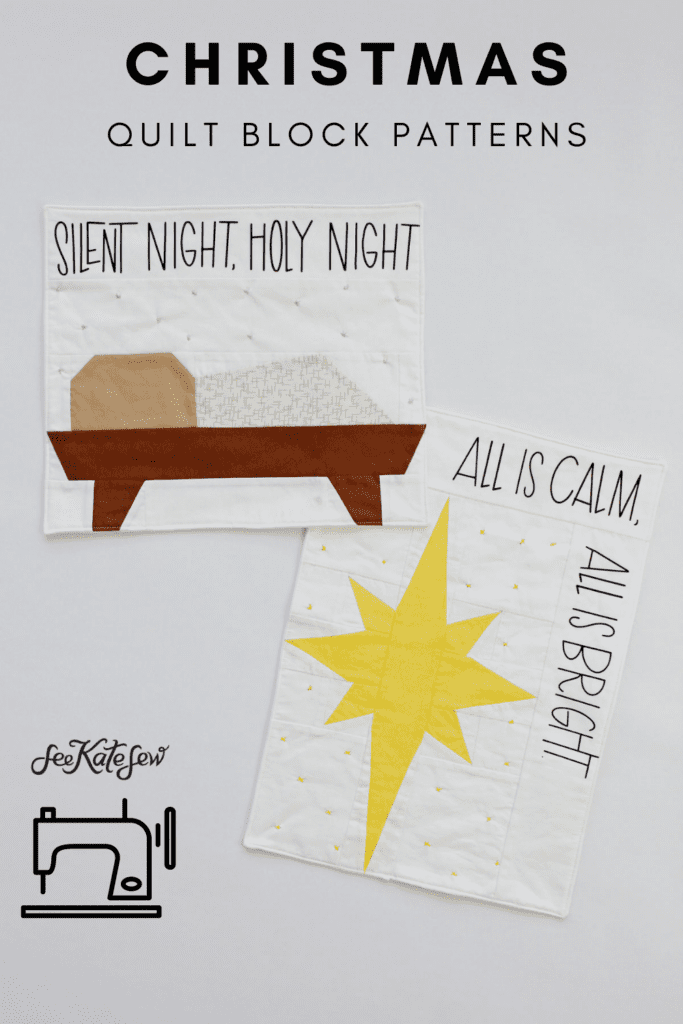
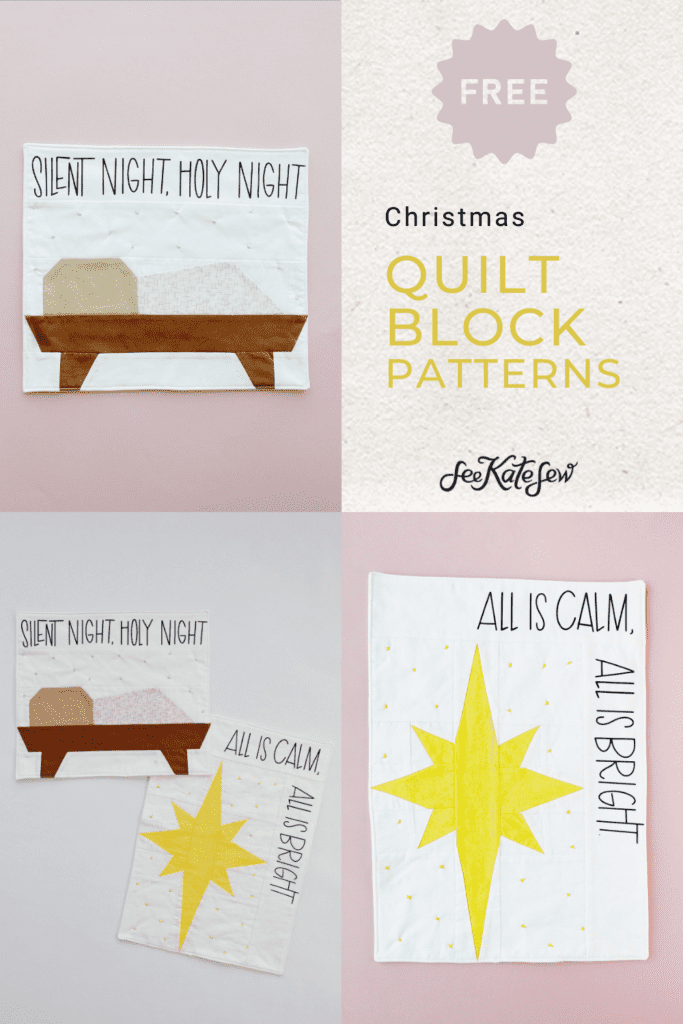
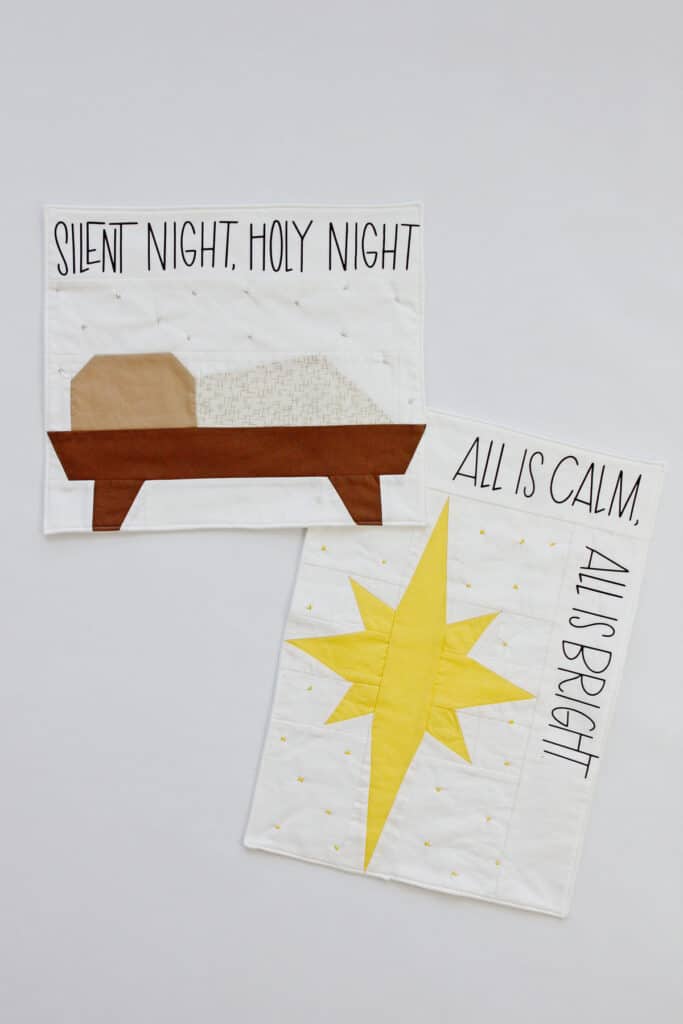
Pair this block with the Nativity block found in this post! These make a cute coordinating wall hanging to hang during the holiday season.

Christmas Star Quilt Block Materials
- 100% Cotton fabric in 2 colors
- Use 100% quilting cotton
- I’m using white and yellow
- Card stock for templates
- Batting, backing fabric and spray baste
- Optional: Iron-on vinyl, embroidery thread and hand embroidery needle
- Optional: binding or bias tape
Christmas Star Quilt Block Templates
Download the Christmas star quilt block pattern by clicking on the link below. Print the templates from your home computer at 100% or DO NOT SCALE. Check the 1″ box to make sure you printed the pieces at the correct scale. Tape the pattern pieces together where necessary.
Piece to Cut – Christmas Star Block
There are a lot of pieces to cut here! Pay attention to the color as you cut the templates with your fabric. If the piece says mirror image – cut 2 on the fold. If your fabric is reversible (such as most cotton solids) you don’t really have to pay attention to that detail.
Background Fabric
- 2 – A
- 4 – B
- 8 – C (mirror image)
- 4 – E (mirror image)
- 2 – G
- 2 – H (mirror image)
- 2 – J (mirror image)
Star Fabric
- 4 – D
- 2 – F
- 1 – I

Sew the Christmas Star Block
1/4″ seam allowance included
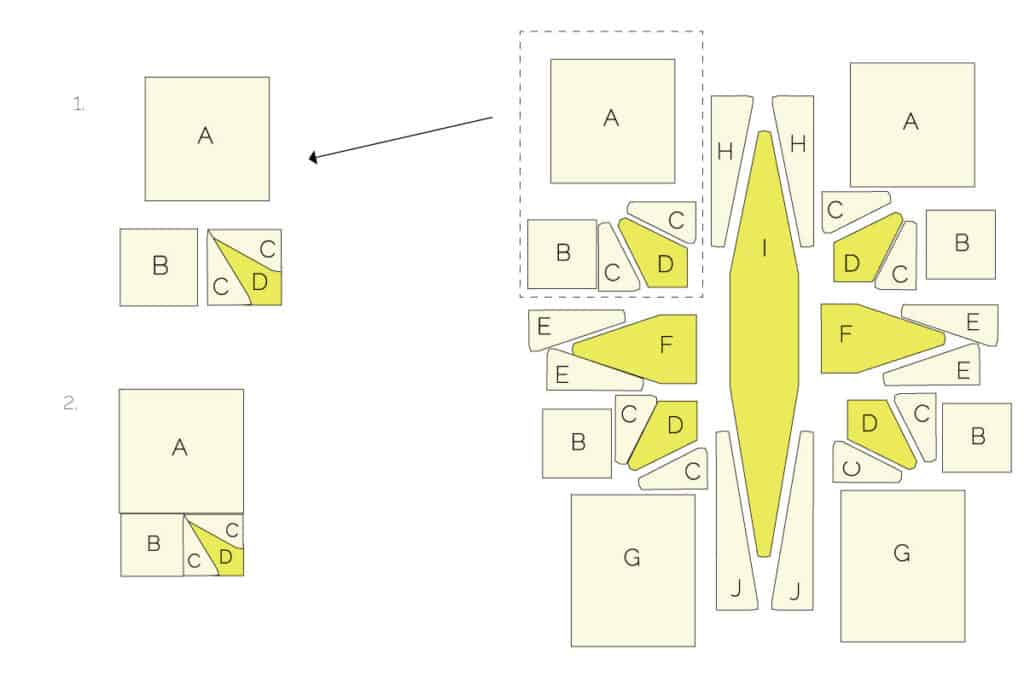
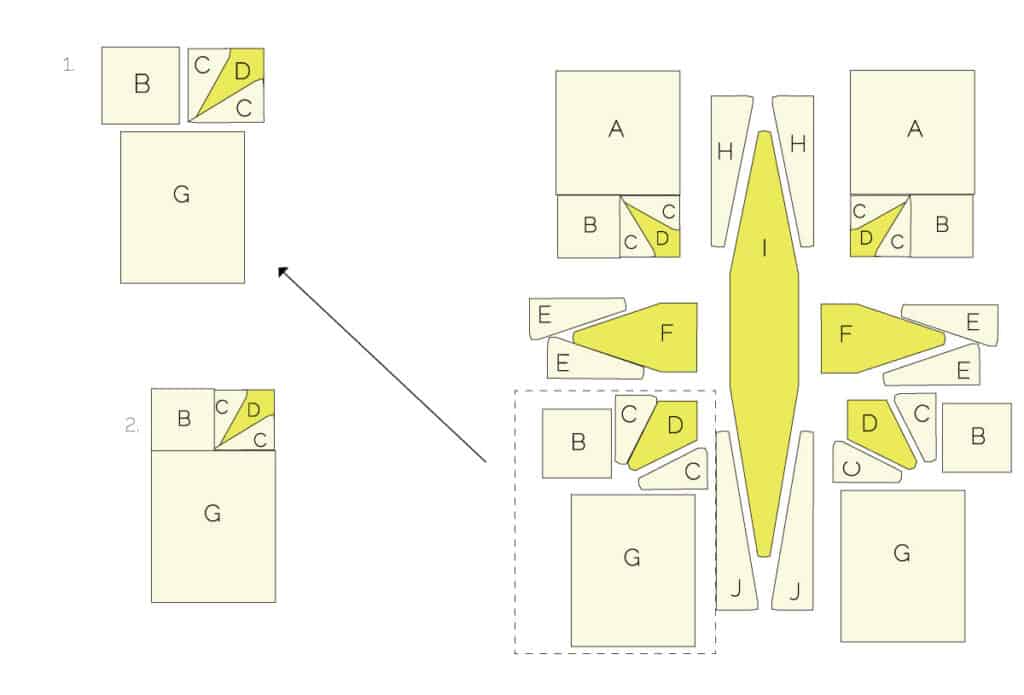
This block has a lot of tiny pieces, so we’ll chunk it down into sections. Start with the upper left corner with pieces A, B and CDC. Sew C to D and both to another C as shown. Then sew B to the CDC square. Sew both to A. Repeat for the upper right but pay attention to the direction of the blocks.
Repeat the process in the bottom corners with the G block instead of A. Note the direction of the yellow star point.
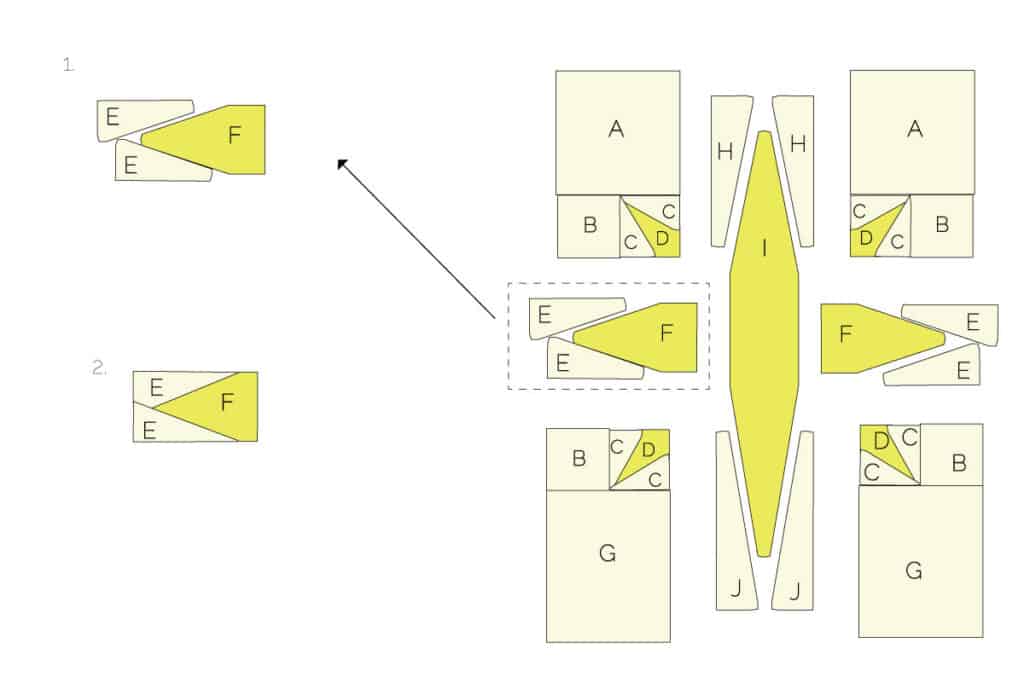
For the star’s middle points sew E blocks on the top and bottom of the F blocks as shown.
Sew both H triangles to the shorter point of the I block. The top of the star is slightly shorter than the bottom so be sure you have it placed correctly. Then repeat with the J blocks at the bottom of the star. Press.
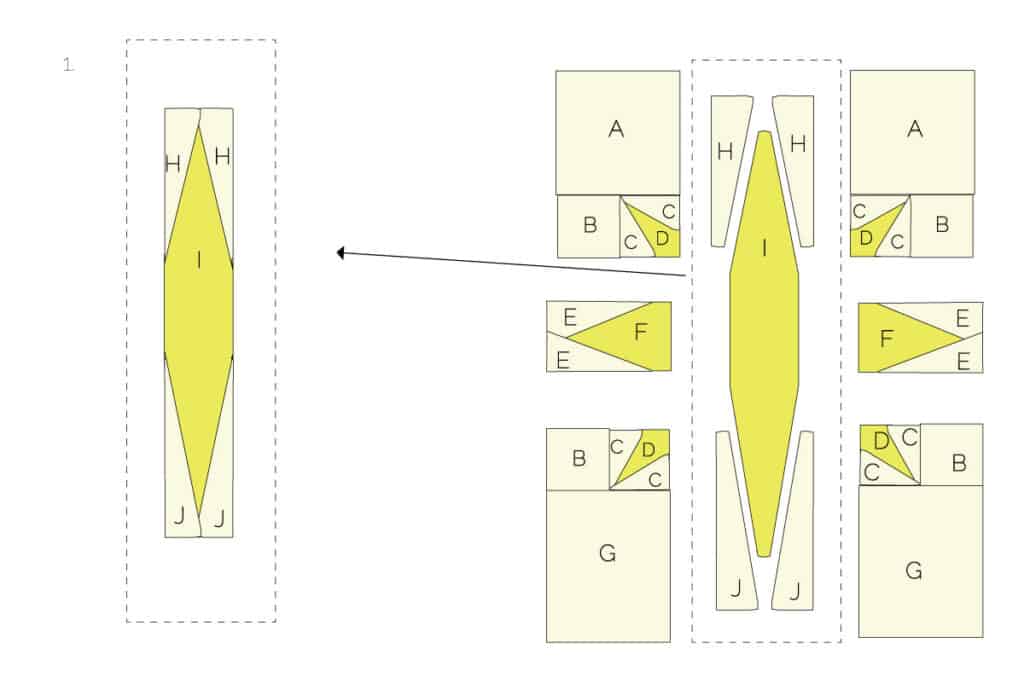
Now that all your pieces are in rectangles, sew the pieces together in vertical rows. Then sew the rows together to create your first star block!

Add a Christmas phrase
To add a Christmas phrase download the SVG you want using the download link below. There are a few choices to pick from. If you are pairing this block with the Baby Jesus in a manger block, you can coordinate the phrases so they connect!
- Silent Night, Holy Night
- All is Calm, All is Bright
You can put the text wherever you want – just adjust the size as needed. I add a 15.5″ by 3.5″ band to the side first. Then a 13.5″ by 3.5″ band to the top. I wrapped the text around the corner for a fun effect!
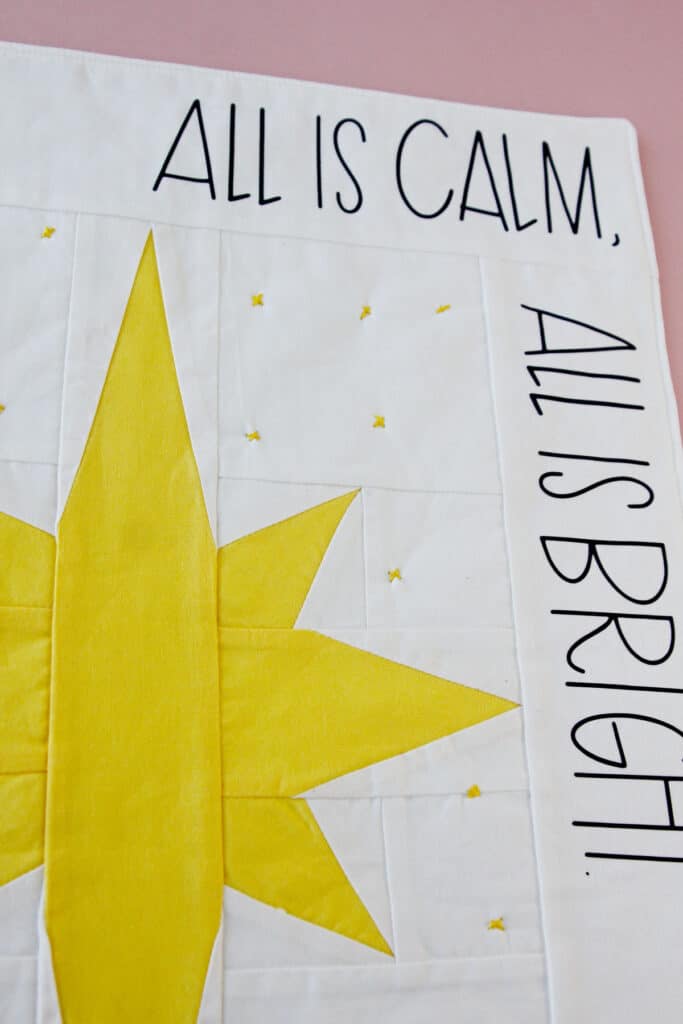
See the Christmas Manger Quilt Block post for more information on the iron-on vinyl and embroidery process! I made little X’s that match the yellow from the star to create a night sky!