Fabric in this post was provided by Raspberry Creek Fabrics.
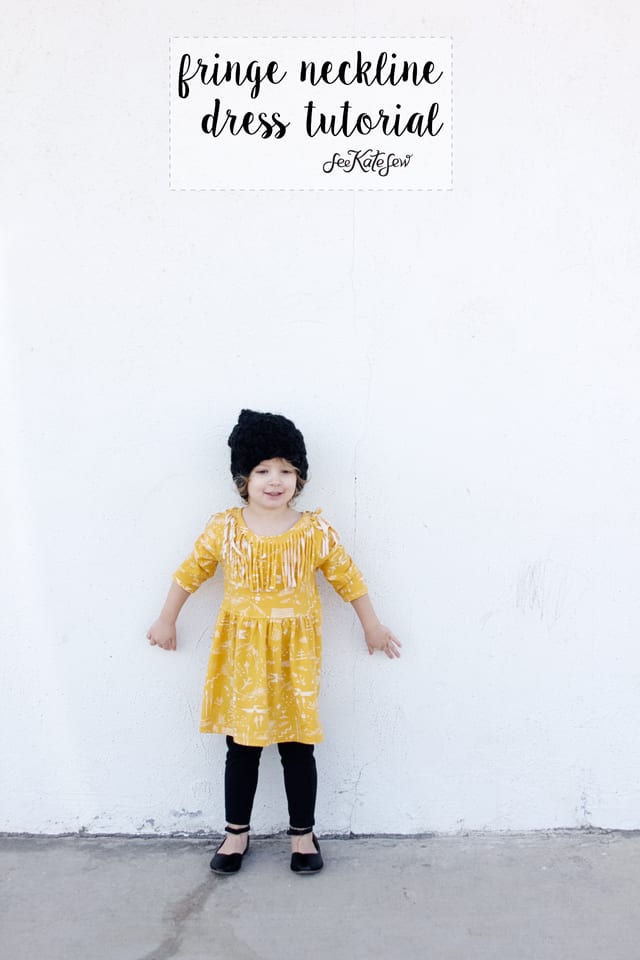
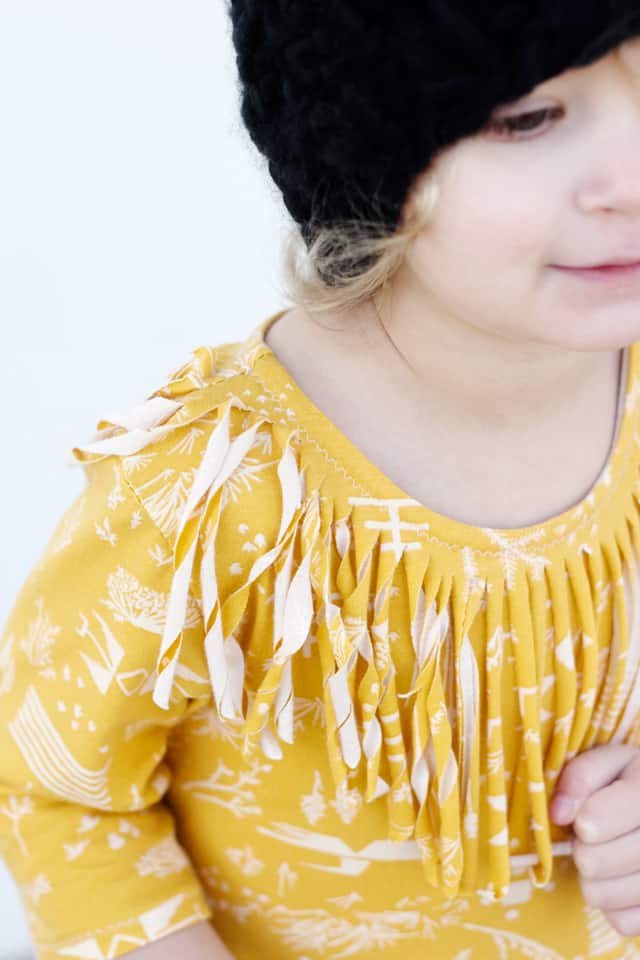
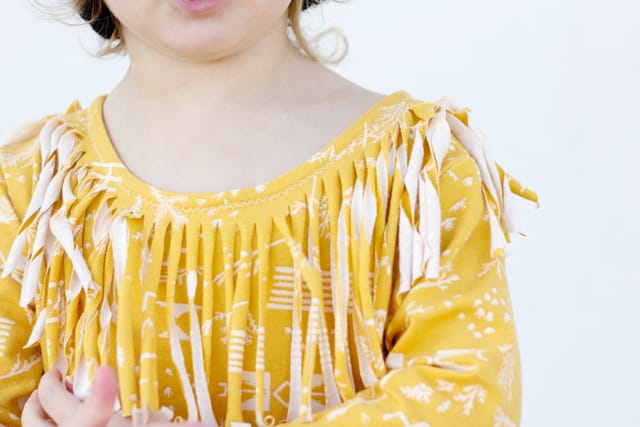
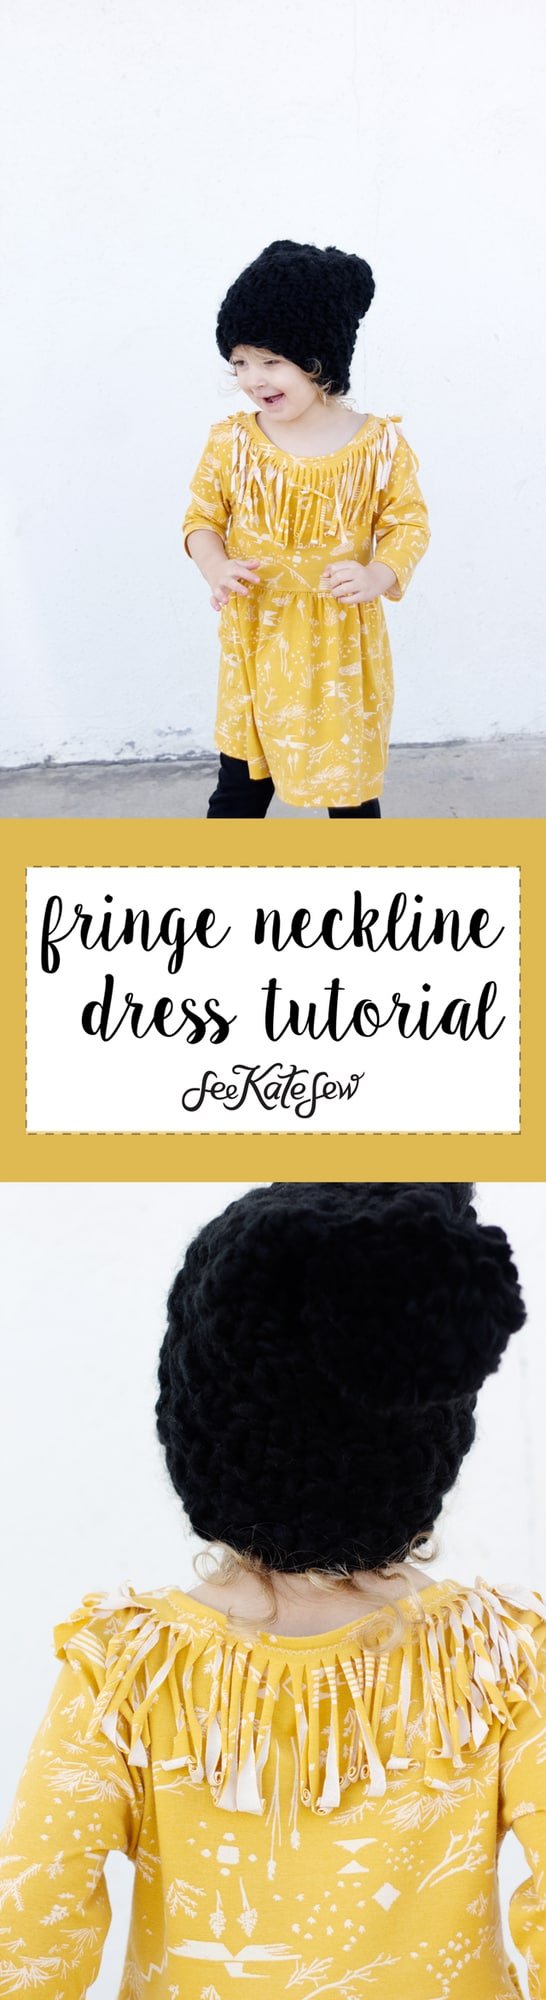
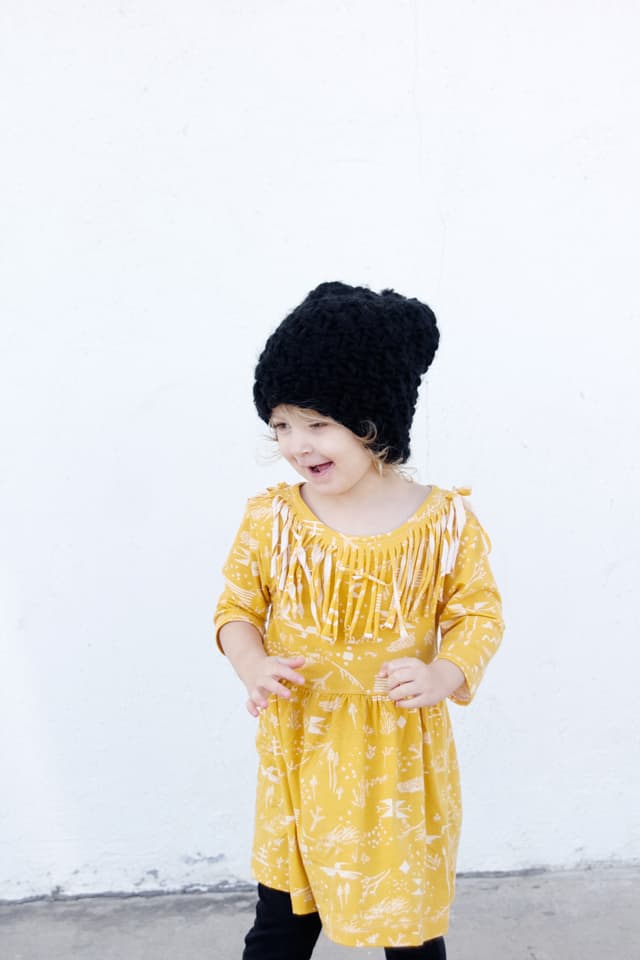
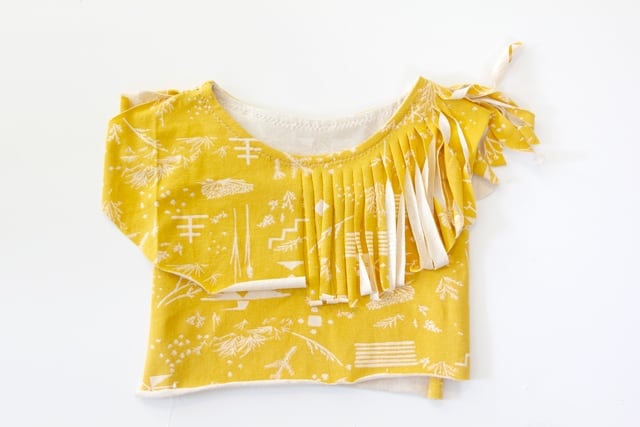
For the final day of Pippa Peplum week, I’ve got another hack for you! This is a really fun way to spice up your dress: with a FRINGE neckline! And it’s really easy, too! I told my daughter it is a built-in necklace and she loves it, even though it’s not pink! (WIN!)
And the sale ends tomorrow! So be sure to collect all the patterns you want before these coupons expire:
“PPW” – save $4 on the Pippa Peplum
“PPW2” – save $2 on the Pippa Add-on Pattern
“PPW3” – save $5 on the Penelope Peplum
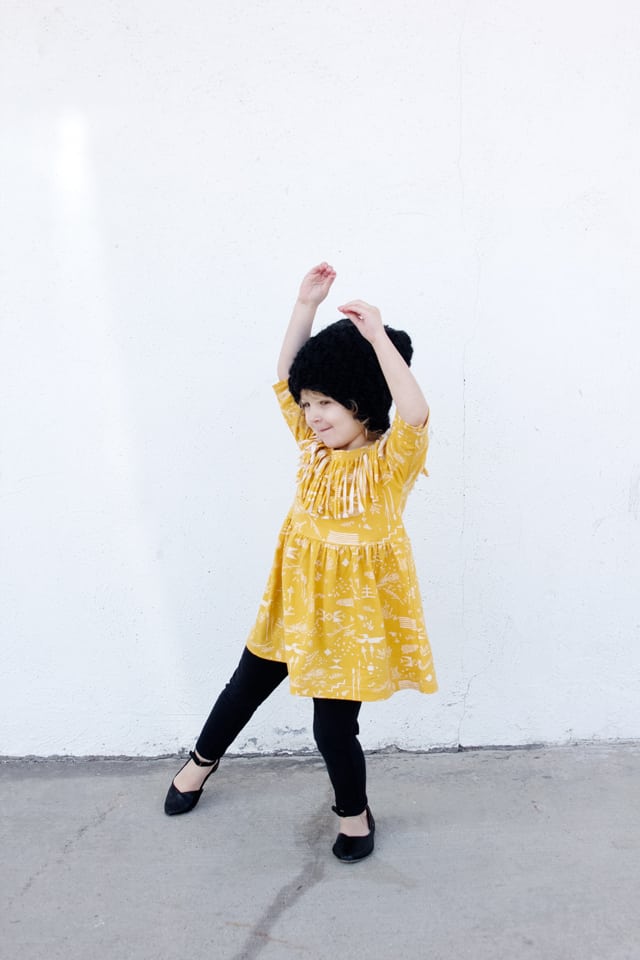
Since the Pippa peplum is a knit pattern, it’s perfect for adding fringe. And you’ll love how easy it is, too!
This fabric design is perfect for fringe also! I think it just goes! This fabric is from Raspberry Creek Fabrics on etsy, by April Rhodes for Art Gallery. It’s a nice 4-way stretch that you’ll love working with! I love spandex blend knits and recommend them to everyone, including those that haven’t worked with knits before. They wear and wash really well, too, just a good high quality knit!

If you’ve missed Pippa Peplum week, here are the rest of the posts:
Pippa Peplum Circle Top with a band (+ tutorial)


Fringe Neckline Dress Tutorial //
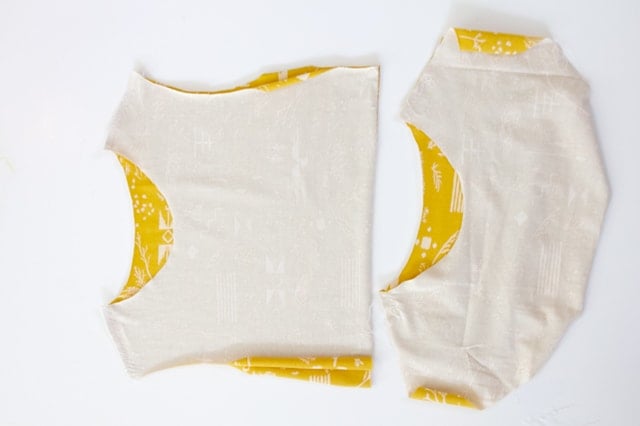
For this version of the Pippa Peplum you need the original pattern pieces.
I also lengthened the skirt of the top about 5-6 inches (for size 4T) to make this more of a tunic than a peplum top. You can use the dress add on, or any circle version as well, since this tutorial only uses the bodice pieces!
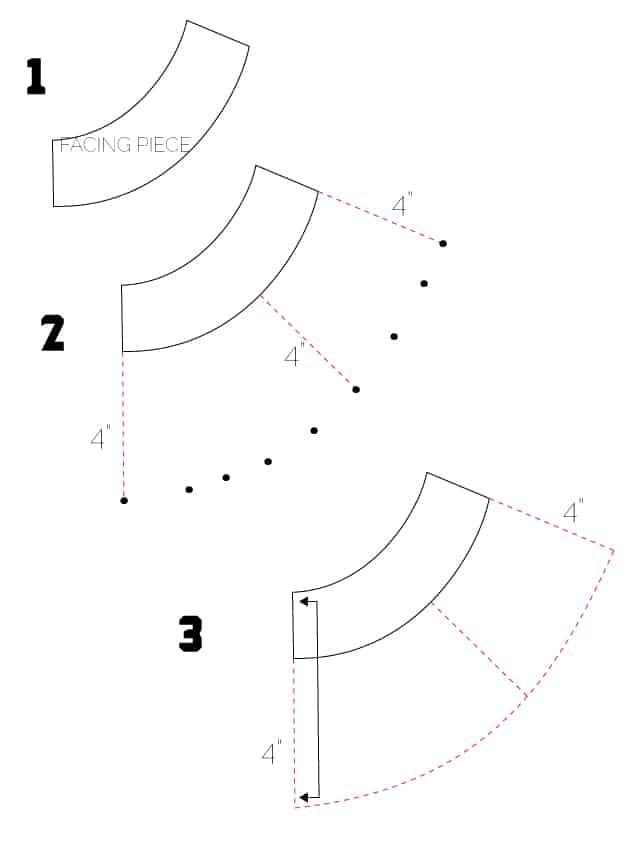
To create your FRINGE pattern piece, pull out your facing pieces.
I made a size 4T and used these measurements. If you’re making a smaller or larger size, you may want to adjust the length of the fringe.
Step 1: Lay your facing piece down on extra paper. Tape in place.
Step 2: Measure out 4 inches from the edge of the facing piece. Draw a line straight down from center fold and also out from the shoulder line. Create points along the line to help you connect the arc.
Step 3: Connect all points and finish your pattern piece. This will be your new facing/fringe piece. Cut 1 on fold.
Repeat with back facing. I used 3″ on the back to create a smaller fringe element. You can choose to do the same or make it all the same length!
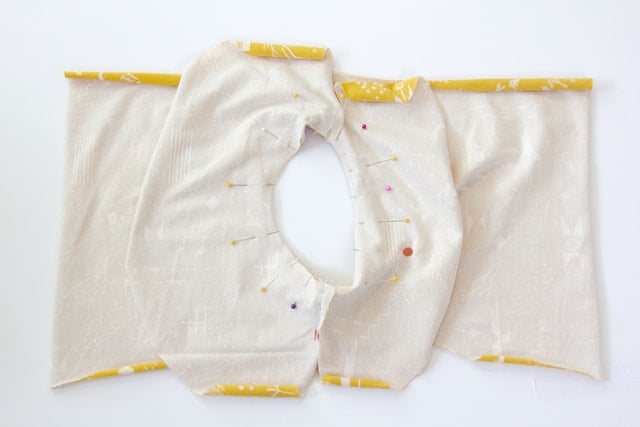
Now sew your front and back peplum pieces together at the shoulder seam with RIGHT SIDES TOGETHER.
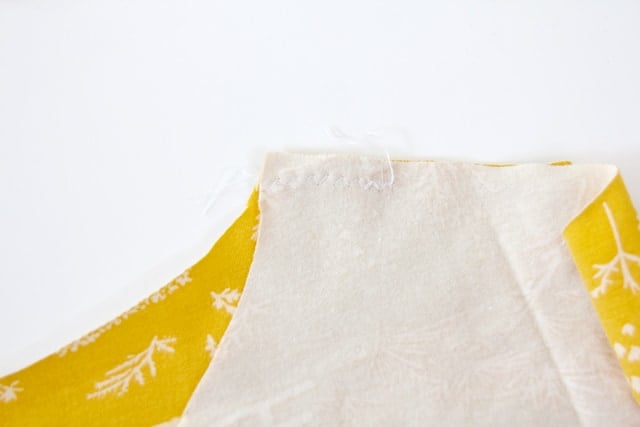
Sew the fringe pieces together starting at the inner neckline and doing out just 1″. Backstitch at the ends.
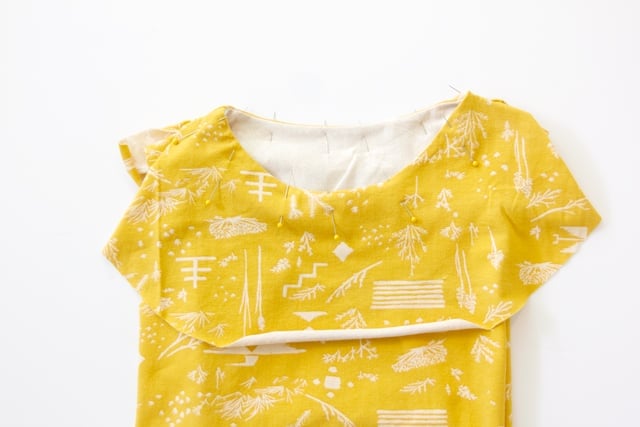
Open your peplum piece with wrong sides facing up. Pin the fringe element to the neckline with WRONG SIDES ALSO UP. This will probably seem wrong to you, since we usually do right sides together.
Sew the fringe element in place. I used a straight stitch for this seam (but a zig zag everywhere else).
Trim seam allowance down to somewhere between 1/4″ and 1/8″.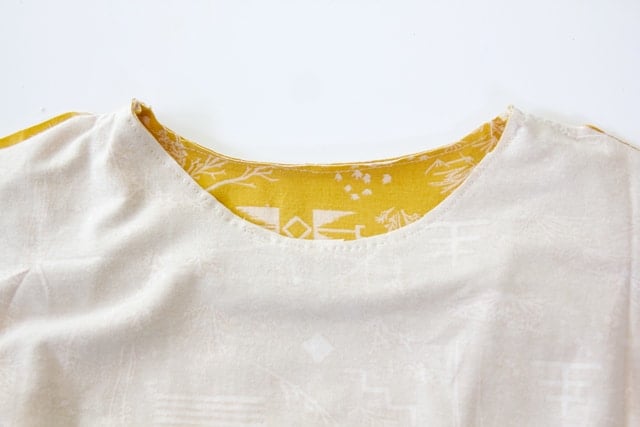
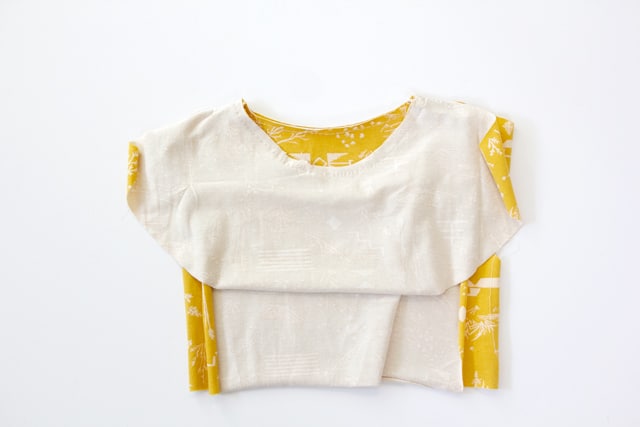
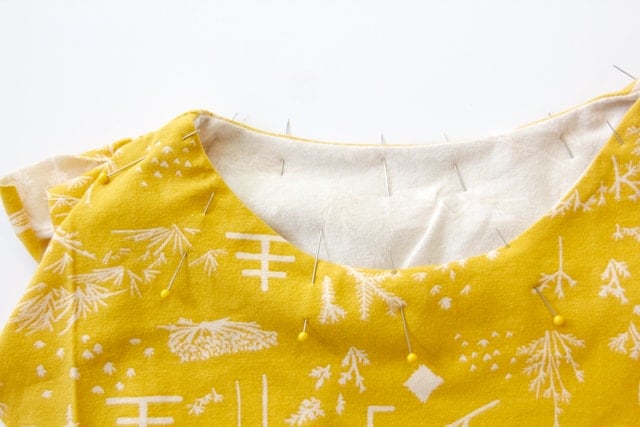
Fold fringe to the outside of the peplum and press well. Line up the neckline seam with pins.
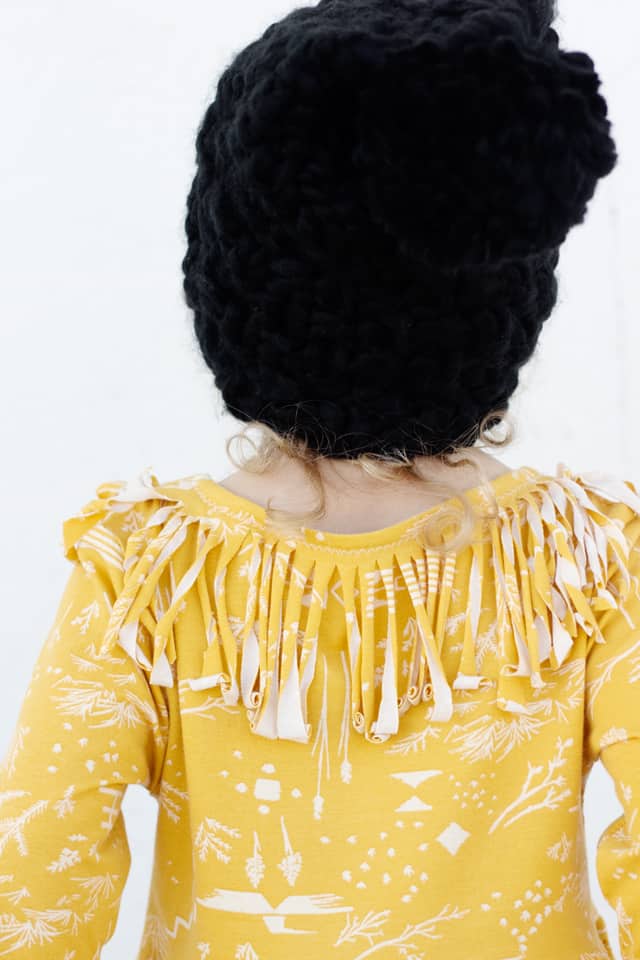
Look how pretty and neat the inside neckline is with this method!
Topstitch around the neckline with a zig zag stitch, at 3/8″. This is totally enclosing your previous seam.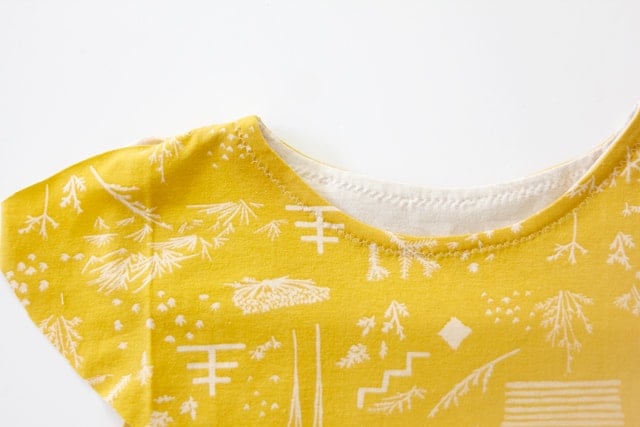
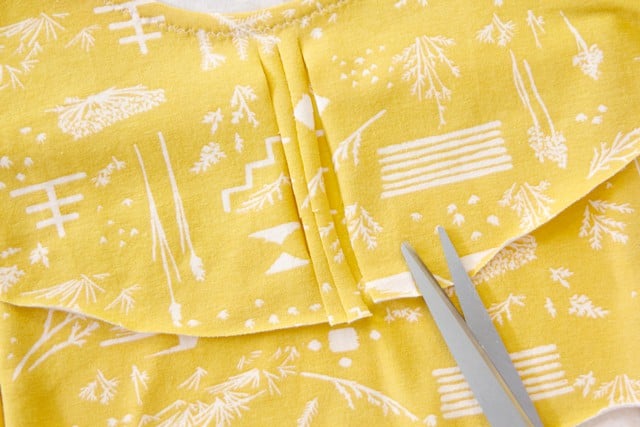
Now the fun part! Grab some super sharp scissors. I’m using 
Cut pieces about 1/4″ wide. You’ll have to make the outer edge wider than the inner edge to keep them all even. Cut cut cut and cut the back fringe also.
And now finish your Pippa Peplum according to the directions! It’s really that easy but packs a huge design punch! The best kind of project! I hope you enjoyed this and continue to share your Pippas in the Facebook Group and in Instagram with #pippapeplum!