• Skip to main content
  • Skip to primary sidebar
  • Skip to footer
  • Blog
  • About
  • Contact
  • FAQ
  • Sponsor

see kate sew

sewing, crafts, tutorials, DIY

  • Patterns
    • Free Patterns
    • Pattern of the Month
  • Tutorials
    • Accessories
    • Bags and Pouches
    • Clothing
    • Costumes
    • Crafts
    • Cricut Projects
    • Holiday
    • Household
    • Kids
    • Maternity
    • Quilting
  • Topics
    • Baby
    • Boy
    • Christmas
    • dog
    • Dolls
    • Easter
    • Girl
    • Halloween
    • Lookbook
    • Party
    • pet
    • Printables
    • Training
    • women
  • No Sew
  • Sewing 101
  • Sew4Good
  • Pet
  • Sewing Room
    • DreamBox
  • Reviews
Home
  • Patterns
    • Free Patterns
    • Pattern of the Month
  • Tutorials
    • Accessories
    • Bags and Pouches
    • Clothing
    • Costumes
    • Crafts
    • Cricut Projects
    • Holiday
    • Household
    • Kids
    • Maternity
    • Quilting
  • Topics
    • Baby
    • Boy
    • Christmas
    • dog
    • Dolls
    • Easter
    • Girl
    • Halloween
    • Lookbook
    • Party
    • pet
    • Printables
    • Training
    • women
  • No Sew
  • Sewing 101
  • Sew4Good
  • Pet
  • Sewing Room
    • DreamBox
  • Reviews

01.25

sewing 101: the easiest zipper

Welcome to See Kate Sew! If you’re new here, sign up for my email newsletter for access to free patterns, tutorials and all the latest sewing news! Tour my sewing room HERE!

If you’ve never sewn an invisible zipper, it might surprise you that it is the easiest kind of zipper to sew in. Yep, the easiest! Plus, it look so nice on your garment, the zipper just looks a like a seam! So neat and clean. Once you do one, you will never go back! Here’s a quick tutorial.

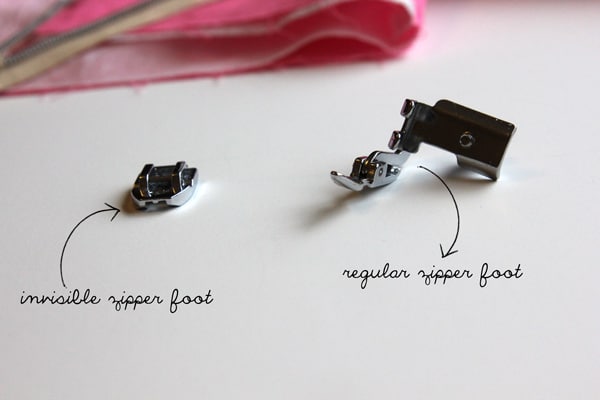
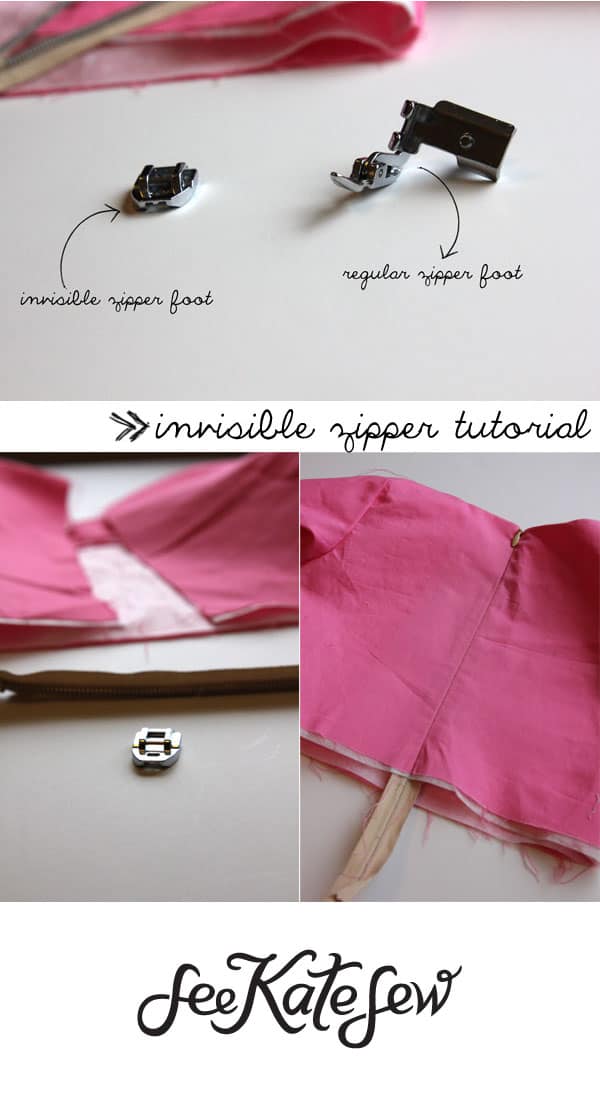
You will need an invisible zipper foot for this and a regular zipper foot is also handy. I have this invisible zipper foot
which I got in this 7-piece set(great deal!…comes with a regular zipper foot and a ruffler foot!)

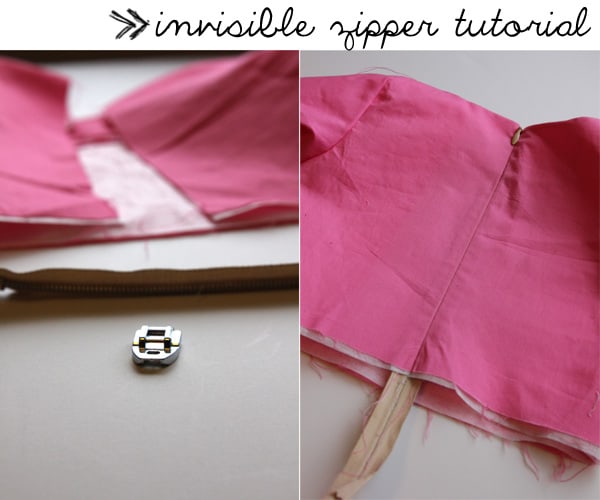
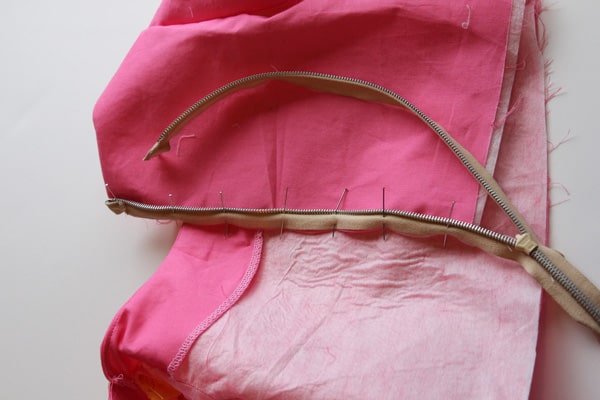
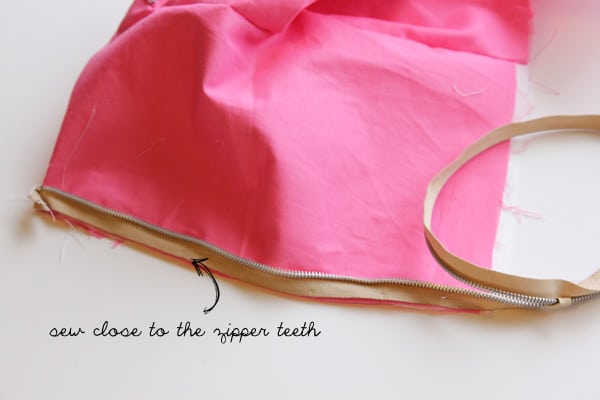
First, unzip your zipper and pin one side to the garment.

Using your regular zipper foot sew the zipper on as close as you can to the teeth.
This is just to keep the zipper in place when you use the invisible zipper foot. Now, change out your feet. The invisible zipper foot has two little grooves. Align your zipper teeth in one groove with the needle on the zipper side of the teeth.

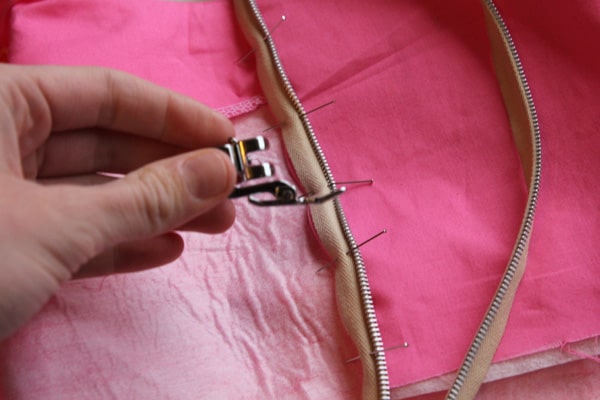
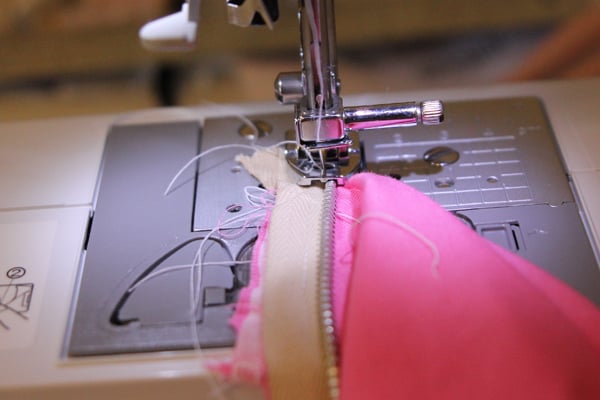
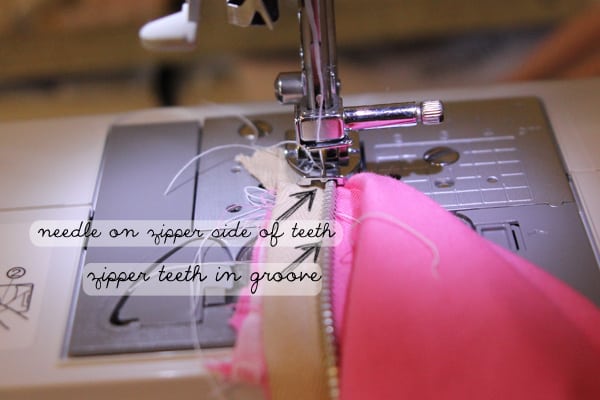
If you look closely, you’ll see that the zipper teeth are in the right groove and the needle is on the left of the teeth. As you sew, the stitch will be SO close to the zipper feet. Make sure your needle is centered and sew it up. You might be surprised at how easy this is!

Finish sewing to the end and repeat on the other side of your garment. Then zip it up!

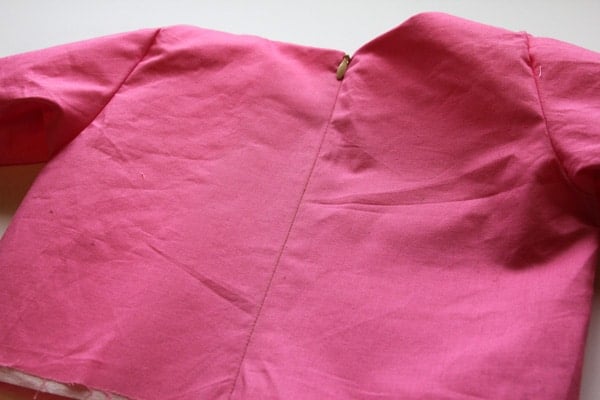
Slick! (If your zipper doesn’t go all the way to the bottom of your piece of clothing like this, you’ll have to just sew over the zipper teeth like in the regular zipper tutorial.)

What do you think? Ready to try an invisible zipper?

Ready for more sewing 101? Try making a welt pocket with this simple tutorial!

Invisible Zippers | See Kate Sew

11 Comments | Sewing 101

Exclusive Free PatternRuffled Apron

Sign up for my email newsletter and receive my ruffled apron pattern totally FREE!

We take your privacy seriously. See our privacy policy here. Unsubscribe at any time.

You may also like these posts...

Bernette B79 Sewing and Embroidery MachineBernette b79 Sewing Embroidery Machine Reviewbabylock melody!meet Melody! Baby Lock Melody Sewing Machine Reviewsewing101: add a seam to any pattern piece[make better ruffles]

Reader Interactions

11 Comments

  1. Jackie

    01/25 at 2:34 PM

    Thanks for posting this……zippers are my arch-nemisis! Printing it for next time I have to do one.

  2. sewingsanity

    01/25 at 2:50 PM

    Awesome!! I love the knowledge I have gained from reading blogs….this one will be in the bank forever!! Thanks Kate

  3. Sally Ann

    01/25 at 3:02 PM

    Great tutorial! I miss my invisible zipper foot and my industrial sewing machine from when I was a bridal seamstress. When all the dresses in the workline were finished, I’d do repairs on broken zippers in the store, and invisible zippers were my favorite!!

    Sally
    sallyannk.com

  4. Cation Designs

    01/25 at 5:19 PM

    I do love how invisible zippers look when inserted properly, but I always have issues with bubbling/rippling at the bottom, where they meet up with the rest of the seam. Could you maybe show that part as well, instead of just ending at the bottom of the scrap?

  5. LisaMarie

    01/25 at 7:18 PM

    I think they key for eliminating the bubbling/rippling where the seam meets the zipper is to sew the zipper in FIRST and then stitch the seam below the zip. Any unevenness from installing the zip will be eased into the entire lower seam. The sewing directions on an invisible zip recommend this method.

  6. Betty

    01/25 at 10:00 PM

    HI! These are really pretty photos. I think the invisible zipper foot is a big help!

    If you want to see a video tutorial on the same subject, I did a video on the same topic: http://youtu.be/lLKYnWg7_S8

  7. cestMoi Sandy

    01/25 at 10:07 PM

    Okay, I was with comment 7. I immediately said…”well how about the rest?”
    That is where it always goes wrong with me.

    This last weekend I even said to a friend…”are you sure that you dare to start on a zipper?” why not put an easy peasy elastic in it?” I will give her this tutorial and a link to it.

    Thanks

    Sandy

  8. projectdowhatyoulove

    01/26 at 1:35 AM

    Great tutorial! Thanx, I’ve never done a zipper and I’m totally a newbie at sewing so this is great! Thanx again!

    Natalie
    http://www.projectdowhatyoulove.wordpress.com

  9. L!$@

    01/26 at 1:49 AM

    I’ve been wanting to try a zip. Will have to build up to it I think. But this makes it seem so easy!! :D

  10. calinai

    01/26 at 5:25 AM

    nice!

  11. L2L

    02/04 at 12:02 AM

    wow, never thought to sew down the zipper before putting on the invis. foot. Can’t wait to try that!!!

Primary Sidebar

  • Facebook
  • Twitter
  • Instagram
  • Pinterest
  • Email

Exclusive Free PatternRuffled Apron

Sign up for my email newsletter and receive my ruffled apron pattern totally FREE!

We take your privacy seriously. See our privacy policy here. You can unsubscribe at any time.

Don’t miss these popular posts!

easy baby dress pattern for the summertime

easy baby dress pattern for the summertime

modern ombre + b/w triangle quilt tutorial + pattern

modern ombre + b/w triangle quilt tutorial + pattern

Fabric

Quilted Cosmetic Case Kiss Me KateKiss Me, Kate FabricOne Hour Granny Square Quilt Tutorial | See Kate SewModern Granny Square Quilt Whole Cloth

Pattern Hacks

Easy Baby Summer Dressthe EMMA pattern | See Kate SewThe EMMA Dress

Footer

Hello friends!

My name is Kate, a twenty something fashion lover and mother of two. When I’m not chasing kids you can find me at my sewing table or daydreaming up new designs. You can read more about me here. Thank you for visiting!

8a918f8da8e0e69102dc0f33a718de85a99c31a57283e0e3e2

FOLLOW ME HERE

  • Facebook
  • Twitter
  • Instagram
  • Pinterest
  • Email
  • Blog
  • About
  • Contact
  • FAQ
  • Sponsor

Copyright © 2023 See Kate Sew  •  All Rights Reserved  •  Privacy Policy  •  Site Design by Emily White Designs