This post is sponsored by Fiskars.
I always recommend refashions for beginner seamstresses, they are always fun (even if you are advanced) and it’s something you can’t really mess up! I love a beginner project that gives you some confidence, a quick final project to wear and a sense of ownership. These 5 refashions are super simple to make and you’ll love wearing them. My winter-to-spring wardrobe is just a little bit cozier now.
I partnered with Fiskars to create these 5 pieces, I used my sharp and shiny “toolkit” that I’ve been collecting. Fiskars has provided all of the supplies in this post. Every time I get a new pair of scissors from Fiskars I am so impressed with them I just want more! They seem to have an endless supply of scissors/shears and other cutting accessories. I’m always spotting new colors and designs!
I used store-bought sweaters for all of these refashions. You can probably raid your closet or search a thrift shop to find a good base, too! Starting from a pre-made item gives you a solid base to start with which is built in confidence. Whatever you add to it is up to you with super low failure risk! But….feel free to knit your own sweater and then refashion it ;)
Sweater Refashion #1: Polka Dot Pom Poms!


Materials//
–Fiskars Ultrasharp Thread Snips
–1/2″ Pom Poms
-white thread
-hand sewing needle
–black sweater
I have been wanting a pom pom sweater and I thought why not mix it with my love of b/w and polka dots! So I used white pom poms on a black sweater and I’m in love with it! I love how classy this sweater looks even though it’s super playful.
This project is way easy, too!
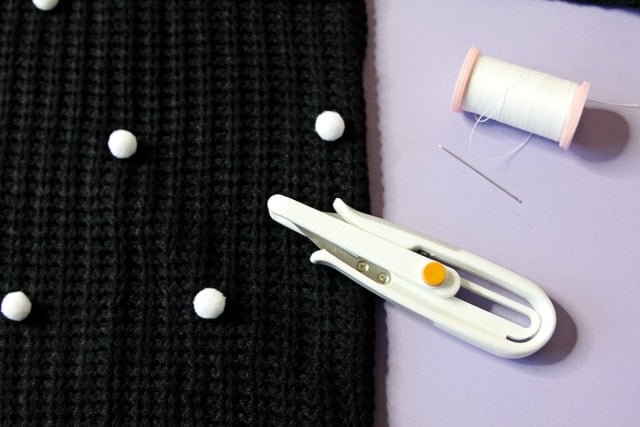
I was super excited to try the Ultrasharp Thread Snips, I think every seamstress needs a good pair of snips and this one has a built-in cover which makes me love it even more. I always make sure my sharp things are up high before leaving my sewing room, but it gives me extra confidence when the sharp part is also covered. This one has a built-in cover, you push the orange button to slide it on and off.
Instructions//
Lay the sweater down flat and set the poms on the sweater OR mark where you want your poms to go. If you plan on sitting on a couch to do this later you can use little stickers or something to mark your spots. I wanted a real polka dot pattern so I sewed them on accordingly. I tried the sweater on and marked my bust points before placement so I wouldn’t have awkwardly placed poms.
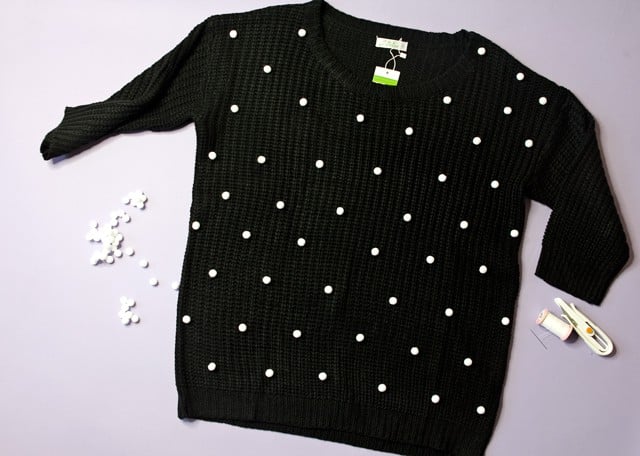
Double thread your needle and tie a knot at the end. Sew through the thick middle part of the pom twice before sewing a knot. Tie the thread off and snip the threads!

This is a perfect Netflix and sewing project! Grab your materials, stick them all in a bowl and cozy up on the couch.
Sweater Refashion #2: Lace hem add-on
Adding a little bit of lace to the bottom of this sweater gave it just a little extra something! The sweater is already pretty long, but I think this would be cute with a shorter sweater also! I love how well this lace matched the sweater’s yarn, but how cute would a high contrast like black be?

Materials//
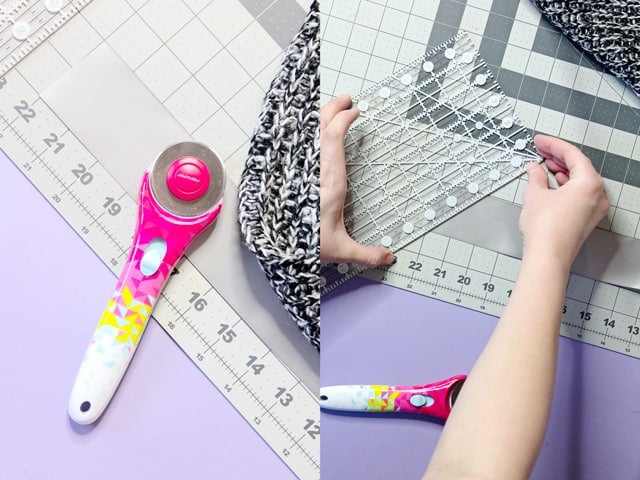
–Fiskars Rotary Cutter
–pink cable knit sweater with a split hem
–6-8″ Lace Trim
Instructions//
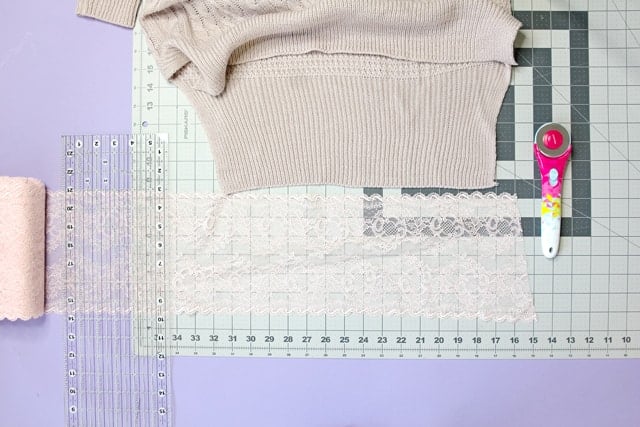
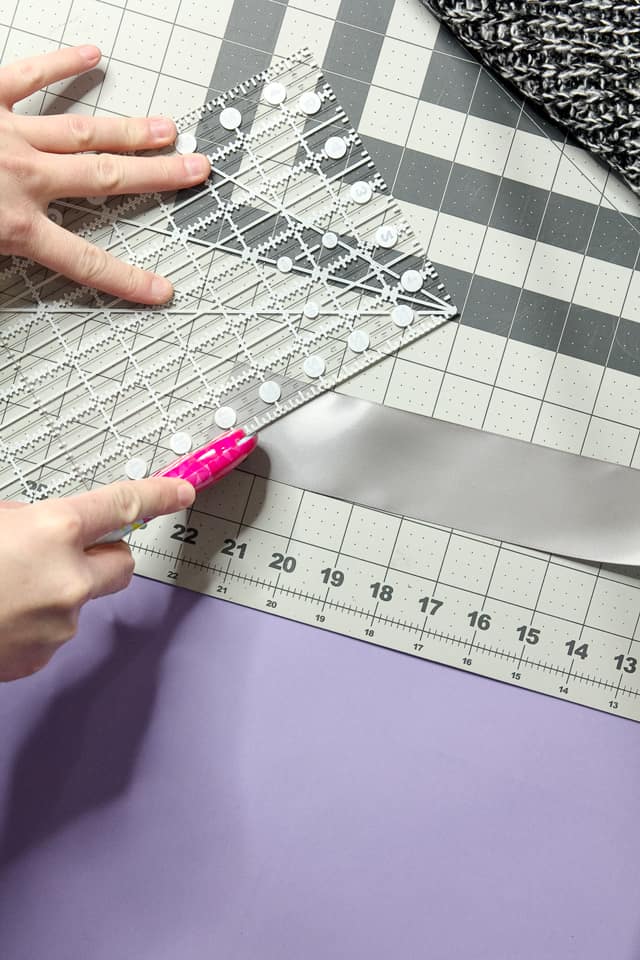
I used my cut new quilty rotary cutter for this one. I’m all about cuteness when it comes to sewing supplies. The pattern on this makes me want to create! I often think of a rotary cutter just for quilt projects but they are awesome for any projects that just need a clean cut, especially when the fabric is varied like on this lace trim. So it’s just a few quick cuts but the ease of the rotary cutter makes all the difference here!
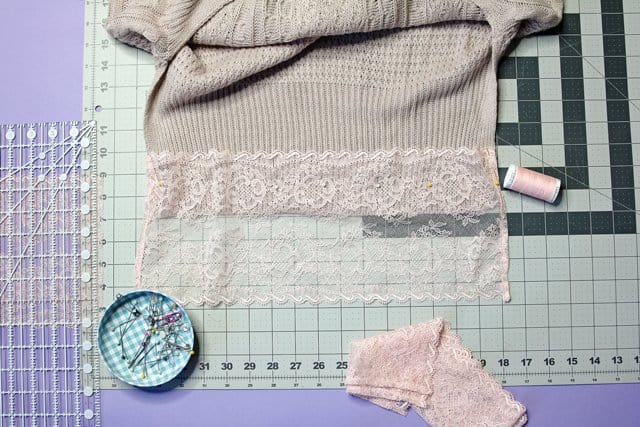
Lay your sweater out and unroll the lace to match up with the back hem. Cut the lace 1/2″ longer on each side of the sweater. Depending on the type of sweater you are using you may want to stretch out the hem a bit as you measure. The one I’m using is ribbed so I wanted a little more lace, if it ruffles a bit after I sew it, even better!
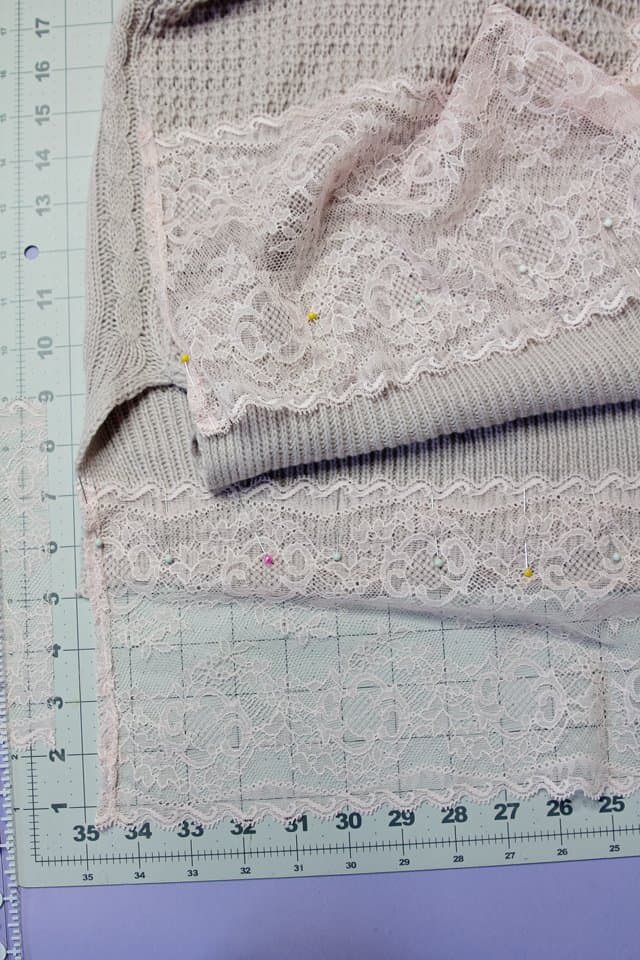
Press the raw edges under 1/4″ with the iron on a low heat setting. Be sure not to hold the iron too long so the lace doesn’t melt.
Press under another 1/4″ and finish the edge with a sewing machine using a narrow zig zag stitch. Repeat on other side.
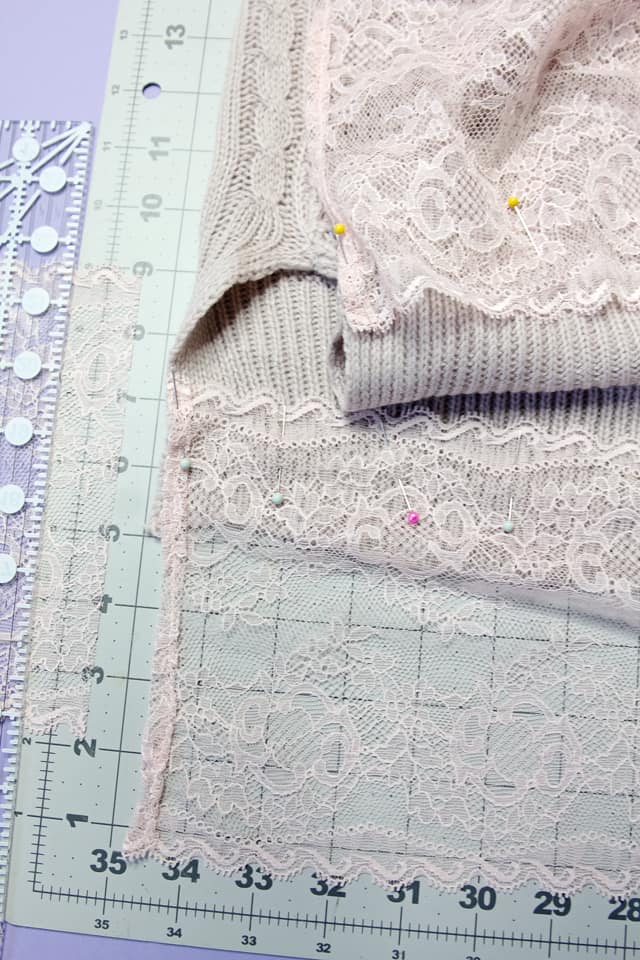
Pin the lace to the inside of the sweater’s hem. Use a zig zag stitch to attach the lace to the sweater at the top of the lace. You can decide how much of the lace you want to show based on where you attach it.
To ensure a straight hem, use a rotary mat. Line up the sweater hem with a line
Repeat with the front hem!
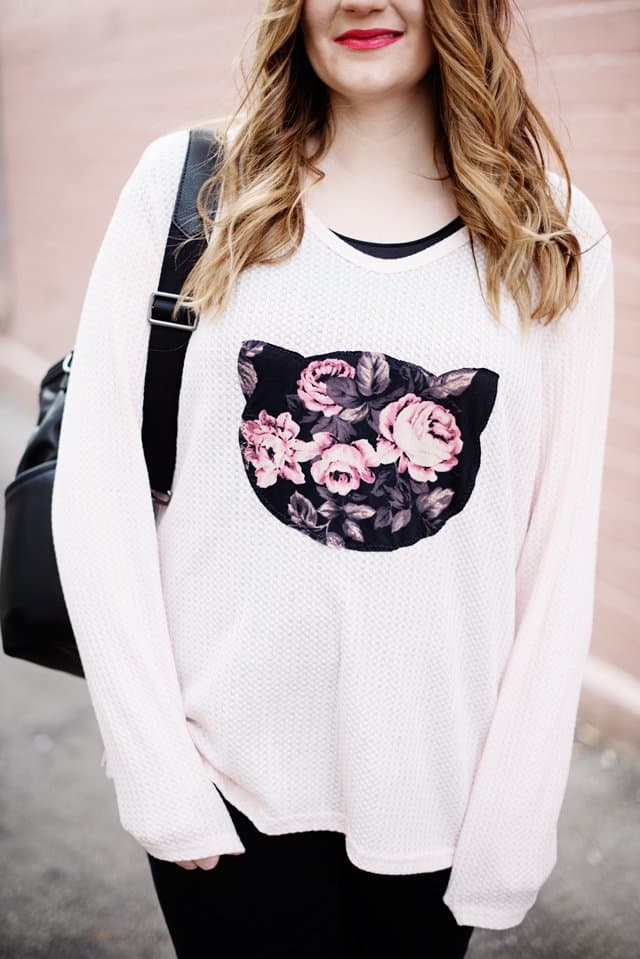
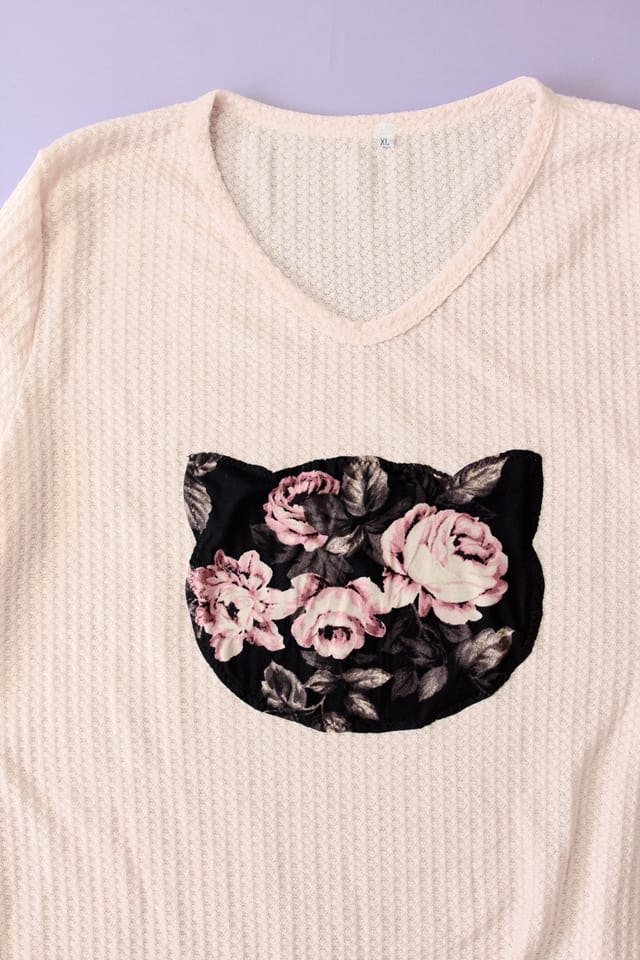
Sweater Refashion #3: Floral Cat Face Sweater
This sweater is perfect for a lazy Cat-urday! Soft knit fabric on top of a soft knit sweater works great because it stretches with the sweater! I love the long sleeves on this one and how it pairs so well with black because of the floral! Give me that cat sweater right MEOW!

Materials//
–Amplify Fabric Shears
–pink sweater
-floral knit fabric
–spray adhesive
Instructions//
Print out the cat outline download, which will fit on 1 page of letter or A4 format paper.
Spray a quick layer of fabric adhesive on the back of the paper and fuse it to the back of the fabric.
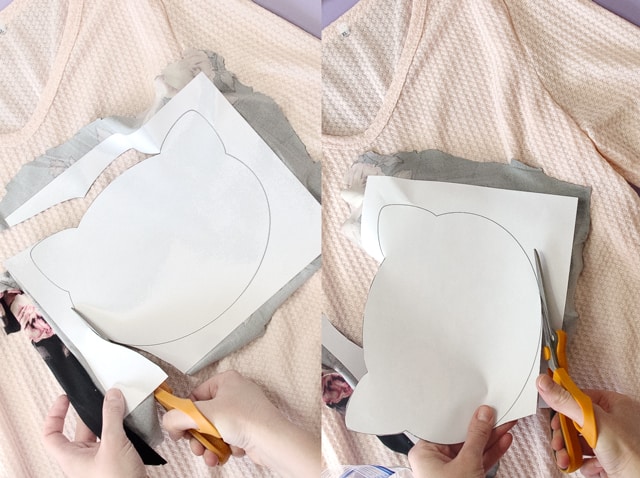
Ah you shouldn’t be using fabric scissors on paper!! But this will be just really quick, I promise! (Sorry Mom!!)
Cut out the cat face with the shears and then peel the paper off. Using the paper as a pattern fused to the fabric will help you get really crisp edges.
Place the cat face on your shirt and pin around the edges.
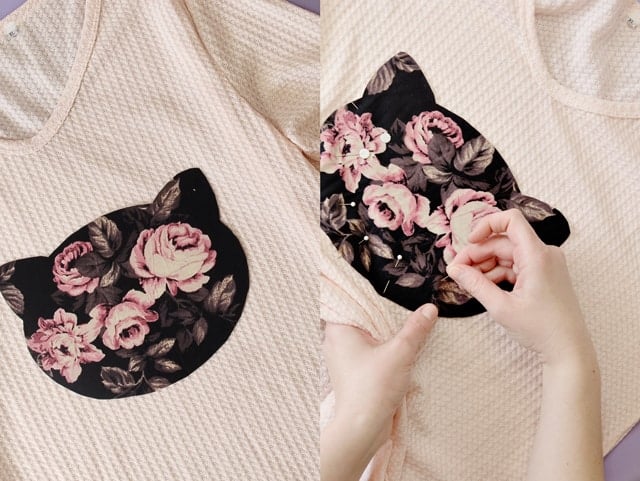
Use a zig zag stitch with matching thread all the way around the face.
Cute! Now give it a little press and you’re done!
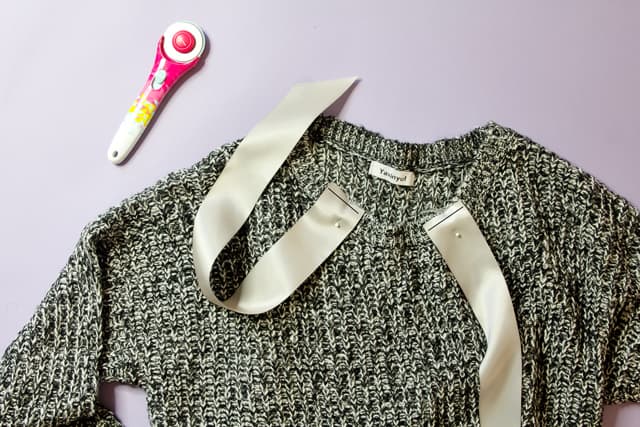
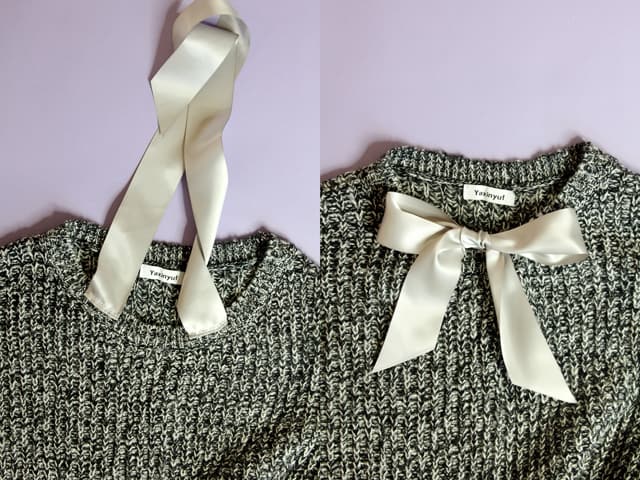
Sweater Refashion #4: Ribbon Tie front
I don’t think shirts with ties in the front get enough attention! I loOooove them! I think they are so cute, so Sailor Moon/preppy/cutesy and eliminates the need for a necklace! I can never have enough. So this sweater refashion takes a basic round neck sweater and creates a new shape with a tie up front. The front ties into a bow.


Materials//
–Quilty Rotary Cutter
–grey sweater
–fray check
–satin ribbon 2″ wide
Instructions//
To make this sweater, cut 2 pieces of ribbon 20″ long.
Use the rotary cutter to cut a 90* angle on 1 edge of each ribbon piece. I like to line up the ribbon edge in a 2″ square and then cut along the diagonal to get the angle right. Dab fray check along the edge of the ribbon and let dry.
When the fray check is dry sew the ribbon face down about 1-2″ from the center front neckline edge. Then flip the ribbon UP and stitch again, hiding the ribbons raw edge.
Tie your ribbon together to create a sweet bow! This refashion also creates a pleat in the front of the sweater when the ribbons are tied! Cute!
Sweater Refashion #5: Felt Lip Motif Sweater
Lips are totally not just for Valentine’s day anymore and these were really fun to cut out with red felt! To get the crisp edges I share a scissor trick below but also don’t skip on cheap felt! The firmer the felt the better! Pucker up and let’s get cutting!


Materials//
–Total control scissors
–white sweater with a smooth surface
–red craft felt
–permanent fabric glue
–lip template
Instructions//
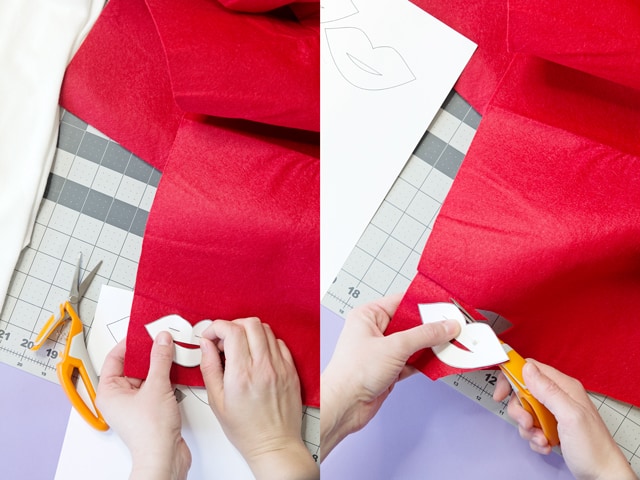
Download the lip template and print it on cardstock. Pin the template to felt and cut it out. The total control scissors are held with your thumb in control so you get a small cutting edge for curves. I love these little scissors. To get the cleanest cut, push down halfway with the scissors and then butt the scissors into the cut before finishing your scissor grasp (is that a term?).
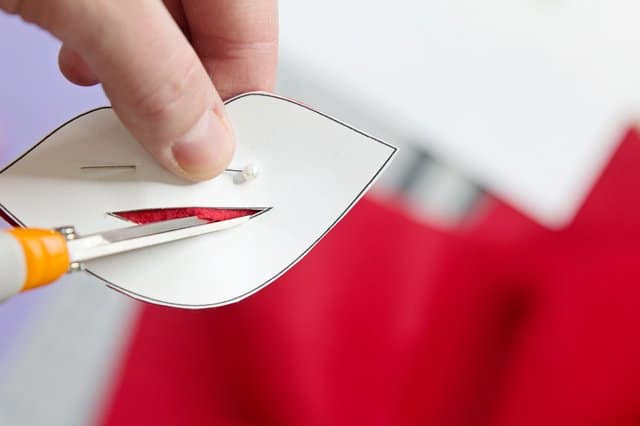
Fold the lips a bit to cut into the center and then repeat around the open mouth part.
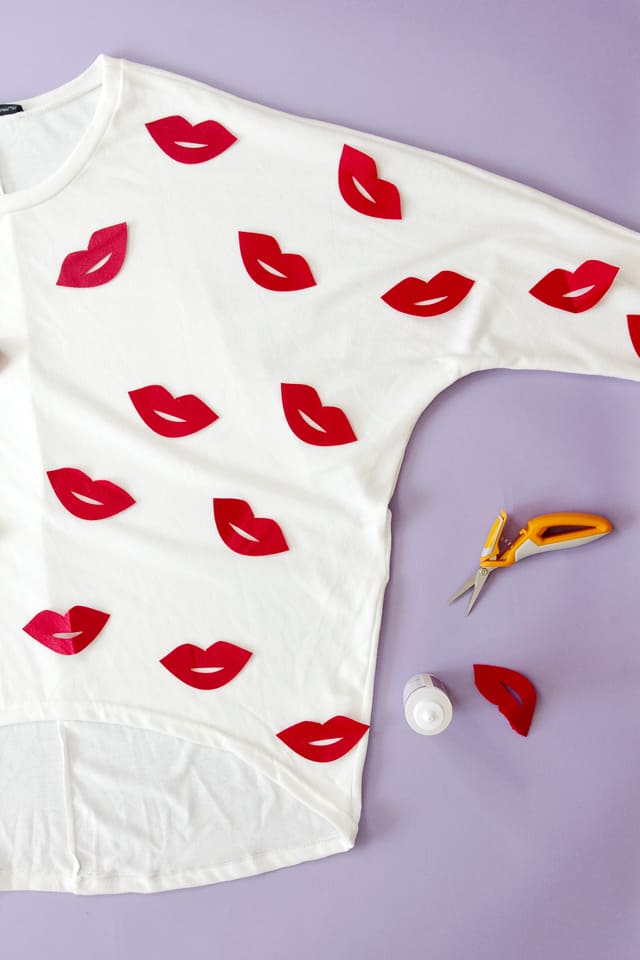
Repeat 20-30 times depending on how lippy you want your sweater!
When you’re ready to attach, arrange your lips however you want! The only advice I have is the angle them around the bust area, and make sure you don’t stick them smack on the bust.
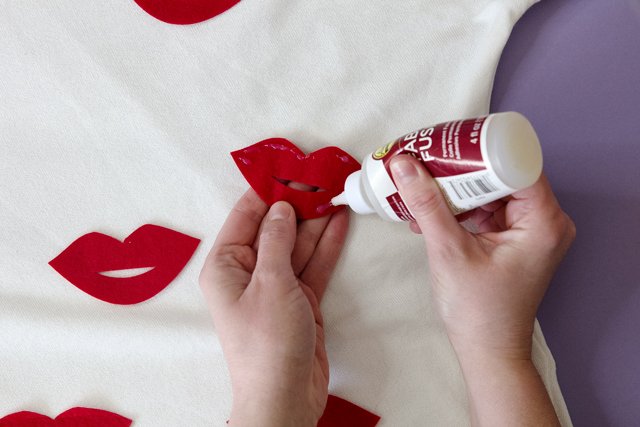
Use permanent fabric glue to adhere lips to sweater.
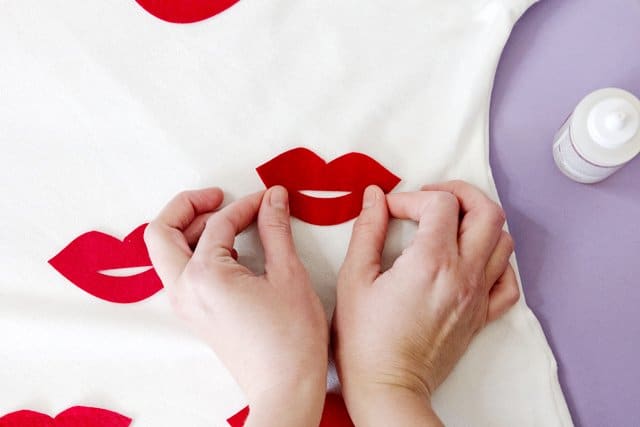
Let dry and you’re done! Muah!
If you liked this post, check out 10 ways to refashion a tshirt and 5 thrift store sewing hacks!