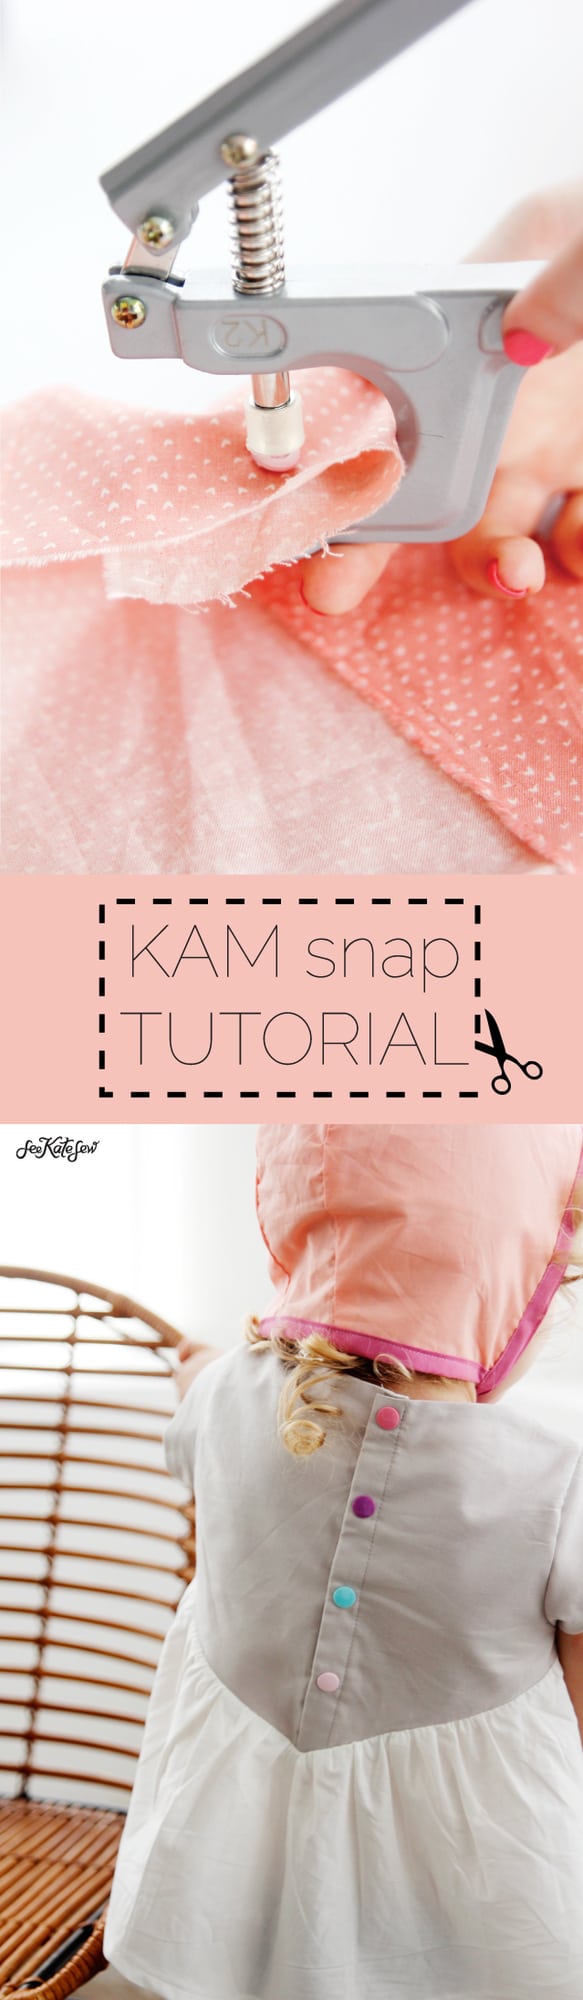
I got a new snap placer a few months ago and it has CHANGED MY LIFE! This post has a KAM snap tutorial – you’ll be amazed at how easy this is. I’ll show you how to use these in clothing, but you can also use them in bags and more.
I think it’s been about 6 months and I’ve been using my KAMsnap placer in all sorts of tutorials.

See the Oilcloth Changing Mat that snaps together and the Bandana bibs that snap together in the back!
KAM snaps add a bright pop of color to your project.

I’ve been looking for excuses to add snaps to projects because the KAMsnap press is so much better than any other snap placer I’ve used! I have one of those metal ones they sell at the fabric store and it has always given me a headache.

But this one is so simple! It comes with everything you need, including the awl and snaps. And the cute pops of color can make any project more fun.
KAM Snap Tutorial
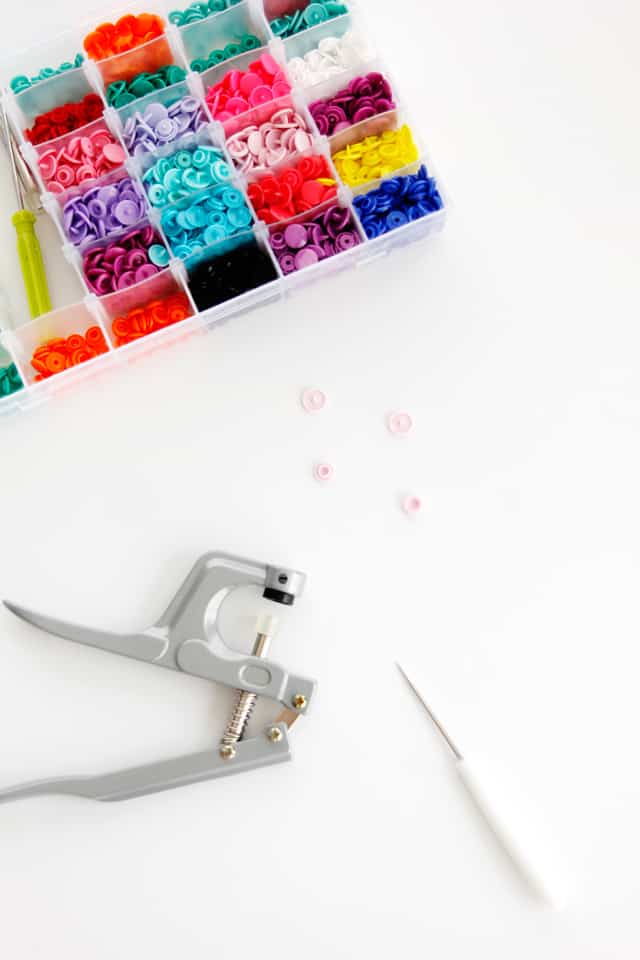
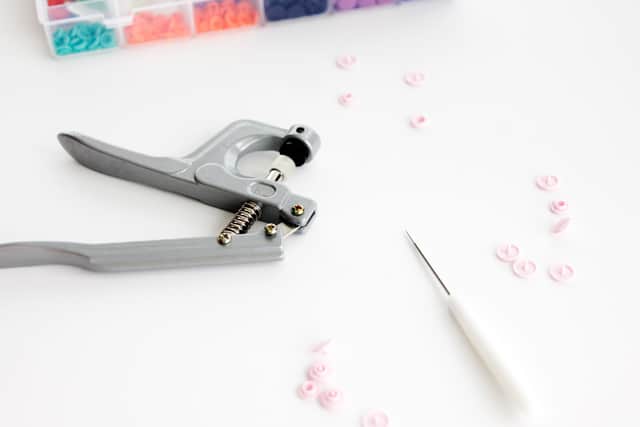
Materials:
–Snap Placer Kit
–Snaps (they also come in cute shapes like hearts and butterflies!)
-Project ready for snaps
*Size 20 is kinda the standard snap size. The Snap kit that I linked to includes size 20 and 2 other sizes.
KAM SNAP INSTRUCTIONS
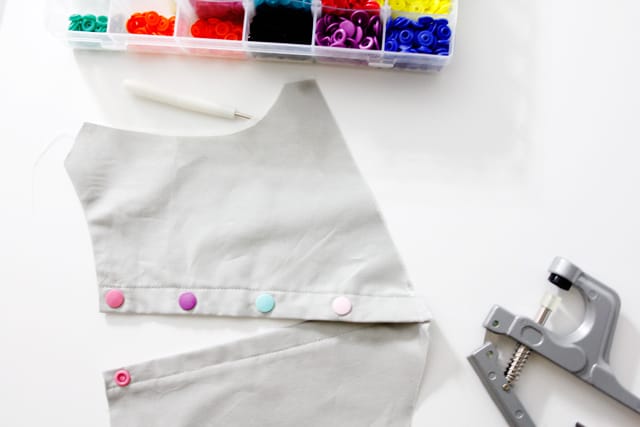
I’m going to show you this on a scrap of fabric, and then I’ll show you how to adjust the Manhattan Blouse to have space for a snap panel along the back.
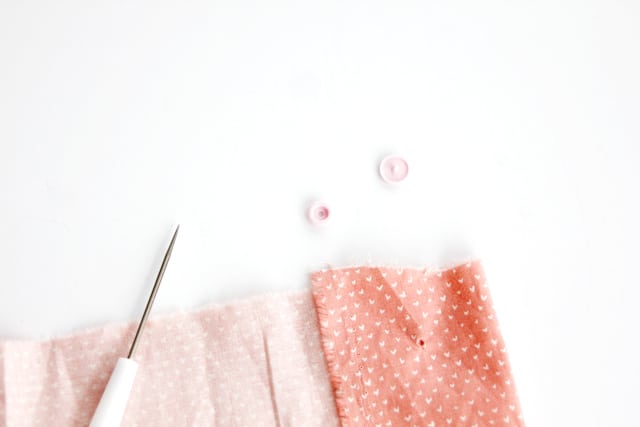
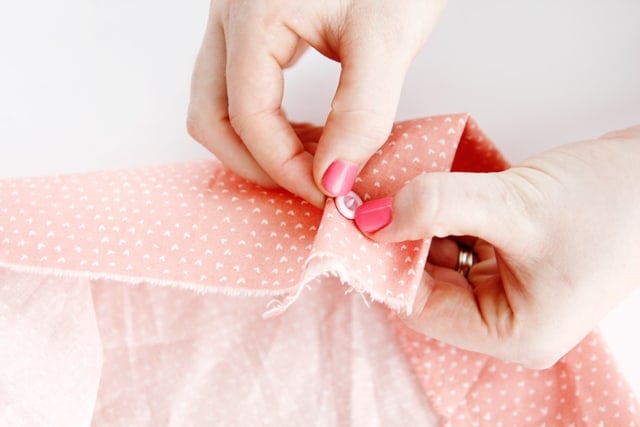
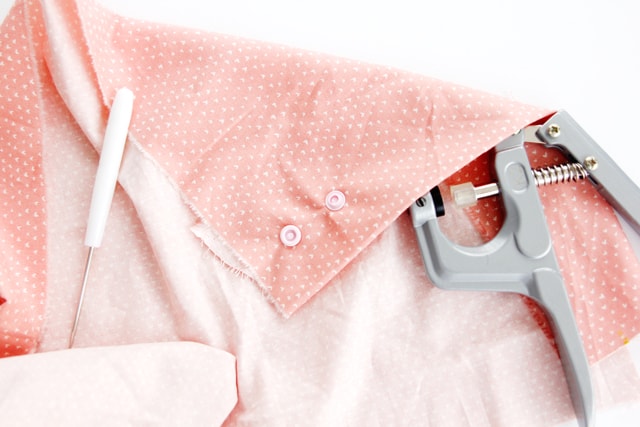
Pick out 4 pieces from your snaps: 2 snap pieces with prong side(don’t step on these, by the way…) and 1 female socket and 1 male socket.
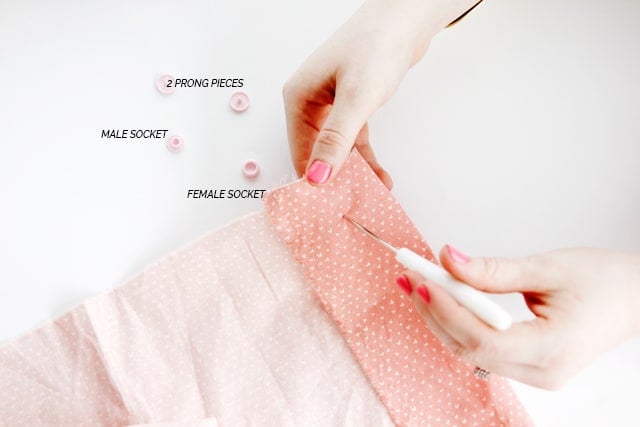
Use the awl (comes in the kit) to poke a hole in your fabric. 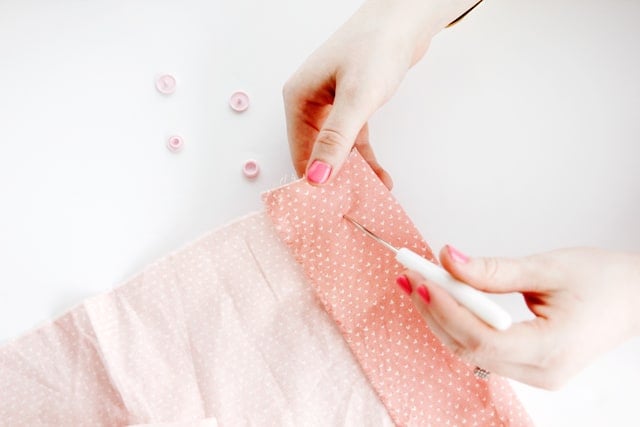
Poke through all the layers.
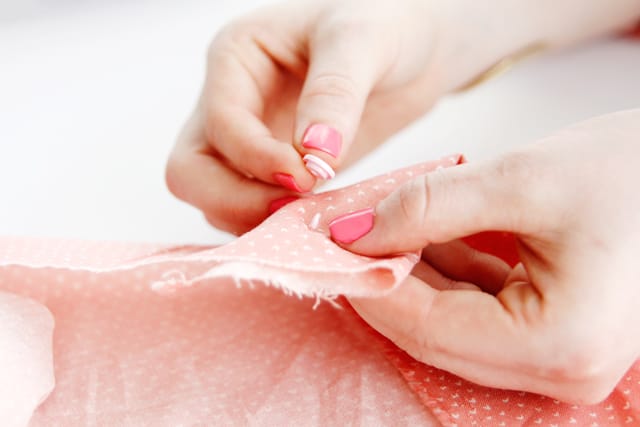
Stick a PRONG piece through the hole.
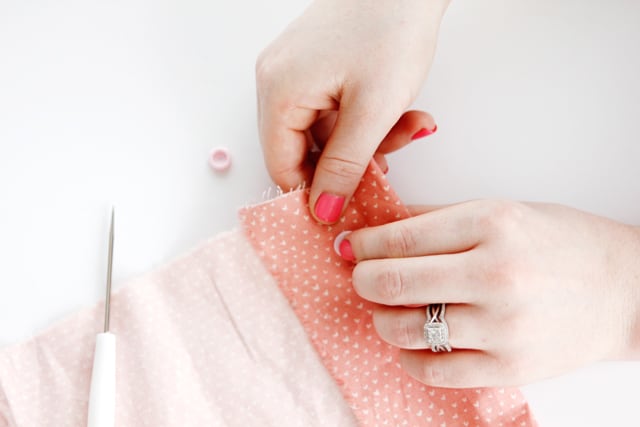
Match a socket piece on the other side.
Slip your KAMsnap press over both snap pieces.
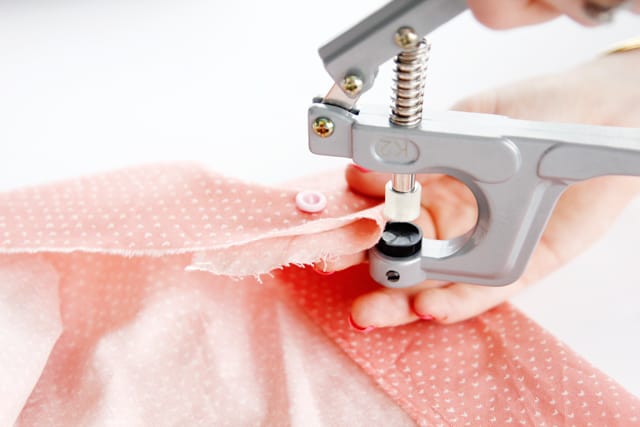
Center the bottom prong piece in the black base on the press.
Sandwich the clear rubber piece over the socket and press down.

Snap! So easy.
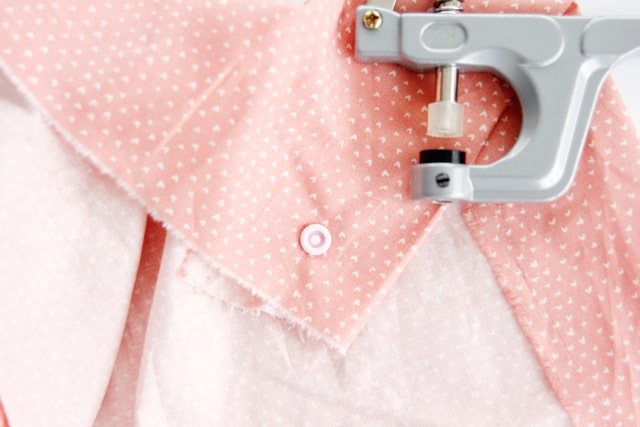
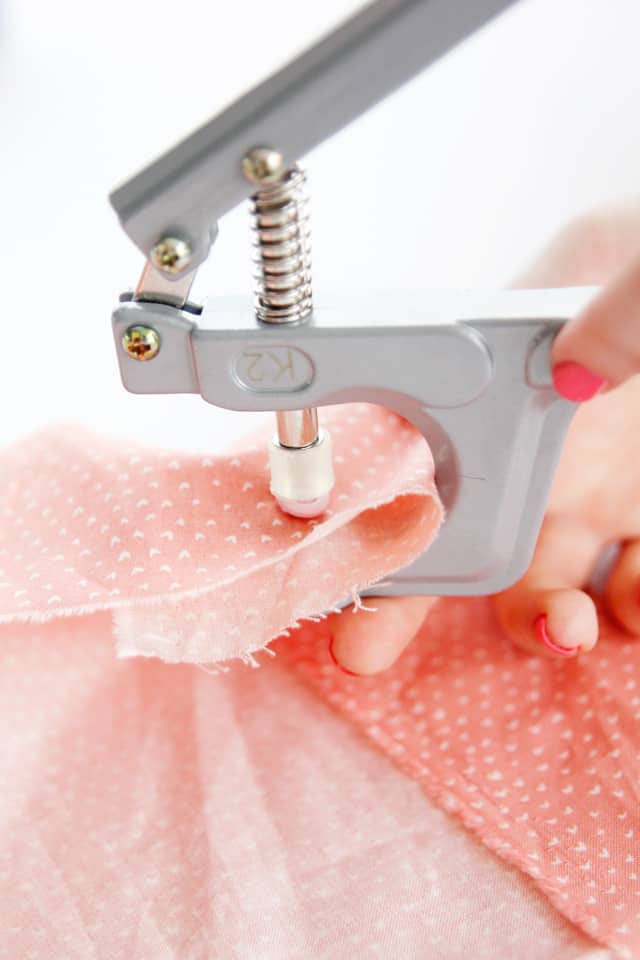
Repeat the process with the other socket side. Make sure you pay attention to the layers of your fabric and how they will snap together. You don’t want to put the socket on the wrong side of the fabric.
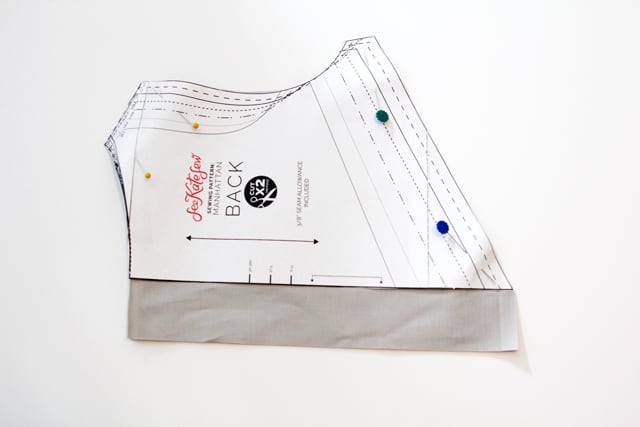
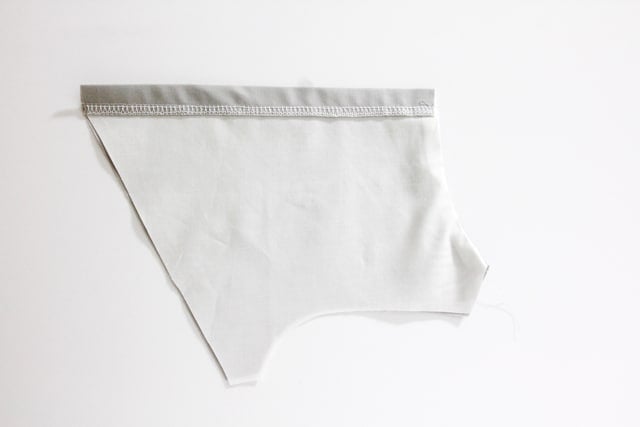
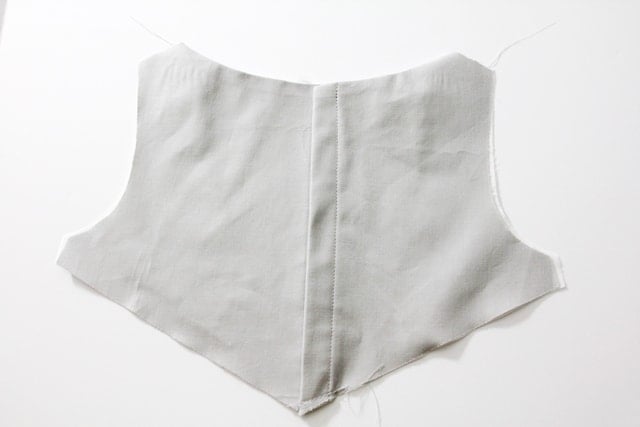
To adjust the Manhattan pattern cute out the back pattern piece NOT ON FOLD. Add 1.5″ to the center. You’ll cut the same out of the lining. Cut 2 main and 2 linings, mirror image to each other.
Sew the main and lining pieces together along the top necklines.
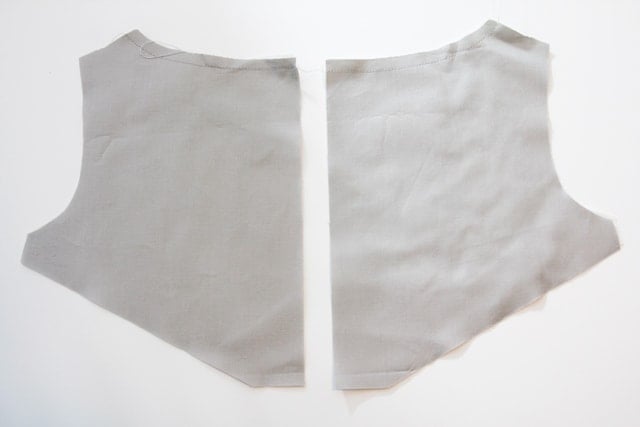
Press and fold over. Press neckline edge well.
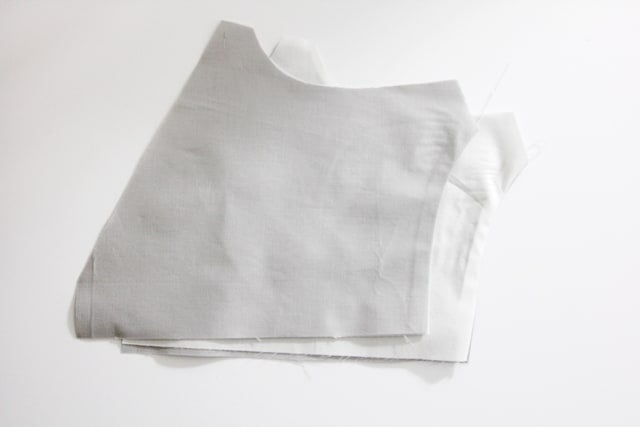
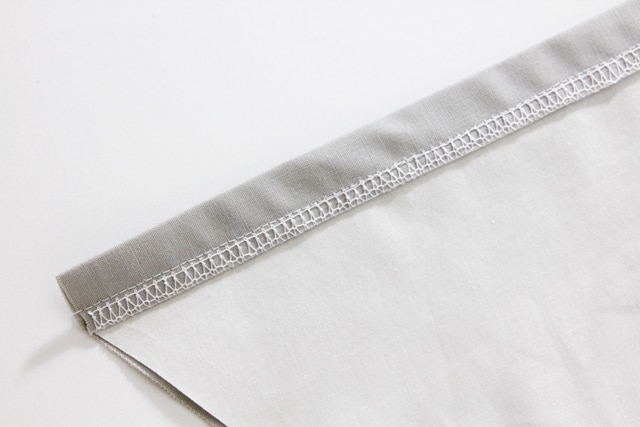
Cut a strip of fusible interfacing 3/4″ wide and press to the edge. Finish the edge of the fabric/interfacing with a serger or zig zag stitch.

On the underside of the snap placket, you’ll fold over 3/4″ and press. Then stitch 1/2″ from the folded edge.
On the other side (the part that will be the outside of the snap placket, press over 3/4″ TWICE. Then sew in place.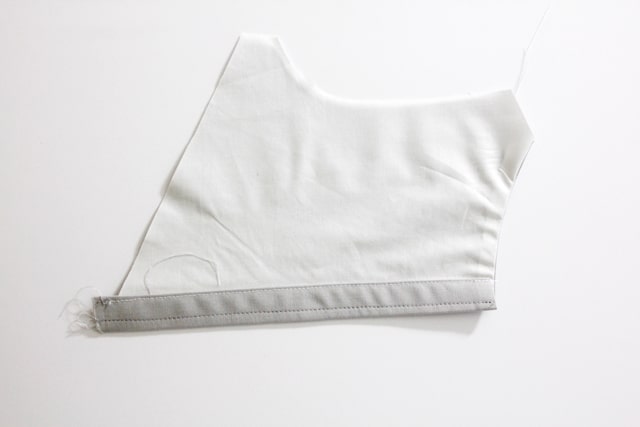

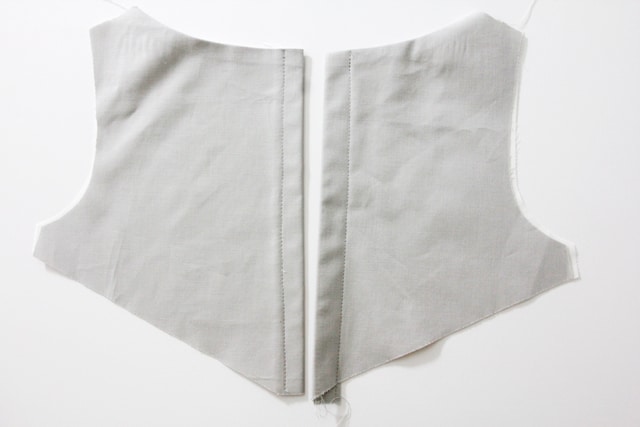
Match up the bottoms at the point of the angle, with the side you folded over TWICE on top. Baste together at the bottom and trim off any remaining fabric.
Add your snaps.
And that’s it! The only other modification you’ll make is that seam where the back skirt piece meets the back bodice piece won’t be hidden between the lining. This seam will now be a visible seam. You’ll sew the skirt piece directly to this back bodice piece. Sew up the rest of the pattern as instructed in the pattern.

Here are the rest of the SOHO-along posts! I’ll be back soon with another lookbook! And keep adding your entries to the $2500 BabyLock Sewing Machine Giveaway!
–LOOKBOOK: Colorblocked Manhattans + Bonnets
–Photographed Manhattan Blouse Tutorial
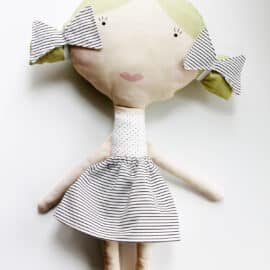
–Manhattan Doll Pattern Photos
–Fabric Selection
–SOHO-along Calendar
–Manhattan Blouse to DRESS hack!


I can’t seem to find a seller on Amazon that will ship the KAM snaps, not just the tool, to Canada :(
I’m wondering if you or your readers have heard anything about the Babyville snaps and tool. They seem more ready to ship to Canada.
Wow!! That looks amazing! I have the old hammer style set, and usually avoid snaps because somehow it moves when I hammer it, things get all messed up and it just is a mess. This looks so easy! I’m working on a pattern right now that has snaps, and have been dreading that part, this might solve my problem.
Question – this might be a ridiculous question – do you use this for adult clothing too? Would you use a different size or style snap then?
Thanks!! Laura
I love this! But do you know if you can use prym/dritz vario pliers to apply these snaps? I’m trying to avoid buying MORE gadgets!
Wonderful tutorial! I like using snaps for my little ones’ clothing, button holes scare me a lot.
Hi Kate! I’m a huge fan of your blog and patterns. I’ve recently purchased the Manhattan and Soho patterns…and thanks to this post I’ve ordered some KAM snaps too!! I’m really enjoying these bonus sew-along/hack posts and I’m excited to get started on my first Manhattan top for my niece.
I was just wondering if you are planning to write about how you made the pieced bodice in this Manhattan: https://seekatesew.com/wp-content/uploads/2015/03/manhattan5.jpg. I think it’s a great “hack” and as a beginner, I’d love to see a step by step on how you achieved this.
Thanks so much!
Do the snaps melt if accidentally touched by a hot iron when ironing?