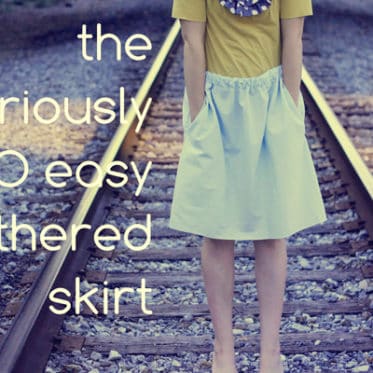
I’ve been trying to destash my fabric stash for like a year now. It’s not working. I decided to tackle it by making a few skirts for me with my bigger pieces of fabric. This is the easiest skirt tutorial ever! I just made it up as I went, but as you’ll see it’s very basic! Like the most basic. It is the perfect starting place if you're interested in making your own clothes. STEP 1: Cutting We're going to gather at a 1.5 to 1 ratio. So, measure your hips and multiply by 1.5. That's how wide your fabric should be. If you'll ...Continue Reading
sewing 101: adding pockets to any skirt pattern!
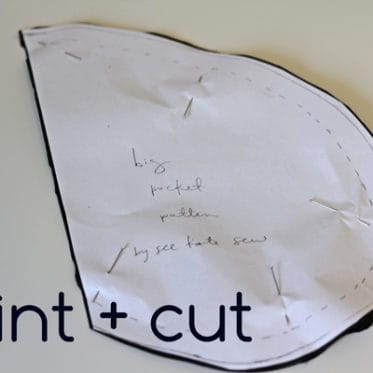
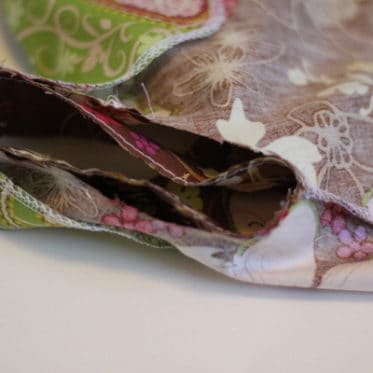
Sometimes I wonder what the point of a skirt without pockets is. If I'm gonna wear a skirt, I need a place to put my lollipops! (and pacifiers, keys, phone and lipgloss. The essentials.) I think every skirt should have pockets. And that includes the skirts of dresses. It's SO easy to add pockets to skirts and dresses with side seams. I've been making a lot of skirts this past week. I think my count is up to 10 now! About half of them I made with pockets. While making another skirt for pleat week, I slowed down to take some photos of the pocket ...Continue Reading
the pop-up pleats camera strap cover PDF pattern
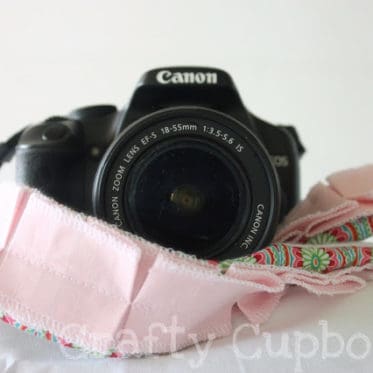
**Thank you so much for your response to my pattern tester request! I used the first ones that responded with the requirements and put the rest on my email list for next time! You guys rock!! Here is finished pattern!**.................... Unlike ordinary camera straps, this camera strap cover is built to hug your strap, no more fussy strap covers! The cute pop-up pleats feature on the top guarantees that you will be the cutest photographer on the block! This 17 page pdf file comes with instructions for two variations, with full-color ...Continue Reading
DIY flower hair clip
I made this flower hair thing up for the handmade gift exchange. It's easy and a good use of scraps! I originally made a headband, but you can make a clip or pin, too! Way 1,200,583 to make a flower with fabric. But there are still never enough ways!........... If you like pretty things, there is still time to enter the just lovely things giveaway! ...Continue Reading
sewing 101: why you might not like sewing with patterns
I love love love patterns. I don't usually use them as they come, but I use them in one way or another all the time! However, they have also made me crazy in the past. So here's a little rant on patterns. (And how to make your experience better!) 1. The sizes are wacky!! I am not a size AMILLION thank you very much. But in pattern size, you have to size UP a few sizes, usually 2-3. Why? Because pattern companies went mainstream in the early 1900s and have not changed a thing. I think we should standardize them all, but I guess that would be ...Continue Reading
keyboard clutch tutorial
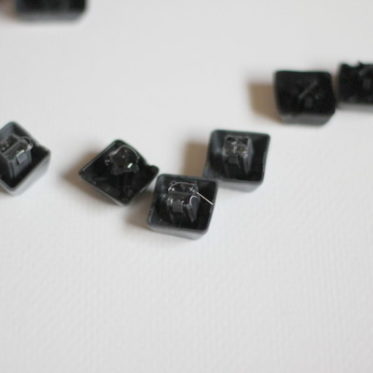
I had such a nice and unexpected response when I posted the geek chic clutch a little while ago. I never would have thought so many of you would like it! I guess you have a little inner nerd, too? I thought I'd show you how to make it today. In case you want one. It's a time consuming project, but flip on some Star Wars while you go and the time will fly by. (Is that too much? Do you guys like Star Wars, too? Only girl syndrome.) The basic construction is just a simple zipper pouch. I made it from an old suit and lace dress with a zipper ...Continue Reading
answers part 3: advice for the aspiring seamstress
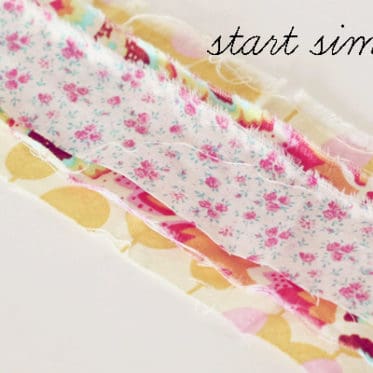
I'm working writing out "my sewing story" because so many of you asked where I learned to sew. It's turning into a self-reflection on my creative life and is taking longer than expected. Gotta get it just right, you know! But it's coming. I've also had lots of questions about where to start if you want to learn to sew. So if you fit in that category, this post is for you! sewing 101:some advice for beginners 1. Start simple. The worst thing you can do to yourself is go out and buy a commercial pattern, materials and end with disaster. (Not ...Continue Reading
medical exam table paper: a patternmaking secret

Maybe this isn't a secret, but medical exam table paper (the kind you sit on at the doctor) makes the perfect patternmaking paper. There is no better tracing paper and it's pretty cheap, too! You can bet if I can find it on Amazon, that is where I will get it. Just last week I noticed I was running out of it. I panicked, naturally. Then I bought this case of 12. (After shipping it was like 3 bucks a roll.) It will last me a looong time! Instead of cutting straight into a commercial pattern, I usually trace out my size on exam paper and then ...Continue Reading
ruffles + cream couture frocks
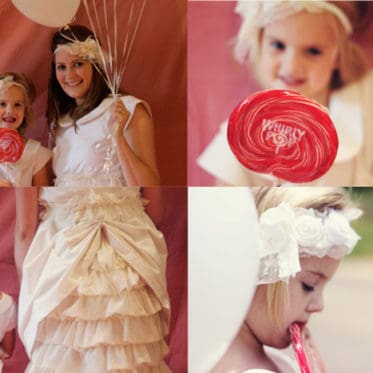
My project post from the sytyc finale. Season wrap-up coming tomorrow! ........... ...with a bustle in back! Since I had free reign this week as far as the theme goes, I made myself a dress with my favorite things: ruffles and cream! I tea-tinted some stark white poplin for a slightly vintage white color. Underneath are layers of ruffled up lace. Layers of poplin bustle in the back, revealing a ruffled underlayer, creating a historic bustle with updated charm. Front and back darts make the bodice slightly fitted, with a big comfy skirt ...Continue Reading
sleeves: quick n’ dirty vs. "the right way"
set-in sleeves: flat vs. round There are two ways to set in sleeves, one is easier than the other. I thought I'd show you both for today's sewing 101 lesson. "the right way": in the round Setting sleeves in in the round, is harder for me than sewing them in flat. I always end up with little pleats that have to go and take out later. It is also hard to get your sleeve to match your sleeve hole because fabric stretches when you pull it! I'm calling this "the right way" because it will give your clothing higher quality. A sleeve sewn ...Continue Reading
how to print with contact paper

I love screenprinting and knew I wanted to incorporate it into at least one of my sytyc projects. But, since the hardware store doesn't sell screen printing ink, I had limited options. So I did this faux screenprinting method, that wouldn't mess up my screen (because you don't even need a screen!) I love birds so it was a good fit. Here is the printing method I used. You can do this on pretty much anything! how to print with contact paper I didn't want to use my real silkscreen for this since I was using home interior paint ...Continue Reading